

Juicy chicken, creamy Caesar dressing, crisp romaine, and toasted bread combine in this easy 15-minute Chicken Caesar Sandwich for a protein-packed lunch.
Ingredients
Instructions
Gather all your ingredients first so the cooking process feels smooth and stress-free. You will need two boneless, skinless chicken breasts, four sturdy ciabatta rolls or another hearty sandwich bread, about half a cup of creamy Caesar dressing, one small head of romaine lettuce, a half cup of shaved Parmesan cheese, one tablespoon of olive oil, a teaspoon of fresh lemon juice, half a teaspoon of garlic powder, and a pinch of salt and black pepper. Having everything measured and within reach means the chicken can go straight into the pan while the heat is perfectly high. If you are using store-bought dressing, give it a quick stir before measuring because the ingredients often separate in the bottle. This first step will save you time and make the entire recipe feel effortless.
Pat the chicken breasts dry with paper towels before seasoning. Removing excess surface moisture is not just a cosmetic step; it is the key to getting a beautiful golden-brown crust when the chicken hits the skillet. If the chicken is wet, it will steam rather than sear, which can make it tough and pale. Once the chicken is dry, season both sides generously with salt, black pepper, and garlic powder. Press the seasoning gently into the meat so it adheres during cooking. Let the seasoned chicken rest at room temperature for about five minutes while you prep the lettuce and toast the bread. This short rest allows the salt to begin penetrating the meat, which helps lock in moisture and amps up the flavor.

Place a large skillet or cast-iron pan over medium-high heat and add the olive oil. When the oil begins to shimmer, carefully lay the chicken breasts in the pan in a single layer. Cook for five to seven minutes per side without moving the chicken too much, because constant flipping prevents a good sear. You will know the first side is ready when it releases easily from the pan and has a deep golden-brown color. Use a meat thermometer to check that the thickest part of the breast reaches 165°F. If you do not have a thermometer, pierce the thickest part and make sure the juices run clear. Transfer the chicken to a cutting board and let it rest for at least five minutes. Resting is essential because it allows the juices to redistribute through the meat; slicing immediately would cause them to run out and leave the chicken dry.
While the chicken cooks, split the ciabatta rolls in half horizontally. You can toast them in the same skillet after the chicken is done, in a toaster, or under the broiler for two minutes. The goal is crisp, golden edges that can stand up to the creamy Caesar dressing without becoming soggy. If you toast the rolls in the hot skillet, the cut sides will soak up a tiny bit of leftover chicken flavor and olive oil, adding another layer of deliciousness. Toast for one to two minutes per side, or until the bread is deeply golden and has noticeable grill marks. Place the toasted rolls on a wire rack so they stay crisp while you prepare the Caesar slaw.
Shred or chop the romaine lettuce into bite-size pieces. In a medium bowl, whisk together the Caesar dressing and the fresh lemon juice, then add the romaine and half of the shaved Parmesan. Toss gently with tongs until every leaf is lightly coated but not drowning in dressing. The lemon juice brightens the creamy dressing and helps it cling to the lettuce without needing extra oil. At this point, taste the dressed lettuce and adjust with a crack of black pepper or a pinch of salt if needed. Remember that the chicken and bread are already seasoned, so you want the Caesar slaw to complement them, not overpower them. Set the dressed romaine aside while you slice the rested chicken.
Now that the chicken has rested, place it on a clean cutting board and slice it across the grain into half-inch strips. Slicing against the grain shortens the muscle fibers, making each bite noticeably more tender. If you prefer chunkier texture, you can chop the chicken into bite-size cubes instead. Use a sharp knife to avoid shredding the delicate meat. For an extra-juicy sandwich, you can toss the sliced chicken with a spoonful of the same Caesar dressing just before assembling. This is optional, but it helps the chicken stay moist and ties it together with the caesar flavor in every single bite.
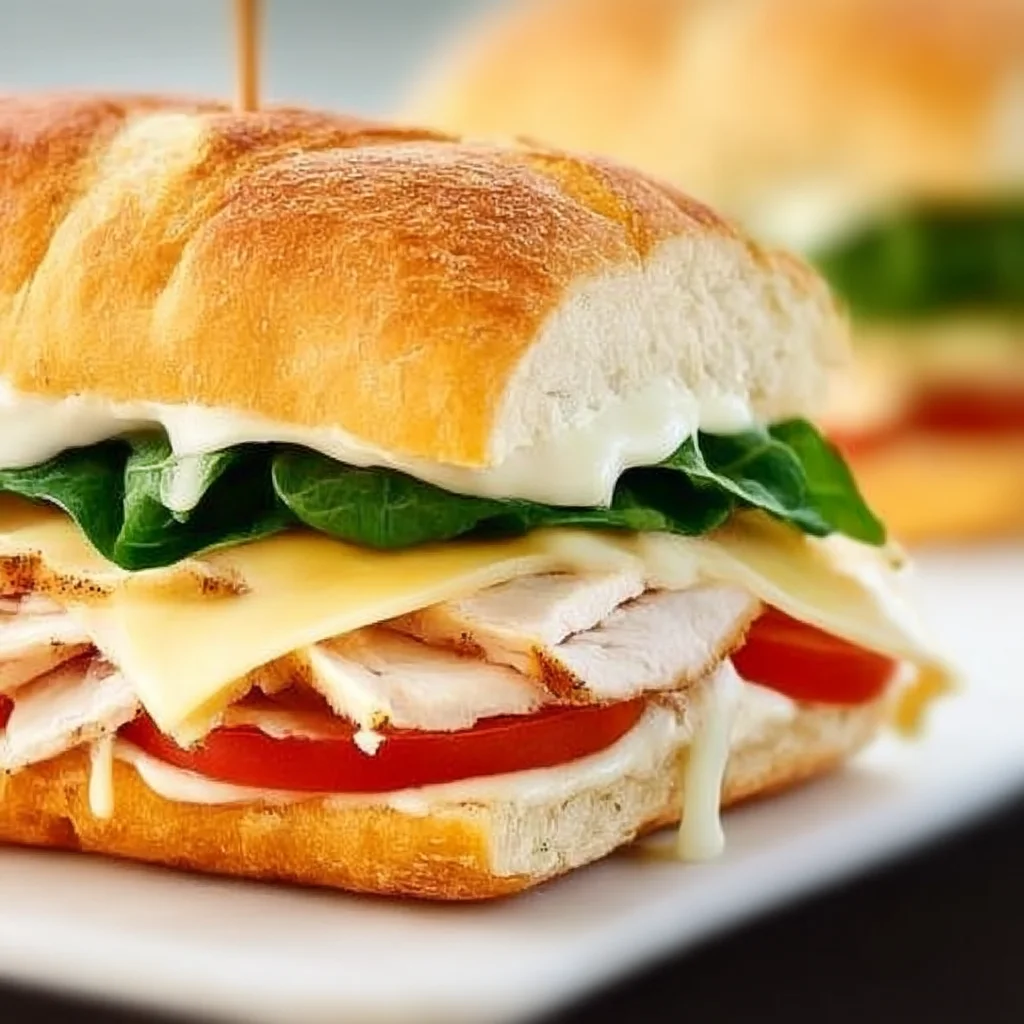
To assemble the sandwiches, place the bottom half of each toasted ciabatta roll on a serving plate or cutting board. Pile a generous handful of the dressed Caesar romaine onto the bottom slice, then layer the sliced chicken evenly over the top. Drizzle with a little additional Caesar dressing if you like a saucier sandwich. Finish with the remaining shaved Parmesan and a few cracks of fresh black pepper. Finally, place the top half of the roll over the filling and press down gently so the sandwich holds together. For easier handling, you can insert a decorative sandwich pick through the center or wrap the bottom half in parchment paper.
Wait about two minutes before slicing if you can manage it; this gives the bread a moment to absorb just enough dressing to soften slightly without turning mushy. Cut each sandwich in half on a diagonal with a serrated knife—this exposes the creamy interior and makes the sandwich look even more appetizing. Serve immediately while the bread is still crisp and the chicken is warm. These sandwiches pair wonderfully with pickle spears, a handful of potato chips, or a simple side salad. If you have leftovers, preserve the crunch by storing the dressed lettuce, sliced chicken, and toasted rolls separately and assembling fresh when you are ready to eat.
For best results
- Use a high-quality store-bought Caesar dressing to save time, but always check the label. Look for a dressing made with real anchovies, egg yolks, and Parmesan rather than long lists of stabilizers and artificial flavors. A genuinely creamy caesar dressing makes a massive difference because it is the backbone of this sandwich. If you are feeling ambitious, you can make a quick homemade version by whisking together two tablespoons of mayonnaise, one tablespoon of grated Parmesan, one teaspoon of lemon juice, one teaspoon of Dijon mustard, a small minced garlic clove, and a dash of Worcestershire sauce. That simple five-minute mixture tastes far brighter and more complex than most bottled options, and it can be stored in the fridge for up to a week.
- Choose the right bread. Ciabatta and sourdough are ideal choices because they have a sturdy crust and a soft, chewy crumb that can hold up to juicy chicken and creamy dressing without falling apart. If you prefer a softer sandwich, use a brioche bun or a potato roll, but keep in mind that softer bread is more likely to become soggy. To prevent sogginess, always toast the cut sides of your bread until golden brown. This creates a crisp barrier that protects the bread from moisture. You can also spread a thin layer of Caesar dressing directly on the toasted surface instead of tossing the lettuce heavily, which lets you control the moisture level better.
- Do not overdress the lettuce. The goal is to have every leaf lightly coated, not swimming in dressing. A good rule of thumb is to start with half of the dressing and add more only after tossing. You can always add, but you cannot remove. If the salad looks shiny and feels light, it is properly dressed. A heavily dressed salad will make your bread soggy and mask the fresh flavor of the romaine. The chicken and Parmesan also carry a lot of flavor, so the dressing should be the supporting player, not the main event. Reserve a little extra dressing on the side for people who want a saucier sandwich.
- Use a meat thermometer to eliminate guesswork. Chicken breasts are perfectly cooked at 165°F, but they will continue to rise a few degrees while resting. If you pull them off the heat at 160°F, carryover cooking will bring them to the safe zone while keeping the meat extra juicy. Insert the thermometer into the thickest part of the breast without touching bone or pan. If you cook chicken breasts often, a digital instant-read thermometer is one of the best investments you can make. It prevents both dry, overcooked chicken and unsafe undercooking, so every sandwich is consistently perfect.
- Slice the chicken against the grain. Look closely at the cooked chicken breast and you will see faint lines running in one direction; those are the muscle fibers. Cutting across those lines instead of parallel to them shortens the fibers and makes the meat dramatically more tender. If you slice with the grain, each bite will feel stringy and slightly tough, even if the chicken is perfectly cooked. Taking thirty extra seconds to orient the chicken properly is a small step that upgrades the entire eating experience. This knife technique is especially useful for sandwiches because the slices need to be compact and easy to bite through without pulling the whole filling out.
- Make the sandwiches into a complete meal with a side. While these chicken caesar sandwiches are satisfying on their own, they pair beautifully with a handful of salted potato chips, a cup of tomato soup, or a simple fruit salad. If you want to keep the meal lower in carbs, swap the ciabatta for lettuce wraps or serve the filling over a bed of greens. For a picnic-friendly spread, pack the sandwiches tightly in parchment paper, bring extra napkins, and serve them at room temperature. The flavors actually continue to meld and deepen as the sandwich rests, so they are just as delicious outdoors as they are fresh from the skillet.
- Store leftover components separately to maintain crispness. If you are meal-prepping these sandwiches, skip the assembly and keep the toasted bread, dressed lettuce, sliced chicken, and extra Parmesan in separate airtight containers in the refrigerator. When you are ready to eat, simply re-toast the bread for a minute and assemble the sandwich fresh. The dressed romaine and sliced chicken will stay good for about two days. Avoid freezing assembled sandwiches, because the lettuce and creamy dressing will not retain their texture after thawing. With this approach, you can prep the fillings on Sunday and enjoy fresh-tasting caesar sandwiches all week.
Variations
- Buffalo Chicken Caesar Sandwich: Toss the sliced chicken with two tablespoons of Buffalo wing sauce before layering it onto the sandwich. The spicy, tangy heat cuts through the creamy Caesar dressing beautifully, and the combination tastes like a restaurant favorite. Add a few slices of pickled jalapeños and a drizzle of blue cheese or ranch dressing for an even bolder flavor profile. If you like extra crunch, scatter a handful of crispy fried onions over the chicken before closing the sandwich. This variation is also fantastic with grilled chicken thighs, which stay juicy and absorb the buffalo sauce especially well.
- Grilled Chicken Caesar Wrap: Transform this sandwich into a portable wrap by spooning the dressed Caesar salad onto a large flour tortilla or a low-carb almond flour tortilla. Add the sliced chicken and shredded Parmesan, then fold in the sides and roll tightly. You can toast the wrap in a dry skillet for two minutes per side to create a crisp, golden exterior that seals all the filling inside. Wraps are perfect for packed lunches, road trips, or picnics because they are easier to eat on the go and less likely to fall apart than a bulky sandwich. Serve them with extra Caesar dressing for dipping.
- Vegetarian Chickpea Caesar Sandwich: Replace the chicken with crispy roasted chickpeas for a vegetarian-friendly version that is still packed with protein and fiber. Rinse and drain one can of chickpeas, pat them dry, then toss with olive oil, salt, smoked paprika, and garlic powder. Roast at 425°F for twenty minutes until crunchy, then let them cool slightly before adding to the Caesar salad. The chickpeas have a delightful nutty flavor and slight crunch that mimics croutons while delivering over seven grams of protein per half cup. Alternatively, use crispy tofu or a plant-based chicken substitute for a heartier texture.
- Low-Carb Lettuce Wrap Caesar Chicken: If you are cutting carbs, skip the bread and use large, sturdy romaine leaves or butter lettuce leaves as the wrapper. Lay several leaves overlapping on a piece of parchment paper, add the dressed Caesar slaw and sliced chicken in the center, then roll it up like a burrito. To make the wrap sturdier, use two layers of lettuce and avoid overfilling. This version is incredibly fresh and light, and it lets the creamy dressing and juicy chicken shine. You can also serve the filling over grilled chicken slices for an even higher protein plate that is completely keto-friendly.
- Garlic Butter Parmesan Toast: Upgrade your bread by brushing the cut sides with garlic butter before toasting. Melt two tablespoons of butter with one minced garlic clove and a pinch of salt, brush it over the ciabatta, then sprinkle with extra Parmesan. Toast the bread in the skillet or oven until golden and fragrant. The garlic butter adds an incredible savory depth that pairs perfectly with the Caesar dressing and grilled chicken. If you love garlic bread, this simple variation will become your go-to way to enjoy these sandwiches. For a hint of heat, add a pinch of red chili flakes to the melted butter.
Nutrition
- Calories520 kcal
- Total Fat26g
- Saturated Fat7g
- Cholesterol85mg
- Sodium890mg
- Total Carbohydrates42g
- Dietary Fiber3g
- Sugars4g
- Protein38g