<

Big-Batch Homemade Pancake Mix (Breakfast for Dinner)

Extreme close-up of a stack of thick, 1-inch diner-style pancakes with melting butter and golden edges.

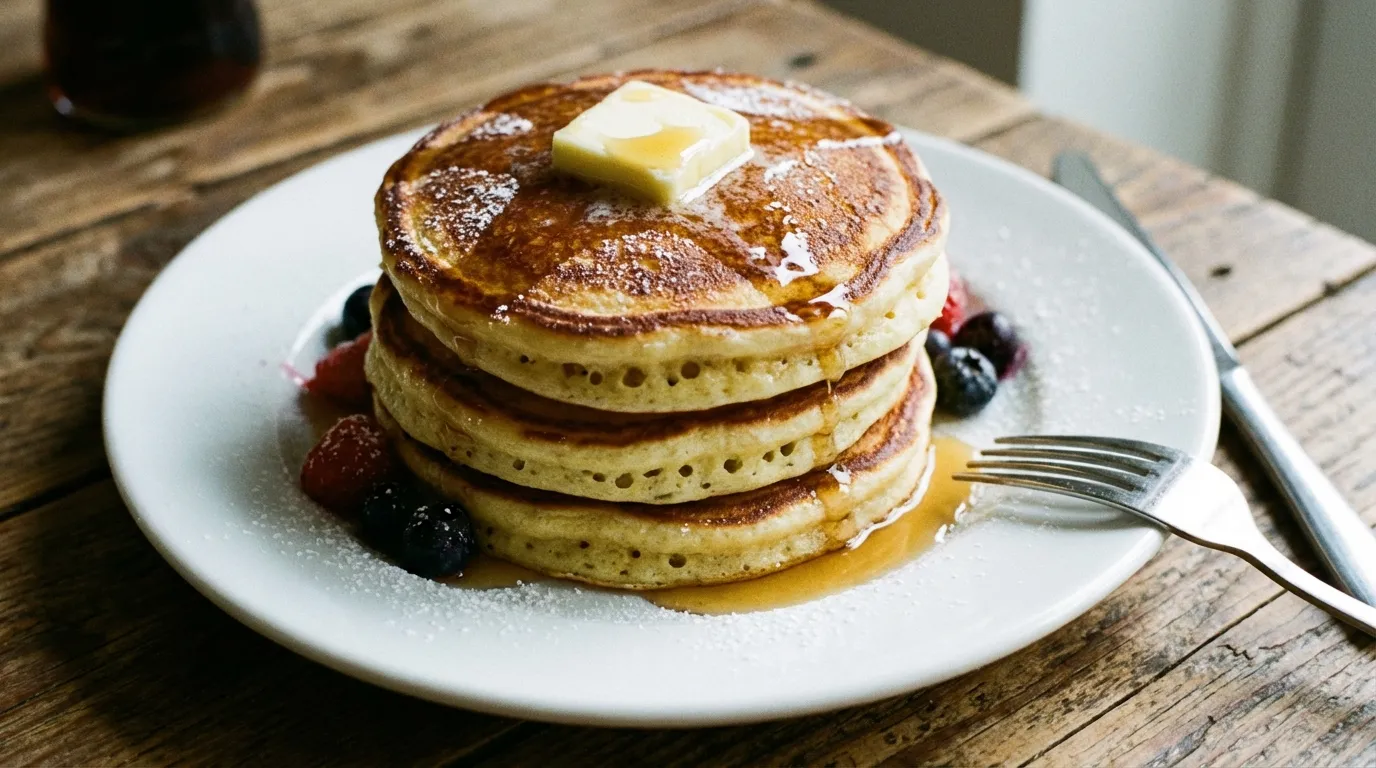
To execute a budget-friendly “breakfast for dinner” as part of feeding a family for under $10 while eliminating the 500% retail markup of branded mixes, you must build a bulk homemade dry mix. By whisking 6 cups of all-purpose flour, 1/3 cup of baking powder, 1/4 cup of sugar, and 1 tablespoon of salt, you create a shelf-stable base for diner-style pancakes at a fraction of the cost.

A large 1-gallon glass hermetic jar filled with white homemade pancake mix on a clean wooden pantry shelf.

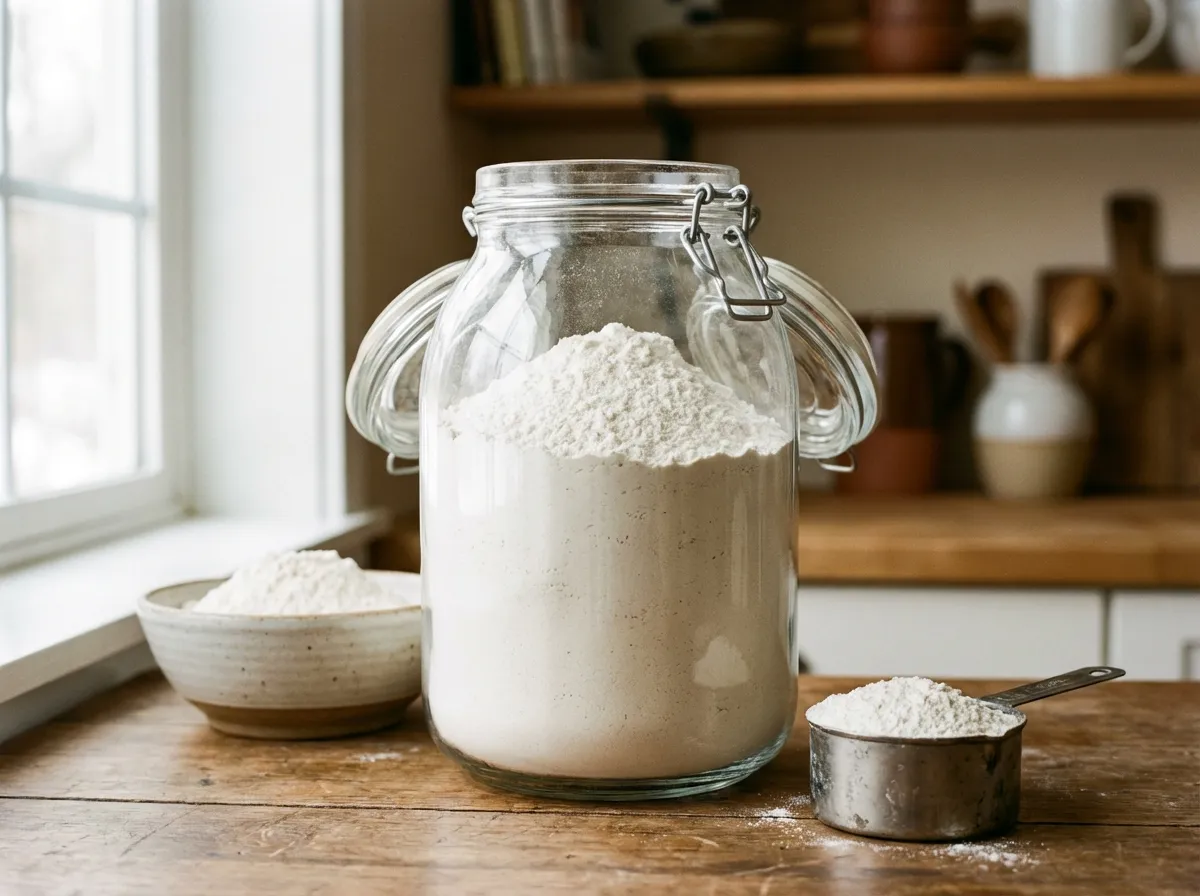
A single gallon jar of homemade mix replaces three expensive brand-name boxes.

The 500% Markup on Boxed Pancake Mixes

A standard box of brand-name pancake mix costs approximately $4.50, representing a 500% markup on the cost of raw ingredients. You are paying a premium for basic flour and leavening agents that you can assemble at home for roughly $0.70 per 96-ounce volume, effectively reclaiming the retail margin for your household budget.

The Pancake Box Arbitrage

Eight pancakes cooking simultaneously on a large black electric griddle with bubbles forming on the surface.

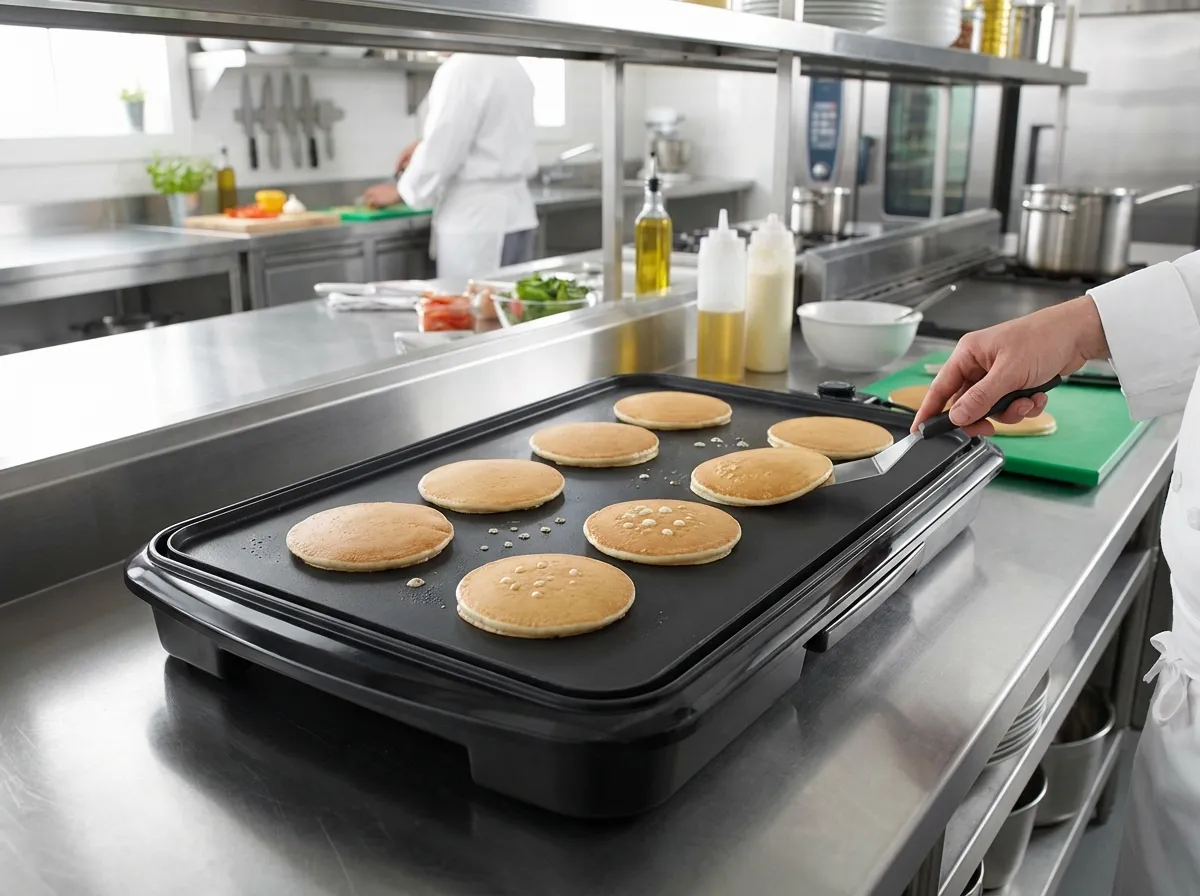
A large griddle allows you to feed the whole family in a single batch.

Mix SourceVolume YieldComponent CostPreservativesChef Verdict
Premium Organic Mix16 oz$7.00NoneMathematically unjustifiable
Branded “Yellow Box”32 oz$4.50High Sodium / Gum500% retail markup
Scratch Bulk Master Mix96+ oz$0.70NoneThe ultimate $1 safety net

The Secret to Diner-Style Fluffiness

Diner-style fluffiness is the result of using an aggressive leavening ratio to create rapid vertical lift. While standard recipes use 1 teaspoon of baking powder per cup of flour, this formula uses 1 full tablespoon of baking powder per cup of flour to ensure a 1-inch rise when hitting a 350°F surface.

Close-up of pancake batter in a bowl showing visible lumps of dry flour as per the lumpy batter rule.

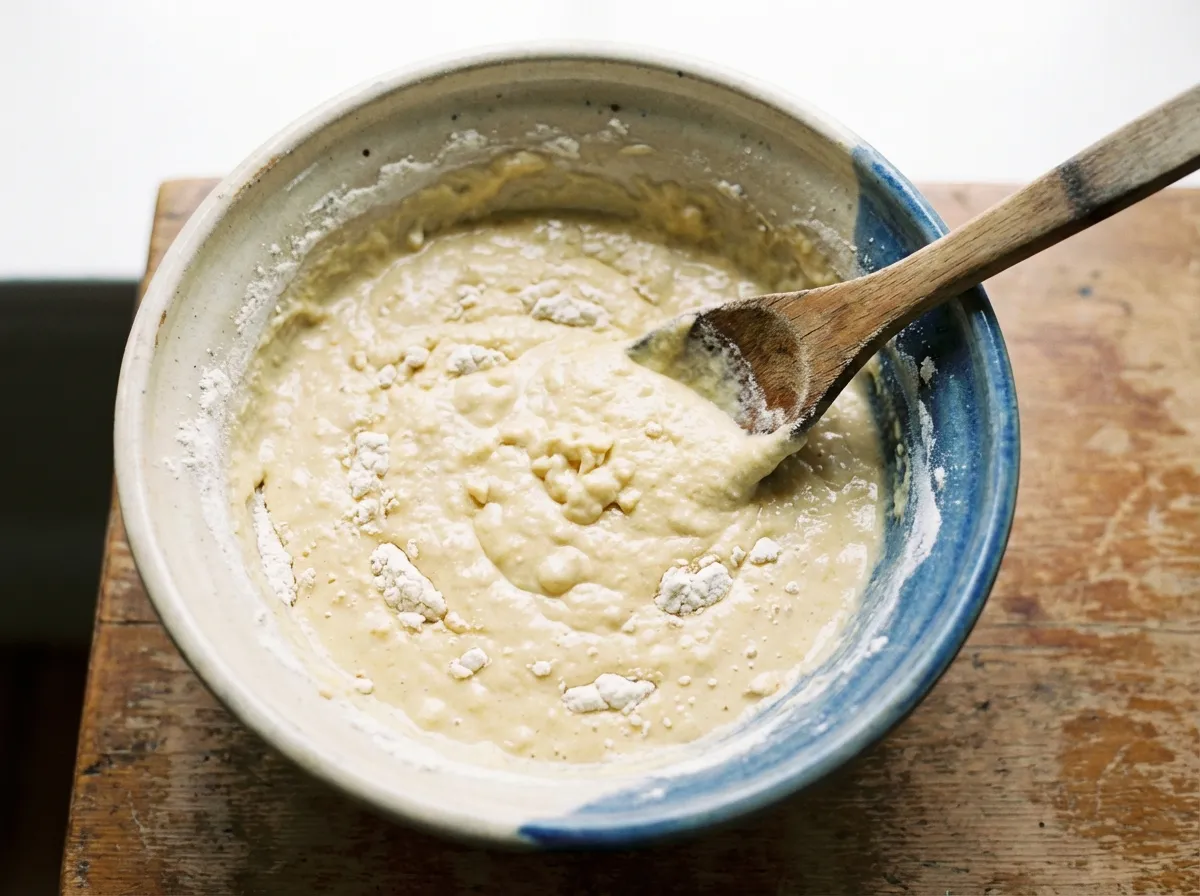
The ‘Lumpy Batter Rule’: Stop mixing when you still see these dry flour pockets.

Why Your Homemade Pancakes are Rubbery (The “Lumpy Batter” Rule)

Rubbery pancakes are caused by over-mixing, which develops excessive gluten strands. To maintain a tender crumb, you must follow the Lumpy Batter Rule: stir wet and dry ingredients exactly 10 times with a spoon. You must leave visible dry flour lumps in the bowl; these will hydrate naturally during the 5-minute rest period.

The Bulk Storage Toolkit

Proper storage of bulk dry mixes requires airtight hardware and precise preparation tools to ensure consistency.

Hardware RequirementCulinary FunctionRisk If Ignored
1-Gallon Glass Hermetic JarBlocks humidity and insectsPowders absorb moisture; leavening fails
Rotary Steel SifterHomogenizes leavening powderLopsided pancakes or chemical taste spots
22-Inch Electric GriddleMaintains consistent 350°F heatRound skillets force cold, uneven batches
  • Glass Hermetic Jar: A 1-gallon glass jar with a steel locking clasp preserves the baking powder’s potency for up to 6 months by sealing out atmospheric moisture.
  • Rotary Sifter: Aerating flour and baking powder through a stainless-steel sifter ensures uniform distribution, preventing dense pockets of leavening.
  • Large Electric Griddle: A 22-inch surface allows for 8 pancakes to cook simultaneously at a steady 350°F, reducing total cook time by 70%.

Field-Tested Results: The Acidic Lift Trick

Adding acid to the batter triggers a chemical reaction with the baking powder, resulting in increased carbon dioxide production. By adding 1 teaspoon of white vinegar or lemon juice to your milk 5 minutes before mixing, you simulate buttermilk and force an aggressive, secondary vertical lift as the pancake hits the griddle.

Recipe: The Master Big-Batch Pancake Mix

Ingredients (Yield: 96 oz Dry Mix):
* 6 cups all-purpose flour
* 1/3 cup baking powder
* 1/4 cup white granulated sugar
* 1 tbsp table salt

To Make a Batch (Yield: 12 pancakes):
* 2 cups Master Dry Mix
* 1.5 cups whole milk or water
* 1 egg
* 2 tbsp melted butter or vegetable oil
* Optional: 1 tsp white vinegar

Method:
1. Sift: Pass flour, baking powder, sugar, and salt through a rotary sifter into a bowl.
2. Store: Transfer to a 1-gallon hermetic jar.
3. Whisk: In a separate bowl, whisk milk, egg, butter, and vinegar.
4. Combine: Add 2 cups of dry mix to wet ingredients.
5. Fold: Stir exactly 10 times. Leave lumps. Rest for 5 minutes.
6. Cook: Heat griddle to 350°F. Cook 2–3 minutes until bubbles pop, then flip once for 1 minute.

Nutrition Per Serving (3 Pancakes)

NutrientAmount
Calories310 kcal
Protein8g
Carbohydrates48g
Total Fat10g
Meal Cost$0.40 per serving

Frequently Asked Questions

How long does this mix stay safe to eat in a pantry?
The mixture remains safe for 6 months when stored in an airtight, hermetic container. Because it contains no volatile oils or raw dairy, it follows the shelf life of the flour itself. Keep it in a cool, dry location to maintain the integrity of the baking powder.

How can I test if my baking powder is still active?
Baking powder loses potency after 6 months once opened. To test, drop 1 teaspoon of powder into a cup of boiling water. If the mixture foams and bubbles immediately, the leavening is active. If it remains flat, discard the powder to avoid ruined batches.

Can I use water instead of milk if I run out?
Yes, you can substitute water for milk without compromising the structure. While milk adds fat and richness, the high ratio of baking powder in this recipe ensures the pancakes will still achieve a 1-inch rise. The batter will fry effectively in butter or oil.

Can I replace half the flour with whole wheat?
Replacing flour with whole wheat will decrease the fluffiness of the pancakes. The bran in whole wheat flour acts like microscopic blades that cut through the gluten bubbles created by the baking powder. For the highest, lightest diner-style result, use 100% all-purpose white flour.

Pinterest pin for Big-Batch Homemade Pancake Mix showing fluffy pancakes and ingredient list.

Save this 500% markup hack to your Frugal Pantry board!

What to Read Next

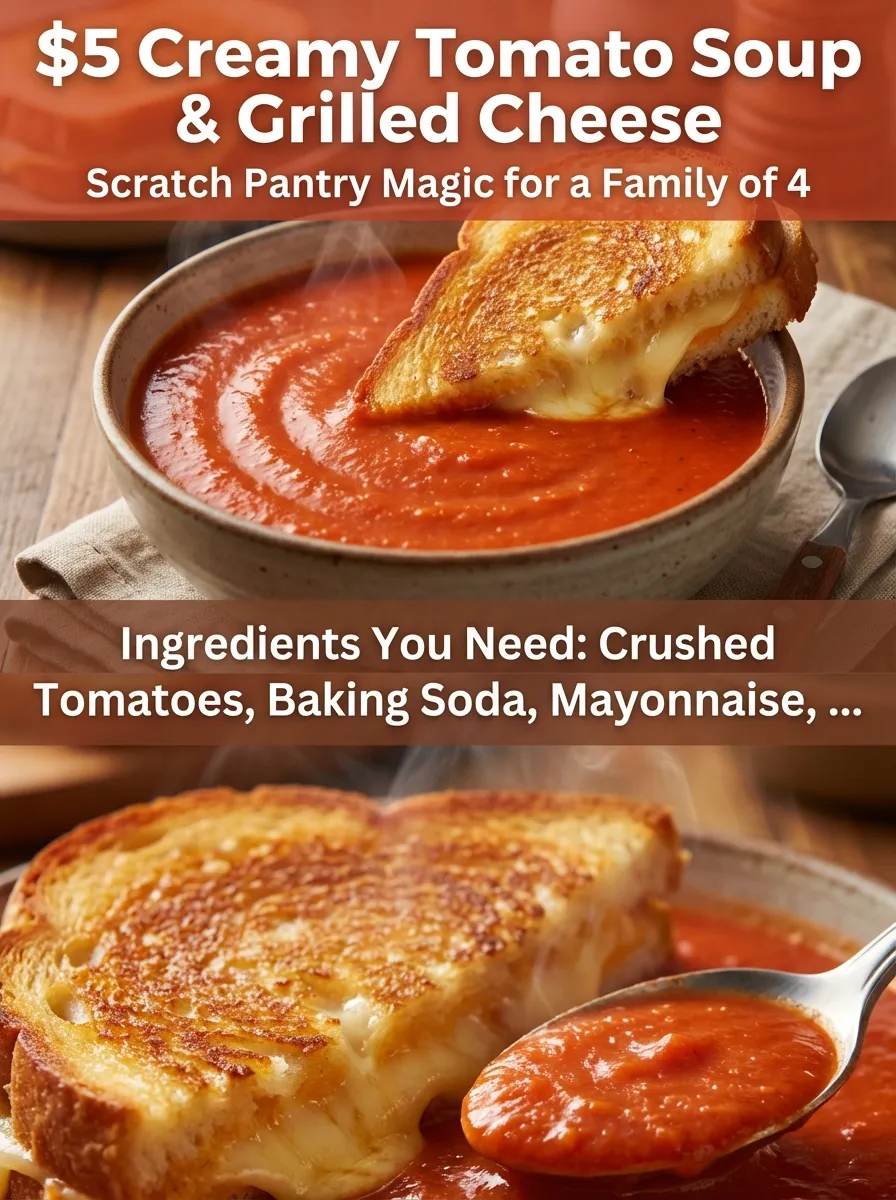
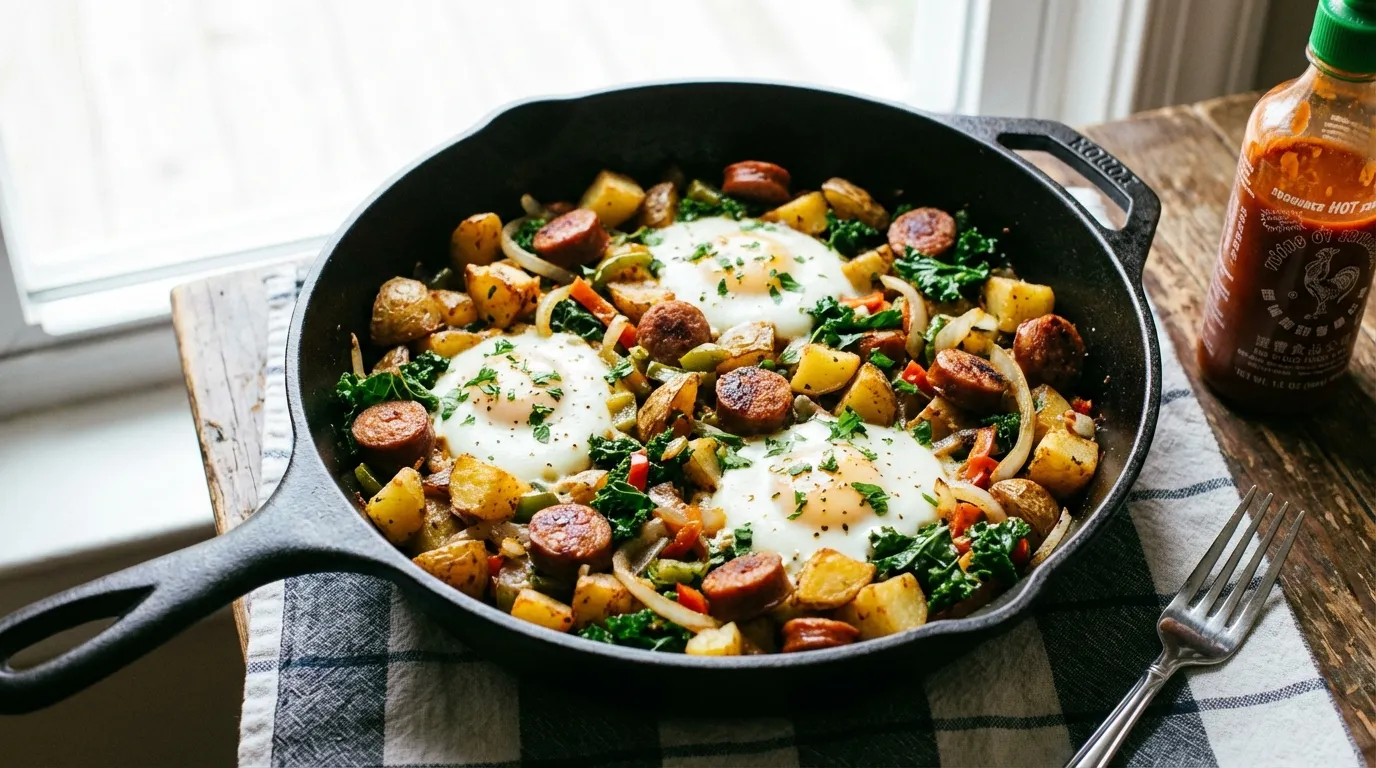
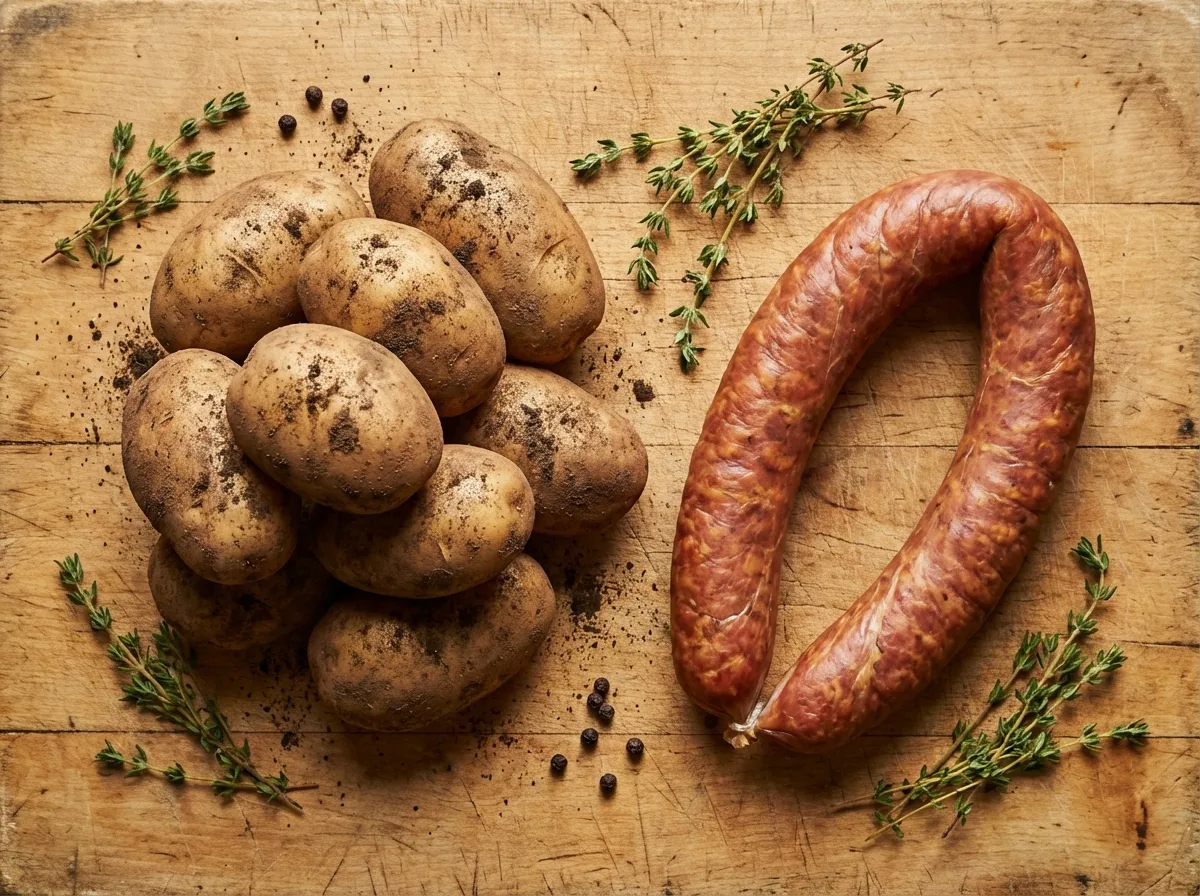
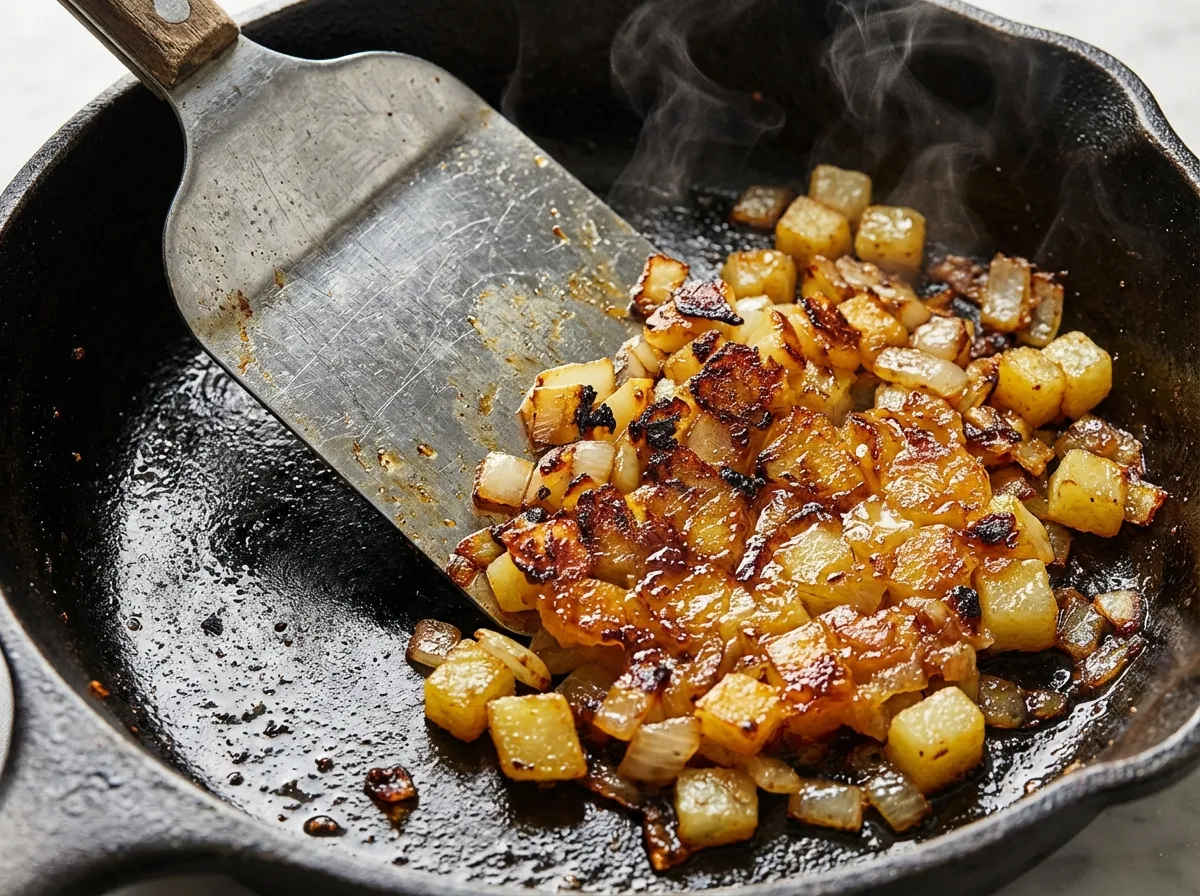
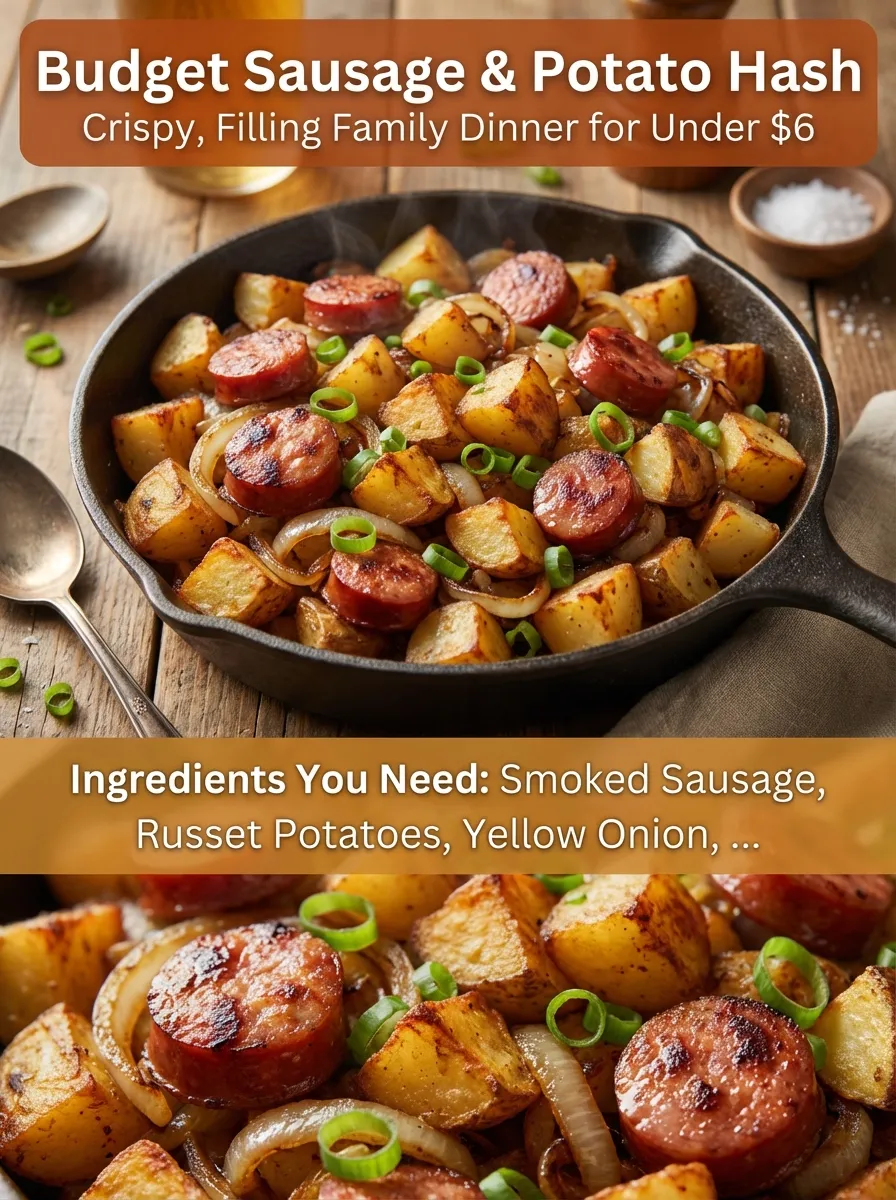
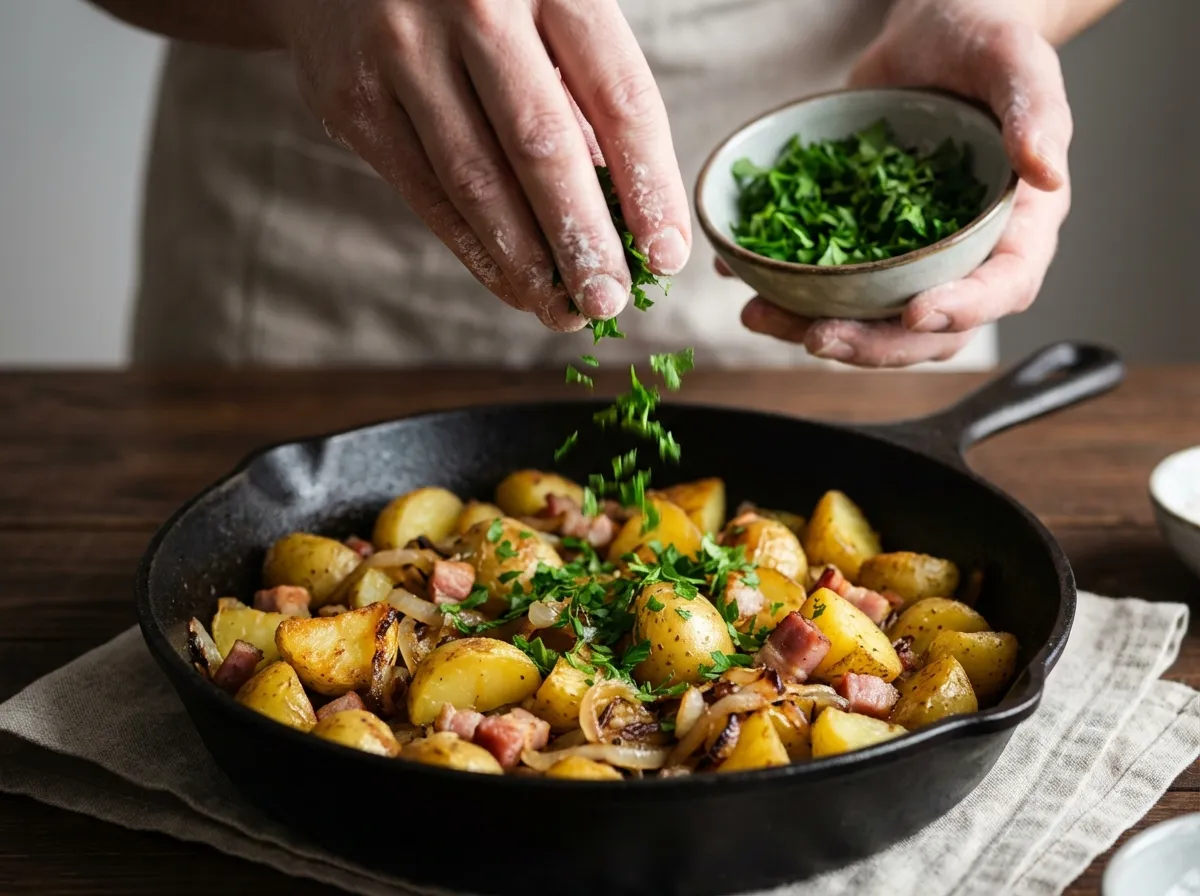
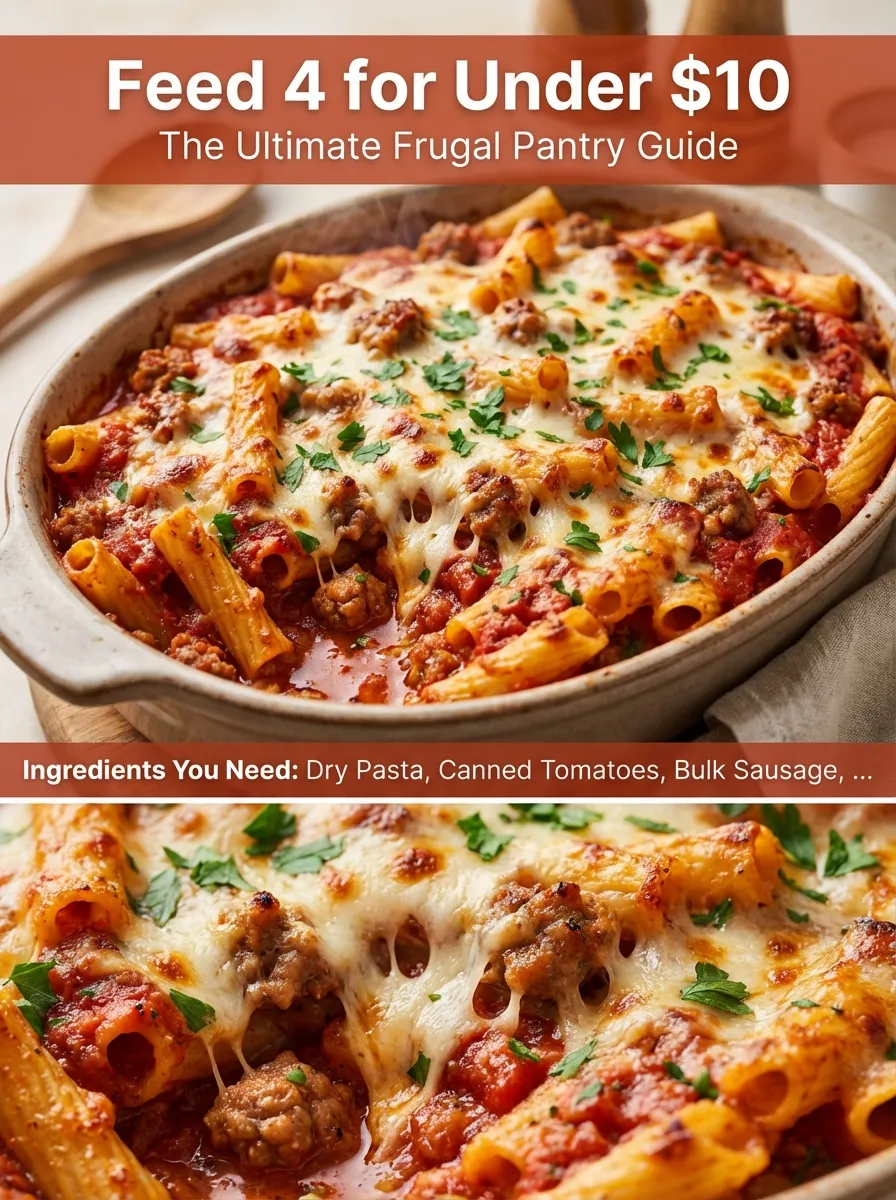
For more high-yield meals, prepare the Large-Yield Baked Ziti Casserole or experience some scratch pantry magic with a creamy tomato soup. If you need to maximize your grocery efficiency, explore the budget sausage & potato hash for a cost-effective protein source.

$5 Creamy Tomato Soup & Grilled Cheese (Scratch Pantry Magic)

Close-up of a steaming bowl of vibrant red creamy tomato soup next to a golden-brown, mayo-crusted grilled cheese sandwich with melted cheese.

To succeed at feeding a family of four for under $10, you can serve a restaurant-quality batch of creamy tomato bisque and crispy grilled cheese for exactly $5 by building the soup from scratch using canned crushed tomatoes and chemical acid neutralization. By simmering generic tomatoes with spices and 1/4 teaspoon of baking soda, you neutralize acidity and create a velvety texture for a fraction of the cost of canned alternatives.

The Economics of Scratch Soup vs. Canned

Two large cans of crushed tomatoes next to a large pot of finished thick tomato soup, demonstrating high yield.

Two simple cans of crushed tomatoes create over 40 ounces of rich, filling soup.

A standard $2.50 can of condensed tomato soup yields only 2.5 small servings, which is insufficient for a family of four. By purchasing two $1 cans of generic crushed tomatoes, you produce over 40 ounces of thick soup. This approach doubles the meal volume while removing excess sugar and sodium found in branded products.

The Soup Volume Arbitrage

Soup MethodTotal Cost (Family of 4)Yield VolumeFlavor ProfileChef Verdict
Premium Gourmet Pouches$14.0032 ozVery HighUnaffordable
Brand-Name Condensed$5.0030 ozThin / High SugarPoor ROI
Scratch Canned Bisque$2.5040+ ozRich / Acid-NeutralBudget Anchor

Bypassing branded marketing budgets by focusing on homemade pantry staples and purchasing raw generic ingredients halves your grocery receipt while increasing total food output by 33%.

The “Baking Soda” Acid Neutralizer Hack

Baking soda is a chemical leavening agent that, when added to acidic tomato bases, reacts to neutralize pH levels. Canned tomatoes are naturally high in citric acid, often resulting in a metallic, harsh flavor. Adding exactly 1/4 teaspoon of baking soda triggers a carbon dioxide release that instantly raises the pH, eliminating bitterness without requiring sugar or excess cream.

The “Mayo-Crust” Grilled Cheese Secret

The “Mayo-Crust” technique involves replacing butter with a thin layer of full-fat mayonnaise on the bread exterior to ensure even browning. Mayonnaise is a shelf-stable emulsion of oil and egg yolks that spreads easily on soft bread without tearing. It fries in a skillet to create a golden, crispy crust that prevents the bread from becoming soggy.

The Bisque Hardware Toolkit

Grilled cheese sandwiches frying on a black cast iron griddle, showing an even golden-brown mayo crust.

The secret to an even, diner-style crust? A thin layer of mayo and a heavy cast iron griddle.

Achieving the correct consistency and crust requires specific tools to handle thermal mass and chemical reactivity.

Hardware RequirementCulinary FunctionRisk if Ignored
Stick Immersion BlenderPurees chunky tomatoesBoiling liquid burns during transfer
Cast Iron GriddleProvides uniform heatSoggy or unevenly browned bread
Stainless Steel SaucepanNon-reactive boilingAcid strips metal from aluminum pans
  • Immersion Blender: Use this to pulverize tomatoes directly in the pot, avoiding the safety hazards of moving boiling liquid to a standard blender.
  • Cast Iron Griddle: Heavy cast iron maintains a consistent 350°F–375°F, ensuring the entire surface of the sandwich browns at the same rate.
  • Stainless Steel Pan: Stainless steel is non-reactive, preventing the acidic tomato base from leaching metallic flavors from aluminum or damaged non-stick coatings.

Field-Tested Results: Preventing Curdled Dairy

Curdling occurs when cold dairy is introduced to a boiling, acidic environment, causing proteins to seize into solid lumps. To ensure a smooth texture, remove the soup from the heat source and allow it to stop boiling before adding dairy. Once the baking soda has neutralized the acid, gently stir in the butter or milk to create a stable, velvety emulsion.

Recipe: $5 Scratch Tomato Soup & Grilled Cheese

A close-up of tomato soup foaming slightly in a pot as baking soda is stirred in to neutralize acidity.

The baking soda reaction: neutralizing canned acidity for a smoother, chef-level flavor.

Ingredients (Yield: 4 servings):
* Bisque: 2 cans (15oz each) crushed tomatoes ($2.00); 1/4 tsp baking soda ($0.05); 1 tbsp butter or milk ($0.15); 1/2 tsp onion powder; 1/2 tsp garlic powder; 1 tsp salt; 1/2 tsp black pepper.
* Grilled Cheese: 8 slices sandwich bread ($0.50); 8 slices American/cheddar cheese ($1.50); 2 tbsp mayonnaise ($0.30).

Method:
1. Build Base: Combine tomatoes, spices, salt, and pepper in a stainless steel saucepan. Bring to a gentle boil over medium heat (approx. 300°F) and simmer for 10 minutes.
2. Neutralize: Remove from heat. Once boiling stops, stir in 1/4 tsp baking soda. Wait 15 seconds for the foam to subside.
3. Finish: Stir in 1 tbsp butter or milk until the texture is velvety.
4. Assemble: Prepare sandwiches with 2 slices of cheese each.
5. Coat: Spread a thin layer of mayonnaise on the exterior of each bread slice.
6. Fry: Heat a cast iron griddle to medium heat. Fry sandwiches for 3–4 minutes per side until golden and the cheese is fully melted.

Nutrition Per Serving (4 Servings)

NutrientAmount
Calories480 kcal
Protein14g
Carbohydrates58g
Total Fat22g
Meal Cost$1.25 per serving

Frequently Asked Questions

Vertical Pinterest graphic for $5 Creamy Tomato Soup and Grilled Cheese with ingredient list and hero view.

Pin this $5 family meal hack for your next rainy weeknight.

Question: Why did my hot soup aggressively foam up when I added baking soda?
Answer: The foam is the visual evidence of a chemical reaction between the alkaline baking soda and the acidic tomato base. This reaction releases carbon dioxide gas, which effectively neutralizes the harsh metallic flavor of the canned tomatoes. The foam will completely subside within 5 to 10 seconds of stirring.

Question: Can I use diced tomatoes instead of crushed?
Answer: Yes, but you must use an immersion blender to pulverize the tomatoes. Diced tomatoes are packed with calcium chloride to maintain their shape, which prevents them from breaking down into a smooth, creamy bisque texture during the simmering process.

Question: Will frying with mayonnaise make the sandwich taste like eggs?
Answer: No. Mayonnaise acts strictly as a fat source. When heated to 350°F in a skillet, the egg yolks and oils fry the bread surface to a crisp finish, leaving no distinguishable mayonnaise or egg flavor behind. It is a standard technique used in professional diner kitchens.

Question: Can I use olive oil instead of mayonnaise on the bread?
Answer: Using olive oil is discouraged because it is a liquid fat that absorbs into the porous bread, resulting in a greasy texture. Mayonnaise is a solid emulsion that sits on the surface of the bread, creating a protective barrier that ensures a crispy, golden-brown crust rather than a soggy sponge.

Budget Sausage & Potato Hash Skillet (Crispy & Filling)

A close-up overhead shot of a crispy sausage and potato hash in a cast iron skillet with golden-brown crusts and green scallion garnish.

To execute a restaurant-crispy sausage and potato hash skillet for under $6, you must use the “fat-rendering” sequence. Place 1 lb of sliced smoked sausage into a cold cast-iron skillet and heat to medium. Once the sausage fat renders, remove the meat, then fry 4 cups of dried, diced potatoes in the remaining oil.

Potatoes: The Ultimate Budget Satiety Base

A clean arrangement of raw russet potatoes and a rope of smoked sausage on a wooden cutting board.

Potatoes and smoked sausage: The most cost-effective way to maximize family satiety.

The Satiety Index is a clinical metric that ranks food based on its ability to satisfy human hunger per calorie. Russet potatoes rank as the most satiating food on earth, outperforming proteins like beef or eggs. By pairing $1 of potatoes with $3–$4 of fatty sausage, you create a nutrient-dense, filling meal.

The Satiety Arbitrage Matrix

A metal spatula lifting a layer of perfectly browned, crispy potato hash from the bottom of a cast iron skillet.

The result of the ‘Rule of 5’: A restaurant-grade crust that stays crispy.

Dinner StrategySatiety YieldTotal Cost (4 Servings)Result
Fast Food BurgersLow$30.00Hungry in 2 hours
Frozen PizzasModerate$14.00High sodium spike
Sausage & Potato HashMaximum$6.00Full until morning

Quick Answer: Potatoes provide the highest satiety-per-dollar ratio of any common grocery staple. Using sausage fat as the cooking medium instead of store-bought oil eliminates additional costs while maximizing flavor extraction.

The “Cold Pan” Fat Rendering Trick

The “Cold Pan Render” is a culinary technique involving placing cold, sliced sausage into a cold skillet and heating it slowly to medium. This process allows the animal fat to liquefy and extract before the protein exterior sears, providing an abundant, flavor-rich oil base for frying the potatoes.

Why Your Hash is Mushy (The Starch Wash)

Close-up of sliced smoked sausage coins rendering fat in a dark cast iron skillet.

The Cold Pan Render: Extracting every drop of flavor to fry the potatoes.

Surface starch is a glue-like residue on raw, cut potatoes that causes them to weld to the pan and turn into mush. A “Starch Wash” involves submerging diced potatoes in ice-cold water for 5 minutes to dissolve this residue, ensuring the potatoes crisp rather than steam when introduced to hot fat.

The Crust Formation Arsenal

HardwareCulinary FunctionRisk If Ignored
12-Inch Cast IronSustained radiant thermal massTemperature crash; steaming
Stainless Slotted SpoonIsolates meat from liquid lipidsLoss of essential frying fat
Steel Micro-Mesh ColanderComplete “Starch Wash” drainageGrease fires from excess water
  • Cast Iron Skillet: Heavy iron maintains high temperatures when cold potatoes are added. A thin pan will drop in temperature, causing the potatoes to steam and soften.
  • Stainless Slotted Spoon: This tool allows you to remove the sausage while keeping the rendered fat in the pan for the potato-frying stage.
  • Large Colander: Removing all water post-wash is mandatory. Excess moisture creates steam, which prevents the formation of a glass-like crust.

Field-Tested Results: The Undisturbed Crust

The “Rule of 5” is a mandatory cooking instruction requiring 5 minutes of undisturbed thermal contact between the potatoes and the hot skillet. Constant stirring prevents the potato surface from reaching the temperature required to polymerize, which is necessary to form a firm, glass-like crust.

Recipe: $6 Budget Sausage & Potato Hash

Ingredients (Yield: 4 servings):
* 1 lb Smoked Sausage or Kielbasa (cut into ½-inch coins)
* 4 cups Russet Potatoes (3 large, diced to ½-inch cubes; do not peel)
* 1 large yellow onion, diced
* 1 tbsp olive oil (optional; use only if sausage renders insufficient fat)
* 1 tsp garlic powder, 1 tsp paprika, ½ tsp salt, ½ tsp black pepper
* Scallions or parsley (garnish)

Method:
1. Starch Wash: Submerge diced potatoes in ice-cold water for 5 minutes. Drain and pat completely dry with a clean towel.
2. Cold-Pan Render: Place sausage in a cold 12-inch cast-iron skillet. Heat to medium for 6–8 minutes until fat renders and sausage is crisp.
3. Extraction: Remove sausage with a slotted spoon. Keep all rendered fat in the pan.
4. Rule of 5: Add potatoes and onion to the hot fat. Season with spices. Do not stir for 5 minutes.
5. Crisping: Toss potatoes with a metal spatula. Cook for 10–12 minutes, tossing occasionally, until fork-tender and browned.
6. Combine: Return sausage to the pan for 1 minute to reheat. Garnish and serve.

Nutrition Per Serving

NutrientAmount
Calories420 kcal
Protein14g
Carbohydrates48g
Total Fat20g
Cost$1.50 per serving

Frequently Asked Questions

Pinterest recipe pin for Budget Sausage and Potato Hash showing a plated view and ingredients.

Pin this $6 meal for your next busy weeknight!

What specific kind of cheap sausage renders the most fat?
U-shaped “Smoked Sausage” or Kielbasa rings are the most efficient choices. These products have a high fat-to-meat ratio designed to release large volumes of savory oil during the slow-rendering process, providing sufficient medium for frying the potatoes without needing extra cooking oil.

Should I peel the russet potatoes before dicing?
Do not peel the potatoes. The skin contains essential fiber and nutrients that add texture to the hash. Frying the skins in rendered sausage fat creates an additional layer of crunch that improves the overall mouthfeel of the dish while saving you preparation time.

Can I add eggs to this skillet for extra protein?
Yes. Once the hash is fully cooked, use a spoon to create 4 wells in the mixture. Crack 4 eggs into the wells, cover the skillet with a lid, and steam on medium-low heat for 3 minutes until the whites are set and yolks remain runny.

Does the starch wash reduce the nutritional value?
No. The 5-minute cold water wash only removes surface starch molecules exposed by cutting. The internal carbohydrate matrix and the nutrients found in the potato skin remain fully intact, ensuring the caloric density and satiety benefits of the meal are preserved.

What to Read Next

To learn more about budget-conscious meal planning, consult the Feeding a Family for Under $10 guide. For additional high-volume, low-cost recipes, explore the Bean Enchilada Skillet Tray or the Large-Yield Baked Ziti Casserole. For more iron-cooking techniques, view the QuickPlateChef Resource Library.

$8 Bean & Cheese Enchilada Tray (Vegetarian Budget Dinner)

Extreme close-up macro photography of a bubbling bean and cheese enchilada tray with melted cheddar and rich red sauce.

To construct a tray of 10 filling enchiladas for under $8, you must replace high-cost proteins with a starch-activated bean mash and synthesize a scratch chili sauce. This budget-focused method avoids premium canned goods, utilizing pantry staples to create a dense, satisfying, and restaurant-authentic vegetarian meal for a family.

The “Meat-Mimic” Bean Mash Technique

Close-up of black beans being mashed with a fork in a bowl to create a thick meat-mimic texture.

Mashing half the beans creates a satisfying, meat-like texture.

The “Meat-Mimic” bean mash is a culinary technique involving the aggressive mashing of 50% of your black beans to release natural starches. This process creates a dense, cohesive paste that binds the remaining whole beans, providing a heavy mouthfeel and protein-rich texture that replicates the physical density of ground meat.

The $0.45 Scratch Enchilada Sauce

The $0.45 scratch enchilada sauce is a high-flavor, low-cost liquid condiment created by blooming chili powder and flour in hot oil. This process, known as spice blooming, extracts lipid-soluble flavor compounds from dry spices, resulting in a deep, complex sauce profile that replaces expensive, preservative-heavy store-bought alternatives for a fraction of the cost.

The Enchilada Sauce Arbitrage

Sauce OriginTotal CostFlavor YieldChemical ActivationChef Verdict
Premium Organic Jar$6.00ExcellentN/A❌ Bankrupts an $8 budget
Generic Grocery Can$3.50Bitter/TinnyContains preservatives❌ Still wastes 40% of budget
Scratch Chili Powder Roux$0.45Restaurant-GradeHot-oil spice blooming✅ The ultimate $3 savings

The Thermodynamics of Corn Tortillas

The “Damp Paper Towel Steam Hack” is a moisture-injection technique where corn tortillas are wrapped in wet paper towels and microwaved for 60 seconds. This process forces boiling steam into the corn starch matrix, rendering the brittle tortillas perfectly pliable for rolling without the need for high-calorie frying or added oils.

The Roll & Roux Toolkit

Hardware RequirementCulinary FunctionRisk If Ignored
9×13 Pyrex Glass Baker10-cylinder geometric lockEnchiladas burst in wrong-sized pans
Seamless Silicone Flat WhiskBreaks flour clumps in hot oilSauce becomes thick, unappetizing gravy
12-Inch Cast Iron SkilletRapid radiant spice toastingSpices don’t bloom / Sauce tastes raw
  • The Pyrex Baker: A 9×13 glass vessel provides the specific surface area required to fit 10 enchiladas in a tight, wall-to-wall configuration, preventing structural blowouts during baking.
  • The Silicone Whisk: This tool is essential for emulsifying the flour roux, ensuring a smooth, lump-free sauce consistency that coats the tortillas evenly.
  • The Cast Iron Skillet: The high thermal mass of cast iron enables the rapid, high-heat radiant toasting of dry spices, which is necessary to unlock the deep flavor profile in under 60 seconds.

Field-Tested Results: Overstuffing Failures

You must maintain a strict ratio of 2 tablespoons of bean mash per tortilla to ensure structural integrity. Overstuffing beyond this 2-tablespoon limit forces the enchilada cylinders to burst open during the 20-minute bake cycle, resulting in a loss of sauce distribution and a compromised, unpresentable final dish.

Recipe: $8 Black Bean & Cheese Enchilada Tray

A silicone flat whisk stirring a dark red bubbling enchilada sauce in a black cast iron skillet.

The $0.45 scratch sauce is made by blooming chili powder in a hot roux.

Ingredients (Yield: 10 heavy enchiladas):
The Filling:
– 2 cans (15oz each) black beans, rinsed and drained ($2.00)
– 1 packet generic low-sodium taco seasoning ($0.50)
– 10 standard yellow corn tortillas ($1.50)
– 1.5 cups generic shredded cheddar/jack blend ($2.50)

The $0.45 Scratch Sauce:
– 2 tbsp vegetable oil
– 2 tbsp all-purpose flour
– 2 tbsp generic chili powder
– ½ tsp garlic powder, ½ tsp cumin, ½ tsp salt
– 2 cups tap water

Method:
1. Preheat oven to 375°F. Lightly grease a 9×13 Pyrex baking dish.
2. The Roux: In a skillet over medium heat, whisk oil, flour, chili powder, cumin, and garlic powder for 60 seconds until bubbling.
3. Rapidly whisk in 2 cups of water. Simmer for 3 minutes until thickened.
4. The Filling: Mash 50% of the drained black beans with taco seasoning to form a paste.
5. The Steam Hack: Wrap 10 tortillas in wet paper towels; microwave for 60 seconds.
6. Assembly: Spread ¼ cup sauce in the dish base. Add 2 tablespoons of bean mash and a pinch of cheese to each tortilla. Roll tightly and place seam-side down.
7. Pour remaining sauce over the top. Add remaining cheese.
8. Bake uncovered at 375°F for 20 minutes. Rest 5 minutes before serving.

Nutrition Per Serving (2 Enchiladas = 1 Serving)

NutrientAmount
Calories340 kcal
Protein16g
Carbohydrates42g
Total Fat13g
Meal Cost$0.80 per massive enchilada

Frequently Asked Questions

Pinterest pin for $8 Bean and Cheese Enchilada Tray with recipe title and ingredient list.

Pin this budget-friendly family dinner for later!

Question: Can I use standard flour tortillas instead of corn?
Answer: While possible, flour tortillas are not recommended. They contain gluten that rapidly absorbs the hot sauce, causing the enchiladas to become gummy and doughy. Corn tortillas maintain a rigid structural matrix that holds up under the boiling sauce, ensuring the enchiladas retain their shape during the baking process.

Question: My scratch sauce is thin and watery; how do I fix it?
Answer: The sauce requires more time for the flour starches to swell. Lower the heat and simmer the sauce for an additional 3 minutes while whisking constantly. This heat application forces the flour molecules to absorb the liquid, thickening the sauce into a rich, cohesive consistency suitable for coating enchiladas.

Question: If I have $0.80 left in the budget, what should I add?
Answer: Purchase a $0.80 can of generic whole kernel sweet corn. Drain the liquid completely and fold the corn directly into your mashed black bean mixture. This adds significant volume to the filling and provides a sweet, distinct textural contrast that balances the heat of the chili powder sauce.

Question: Can I assemble these the night before baking?
Answer: No. The acidity in the scratch chili sauce will break down the corn tortillas if left in the refrigerator overnight, causing them to dissolve into mush. You may prepare the sauce and mash the beans in advance, but you must assemble the rolls no more than 5 minutes before baking.

What to Read Next

To fully grasp high-volume architectural rules, read the Feeding a Family for Under $10 masterclass. For another large-yield 9×13 tray, try the Large-Yield Baked Ziti Casserole. If you have extra meat budget, stretch it using the botanical lentil matrix in the Hidden Lentil Sloppy Joes.

Get Sophia’s Complete Mexican Pantry Checklist → QuickPlateChef Resource Library

Large Yield Baked Ziti Casserole (Feed 6 for Under $9)

Close-up macro shot of a cheesy baked ziti casserole with bubbling golden-brown mozzarella, rich red tomato sauce, and visible ridges of al dente pasta.

To bake a 9×13 ziti casserole that feeds six people for under $9, prioritize pantry staples over premium dairy by following a frugal pantry guide. Use a “cottage cheese blender hack” to replicate ricotta texture and bloom dry spices in oil to enhance canned tomato flavor. This method yields six servings at $1.40 each when using a 16oz box of ziti.

The Economics of Pasta Expansion

Dry pasta is a high-yield, low-cost calorie source that triples in physical volume when boiled. A 16oz box of dry ziti absorbs boiling water to create over 2.5 pounds of cooked food, providing the essential structural foundation for a family-sized meal while maintaining a cost-per-serving of $1.40.

The High-Yield Pasta Arbitrage

Base StrategyTotal Dinner CostSatiety / YieldRisk ProfileChef Verdict
Fresh Bakery Pasta$22.00Low (Feeds 3)High Budget FailureNot for weeknights
Chicken/Steak Centerpiece$28.00Moderate (Feeds 4)High Budget FailureImpossible for inflation
$1 Box of Dry Ziti$8.50Massive (Feeds 6+)Low RiskBedrock of volume dining

A clean kitchen counter layout featuring a heavy ceramic 9x13 baking dish, a high-speed blender, and a roll of heavy-duty aluminum foil.

The Volume Toolkit: Essential gear for professional-grade budget baking.

The $2 Ricotta Cheese Swap

Structural homogenization is a technique that uses mechanical blending to alter food texture for culinary applications. By processing 16oz of 4% milkfat cottage cheese with one raw egg for 15 seconds, you destroy the large curds and create a creamy, stable dairy base that mimics premium ricotta when baked at 375°F.

Doctoring $1.50 Canned Tomatoes

Blooming is a high-heat technique that releases fat-soluble flavor compounds from dried spices into oil. To neutralize the metallic acidity of a $1.50 can of crushed tomatoes, heat 2 tablespoons of olive oil with dried garlic and oregano for 30 seconds before adding the tomatoes. This process creates a balanced, rich sauce.

The Volume Hardware Toolkit

HardwareCulinary FunctionRisk If Ignored
1000W High-Speed BlenderPulverizes cottage cheese curdsTexture fails
Heavy Ceramic 9×13 DishRegulates thermal distributionEdge scorching
Commercial Heavy-Duty FoilCreates an airtight steam domeNoodle dehydration

The Blender: A 1000W+ high-speed blender is required to convert cottage cheese curds into a velvet consistency in 15 seconds.
The Ceramic Baker: A heavy ceramic 9×13 dish prevents the edges of the 6-pound casserole from burning during the 30-minute bake.
The Foil: Heavy-duty foil must be used to create an airtight seal, preventing the top layer of pasta from hardening into inedible shards.

Field-Tested Results: Preventing Watery Casseroles

Watery separation in baked pasta occurs when fully cooked noodles are unable to absorb the moisture released by cheese and sauce. Boil the ziti for exactly 3 minutes less than the package instructions (al dente). The undercooked pasta acts as a sponge, absorbing excess liquid during the 30-minute oven cycle.

Recipe: $9 Large Yield Baked Ziti

A high-speed blender containing a perfectly smooth, creamy white mixture of cottage cheese and egg, mimicking the texture of ricotta.

Chef Sophia’s secret: Blending $2 cottage cheese to perfectly simulate premium ricotta.

Ingredients (6 Servings):
* 16oz dry ziti pasta ($1.00)
* 28oz crushed tomatoes ($1.50)
* 16oz full-fat 4% cottage cheese ($2.00)
* 8oz mozzarella cheese, shredded ($2.50)
* 1 raw whole egg ($0.25)
* 2 tbsp olive oil, 1 tbsp dried oregano, 1 tbsp garlic powder ($0.50)
* Salt and cracked black pepper

Method:
1. Preheat oven to 375°F.
2. Blend cottage cheese, raw egg, salt, and pepper on high for 15 seconds until smooth.
3. Heat olive oil in a skillet over medium-high heat. Add oregano and garlic powder; sizzle for 30 seconds. Add tomatoes and simmer.
4. Boil ziti for 3 minutes less than package directions. Drain.
5. Toss ziti with tomato sauce.
6. Layer half the ziti in a 9×13 ceramic dish, add the blended cheese mixture, then top with remaining ziti.
7. Cover with mozzarella.
8. Seal with heavy-duty foil. Bake for 25 minutes.
9. Remove foil; broil on high for 5 minutes until browned.
10. Rest for 10 minutes before serving.

Nutrition Per Serving

  • Calories: 460 kcal
  • Protein: 24g
  • Carbohydrates: 58g
  • Total Fat: 14g
  • Meal Cost: $1.40 per serving

Frequently Asked Questions

Why do I need to add a raw egg to the blended cottage cheese?
The raw egg acts as a binding agent that coagulates at 375°F. This creates a protein net that traps the cottage cheese moisture, preventing the casserole from becoming watery while providing the structural fluffiness associated with traditional baked ricotta.

Can I successfully add meat to this cheap baked ziti?
Yes. Adding 0.5 pounds of bulk Italian sausage increases the total cost to approximately $12.50. Brown the sausage thoroughly in the skillet before adding your spices and tomatoes to ensure the fat is fully rendered and the flavor is distributed throughout the sauce. For other budget-friendly tray bakes, consider exploring high-yield bean and cheese alternatives.

Do I absolutely need to bake the casserole covered in foil?
Yes. Baking uncovered for 30 minutes will cause the top layer of pasta to dehydrate and turn into hard, plastic-like shards. The foil creates a steam dome that ensures the top noodles hydrate properly while the internal structure sets.

Can I freeze half of the 9×13 pan for later?
Yes. Allow the casserole to cool completely. Portion the ziti into individual squares, wrap them tightly in plastic wrap followed by a layer of foil, and freeze for up to 2 months. Reheat directly from frozen in the microwave or oven.

Pinterest pin for Large Yield Baked Ziti Casserole showing a plated serving and a list of budget ingredients.

Save this recipe to your Budget Family Dinners board!

Feeding a Family of 4 for Under $10: The Ultimate Frugal Pantry Guide

Close-up of a bubbling baked ziti casserole with melted cheese and fresh parsley, representing a budget-friendly family meal.

To feed a family of four for under $10, you must adopt a “pantry-first” volume strategy that prioritizes high-yield complex carbohydrates. By using $1 staples—such as dry pasta, rice, or potatoes—as the meal foundation and extending smaller portions of protein with $1 canned beans or tomatoes, you create nutrient-dense, large-volume meals that match restaurant-grade flavor profiles.

The Restaurant Secret: High-Yield Carbohydrates

High-yield carbohydrates are low-cost, shelf-stable starches that expand significantly in volume when cooked, providing the caloric foundation for cost-effective, large-batch meals. By focusing on pasta, rice, and potatoes, you shift the meal’s primary cost from expensive proteins to inexpensive, satiating starches, allowing you to feed four people while maintaining a strict $10 budget.

A structured grid layout showing dry pasta, a bag of rice, and a pile of potatoes on a wooden surface.

The foundation of a $10 budget: high-volume, low-cost carbohydrates.

Stop Buying Pre-Made Sauces (The $3 Save)

A DIY tomato sauce is a culinary preparation of crushed tomatoes, dried herbs, and aromatics simmered for 10 minutes to mimic the flavor profile of premium jarred sauces. By replacing $5.00 pre-made jars with $1.50 canned crushed tomatoes and pantry spices, you reduce your per-meal cost by approximately $3.50. This method is the foundation for creating a Rich Tomato Soup & Grilled Cheese combo that costs less than a single premium jar.

Crushed tomatoes simmering in a stainless steel pan with visible herbs and garlic.

Ditch the $5 jar: a 10-minute simmer transforms basic crushed tomatoes into premium sauce.

The Marinara Arbitrage Matrix

Close-up of dried spices sizzling in golden olive oil in a pan.

Blooming spices in oil is the secret to unlocking flavor in dried pantry staples.

Tomato SourceTotal CostFlavor YieldChef’s Chemistry FixResult
Premium Glass Jar$5.50Very HighNone required❌ Destroys the $10 budget
Generic Store Brand$2.50Watery / ThinSimmering reduction❌ Often too sweet/metallic
28oz Canned Crushed$1.50Massive VolumeBloom spices in hot oil✅ The $3.50 Savings Hack

The Chemistry: Essential flavor oils in dried spices like oregano and garlic are lipid-soluble, meaning they only release their full aromatic profile when dissolved in hot fat. Spending 120 seconds blooming these spices in hot olive oil before adding tomatoes ensures a professional depth of flavor that is otherwise absent when spices are added directly to cold liquid.

The Meat-Extender Matrix

Meat-extending is a culinary technique where high-flavor, low-cost proteins like bulk Italian sausage are combined with legumes to increase total meal volume without increasing meat expenditure. The starches in beans act as sponges, absorbing rendered fats and seasonings—a technique perfected in our Smoky Sausage & Potato Skillet—to ensure every bite provides the texture and savory satisfaction of a meat-heavy dish.

Browning ground sausage mixed with white cannellini beans in a cast iron skillet.

The Meat-Extender Matrix: Using beans to double the volume of your protein.

To maximize your budget, prioritize bulk-packaged proteins like ground turkey or bone-in chicken thighs. Avoid pre-diced, pre-marinated, or boneless cuts, as these incur a “labor upcharge”—a premium price added by retailers for the convenience of pre-processing.

The High-Yield Pantry Arsenal

To execute bulk meals that feed four or more, you must utilize specialized cookware designed for thermal efficiency and high-volume capacity.

Hardware RequirementCulinary FunctionRisk If Ignored
6-Quart Enameled Dutch OvenRetains massive starch volumesFlimsy pots boil over onto the stove
Premium 9×13 Ceramic BakerEvenly distributes casserole edge heatCheap metal pans scorch and ruin dinners
Locking Glass Storage MatricesLong-term budget leftoversPlastic warps, stains, and breeds odors
  • The Dutch Oven: A 6-quart enameled cast iron vessel provides the thermal mass needed to boil bulk pasta or reduce large volumes of sauce without scorching.
  • The Ceramic Baker: Ceramic distributes heat uniformly, preventing the edges of large-batch casseroles from burning before the center is fully cooked.
  • Glass Storage: Airtight glass containers prevent flavor migration and staining, keeping bulk leftovers food-safe for up to 5 days.

A heavy red enameled Dutch oven sitting on a stovetop.

A 6-quart Dutch oven is essential for retaining heat in large-batch budget meals.

An empty white ceramic 9x13 baking dish on a clean kitchen counter.

Ceramic bakers prevent scorching, ensuring every bit of your $10 meal is edible.

A neat stack of glass food storage containers with locking lids.

Glass storage protects your investment and keeps leftovers fresh for up to 4 days.

Field-Tested Results: The Visual Trick of Styling

Culinary garnishing is the practice of using low-cost fresh herbs and fats to improve the visual presentation of budget-friendly meals. A $0.99 bunch of fresh parsley and a drizzle of olive oil can transform a $6 skillet meal into an aesthetically pleasing, dignified dinner, effectively removing the “struggle food” stigma from the table.

Hands sprinkling fresh chopped parsley over a skillet of sausage and potatoes.

A $0.99 bunch of parsley removes the ‘struggle’ feel from budget cooking.

5 Family Dinners for Under $10 Total

Pinterest infographic for Feeding a Family of 4 for Under $10.

Pin this guide to save your grocery budget this week!

  1. Large-Yield Baked Ziti Casserole
  2. Family Friendly Bean Enchiladas
  3. Smoky Sausage & Potato Skillet
  4. Rich Tomato Soup & Grilled Cheese
  5. Big-Batch Homemade Pancake Mix (Breakfast for Dinner)

Frequently Asked Questions

Are deeply discounted canned vegetables less nutritious than expensive fresh produce?
No. Canned vegetables are processed at their botanical peak, locking in nutrients immediately. Fresh produce often degrades during transit and storage. Canned tomatoes and beans are shelf-stable, cost-effective, and provide high nutritional value comparable to or better than fresh options that have spent weeks in a supply chain.

How long can I safely store leftovers from a massive 9×13 budget casserole?
You can store a dense pasta or rice casserole in an airtight glass container in the refrigerator for up to 4 days. Because the starches continue to absorb the sauce while chilled, the flavor profile often improves by the second or third day, making these meals ideal for advance preparation.

Is it safe to eat $1 pasta if we are trying to eat healthy?
Yes. Pasta serves as a versatile delivery vehicle for fiber-rich legumes and lean proteins. By combining pasta with beans or ground turkey, you create a balanced macro profile. The health value of the meal is determined by the total ratio of fiber and protein to starch, not by the cost of the noodles.

What to Read Next

To see the exact volume and styling mechanics applied to pasta, start with the Large-Yield Baked Ziti Casserole. For an elite masterclass in extending $7 ground beef into two pounds of food using fiber, review the Hidden Lentil Sloppy Joes. Need to prep incredibly cheap, high-yield breakfasts? Learn the Big-Batch Homemade Pancake Mix execution. Feed the kids for absolute pennies using the Family Friendly Bean Enchiladas.

Get Sophia’s Complete $10 Frugal Grocery List Spreadsheet → QuickPlateChef Resource Library