
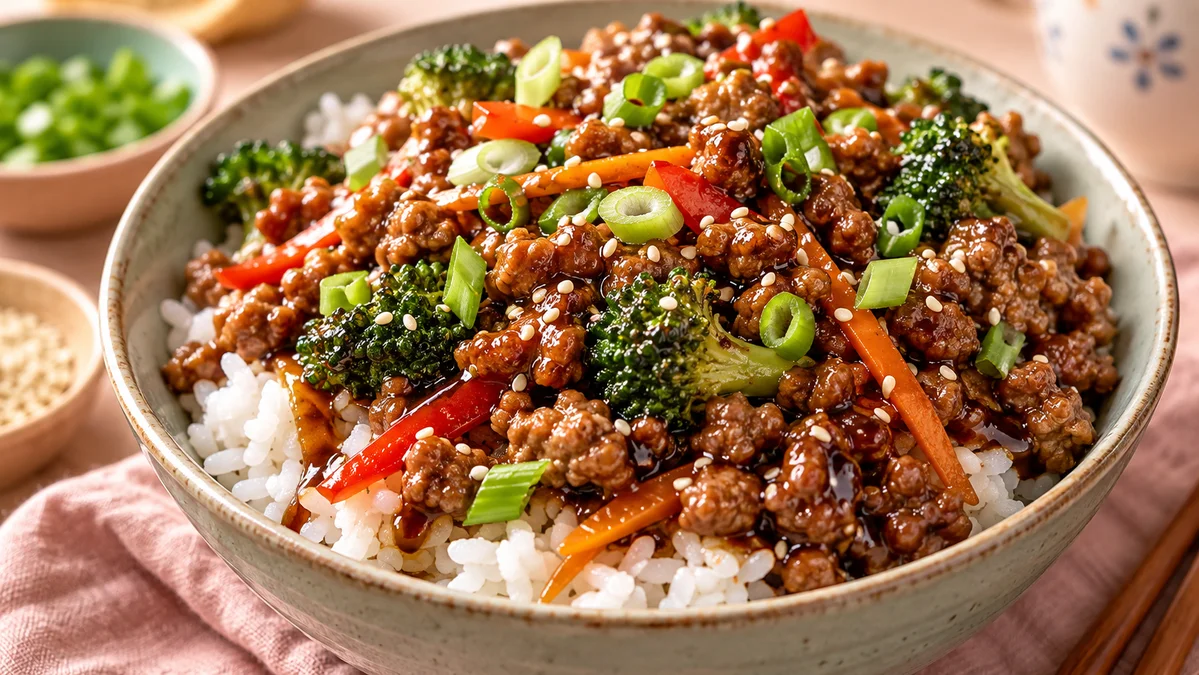
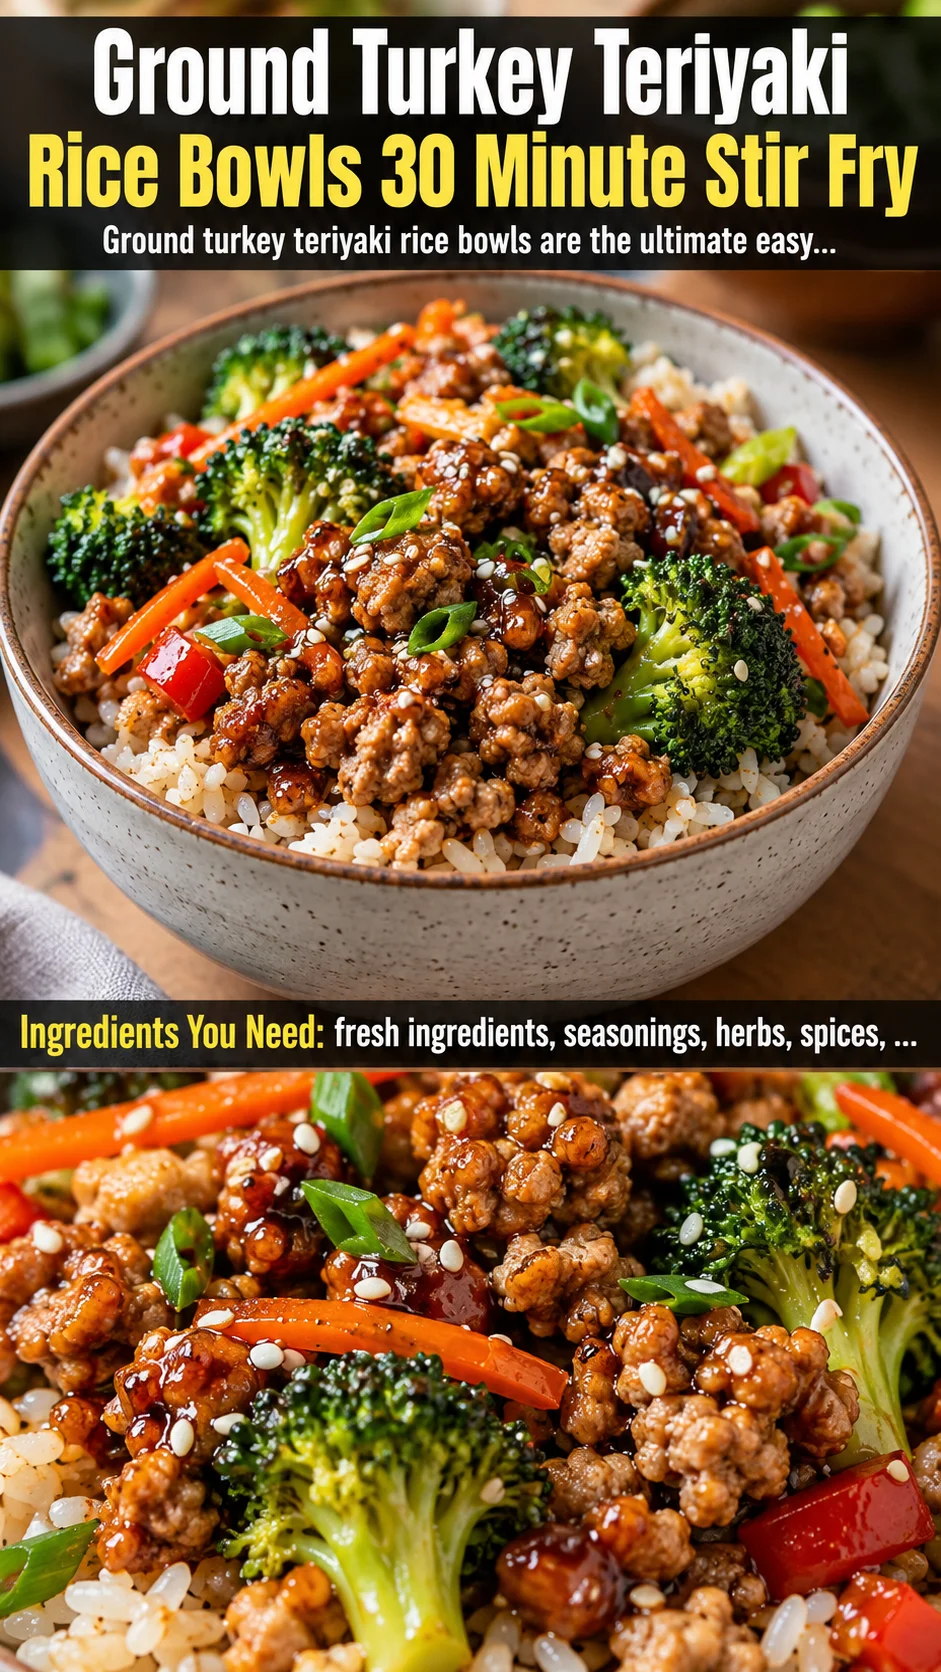
These 30 minute ground turkey teriyaki rice bowls are the ultimate easy dinner: juicy high-protein turkey in a sticky homemade teriyaki glaze over rice.
Ingredients
Instructions
Before you turn on a single burner, take five minutes to set up your mise en place — this is the real secret behind any genuine 30-minute meal. Whisk together the soy sauce, mirin, brown sugar, rice vinegar, sesame oil, grated ginger, and minced garlic in a small bowl or measuring cup until the sugar fully dissolves and the mixture looks glossy and uniform, then set it right beside the stove. In a separate tiny bowl, stir the cornstarch into two tablespoons of cold water to create a smooth slurry with no lumps and no dry pockets, because that slurry is what later transforms a thin sauce into a sticky, lacquered teriyaki glaze. Dice the onion and bell pepper into even, bite-sized pieces, cut the broccoli into small florets, and slice the green onions. Having every ingredient chopped, measured, and within arm’s reach means you will never burn garlic while frantically hunting for the sesame oil, and the whole stir fry will come together in the exact time it takes the rice to finish steaming.
Get your rice going first, because fluffy, hot rice is the foundation the entire bowl is built on. If you are using a rice cooker, rinse 1½ cups of jasmine rice under cold running water until the water runs clear, add the matching water, and press start — it will be perfectly steamed and waiting by the time the turkey is done. On the stovetop, combine the rinsed rice with water using roughly a 1:1.2 ratio for jasmine, bring it to a rolling boil, then clamp on a tight lid, drop the heat to the lowest possible setting, and let it steam undisturbed for 12 minutes. Resist every urge to peek or stir, because each time you lift the lid you release the trapped steam that is actually cooking the grains. Once the timer goes off, let the pot rest off the heat for 5 minutes, then fluff the rice gently with a fork so the grains stay separate instead of turning gummy.
Heat a large, heavy skillet or wok over medium-high heat and add one tablespoon of neutral oil. When the oil shimmers and slides like water across the surface, add the ground turkey in a single even layer and press it down gently with a spatula. Let it sit completely untouched for a full three to four minutes so it can develop a deep, caramelized brown crust — that browning is where nearly all the flavor lives, and if you stir too early you will end up steaming the meat into pale, watery crumbles. Once the underside is beautifully golden, break it apart into bite-sized pieces and continue cooking, stirring occasionally, for another 4 to 5 minutes until no pink remains and the turkey registers 165°F (74°C) on an instant-read thermometer. Lean turkey is unforgiving, so the moment it starts to look dry and chalky you have overcooked it.
Push the browned turkey out to the outer edges of the pan to create a hot well in the center. Add the remaining tablespoon of oil if the pan looks dry, then tumble the diced onion and red bell pepper into that central well. Cook for 3 to 4 minutes, stirring just the vegetables in the middle, until the onion turns translucent and the pepper begins to soften and sweeten. Cooking the vegetables in their own hot pocket like this keeps them from steaming in the turkey’s juices, so they caramelize at the edges and retain a pleasant, snappy texture that contrasts beautifully with the tender meat. You should start to smell a sweet, savory aroma rising from the pan as the sugars in the onion begin to brown.
Add the broccoli florets to the pan and toss everything together until the vegetables and turkey are evenly mixed. Pour in two tablespoons of water, immediately clamp a lid onto the skillet, and let the vegetables steam for 3 minutes. That splash of water flashes instantly into steam and gently cooks the broccoli from the outside in, keeping it vivid green and crisp-tender rather than mushy or raw. When you lift the lid, the broccoli should be bright and fork-tender at the stem with just a slight bite at the floret. If you prefer a more roasted, charred broccoli with deeper flavor, skip the water and lid entirely and stir-fry over high heat for 4 minutes instead.
Give your whisked sauce one final stir — the cornstarch settles as it sits — then pour it over the entire contents of the pan. Stir everything together so every crumble of turkey and every piece of vegetable gets coated, and bring the mixture up to a gentle simmer. You will watch the sauce transform from thin and watery into glossy and syrupy in about 2 to 3 minutes as the cornstarch gelatinizes and the sugars reduce. Keep the heat at a steady medium, because a hard rolling boil can scorch the sugars against the bottom of the pan and give the whole dish a bitter edge. When the sauce coats the back of a spoon and clings to the turkey instead of pooling underneath it, the glaze is ready.
Taste the teriyaki and adjust it to your family’s palate — a splash more soy sauce for saltiness, a drizzle of honey or brown sugar for sweetness, a few drops of rice vinegar for brightness, or a pinch of red pepper flakes if you like heat. This tasting step is your chance to dial the sauce in perfectly before serving. If the glaze looks too thick and sticky, loosen it with a tablespoon of water; if it looks too thin, simmer it another minute uncovered to let more moisture evaporate. Turn off the heat and drizzle in a teaspoon of toasted sesame oil for that final aromatic finish — adding it off the heat preserves its delicate nutty fragrance, which would otherwise cook away into nothing.
Fluff your rested rice and divide it among four wide bowls. Spoon the glossy ground turkey teriyaki over the top, making sure to scrape up every bit of that sticky glaze from the pan because it is genuinely the best part. Shower each bowl with sliced green onions and a generous pinch of toasted sesame seeds for crunch and a pop of color and texture. Serve immediately while everything is piping hot, or pack the components into airtight containers for meal prep, where they will keep for up to 4 days in the refrigerator. For the freshest texture, store the glazed turkey separately from the rice and reheat gently in a skillet or microwave, adding a teaspoon of water to loosen the sauce back to its glossy, drizzly consistency.
For best results
- Choose your ground turkey deliberately, because the fat ratio changes everything. I reach for 93/7 (93% lean, 7% fat) for this recipe: it has just enough fat to brown beautifully and stay juicy, while still delivering a lean, high-protein macro profile. If you grab the 99% fat-free package instead, you will need to add an extra tablespoon of oil, brown it in smaller batches, and be extra careful with the cook time, because ultra-lean turkey dries out and turns crumbly in seconds. Conversely, if you happen to have 85/15 on hand, simply drain off the excess rendered fat after browning so the finished bowl is not greasy.
- The cornstarch slurry is non-negotiable if you want that classic sticky teriyaki lacquer rather than a watery soy sauce puddle at the bottom of your bowl. Always mix the cornstarch into cold water before it hits the pan — dropping dry cornstarch straight into a hot liquid creates stubborn lumps that never fully dissolve. If you want to skip cornstarch entirely, you can reduce the sauce longer, simmering it for 5 to 6 minutes so the natural sugars thicken it, though the result will be a touch less glossy. For a Paleo or grain-free version, arrowroot starch or tapioca starch works as a 1:1 swap in the slurry.
- Meal prep is where this recipe truly shines, and a little strategy keeps it tasting fresh all week. Store the teriyaki turkey and the cooked rice in separate airtight containers, because rice absorbs sauce and becomes mushy if they sit together. The glazed turkey keeps beautifully for 3 to 4 days in the fridge, and the broccoli stays bright for about 3 days. When reheating, add a teaspoon of water to the turkey and warm it gently in a skillet or covered microwave dish so the sauce loosens and re-glazes instead of drying into a sticky film. This dish also freezes surprisingly well for up to 2 months if you freeze the turkey mixture on its own.
- Rice selection matters more than people realize, and jasmine is my top pick for teriyaki bowls because its floral aroma and slightly sticky texture soak up the glaze perfectly. If you prefer short-grain sushi rice, you will get an even stickier, more compact bowl, while long-grain basmati gives you a fluffier, more separate grain. Whatever you choose, always rinse the raw rice until the water runs clear — this washes away surface starch that otherwise makes rice gummy. For a faster weeknight option, a pre-cooked microwave rice pouch works in a pinch, but nothing beats the texture and value of rice cooked from scratch in a rice cooker.
- Getting true restaurant-style depth in a home stir fry comes down to two things: heat and patience. Let your pan preheat for a full two minutes before the oil goes in, and do not overcrowd it — if your skillet is small, brown the turkey in two batches so it sears instead of steams. A cast-iron skillet or a carbon-steel wok retains heat far better than a thin nonstick pan and will give you those gorgeous caramelized edges on the meat. Also resist stirring constantly; letting the turkey and vegetables sit still against the hot surface is what builds the browned flavor that makes this dish taste far more complex than its 30-minute timeline suggests.
- Balance is the soul of a great teriyaki sauce, and the three levers you control are sweet, salty, and acidic. Soy sauce brings the salt, brown sugar or honey brings the sweet, and rice vinegar brings the bright acidic lift that keeps everything from tasting flat or cloying. If your finished sauce tastes too sweet, add a splash more vinegar; if it tastes too salty, a pinch of sugar or a squeeze of honey rounds it out. Taste before you serve — every brand of soy sauce and mirin has a different salinity and sweetness level, so your palate is the final judge, not the recipe card.
- Do not skip the fresh ginger and garlic, and grate them rather than chopping when you can. Freshly grated ginger releases far more aromatic oils than dried ground ginger and gives the sauce that unmistakable warm, peppery bite. If you only have garlic powder, use about ¾ teaspoon as a substitute, but understand that the flavor will be flatter and less bright. For a deeper, more caramelized base note, you can sauté the ginger and garlic in a teaspoon of oil for 30 seconds before adding the rest of the sauce ingredients — just be careful, because garlic goes from fragrant to burnt in under a minute.
- Garnishes are not decoration here; they are a layer of flavor and texture that finishes the bowl. Sliced green onions add a fresh, sharp onion bite that cuts through the rich sweet glaze, while toasted sesame seeds deliver a nutty crunch and a toasty aroma. Toast your own sesame seeds in a dry skillet for 2 minutes until they smell fragrant and start to pop — the difference between raw and toasted seeds is dramatic. A final drizzle of toasted sesame oil, a sprinkle of red pepper flakes, or even a squeeze of fresh lime can take these bowls from good to unforgettable.
Variations
- Swap the protein to keep this recipe in constant rotation. Ground chicken behaves almost identically to ground turkey and works beautifully here, while lean ground beef gives you a richer, beefier take that tastes like a Japanese steakhouse bowl. Ground pork is another fantastic option with a touch more natural sweetness. If you go with beef or pork, drain off excess fat after browning and reduce the brown sugar slightly, since the meat itself brings more richness. You can also use thinly sliced flank steak or chicken thighs instead of ground meat — just stir-fry the strips first, remove them, build the sauce, then return the meat at the end so it stays tender.
- For a lower-carb or keto-friendly bowl, serve the teriyaki turkey over cauliflower rice or a mix of shredded cabbage and broccoli slaw instead of jasmine rice. Riced cauliflower soaks up the glaze nicely and keeps the dish light, while a cabbage slaw adds a satisfying crunch. If you want to reduce the sugar further, replace the brown sugar with a granulated monk fruit or erythritol blend, and use a low-sodium, sugar-free soy sauce or coconut aminos. Just note that sugar-free sweeteners do not caramelize the same way, so the sauce will be a little less glossy and sticky.
- Make it vegetarian or vegan by swapping the ground turkey for a block of extra-firm tofu that has been pressed, cubed, and pan-fried until golden and crisp on all sides. Crumbled tempeh is another superb high-protein plant option that holds its shape beautifully in the sauce. Use tamari or coconut aminos instead of soy sauce to keep it gluten-free, and confirm your mirin is vegan-friendly, since some brands contain no animal products while others are fortified. Add a handful of shelled edamame at the end for extra protein and that lovely bright green pop.
- Turn up the heat with a spicy teriyaki version that has become a family favorite in my house. Stir 1 to 2 teaspoons of sriracha, chili garlic sauce, or gochujang straight into the teriyaki sauce before it goes in the pan, and finish the bowls with sliced fresh chili and a drizzle of chili crisp. For a sweet-and-spicy twist, add a handful of pineapple chunks along with the bell pepper — the pineapple caramelizes in the glaze and adds a tropical brightness that pairs incredibly well with the savory turkey. A squeeze of lime over the top balances the heat and the sweetness beautifully.
- Lean into an island teriyaki bowl by adding drained canned pineapple chunks, a splash of pineapple juice in place of some of the mirin, and a scattering of toasted macadamia nuts for richness. You can also transform these leftovers into entirely new meals: pile the glazed turkey into lettuce cups for a light lunch, tuck it into a toasted hoagie roll for a teriyaki sub, or stir it into ramen or fried rice the next day. Fold it into a cheesy quesadilla with mozzarella for a fusion mash-up that kids absolutely devour. The sauce is so versatile that it works as a glaze for salmon, shrimp, or roasted vegetables, too.
Nutrition
- Calories520 kcal
- Total Fat18g
- Saturated Fat4g
- Cholesterol95mg
- Sodium780mg
- Total Carbohydrates55g
- Dietary Fiber4g
- Sugars14g
- Protein38g