
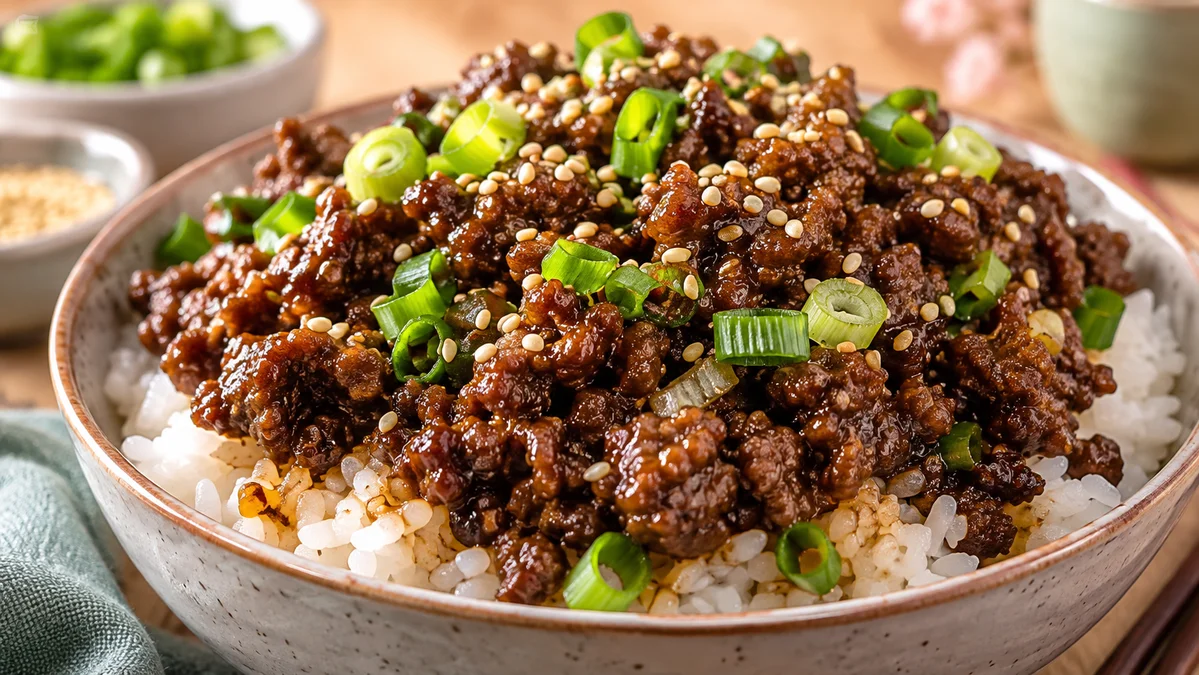
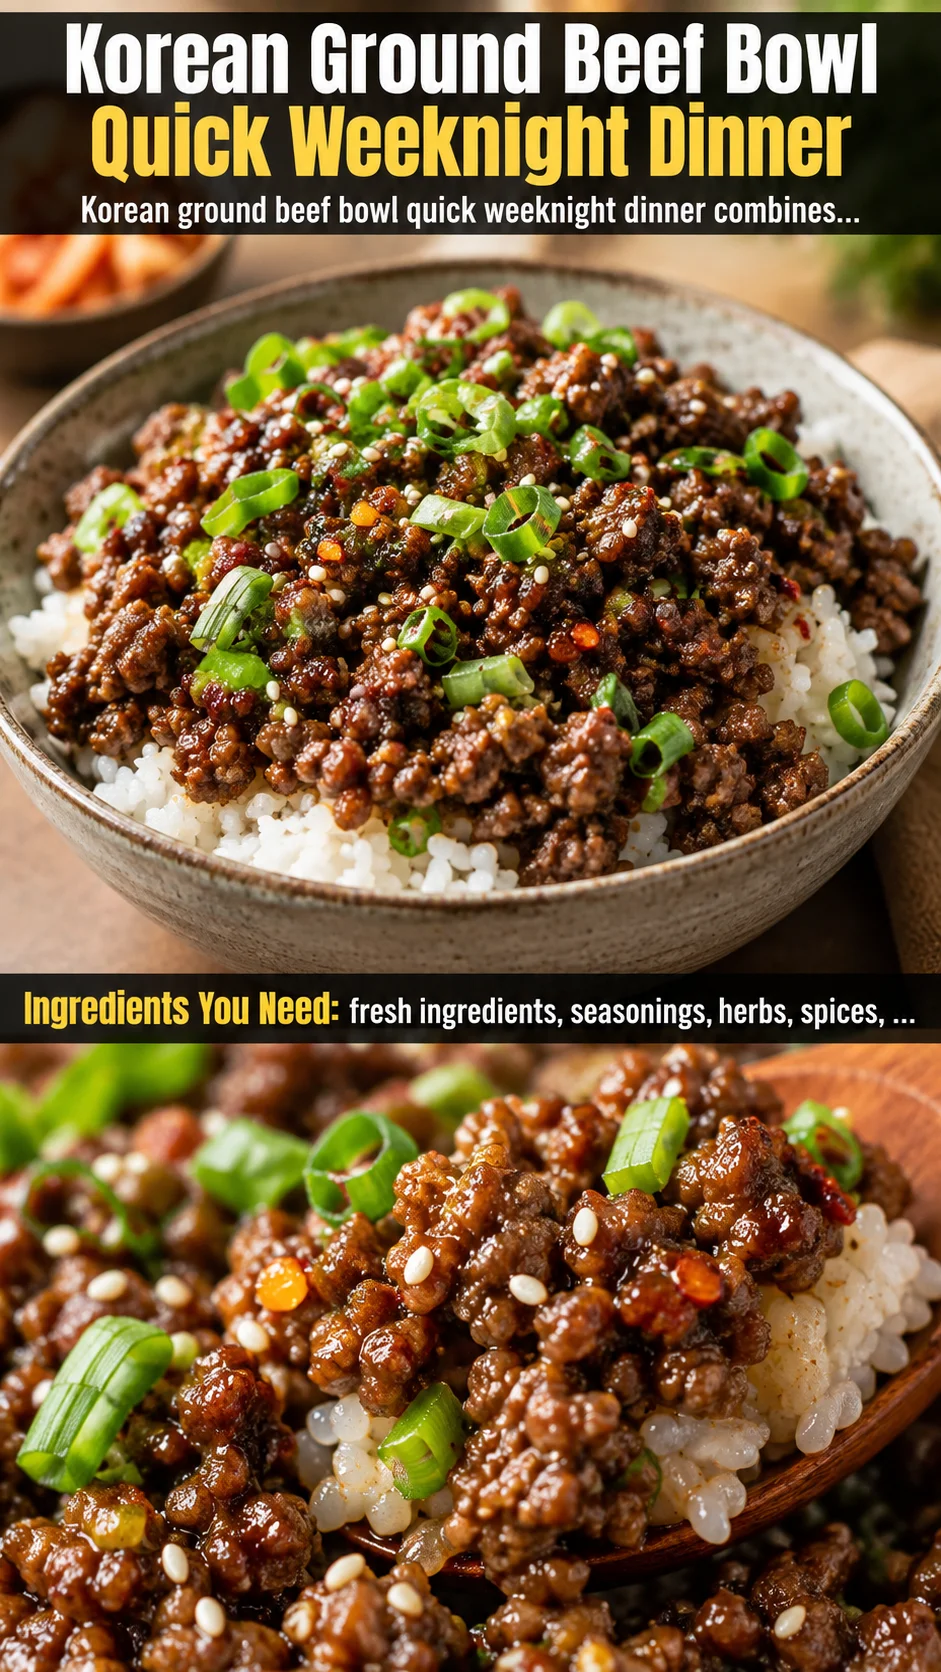
This Korean ground beef bowl is a quick weeknight dinner ready in 20 minutes. Savory soy-garlic beef over fluffy rice — an easy, high-protein family meal.
Ingredients
Instructions
Begin by gathering every ingredient and prepping your mise en place, because this Korean ground beef bowl moves from stove to table in under twenty minutes and there is simply no time to hunt for a missing bottle of sesame oil while the garlic browns. Measure 3 tablespoons of low-sodium soy sauce, 1 tablespoon of packed brown sugar, 1 tablespoon of honey, 1 tablespoon of toasted sesame oil, 1 tablespoon of gochujang, 1/2 teaspoon of red pepper flakes, and 1/4 teaspoon of black pepper into a small bowl so the sauce is ready the instant the beef hits the pan. Finely mince 4 garlic cloves and grate 1 tablespoon of fresh ginger on a Microplane — the fine, fibrous paste releases far more flavor than coarse chopping and melts evenly into the sauce instead of leaving stringy bits. Slice 4 green onions and separate the white and light-green parts (which go into the pan) from the crisp dark-green tops (which become a fresh garnish). Finally, cook or reheat 4 cups of jasmine rice so it is steamy and fluffy right when the beef finishes. Cluster everything within arm’s reach of the stove — this is the single biggest trick to cooking fast without burning anything.
Whisk the sauce together in a small bowl until the brown sugar dissolves completely and the mixture looks glossy and uniform, about 30 seconds. You want a smooth, pourable liquid rather than a gritty one, because undissolved sugar can scorch against a hot pan and turn the whole dish bitter. Taste the sauce with a clean spoon: it should hit that signature Korean sweet-savory balance — salty from the soy, gently sweet from the sugar and honey, nutty from the sesame oil, and warm and gently funky from the gochujang. If it tastes flat or dull, add a splash more soy sauce; if it is too salty, a pinch more sugar will round everything out. Remember that the sauce will concentrate and intensify as it reduces, so it is fine if it tastes slightly strong right now.
Place a large, heavy skillet or wok over medium-high heat and let it get genuinely hot for a full 2 minutes before the beef goes in. This preheating step is the secret to deeply caramelized, savory meat instead of gray, steamed crumbles — a cold pan steams ground beef and robs it of flavor. Add the ground beef in one even layer and leave it untouched for 3 to 4 minutes so a browned crust can form on the bottom, because that browning (the Maillard reaction) is where most of the flavor is created. Resist the urge to stir constantly; let the meat sit, then break it into bite-sized pieces with a wooden spoon. Cook for 5 to 6 minutes total until no pink remains and the beef is crumbly and lightly browned. If your beef releases a lot of fat, spoon off all but about 1 tablespoon so the final sauce clings beautifully rather than pooling in the bowl.
Push the browned beef to one side of the pan and add the minced garlic, grated ginger, and the white and light-green parts of the green onions directly into the rendered fat. Stir them in the hot fat for just 30 to 45 seconds, until they smell intensely fragrant and the raw edge disappears but before they take on any color. Garlic and ginger burn in seconds at this heat, and burnt alliums turn acrid and bitter, so keep them moving and pull the pan off the heat briefly if they start to darken. The moment that heady aroma blooms, fold the aromatics all the way through the beef so every crumble is perfumed with garlic and ginger. This is the step that makes your kitchen smell like a Korean barbecue restaurant.
Pour the whisked sauce evenly over the beef and stir gently to coat every crumble. Reduce the heat to medium and let the sauce bubble and thicken for 2 to 3 minutes, stirring occasionally, until it coats the back of a spoon and glazes the meat in a deep mahogany sheen. This short simmer is where the sauce concentrates and the sugar caramelizes into the sticky, glossy finish you recognize in restaurant beef bowls. Watch closely, because a sweet sauce can go from perfect to burnt in under a minute. If the sauce reduces too far and looks dry, loosen it with a tablespoon of water; if it still looks thin, cook one more minute. The finished sauce should cling to the beef, not run off it.
While the beef simmers, fluff the warm jasmine rice with a fork and season it with 1 teaspoon of rice vinegar and a tiny pinch of salt. The vinegar does not make the rice sour — it brightens the grains, keeps them separate, and creates a subtle tangy contrast against the rich, sweet-savory beef that keeps each bite from feeling heavy. Taste a spoonful: the rice should be lightly seasoned, not plain, because it acts as the calm canvas underneath a bold sauce. Divide the rice evenly among four shallow bowls, mounding it slightly to one side so there is room for the beef and a colorful border of toppings.
Spoon the glazed Korean beef generously over the rice, making sure to scrape in every last drop of the sticky pan sauce, because that sauce is liquid gold and carries most of the flavor. Arrange your fresh toppings around the edge in neat, colorful clusters: a spoonful of kimchi for tang and gentle heat, some julienned cucumber and shredded carrot for cool crunch, and, if you like, a sunny-side-up fried egg with a runny yolk that transforms the bowl into an even heartier, protein-packed meal. Keeping toppings separate lets each person customize their own bowl and keeps textures distinct instead of turning everything into a mash.
Finish the bowls with a generous shower of toasted sesame seeds and the reserved dark-green scallion tops, then drizzle a few drops of toasted sesame oil over each serving for a final aromatic flourish that ties the whole dish together. Serve immediately while the rice is hot and the beef is glistening, because this dish is at its absolute best fresh from the pan. If you are meal-prepping, pack the beef and rice in separate containers and add the crisp toppings just before eating so nothing turns soggy. Leftovers keep beautifully in the fridge, and the bowl is just as delicious gently reheated the next day.
For best results
- Choose the right fat ratio for ground beef and your bowl will taste twice as good. An 85/15 lean-to-fat blend is the sweet spot for this recipe: it has enough fat to brown deeply and carry flavor, yet not so much that the sauce turns greasy and separates. If you only have 90/10 or even 93/7 on hand, add an extra teaspoon of toasted sesame oil to the pan before browning so the meat still caramelizes instead of drying out and steaming. Conversely, if you are working with a fatty 80/20 blend, drain all but about a tablespoon of the rendered fat after browning, otherwise the final sauce will slide off the meat rather than clinging to it. The fat is flavor, but the balance is everything.
- Toast your sesame seeds and bloom your aromatics for restaurant-level depth. Raw sesame seeds taste pale and slightly bitter, so toast them in a dry skillet over medium heat for 2 to 3 minutes, tossing often, until they smell nutty and turn one shade darker — then pull them off immediately, because they go from toasty to burnt in seconds. Likewise, giving the garlic and ginger 30 to 45 seconds in the hot fat before the sauce goes in wakes up their fat-soluble flavor compounds. This tiny extra step is the difference between a good bowl and an unforgettable one, and it takes less time than reading this sentence.
- Rice is not an afterthought here — it is half the dish. Jasmine rice is ideal because its fluffy, slightly sticky texture soaks up the sauce without turning mushy, but short-grain sushi rice works beautifully too if you want a chewier, more classic Korean feel. Always rinse your rice under cold water until it runs clear before cooking, which removes surface starch and keeps the grains distinct. Rinse, then cook with a 1:1.2 rice-to-water ratio for a firmer grain that holds up under sauce. A splash of rice vinegar and a pinch of salt after cooking gives the rice a subtle backbone so it does not taste flat beneath the bold beef.
- Resist the urge to stir the ground beef constantly — browning requires patience. The instinct when cooking ground meat is to break it apart and toss it nonstop, but that keeps the meat's surface temperature low and steams it gray instead of searing it brown. Instead, press the beef into a flat layer, let it sit undisturbed for 3 to 4 minutes to develop a crust, then flip and break it up. Those caramelized bits are concentrated flavor, and they are the reason a 20-minute bowl can taste like it simmered all day. If you are cooking for a crowd, brown the beef in two batches so the pan never gets overcrowded and steams.
- Learn to balance the sauce by tasting, not by measuring blindly. Soy sauces vary wildly in saltiness, gochujang varies in sweetness and heat, and honey and mirin differ in their sugar content, so no single recipe can account for every brand in your pantry. Taste the whisked sauce before it hits the pan and adjust: too salty, add sugar; too sweet, add soy; too flat, add a splash of rice vinegar or a pinch of gochugaru. This habit of tasting as you go is what separates confident cooks from recipe-followers, and it takes seconds. Write down what you adjusted so you can nail your personal sweet spot next time.
- Build the bowl with texture in mind and it will never feel one-note. The beef and rice are soft, so the toppings should bring contrast: cool, crunchy cucumber; crisp, slightly sour kimchi; shredded carrot for sweetness; a runny fried egg for richness; and toasted sesame seeds for a subtle crunch. Even a small handful of quick-pickled red onion or a sprinkle of crushed roasted seaweed adds a bright, salty snap. Aim for at least two crunchy elements per bowl, and add them at the very end so they stay crisp against the hot beef. This is the difference between a good weeknight dinner and one people request by name.
- Meal prep and storage are where this recipe earns its keep in a busy week. The cooked beef mixture keeps in an airtight container in the refrigerator for up to 4 days and actually deepens in flavor overnight as the sauce permeates the meat. Store the rice in its own container and reheat it with a splash of water, covered, in the microwave so it steams back to fluffy life. Keep the crisp toppings — cucumber, scallions, sesame seeds — separate and add them fresh. To freeze, portion the cooled beef into freezer bags, press flat, and freeze for up to 3 months; thaw overnight in the fridge and reheat gently on the stovetop.
- Gluten-free and lower-sodium eaters can enjoy this bowl with two easy swaps. Replace the soy sauce with tamari or a certified gluten-free coconut aminos, and double-check that your gochujang is labeled gluten-free, as many traditional brands contain wheat. To cut sodium, use a low-sodium soy sauce, skip any added salt in the beef (the soy is plenty), and lean on rice vinegar and sesame oil for flavor instead. The dish loses none of its character with these adjustments. As always, taste and adjust, because coconut aminos are noticeably sweeter and less salty than soy, so you may want a touch more rice vinegar to brighten the final sauce.
Variations
- Swap the beef for ground turkey or chicken for a lighter, leaner bowl that still delivers big flavor. Use 1 pound of ground turkey (preferably dark meat for moisture, or 93/7 if you want it extra lean) and follow the recipe exactly, but add an extra teaspoon of toasted sesame oil to the pan before browning since poultry has less fat and can dry out quickly. Because turkey is milder, bump up the garlic by one clove and add a teaspoon of gochugaru for richness. The result is a 30-minute, high-protein dinner that lands around 380 calories per serving while still tasting deeply savory and satisfying.
- Go classic with a beef bulgogi-inspired version using thinly sliced ribeye or sirloin instead of ground meat. Freeze the steak for 20 minutes to firm it up, then slice it paper-thin against the grain. Marinate the slices in the soy, sugar, honey, sesame oil, garlic, and ginger for at least 30 minutes (or overnight for maximum tenderness), then sear them in a screaming-hot skillet in a single layer for 1 to 2 minutes per side. The marinade's sugar caramelizes into a lacquered glaze, and you get that unmistakable Korean barbecue flavor with tender, juicy ribbons of beef. Serve over rice with the same toppings for a steakhouse-worthy bowl at home.
- Turn up the heat with a spicy gochujang-forward version. Increase the gochujang to 2 tablespoons and add 1 to 2 teaspoons of gochugaru (Korean red pepper flakes) along with a teaspoon of minced garlic-chili paste if you like serious warmth. Bloom the gochujang in the hot fat for 30 seconds before adding the sauce, which deepens its fermented complexity and tempers its raw edge. Top the bowl with extra kimchi and a drizzle of chili oil for a fiery, bold dinner. If you want the heat without the intensity, cut the gochujang back to a teaspoon and rely on a pinch of gochugaru for gentle warmth.
- Make it plant-based with crumbled extra-firm tofu, tempeh, or finely chopped mushrooms. Press a block of extra-firm tofu for 15 minutes to remove excess water, then crumble it and pan-fry in sesame oil until golden and crisp before adding the aromatics and sauce — this browning step is essential for texture and flavor. Tempeh offers a nutty, firm bite, while a mix of shiitake and cremini mushrooms brings an earthy, meaty depth. Add a teaspoon of miso paste to the sauce for an umami boost that mimics the savoriness of beef, and finish with the same sesame-scallion garnish.
- Think beyond the bowl and turn this Korean beef into tacos, lettuce wraps, or a rice cake stir-fry. For tacos, spoon the glazed beef into warm corn tortillas and top with kimchi, pickled carrots, and a lime-cream drizzle for a Korean-Mexican fusion. For lettuce wraps, pile the beef into crisp butter lettuce leaves with cucumber and scallions for a fresh, low-carb handheld. Or toss the beef with chewy Korean rice cakes (tteokbokki) and a splash of water to make a spicy, satisfying stir-fry. Each variation uses the same 20-minute base and opens up a whole week of dinners.
- Go low-carb with cauliflower rice or a shredded cabbage base for a lighter, keto-friendly bowl. Pulse cauliflower florets in a food processor until they resemble rice, then sauté in a little sesame oil for 4 to 5 minutes until tender and slightly toasted — this removes the raw, sulfurous bite. Alternatively, use a base of finely shredded cabbage or zucchini noodles for crunch. Because these bases do not absorb sauce the way real rice does, spoon the beef over them while hot and add an extra drizzle of sesame oil so the bowl still tastes rich and balanced.
- Add extra vegetables to stretch the meal and boost nutrition on a budget. Sauté a bag of coleslaw mix or frozen stir-fry vegetables with the aromatics, or fold in blanched broccoli florets, julienned bell peppers, and shelled edamame right before serving. Spinach wilts into the hot beef in seconds and adds iron and color. This is the economical move for feeding a family of four on a small budget, and it turns a meat-centric bowl into a balanced, veggie-packed meal that still comes together in well under 30 minutes.
Nutrition
- Calories520 kcal
- Total Fat24g
- Saturated Fat8g
- Cholesterol85mg
- Sodium780mg
- Total Carbohydrates46g
- Dietary Fiber2g
- Sugars10g
- Protein30g