
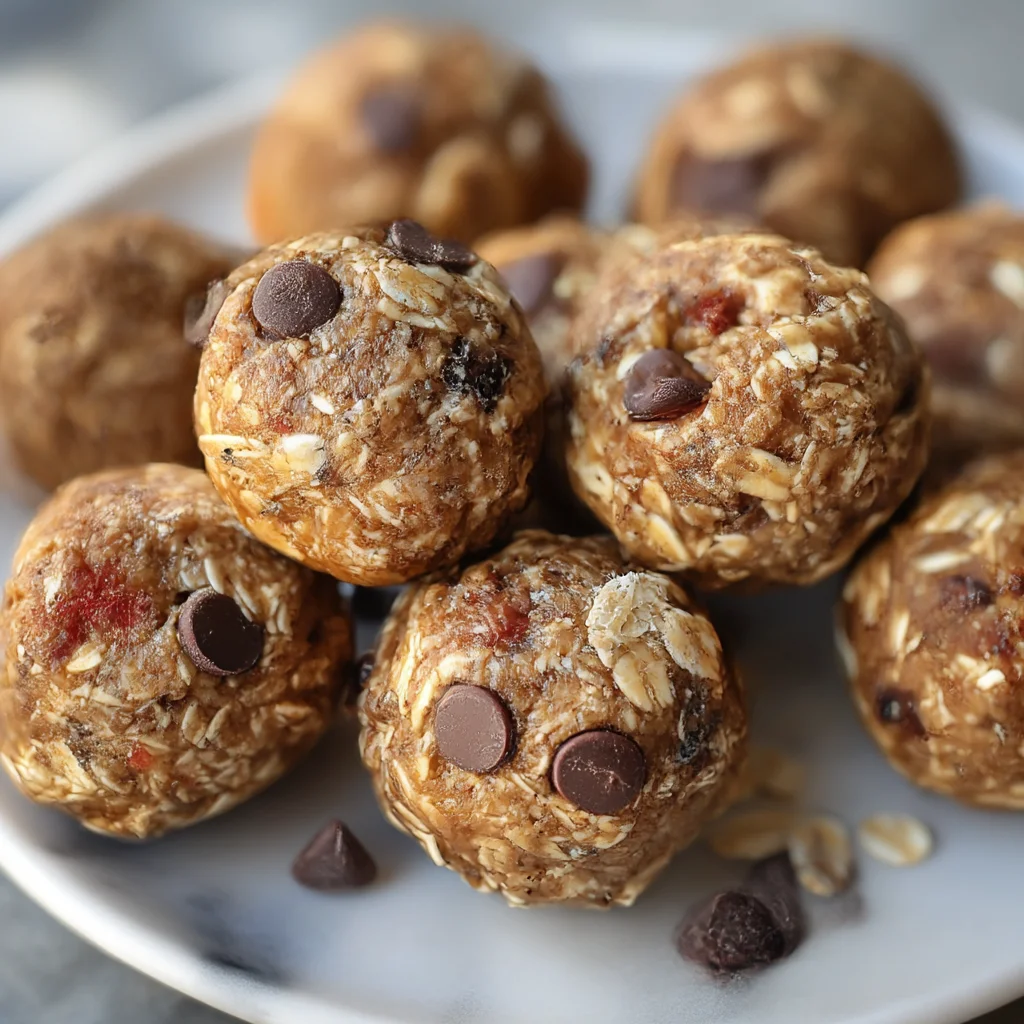
These no bake protein balls are healthy kids snacks made with 6 ingredients. A perfect school lunch idea, high-protein snack, and toddler snack for busy parents.
Ingredients
Instructions
Start by pulling together every ingredient and clearing a little workspace. Bring your rolled oats, creamy peanut butter, honey, vanilla protein powder, mini chocolate chips, and your chosen milk to the counter. Measure each ingredient precisely using dry cups for the oats and protein powder, and liquid measuring cups for the honey and milk. Because this is a no-bake recipe, the texture is everything: if you miss a measurement, the balls can end up either dry and crumbly or greasy and loose. Set out a large mixing bowl, a sturdy spatula or wooden spoon, and a parchment-lined baking sheet or tray where your finished protein balls can rest while they chill. This setup, often called mise en place, makes the next few minutes feel effortless and keeps sticky ingredients from turning into a mess. You’ll also know immediately if anything is missing before your hands are covered in honey.
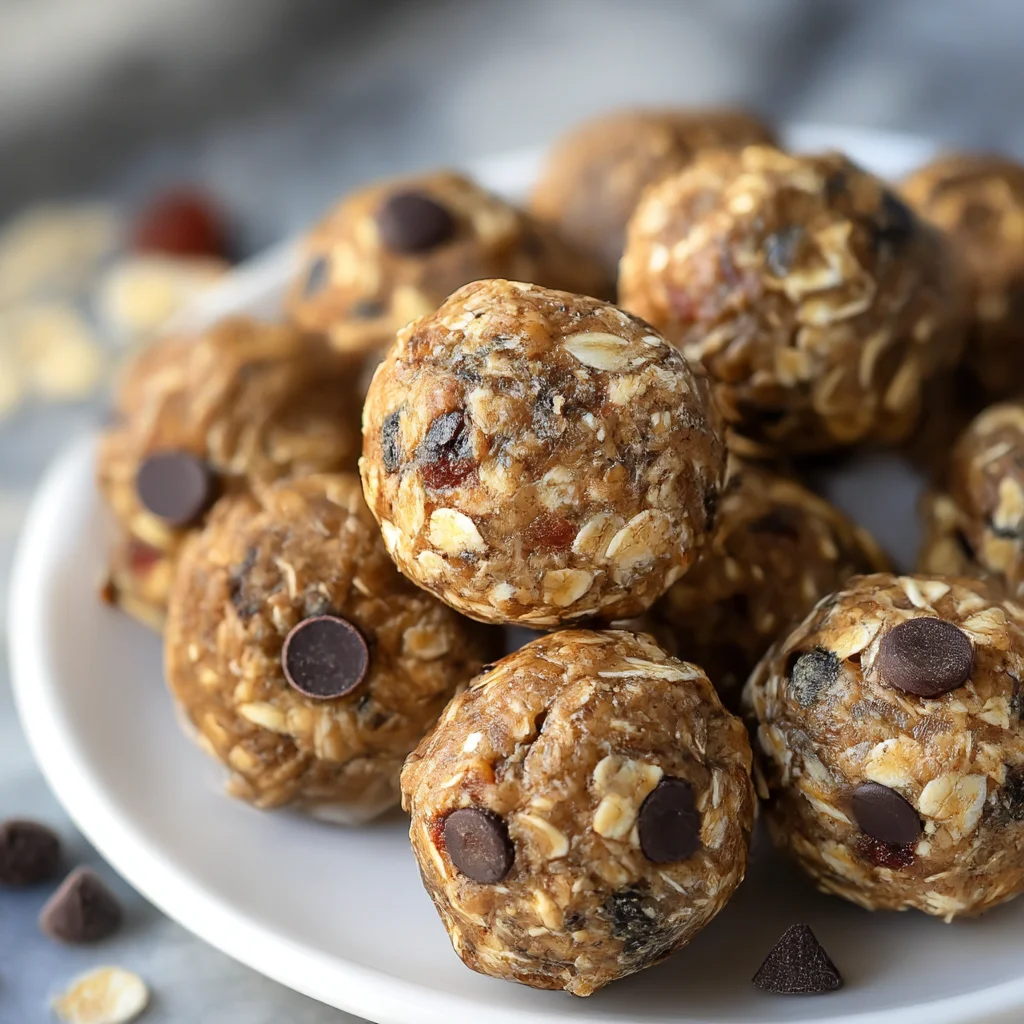
Place the rolled oats and protein powder into the large mixing bowl. Whisk them together thoroughly for about 30 seconds. Why both dry ingredients first? Oats are naturally a little clumpy in the bag, and protein powder can be very dusty, so a quick whisk breaks up any lumps and ensures every bite has the same balanced flavor. You want the mixture to look uniform, with no streaks of uncolored powder. If you’re using a plant-based protein powder, give it an extra mix because vegan protein tends to clump more than whey. As you whisk, take a moment to smell the mixture: it should smell like a cozy oatmeal cookie, not like a dusty supplement shake. This dry blend also tells you how much room you have before adding wet ingredients, so you can anticipate how sticky or dry the dough will feel.

Add the creamy peanut butter and honey to the dry mixture. Using a spatula, stir until a thick, shaggy dough begins to form. At first it will look like there is not enough wet ingredient to pull everything together, but keep folding from the bottom of the bowl. The oats and protein powder need a minute to absorb the moisture from the peanut butter and honey. If the mixture still looks very dry and sandy after about thirty seconds, add one tablespoon of milk at a time. You are looking for a dough that clumps together when you press it between your fingers and holds its shape for a couple of seconds before slowly cracking. If it crumbles immediately, add a little more milk. If it feels oily or slides apart, you have added too much liquid; balance it with a tablespoon of additional oats or protein powder.
Once the dough has come together, fold in the mini chocolate chips. Distribute them evenly so you get a few in every ball. Reserve a handful of chocolate chips to press into the outside of the rolled balls if you want a prettier presentation and a more chocolate-forward first bite. This step is also the moment to adjust texture: if the dough is too sticky to handle cleanly, cover the bowl and refrigerate it for 10 to 15 minutes. Chilling the dough before rolling makes it dramatically easier to shape, because the peanut butter and honey firm up and the oats have time to hydrate. If it is too dry, don’t panic; just sprinkle in a tiny splash of milk and knead the dough gently with your hands.
Use a cookie scoop or a regular tablespoon to portion out the dough into uniform balls. For a standard serving, scoop about one tablespoon of dough per ball; this gives you roughly 18 energy balls and a cute little snack-size portion that fits perfectly into a lunchbox. Roll each portion between your palms using light pressure until it forms a smooth, round ball. Lightly wetting your hands with cold water every few rolls prevents sticking and leaves a clean surface. If the edges crack while rolling, simply compress the dough a little more firmly; if it keeps cracking, the dough is too dry, so add a touch more milk. Place the finished balls onto the parchment-lined tray, leaving a little space between them.
Once all the dough is rolled, stop and do the fingertip test. Press one ball gently; it should feel firm but still soft enough to yield slightly. If it feels too soft or greasy, pop the whole tray into the refrigerator for 15 to 30 minutes before storing. That chill time is your best friend in a no-bake recipe: it allows the honey and peanut butter to set, which prevents the balls from squishing in a backpack or lunchbox. If you are serving them right away, they are delicious at room temperature, but the texture is much more satisfying after a brief chill. When the balls firm up, they look less like messy cookie dough and more like tidy little truffles that kids can grab by the handful. After chilling, transfer the protein balls to an airtight container and stash them in the fridge or freezer for future snacks.
For best results
- Rolled oats are the backbone of this recipe. Use old-fashioned rolled oats, not quick oats or steel-cut oats. Quick oats break down too quickly and turn the protein balls mushy, while steel-cut oats stay rock-hard and can crack teeth. Rolled oats hold their shape but soften enough in the fridge to give that cookie-dough chew. If you only have quick oats on hand, you can still make the recipe, but expect a finer, more uniform texture. For a gluten-free version, choose certified gluten-free rolled oats.
- Let the dough rest before rolling. After mixing, cover the bowl and refrigerate for 15 minutes. This lets the oats soak up some of the honey and peanut butter, meaning your balls will be less sticky and hold together better. If you skip this step, you'll likely need to add extra milk and end up with a wetter, more fragile dough. Patience is a small price for perfectly round protein balls.
- Choose the right protein powder. A vanilla-flavored whey protein adds sweetness and a smooth, milkshake-like flavor. Plant-based protein powders can be gritty or have a beany aftertaste, so you may need an extra tablespoon of milk. If your protein powder is unsweetened, consider increasing the honey by one tablespoon. Collagen peptides work in a pinch because they dissolve easily, but they don't contribute as much protein per scoop and can make the mixture slightly more sticky.
- Sticky hands are optional. The old trick of wetting your hands with cold water before rolling works beautifully, but you can also rub a tiny drop of neutral oil on your palms. Another easy trick is to dust your hands with powdered sugar or cocoa powder, but that changes the flavor and adds extra sugar. A cookie scoop is the easiest way to get uniformly sized balls, and uniformity matters because smaller balls dry out faster and larger balls can be too much for a child.
- Storage and lunchbox safety: These protein balls contain perishable ingredients like peanut butter and milk, so they should not stay at room temperature for more than four hours. Pack them in an insulated lunchbox with an ice pack if your child has a long school day. In the fridge, store them in an airtight container with a paper towel folded at the bottom to absorb any excess moisture; swap the paper towel whenever it gets wet. In the freezer, flash-freeze the balls on a tray for 30 minutes before transferring to a zip-top bag so they don't fuse into a single lump.
- Fix dry or crumbly dough without adding more sugar. If your mixture refuses to come together, add milk one teaspoon at a time until it does. If the dough feels too oily or loose, mix in one or two tablespoons of almond flour, oat flour, or extra protein powder. Remember that the texture will continue to firm up as the balls chill, so err on the slightly-sticky side when you decide to stop adding dry ingredients.
Variations
- Nut-free school lunch version: Swap the peanut butter for sunflower seed butter or tahini. Sunflower seed butter is naturally sweet and creamy, but be aware that it can turn slightly green when combined with baking soda (which isn't in this recipe) and some protein powders; that reaction is harmless. Make sure to buy a seed butter with no added sugar for the best results, and taste the dough before rolling to see if you need an extra teaspoon of honey. Use certified nut-free chocolate chips and place the finished balls in a clearly labeled container so teachers and parents know they are safe.
- Chocolate peanut butter swirl: Use chocolate protein powder instead of vanilla and reduce the honey to 1/4 cup (85g). Fold in 2 tablespoons of cocoa powder along with the dry ingredients if you want a deeper chocolate flavor. For a marbled effect, melt 2 tablespoons of peanut butter with 1 tablespoon of honey and drizzle it over the finished balls; then refrigerate until set. This turns the recipe into a dessert-like treat that still fits in a healthy snack rotation.
- Super-seed boost: Add one tablespoon of chia seeds, one tablespoon of ground flaxseed, and one tablespoon of hemp seeds to the dry mixture. This adds omega-3s, fiber, and a pleasant crunch, but it also absorbs additional liquid, so you will need an extra tablespoon of milk. Let the dough sit for 5 minutes after mixing so the seeds can absorb moisture. If you are making these for a toddler, grind the chia seeds briefly in a blender to reduce the risk of the seeds sticking in tiny teeth.
- No-honey version and vegan swap: Replace honey with an equal amount of maple syrup or agave nectar for a vegan-friendly snack. Keep in mind that maple syrup is thinner than honey, so you'll likely need one less tablespoon of milk. Use vegan chocolate chips and a plant-based protein powder to make the entire recipe vegan. If you are avoiding added sugar entirely, replace the chocolate chips with unsweetened shredded coconut and use a mashed ripe banana as the liquid sweetener; reduce the milk to 1-2 tablespoons because banana adds a lot of moisture.
Nutrition
- Calories120 kcal
- Total Fat6g
- Saturated Fat1.5g
- Cholesterol2mg
- Sodium55mg
- Total Carbohydrates13g
- Dietary Fiber2g
- Sugars8g
- Protein5g