<

Crispy Beef Taco Crunch

Crispy Beef Taco Crunch
Beef Tacos • Crispy Tacos • Easy Dinner

⏱️ Prep: PT15M
🔥 Cook: PT15M
🍞 Baking: PT10M
⏳ Total: PT40M
🍽️ Yield: 8 tacos
⚡ Calories: 350 kcal
(284)
beef tacoscrispy tacosquick dinnerweeknight mealground beef recipefamily dinner

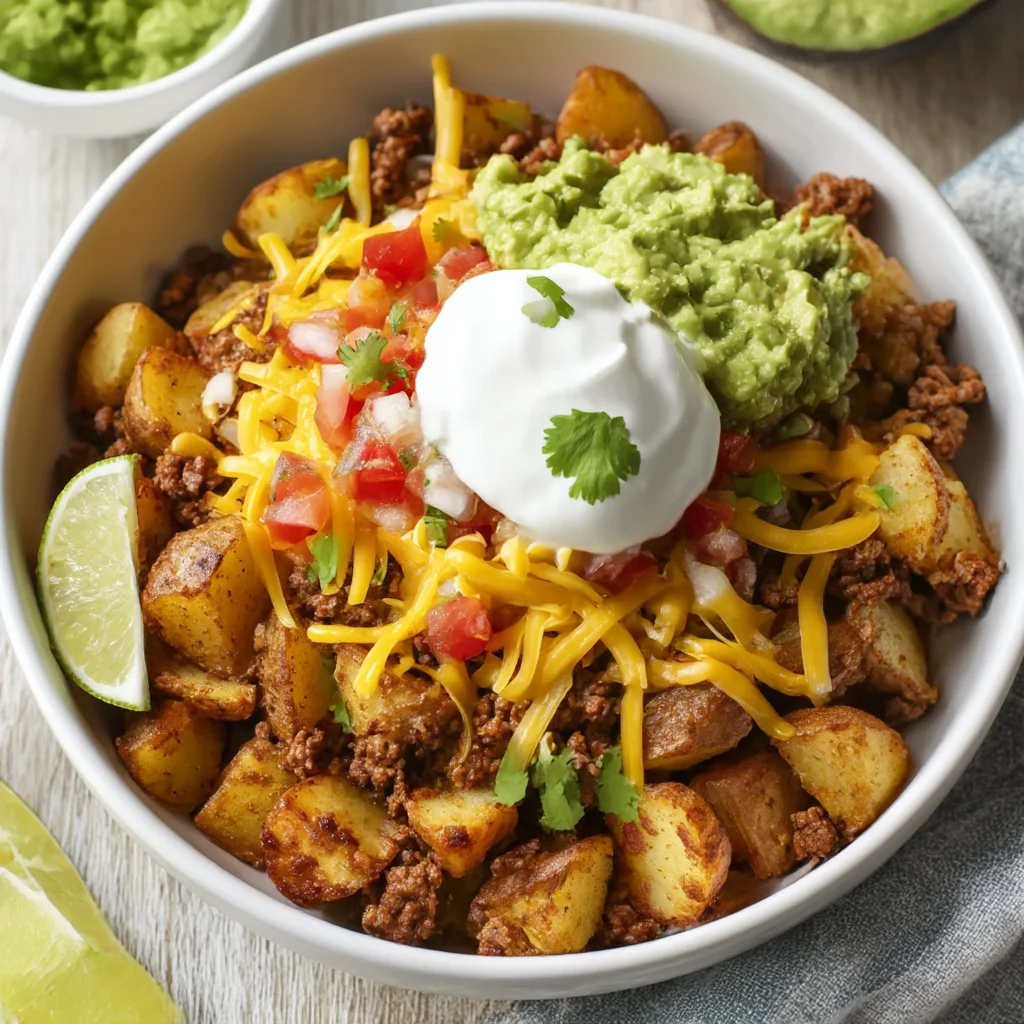
This crispy beef taco crunch recipe delivers juicy seasoned ground beef with melty cheese in every bite. A quick dinner idea perfect for busy weeknights or game day gatherings.

Ingredients

Toggle: Metric / US

Instructions

Step 1

Begin by gathering all your ingredients: ground beef, taco seasoning, water, taco shells, cheese, lettuce, and tomato. Having everything prepped and within reach makes the cooking process seamless. For the best flavor, choose a taco seasoning that is low in salt so you can control the sodium, or make your own with chili powder, cumin, paprika, garlic powder, onion powder, and a pinch of cayenne. If using store-bought shells, check the expiry date and ensure they are crisp and not stale.

Step 1 image
Step 2

Place a large non-stick skillet over medium-high heat. Add the ground beef and break it apart with a wooden spoon or spatula. Cook for about 5-7 minutes, stirring occasionally, until the beef is browned and no longer pink. You want to achieve a deep golden-brown color, which adds rich flavor through the Maillard reaction. Do not overcrowd the pan; if necessary, cook in batches. Drain any excess fat, leaving about 1 tablespoon in the pan for moisture and flavor.

Step 2 image
Step 3

Reduce heat to low. Sprinkle the taco seasoning evenly over the cooked beef, then pour in the water. Stir well to combine. Let the mixture simmer for 2-3 minutes, stirring occasionally, until the liquid has mostly evaporated and the seasoning coats the meat thickly. The mixture should be moist but not watery. Taste and adjust seasoning if needed – you can add a pinch of salt or a dash of hot sauce for extra kick.

Step 3 image
Step 4

While the beef simmers, preheat your oven to 375°F (190°C). Arrange the taco shells upright on a baking sheet, ensuring they are stable. If they tend to tip, you can place crumpled foil between them for support. Warm the shells in the oven for 5-7 minutes until they are fragrant and slightly crisp. Alternatively, you can crisp them in a dry skillet for 1-2 minutes per side. This step ensures the shells remain crunchy even after adding the toppings.

Step 5

Spoon the seasoned beef evenly into the warmed taco shells. Fill each shell generously, but avoid overstuffing to prevent breaking. Immediately sprinkle the shredded cheese over the hot beef so it begins to melt. The residual heat from the beef will soften the cheese, creating a gooey, irresistible layer. For extra melted cheese, you can return the filled shells to the oven for 2-3 minutes until bubbly.

Step 6

Top each taco with a handful of shredded lettuce and a spoonful of diced tomato. Add any additional toppings you desire – a dollop of sour cream, a drizzle of salsa, or slices of avocado. Serve immediately while the shells are still crunchy and the cheese is melted. For a finishing touch, garnish with fresh cilantro or a squeeze of lime. These tacos are best enjoyed fresh, but any leftovers can be stored and reheated (see tips for best results).

Step 6 image

For best results

  • For the juiciest taco meat, choose ground beef with an 80/20 lean-to-fat ratio. The fat renders during cooking, keeping the meat moist and flavorful. If using leaner beef (like 93/7), add a tablespoon of olive oil or a splash of beef broth to prevent dryness. Also, avoid overcooking the meat – once it's browned and the seasoning is incorporated, remove it from heat to keep it tender.
  • To prevent taco shells from cracking, warm them gently and handle with care. If using hard corn shells, heating them in the oven at 350°F for 5 minutes makes them more pliable and less likely to shatter. For an extra-crunchy texture, you can also lightly brush the shells with oil before baking. Never microwave hard shells as they become rubbery.
  • Make your own taco seasoning to control salt and spice levels. Combine 1 tablespoon chili powder, 1 teaspoon cumin, 1 teaspoon paprika, 1/2 teaspoon garlic powder, 1/2 teaspoon onion powder, 1/4 teaspoon cayenne (optional), and 1/2 teaspoon salt. This blend is enough for 1 pound of meat and keeps well in an airtight jar for months. Adjust the cayenne to suit your heat preference.
  • If you have leftovers, store the components separately. Keep the seasoned beef in an airtight container in the fridge for up to 4 days. Reheat it in a skillet with a splash of water to restore moisture. Taco shells should be stored in a cool, dry place and re-crisped in the oven before serving. Lettuce and tomato are best fresh, so only prep what you'll eat immediately.
  • For a lower-carb version, skip the taco shells and serve the beef over lettuce wraps or in a bowl with cauliflower rice. You can also use cheese shells (baked shredded cheese rounds) for a keto-friendly crunch. The beef itself is very versatile and can be used in salads, nachos, or burrito bowls.

Variations

  • Chicken Taco Crunch: Substitute ground chicken or turkey for the beef. Cook the poultry thoroughly, and consider adding a tablespoon of oil if using extra-lean ground chicken. The same taco seasoning works beautifully, but you might want to add a squeeze of lime at the end for brightness. Chicken tacos are lighter but still packed with flavor.
  • Vegetarian Black Bean Tacos: Replace the meat with two cans of black beans (drained and rinsed). Mash half the beans with a fork, then combine with the whole beans and taco seasoning. Cook in a skillet with a little oil until heated through and slightly thickened. The mashed beans create a meaty texture while the whole beans add bite. Top with avocado for creaminess.
  • Spicy Chorizo Tacos: Use ground Mexican chorizo instead of beef. Chorizo is already seasoned, so skip the taco seasoning or use half to avoid over-spicing. Cook the chorizo until browned and crispy, then drain excess fat. The spicy, smoky flavor pairs perfectly with cool sour cream and fresh pico de gallo. This variation is ideal for those who love heat.
  • Fish Taco Crunch: Swap beef for flaky white fish like cod or tilapia. Cut the fish into strips, season with chili powder and cumin, and pan-sear until golden. Use a creamy chipotle sauce (mix sour cream, mayo, and chipotle in adobo) instead of traditional toppings. The contrast of crispy shell, tender fish, and creamy sauce is a coastal favorite.
  • Breakfast Taco Crunch: For a morning twist, use scrambled eggs and breakfast sausage instead of beef. Cook the sausage, then scramble eggs in the same pan. Season with a bit of taco seasoning or just salt and pepper. Fill shells with eggs, sausage, cheese, and salsa. These are great for brunch or a hearty breakfast on the go.

Nutrition

  • Calories350 kcal
  • Total Fat22g
  • Saturated Fat9g
  • Cholesterol65mg
  • Sodium580mg
  • Total Carbohydrates18g
  • Dietary Fiber2g
  • Sugars3g
  • Protein22g

Common Questions

Can I make these tacos ahead of time?
While tacos are best assembled fresh, you can prep the components in advance. Cook the beef up to 4 days ahead and store it in the fridge. Shred lettuce and dice tomato a few hours before serving (keep them chilled). Warm the shells just before assembling. Reheat the beef in a skillet with a splash of water to refresh the texture. Avoid assembling fully until serving to prevent soggy shells.
How do I keep taco shells from getting soggy?
To prevent sogginess, warm the shells before filling – this creates a barrier. Also, drain any excess liquid from toppings like salsa or diced tomatoes (use a slotted spoon). Add wet toppings like sour cream or salsa just before eating. If using lettuce, pat it dry with paper towels. Another trick is to spread a thin layer of refried beans at the bottom of the shell to shield it from moisture.
Can I use soft tortillas instead of hard shells?
Absolutely! Soft flour or corn tortillas work wonderfully. For soft tacos, warm the tortillas in a dry skillet or directly over a gas flame until pliable and lightly charred. Then fill as you would hard shells. Soft tortillas are less likely to break and are great for kids or those who prefer a chewier texture.
What is the best cheese for melting on tacos?
A Mexican blend (cheddar, Monterey Jack, asadero, and queso quesadilla) melts beautifully and has great flavor. Shredded cheddar is a classic choice. For a creamier melt, use Oaxaca or mozzarella. Avoid pre-shredded cheese with anti-caking agents, as they don’t melt as smoothly. Shred your own cheese for best results.
How can I make this recipe gluten-free?
This recipe is naturally gluten-free if you use certified gluten-free taco shells and taco seasoning. Many store-bought hard corn shells are gluten-free, but always check the label. For the seasoning, make your own to avoid hidden gluten in pre-mixed packets. Serve with corn tortillas or lettuce wraps for a fully gluten-free meal.
What can I serve with beef tacos?
Classic sides include Mexican rice, refried beans, black beans, or a simple corn salad. For a lighter option, serve with a side of grilled vegetables or a fresh green salad with lime vinaigrette. Guacamole and chips are always a hit. For drinks, a cold beer, margarita, or horchata complements the flavors perfectly.

Notes

This Crispy Beef Taco Crunch recipe holds a special place in my heart because it reminds me of the impromptu taco nights my family enjoyed when I was growing up. We didn’t have much, but a pound of ground beef and a box of taco shells could transform an ordinary Tuesday into a fiesta. The magic lies in the contrast: the crunchy shell, the savory beef, the cool lettuce, and the burst of tomato. It’s a symphony of textures that never fails to satisfy. I’ve refined this recipe over the years to ensure maximum flavor with minimal effort. Using 80/20 beef gives you that juicy richness without being greasy, and toasting the shells briefly in the oven elevates them from ordinary to irresistible. The homemade taco seasoning is a game-changer – you can adjust the heat to your liking and avoid the additives found in packets. One of my favorite memories is hosting a taco bar for friends, where everyone customizes their own creation. It’s interactive, fun, and always a hit. For serving, I like to arrange the toppings in small bowls so each person can build their perfect taco. Add a side of Mexican street corn or a simple black bean salad, and you have a meal that feels festive yet effortless. I hope this recipe brings as much joy to your table as it has to mine. ¡Buen provecho!

recipes beef tacos

recipes beef tacos
Easy Dinner Recipes • Beef Tacos • Quick Weeknight Meals

⏱️ Prep: PT10M
🔥 Cook: PT20M
⏳ Total: PT30M
🍽️ Yield: 8 tacos
⚡ Calories: 385 kcal
(284)
beef tacoscrispy tacoseasy dinner30-minute mealground beef recipeweeknight dinnergame day food

Crispy beef tacos loaded with seasoned ground beef and melty cheese. Ready in 30 minutes, perfect for busy weeknights or game day. Save this easy recipe!

Ingredients

Toggle: Metric / US

Instructions

Step 1

First, gather all your ingredients and set up your workstation. This mise en place approach ensures a smooth cooking process. For the ground beef, choose an 80/20 or 85/15 blend – the fat content is crucial because it provides moisture and flavor during browning. If you use leaner beef (like 93/7), the meat can become dry and crumbly. Place a large non-stick skillet or cast-iron pan over medium-high heat and let it get hot for about 2 minutes. You want the pan hot enough that a drop of water sizzles upon contact. Add the ground beef to the pan, breaking it apart with a wooden spoon or spatula. Spread it into an even layer and let it sear undisturbed for 3-4 minutes. This step develops a rich, savory crust (the Maillard reaction) that adds deep flavor. You’ll see the bottom turning brown while the top remains pink. After the sear, begin breaking the meat into smaller crumbles, stirring occasionally. Cook for another 4-5 minutes until the beef is fully browned and no pink remains. If there’s excess fat (more than 2 tablespoons), carefully drain it off, leaving about 1 tablespoon for flavor. The sound of sizzling will decrease as moisture evaporates, and the meat will start to crackle – that’s your cue that it’s ready for seasoning.

Step 1 image
Step 2

Reduce the heat to medium-low. Sprinkle the taco seasoning evenly over the cooked beef – if using a packet, use the entire contents. If you’re making your own seasoning, combine 1 tablespoon chili powder, 1 teaspoon each of cumin, paprika, garlic powder, onion powder, dried oregano, and salt, plus 1/4 teaspoon black pepper and a pinch of cayenne (optional for heat). Stir the seasoning into the meat until well coated. The spices will become fragrant within 30 seconds. Pour in 1/2 cup of water and stir to combine, scraping up any browned bits from the bottom of the pan. This deglazing step incorporates all that flavor into the sauce. Let the mixture simmer gently for 3-5 minutes, stirring occasionally, until most of the liquid has evaporated and the meat is moist but not soupy. You want a thick, saucy consistency that clings to the meat. The sauce will reduce and become glossy. Taste and adjust salt or spices if needed. Remove from heat and cover to keep warm.

Step 2 image
Step 3

While the beef simmers, prepare your taco shells and toppings. For hard taco shells, preheat your oven to 350°F (175°C) and place the shells upright on a baking sheet (you can use a taco shell holder or crumple foil to keep them stable). Bake for 5-7 minutes until warm and slightly crisper. Alternatively, you can crisp them in a dry skillet over medium heat for 1-2 minutes per side. If using soft corn tortillas, warm them directly over a gas flame (using tongs) for 30 seconds per side, or in a dry skillet until pliable and lightly charred. Meanwhile, shred the lettuce (iceberg gives the best crunch, but romaine works too), dice the tomato, and grate the cheese if not pre-shredded. Pre-shredded cheese often contains anti-caking agents that prevent smooth melting, so grating your own from a block yields a creamier melt. Set out any additional toppings like sour cream, salsa, sliced avocado, pickled jalapeños, or fresh cilantro.

Step 3 image
Step 4

Assemble the tacos just before serving to prevent sogginess. Place a generous spoonful (about 2-3 tablespoons) of the seasoned beef into each taco shell. Immediately top with a sprinkle of shredded cheese while the beef is still hot – this allows the cheese to melt slightly, creating that irresistible gooey layer. Add a handful of shredded lettuce and a spoonful of diced tomato. For extra creaminess, add a dollop of sour cream or a drizzle of crema. If you like heat, add sliced jalapeños or a dash of hot sauce. Serve immediately, as the shells can become soft if left too long. The contrast between the crunchy shell, warm savory beef, melted cheese, and cool crisp toppings is the hallmark of a perfect crispy beef taco. Enjoy with a wedge of lime to squeeze over each taco for a bright, citrusy finish.

Step 4 image

For best results

  • Choosing the Right Ground Beef: For the juiciest, most flavorful tacos, opt for ground beef with an 80/20 or 85/15 meat-to-fat ratio. The fat renders during cooking, basting the meat and keeping it moist. If you prefer leaner meat, add a tablespoon of olive oil or a splash of beef broth to compensate for the missing moisture. Avoid extra-lean (93/7) as it tends to dry out quickly and can result in crumbly, tough taco filling.
  • Homemade Taco Seasoning: Making your own taco seasoning is not only cost-effective but also allows you to control the sodium and spice level. A basic blend includes chili powder, cumin, paprika, garlic powder, onion powder, oregano, salt, and pepper. Toast the spices in the pan for 30 seconds before adding water to deepen their flavor. You can also add a pinch of cinnamon or cocoa powder for a subtle, authentic Mexican touch.
  • Preventing Soggy Shells: The enemy of a crispy taco is moisture. To keep shells crunchy, serve assembled tacos immediately. If you need to prep ahead, store the beef, cheese, and toppings separately and assemble just before eating. For hard shells, you can also line the inside with a thin layer of refried beans or sour cream before adding the beef – this creates a barrier that prevents the shell from absorbing liquid from the meat.
  • Cheese Melting Magic: For the best melt, grate your cheese from a block rather than using pre-shredded bags. Pre-shredded cheese is coated with cellulose (an anti-caking agent) that inhibits smooth melting. A Mexican blend with cheddar, Monterey Jack, and asadero is ideal. Add the cheese immediately after spooning the hot beef onto the shell so the residual heat melts it into a luscious, stringy layer.
  • Customizing Heat Level: Adjust the spiciness to your preference. For mild tacos, use a standard taco seasoning and omit cayenne. For medium heat, add 1/4 teaspoon cayenne or a chopped chipotle pepper in adobo sauce. For fiery tacos, include a minced habanero or a drizzle of hot sauce like Cholula or Tapatío. Remember that the heat will mellow slightly as the beef simmers.
  • Batch Cooking and Storage: The seasoned beef freezes beautifully. Double the recipe and freeze half in an airtight container for up to 3 months. To reheat, thaw overnight in the fridge and warm in a skillet over medium heat with a splash of water to restore moisture. The beef can also be used in other dishes like taco salads, nachos, burritos, or stuffed peppers.

Variations

  • Chicken Tacos: Substitute ground beef with ground chicken or turkey. Since poultry is leaner, add 1 tablespoon of olive oil to the pan before cooking. You may also want to increase the seasoning slightly (by 1/2 teaspoon each of cumin and chili powder) to compensate for the milder flavor. The cooking time remains the same.
  • Vegetarian Black Bean Tacos: Replace the meat with two cans of black beans (rinsed and drained) or a 12-ounce package of plant-based crumbles. For beans, mash half of them with a fork before adding to the pan and simmer with the seasoning and water for 5-7 minutes. This creates a hearty, protein-packed filling. Top with crumbled queso fresco or a vegan cheese alternative.
  • Fish Tacos: For a lighter twist, use flaky white fish like cod or tilapia. Cut into 1-inch pieces, season with chili powder, cumin, and lime juice, then pan-sear in a hot skillet with oil for 2-3 minutes per side. Break into chunks and serve in soft corn tortillas with cabbage slaw and a creamy chipotle sauce. Omit the cheese for a fresher flavor.
  • Breakfast Tacos: Transform this recipe into a breakfast favorite by scrambling eggs with the seasoned beef. Cook the beef as directed, then push it to one side of the pan. Crack 4 eggs into the other side, scramble, and mix together. Serve in warm tortillas with cheese, salsa, and avocado. Perfect for a hearty morning meal.
  • Low-Carb/Keto Tacos: For a low-carb version, skip the taco shells and serve the beef over lettuce wraps or in large romaine leaves. Use full-fat cheese and add extra toppings like sour cream, guacamole, and pickled jalapeños. You can also use cheese shells (baked cheese crisps) for a crunchy, keto-friendly alternative.

Nutrition

  • Calories385 kcal
  • Total Fat22g
  • Saturated Fat10g
  • Cholesterol85mg
  • Sodium720mg
  • Total Carbohydrates24g
  • Dietary Fiber3g
  • Sugars3g
  • Protein25g

Common Questions

Can I use a different type of ground meat?
Absolutely! Ground turkey, chicken, pork, or lamb all work well. Just adjust the fat content: leaner meats may need a little oil to prevent drying. For turkey or chicken, add 1-2 tablespoons of olive oil or use a non-stick pan. Cooking times remain similar, but always cook poultry to an internal temperature of 165°F (74°C).
How do I make my taco shells extra crispy?
For hard shells, bake them at 350°F for 5-7 minutes, or until fragrant and lightly golden. For soft corn tortillas, fry them in a shallow layer of oil (about 1/4 inch) for 30-45 seconds per side until golden and crisp. Drain on paper towels. Alternatively, you can brush tortillas with oil and bake them draped over the bars of an oven rack to form a shell shape.
Can I prepare the beef in advance?
Yes, the seasoned beef can be made up to 3 days ahead and stored in an airtight container in the refrigerator. Reheat in a skillet over medium heat, adding a splash of water to restore moisture. You can also freeze the cooked beef for up to 3 months. Thaw overnight in the fridge before reheating.
What are the best toppings for beef tacos?
Classic toppings include shredded lettuce, diced tomatoes, shredded cheese, sour cream, and salsa. For extra flavor, add sliced avocado or guacamole, pickled red onions, jalapeños, fresh cilantro, and a squeeze of lime. You can also drizzle with crema or hot sauce. Feel free to customize based on your preferences.
How can I make this recipe dairy-free?
Simply omit the cheese or use a dairy-free shredded cheese alternative (look for brands that melt well). Replace sour cream with a dairy-free version or use sliced avocado for creaminess. The rest of the recipe is naturally dairy-free.
Is it possible to make this recipe gluten-free?
Yes, the beef filling itself is gluten-free. Use gluten-free taco shells (corn tortillas are naturally gluten-free) and ensure your taco seasoning or spice blend is certified gluten-free, as some packets may contain flour or additives. Check labels carefully.

Notes

These crispy beef tacos hold a special place in my heart because they remind me of the weeknight dinners my mom used to make when I was growing up. She always had a way of turning simple ingredients into a meal that felt like a celebration. The sizzle of ground beef hitting a hot cast-iron pan, the aromatic cloud of cumin and chili powder, and the crunch of a perfectly baked shell – these are the sensory memories that inspired this recipe. I’ve refined it over the years to be foolproof for busy home cooks. The key is to not rush the browning of the meat; that deep, caramelized crust is where the magic happens. I also love how versatile this dish is – you can dress it up for a taco bar party or keep it simple for a Tuesday night. Serve these tacos with a side of Mexican rice, refried beans, or a simple corn and black bean salad. For a festive touch, offer a variety of salsas (roasted tomato, mango, or tomatillo) and let everyone build their own. Leftover beef is fantastic in quesadillas, on nachos, or stirred into scrambled eggs. I hope this recipe becomes a staple in your kitchen as it has in mine. Happy cooking!

Easy Slow Cooker Tacos

Easy Slow Cooker Tacos
Easy Dinner Recipes • Quick Weeknight Meals • Slow Cooker

⏱️ Prep: PT15M
🔥 Cook: PT4H
⏳ Total: PT4H15M
🍽️ Yield: 8 servings (2 tacos each)
⚡ Calories: 385 kcal
(284)
slow cooker tacoseasy dinnerstreet tacosground beef tacoschicken tacoscrock pothigh proteinfamily meal

Easy Slow Cooker Tacos are a go-to for quick dinner ideas and 30-minute meals. This high-protein recipe is perfect for busy nights, offering a simple and delicious family comfort food.

Ingredients

Toggle: Metric / US

Instructions

Step 1

Begin by preparing your slow cooker. If you have a 6-quart model, that’s perfect; a 4-quart will also work. Place the ground beef and chicken pieces directly into the slow cooker. There’s no need to brown the meat first—this saves time and allows the flavors to meld during the long, slow cooking process. The chicken will become incredibly tender and shred easily, while the ground beef will cook through and absorb all the seasoned liquid. Sprinkle the entire packet of taco seasoning evenly over the meat. Pour in the water or chicken broth—this helps create a flavorful cooking liquid that keeps the meat moist and helps the seasoning distribute evenly. Use a spoon or spatula to gently toss the meat with the seasoning and liquid, making sure everything is coated. Cover the slow cooker with its lid and set it to cook on LOW for 4 hours. If you’re short on time, you can cook on HIGH for 2 hours, but the low-and-slow method yields more tender, flavorful results. The meat is ready when the chicken reaches an internal temperature of 165°F (74°C) and shreds easily with a fork, and the ground beef is fully cooked and no longer pink.

Step 1 image
Step 2

While the meat cooks, prepare your toppings. This is where you can get creative and set up a taco bar that everyone will love. Start by dicing the white onion into small, uniform pieces—about 1/4-inch dice. The sharpness of raw onion adds a beautiful crunch and bite that contrasts with the rich meat. Chop the cilantro finely, including the tender stems for extra flavor. If you’re making guacamole, mash 2 ripe avocados with a fork, then stir in 1 tablespoon of lime juice, 1/4 cup of diced tomato, 2 tablespoons of finely chopped onion, 1 tablespoon of chopped cilantro, and salt to taste. For a quick pico de gallo, combine 1 cup of diced tomatoes, 1/4 cup of diced onion, 2 tablespoons of chopped cilantro, 1 tablespoon of lime juice, and a pinch of salt. You can also prepare sour cream (or use Greek yogurt for a protein boost), shred some cheese (cotija or Monterey Jack are great), and cut lime wedges. Keep all toppings refrigerated until serving.

Step 2 image
Step 3

When the cooking time is up, carefully remove the lid—watch out for the steam. Using tongs, transfer the chicken pieces to a cutting board. Let them rest for a few minutes until cool enough to handle. Then, using two forks, shred the chicken into bite-sized pieces. The meat should pull apart effortlessly; if it resists, it might need a bit more cooking time. Return the shredded chicken to the slow cooker with the ground beef. Give everything a good stir to combine the two meats and coat them in the seasoned juices. Taste the meat and adjust seasoning if needed—you might want a pinch of salt or an extra sprinkle of cumin. If the mixture seems too wet, you can leave the lid off for 10-15 minutes to let some liquid evaporate. The final texture should be moist but not soupy.

Step 4

Now it’s time to warm the tortillas. This step is crucial for authentic street tacos. Heat a dry skillet or griddle over medium-high heat. Working one at a time, place a corn tortilla in the hot skillet for about 30 seconds per side. You’ll see it puff up slightly and develop brown spots—that’s the char that adds smoky flavor. Alternatively, you can wrap a stack of tortillas in foil and warm them in a 350°F (175°C) oven for 10-15 minutes. The goal is pliable, warm tortillas that won’t crack when folded. Keep them covered with a clean kitchen towel to stay warm while you prepare the tacos.

Step 5

To assemble the tacos, place a warm tortilla on a plate or in your hand. Spoon about 2-3 tablespoons of the meat mixture into the center. Don’t overfill—street tacos are meant to be modest in size, allowing the flavors of the toppings to shine. Top with a sprinkle of diced onion and fresh cilantro. Add a dollop of sour cream, a spoonful of guacamole, and some pico de gallo if desired. Finish with a squeeze of fresh lime juice—the acidity brightens all the flavors. Serve immediately while the tortillas are still warm and the meat is hot. These tacos are best enjoyed fresh, but you can keep the meat warm in the slow cooker on the ‘keep warm’ setting for up to 2 hours.

Step 5 image

For best results

  • For the most tender chicken, use boneless skinless thighs instead of breasts. Thighs have a higher fat content, which keeps them juicy during the long slow cook. If you prefer white meat, be careful not to overcook—check for doneness at 3 hours on low. The ground beef should be at least 85% lean; anything leaner may become dry. You can also substitute ground turkey or pork for a different flavor profile. If you want a thicker, more caramelized texture, you can brown the ground beef in a skillet before adding it to the slow cooker, but this step is optional and adds about 10 minutes to prep time.
  • Homemade taco seasoning is easy to make and lets you control the sodium and spice level. Combine 1 tablespoon chili powder, 1 teaspoon cumin, 1 teaspoon smoked paprika, 1/2 teaspoon garlic powder, 1/2 teaspoon onion powder, 1/2 teaspoon oregano, 1/4 teaspoon cayenne (optional), and 1 teaspoon salt. This equals about one packet. Store extras in an airtight jar for up to 6 months. Using homemade seasoning also allows you to adjust the heat—add more cayenne for a kick or reduce it for a milder family-friendly version.
  • To keep the tortillas from getting soggy, warm them just before serving and don't let the meat sit on them for too long before eating. If you're making a batch for a party, set up a taco bar where guests can assemble their own tacos. This way, the tortillas stay fresh and the meat stays hot in the slow cooker. You can also double the meat recipe and freeze half for later—the cooked meat freezes beautifully for up to 3 months. Thaw overnight in the fridge and reheat in a skillet or microwave.
  • For a smoky, charred flavor, you can char the tortillas directly over a gas flame using tongs. Hold each tortilla over the flame for about 15-20 seconds per side, watching closely so they don't burn. This method gives an authentic street taco taste that can't be beat. If you don't have a gas stove, a hot cast-iron skillet works well too. Just make sure the skillet is screaming hot before adding the tortilla.
  • Leftover meat can be repurposed in so many ways: use it as a filling for burritos, nachos, quesadillas, or taco salads. You can also mix it with scrambled eggs for a delicious breakfast hash. Store leftover meat in an airtight container in the refrigerator for up to 4 days. Reheat gently in a skillet with a splash of water or broth to restore moisture. The meat also freezes well—portion it into freezer bags and flatten for easy storage. Thaw in the fridge overnight before reheating.
  • If you want to add more vegetables to the slow cooker, consider adding diced bell peppers and onions during the last 30 minutes of cooking. They'll soften but still retain some texture. You can also stir in a can of drained and rinsed black beans or corn kernels for extra fiber and sweetness. Just be aware that adding too many veggies may dilute the seasoning, so you might need to adjust the spices accordingly.

Variations

  • For a vegetarian version, replace the meat with 2 cans (15 oz each) of black beans or pinto beans, drained and rinsed, plus 1 cup of frozen corn. Add the beans and corn to the slow cooker with the taco seasoning and 1/2 cup of vegetable broth. Cook on low for 2-3 hours until heated through. The beans will absorb the seasoning and become creamy. You can also add diced bell peppers, onions, and zucchini for more texture. Serve with all the same toppings—the result is a hearty, protein-packed vegetarian taco that even meat-lovers will enjoy.
  • For a spicy chipotle twist, add 2-3 chipotle peppers in adobo sauce (minced) along with the taco seasoning. This will give the meat a smoky, deep heat that pairs beautifully with a cooling crema made from sour cream and lime. You can also stir in a tablespoon of adobo sauce for extra flavor. If you're sensitive to spice, start with one pepper and taste before adding more. The chipotle adds complexity that elevates the dish from simple to extraordinary.
  • For a keto or low-carb option, skip the corn tortillas and serve the meat over lettuce wraps, in bell pepper halves, or on a bed of cauliflower rice. The meat itself is low-carb (especially if you use homemade seasoning without sugar), so it fits perfectly into a keto lifestyle. Top with cheese, avocado, sour cream, and salsa—just avoid tortillas and beans. You can also use the meat to make a taco salad: layer lettuce, meat, cheese, tomatoes, avocado, and a drizzle of ranch or chipotle dressing.
  • For a breakfast taco variation, use the leftover meat to fill warm tortillas and top with scrambled eggs, shredded cheese, and salsa. This makes a fantastic high-protein breakfast or brunch that comes together in minutes. You can also add crispy bacon or chorizo for extra indulgence. Breakfast tacos are a Texas tradition and a great way to repurpose leftovers in a creative way.

Nutrition

  • Calories385 kcal
  • Total Fat18g
  • Saturated Fat7g
  • Cholesterol95mg
  • Sodium720mg
  • Total Carbohydrates28g
  • Dietary Fiber4g
  • Sugars3g
  • Protein32g

Common Questions

Can I use only ground beef or only chicken?
Absolutely! This recipe is designed to be flexible. If you want all beef, use 2 pounds of ground beef (or a mix of ground beef and ground pork). For all chicken, use 2 pounds of boneless chicken thighs or breasts. The cooking time remains the same. Just make sure the meat is fully cooked to safe internal temperatures: 160°F for beef, 165°F for chicken. Using a mix of meats adds variety in texture and flavor, but a single meat works just as well.
How do I store leftovers and how long do they last?
Store leftover meat in an airtight container in the refrigerator for up to 4 days. To reheat, place the meat in a skillet over medium heat with a splash of water or broth to prevent drying. Stir occasionally until heated through, about 5 minutes. You can also microwave it in a covered dish for 2-3 minutes. The meat can be frozen for up to 3 months—thaw overnight in the fridge before reheating. Tortillas and fresh toppings should be stored separately and assembled just before eating to maintain quality.
Can I make this recipe in an Instant Pot or pressure cooker?
Yes, you can adapt this recipe for an Instant Pot. Use the sauté function to brown the ground beef first (optional), then add the chicken, seasoning, and 1/2 cup broth. Pressure cook on high for 10 minutes (for chicken thighs) or 12 minutes (for chicken breasts) with a natural release of 10 minutes. Shred the chicken and stir with the beef. The total time is much shorter, but the slow cooker version allows for more hands-off cooking and deeper flavor development. Both methods yield delicious results.
What can I use instead of taco seasoning?
If you don’t have taco seasoning, you can make your own with common pantry spices. Mix 1 tablespoon chili powder, 1 teaspoon ground cumin, 1 teaspoon smoked paprika, 1/2 teaspoon garlic powder, 1/2 teaspoon onion powder, 1/2 teaspoon dried oregano, 1/4 teaspoon cayenne (optional), and 1 teaspoon salt. This blend closely mimics the flavor of store-bought packets. You can also use a combination of cumin, chili powder, and garlic powder as a base; adjust to taste. If you want a more authentic Mexican flavor, add a pinch of ground coriander and a teaspoon of dried Mexican oregano.
Are these tacos gluten-free?
Yes, as written this recipe is naturally gluten-free. Corn tortillas are typically gluten-free, but always check the package to ensure they are made from 100% corn and not a blend with wheat flour. The taco seasoning should also be checked—some brands may contain wheat flour as a filler. To be safe, use homemade seasoning or a certified gluten-free brand. All other ingredients (meat, vegetables, toppings) are naturally gluten-free. Serve with corn tortillas and enjoy!
Can I prepare the meat ahead of time for a party?
Definitely! The meat can be cooked up to 2 days in advance. After cooking, let it cool completely, then store it in the refrigerator in an airtight container. On the day of your party, reheat the meat in the slow cooker on low for 1-2 hours, adding a little water or broth if needed to restore moisture. You can also keep it warm in the slow cooker on the ‘keep warm’ setting for up to 2 hours. This makes party prep a breeze—just set out warm tortillas and toppings, and let guests build their own tacos.

Notes

I first fell in love with street tacos during a trip to Mexico City, where a vendor on a corner served up the most incredible al pastor on tiny corn tortillas with just a sprinkle of onion, cilantro, and a squeeze of lime. It was simple, yet the flavors were explosive. I knew I had to recreate that magic at home, but I wanted a version that was accessible for busy weeknights. That’s how this slow cooker recipe was born. By using both ground beef and chicken, you get the best of both worlds: the richness of beef and the tenderness of chicken, all infused with classic taco seasoning. The slow cooker does all the heavy lifting, so you can set it and forget it while you go about your day. These tacos have become a staple in my house, especially on Taco Tuesdays. They’re perfect for feeding a crowd—just set up a toppings bar and let everyone customize their own. I love serving them with a side of Mexican rice and refried beans for a complete meal. The leftovers are fantastic for lunch the next day, or you can repurpose the meat into nachos, burritos, or even a taco pasta bake. I hope this recipe brings a little bit of street food joy into your kitchen. Happy cooking!

Crock Pot Taco Dinner

Crock Pot Taco Dinner
Crock Pot Tacos • Slow Cooker Dinner • Easy Weeknight Meals

⏱️ Prep: PT15M
🔥 Cook: PT240M
⏳ Total: PT255M
🍽️ Yield: 8 servings
⚡ Calories: 310 kcal
(284)
crock pot tacosslow cooker tacosstreet tacoseasy taco recipeground beef tacoschicken tacosweeknight dinnerfamily dinner

Make the best Easy Crock Pot Street Tacos with seasoned ground beef or chicken. This slow cooker taco dinner is perfect for busy weeknights and family dinners.

Ingredients

Toggle: Metric / US

Instructions

Step 1

Gather and prep all ingredients. Dice the white onion finely (about 1/4-inch pieces) and chop the cilantro. If using chicken, trim any excess fat and cut into large chunks (about 2-inch pieces) for even cooking. For the ground beef, no pre-cooking is needed—the slow cooker will render the fat and cook it perfectly. Have your taco seasoning ready: if using a packet, simply open it; if making your own, combine the spices in a small bowl. This step ensures a smooth cooking process without scrambling for ingredients later.

Step 1 image
Step 2

Place the ground beef and chicken chunks into the slow cooker (a 6-quart or larger works best). Sprinkle the taco seasoning evenly over the meat. Pour in the water or chicken broth—this helps create steam and infuses flavor. Do not stir yet; the seasoning will mix as it cooks. Cover with the lid and set the slow cooker to LOW for 4 hours or HIGH for 2 hours. The low-and-slow method allows the meat to become incredibly tender and absorb all the spices deeply.

Step 2 image
Step 3

After the cooking time, remove the lid and use two forks to shred the chicken directly in the slow cooker. Stir the shredded chicken and ground beef together until well combined. The meat should be moist and flavorful, with the seasoning evenly distributed. If the mixture seems too watery, leave the lid off for 10-15 minutes on HIGH to reduce the liquid. Taste and adjust salt or spices if needed—sometimes a pinch of extra cumin or chili powder brightens the flavor.

Step 3 image
Step 4

Warm the corn tortillas: you can do this in a dry skillet over medium heat for about 30 seconds per side, directly over a gas flame for a slight char, or wrap them in a damp paper towel and microwave for 30 seconds. Warm tortillas are pliable and less likely to crack when filled. For authentic street tacos, use double-layer tortillas (two stacked) to hold the filling better.

Step 5

Assemble the tacos: spoon about 2-3 tablespoons of the meat mixture onto each tortilla. Top with a generous pinch of diced onion and a sprinkle of fresh cilantro. Add any optional toppings like shredded cheese, salsa, sour cream, or a squeeze of lime juice. Serve immediately while warm. The contrast of the hot, savory meat with the cool, crisp onion and fresh cilantro is what makes street tacos so irresistible.

Step 5 image

For best results

  • For the best flavor, brown the ground beef in a skillet before adding to the slow cooker. While not necessary, this extra step caramelizes the meat and adds a deeper, richer taste through the Maillard reaction. Simply cook the beef over medium-high heat for 5-7 minutes until browned, then drain excess fat and transfer to the slow cooker along with the chicken. The texture improves dramatically.
  • If you prefer a thicker taco filling, mix 1 tablespoon of cornstarch with 2 tablespoons of cold water to create a slurry. Stir this into the slow cooker during the last 30 minutes of cooking. The cornstarch will thicken the juices, coating the meat in a glossy, clingy sauce that stays on the tortilla instead of dripping everywhere.
  • Don't skip the onion and cilantro garnish—it's the hallmark of street tacos. For a milder onion flavor, soak the diced onion in cold water for 10 minutes, then drain. This removes some of the sulfur compounds that cause sharpness, leaving a crisp, sweet crunch that balances the savory meat perfectly.
  • Store leftover meat in an airtight container in the refrigerator for up to 4 days. Reheat gently in a skillet or microwave with a splash of water to restore moisture. You can also freeze the meat for up to 3 months: portion it into zip-top bags, flatten for quick thawing, and reheat directly from frozen in a covered skillet over low heat.
  • Corn tortillas are traditional for street tacos, but flour tortillas work too. However, corn tortillas have a distinct earthy flavor that complements the spices. Look for 100% corn tortillas (not corn and flour blend) for authentic texture. To prevent them from breaking, warm them properly and handle gently.

Variations

  • Vegetarian Option: Replace the meat with 2 cans (15 oz each) of black beans or pinto beans, drained and rinsed, plus 1 cup of frozen corn. Add the taco seasoning and broth, then cook on LOW for 2-3 hours. The beans will absorb the spices and become creamy. For extra protein, stir in 1 cup of crumbled queso fresco or shredded Monterey Jack cheese before serving.
  • Spicy Version: Add 2-3 chipotle peppers in adobo sauce (minced) along with the taco seasoning. This adds a smoky, intense heat that builds slowly. For even more kick, include a diced jalapeño (seeds and membranes for maximum heat) or a teaspoon of cayenne pepper. Balance the heat with a dollop of sour cream or crema Mexicana.
  • Chicken-Only Version: Use 2 lbs of boneless skinless chicken thighs instead of a mix. Thighs are juicier and more forgiving in the slow cooker, resulting in shreds that are succulent and never dry. Add a squeeze of lime juice at the end to brighten the flavor. This version is perfect for those who prefer white meat but want extra moisture.
  • Beef-Only Version: Use 2 lbs of ground beef (80/20 lean-to-fat ratio) and skip the chicken. The higher fat content keeps the meat moist and flavorful. After cooking, drain any excess fat if desired. This is a budget-friendly option that still delivers classic taco night flavor with minimal effort.

Nutrition

  • Calories310 kcal
  • Total Fat14g
  • Saturated Fat5g
  • Cholesterol85mg
  • Sodium620mg
  • Total Carbohydrates18g
  • Dietary Fiber3g
  • Sugars2g
  • Protein28g

Common Questions

Can I use only ground beef or only chicken?
Yes, absolutely. This recipe is designed to be flexible. If using only ground beef, use 2 lbs of lean ground beef (90/10) and cook on LOW for 3-4 hours. For only chicken, use 2 lbs of boneless skinless chicken thighs and cook on LOW for 4-5 hours. The cooking time may vary slightly, so check for doneness: chicken should shred easily, and beef should be fully cooked with no pink.
How do I prevent the meat from becoming dry?
The key to moist meat in a slow cooker is sufficient liquid and not overcooking. The water or broth (1/2 cup) creates steam that keeps the meat tender. Using chicken thighs instead of breasts adds natural fat. If your slow cooker runs hot, check the meat after 3 hours on LOW. Also, avoid lifting the lid frequently, as each release of steam extends cooking time and can dry out the meat.
Can I make this recipe in an Instant Pot or pressure cooker?
Yes! To make this in an Instant Pot, use the sauté function to brown the ground beef (if desired), then add the chicken, seasoning, and broth. Pressure cook on HIGH for 10 minutes for chicken breasts (12 minutes for thighs) and 15 minutes for ground beef (if cooking separately). Use a natural release for 5 minutes, then quick release. Shred the chicken and stir. The flavor will be just as good, and the cooking time is much faster.
What are the best toppings for street tacos?
Authentic street tacos are simple: diced white onion, fresh cilantro, and a squeeze of lime. But you can customize with shredded lettuce, diced tomatoes, crumbled queso fresco, salsa verde, pickled jalapeños, or a drizzle of crema. For a heartier meal, add refried beans or Mexican rice on the side. The beauty of tacos is that everyone can build their own.
How long do leftovers last and how should I reheat?
Leftover meat can be stored in an airtight container in the refrigerator for up to 4 days. To reheat, place the meat in a skillet over medium heat with a tablespoon of water or broth, cover, and cook for 3-5 minutes, stirring occasionally, until heated through. You can also microwave in 30-second bursts, stirring in between. The meat freezes well for up to 3 months; thaw overnight in the fridge before reheating.
Can I use homemade taco seasoning?
Absolutely! Homemade taco seasoning is easy and lets you control the sodium and spice. A simple blend: 2 tsp chili powder, 1 tsp cumin, 1 tsp paprika, 1/2 tsp garlic powder, 1/2 tsp onion powder, 1/4 tsp cayenne (optional), 1/2 tsp salt, 1/4 tsp black pepper. This equals about 1 ounce (2 tablespoons). Adjust to your taste. Store any extra in an airtight jar.

Notes

This Easy Crock Pot Street Tacos recipe is a true weeknight hero. I first developed it when my family was craving the vibrant flavors of the taco trucks we loved but needed a hands-off meal that could cook while we worked or did homework. The slow cooker transforms simple ingredients into something magical: the meat becomes impossibly tender, absorbing the smoky, earthy spices of the taco seasoning. I love that this recipe uses both ground beef and chicken, offering a variety of textures and flavors in every bite. The ground beef provides a hearty, familiar base, while the shredded chicken adds a lighter, juicy element. Together, they create a filling that’s perfect for soft corn tortillas. The garnishes—crisp white onion and fresh cilantro—are non-negotiable; they add a bright, pungent crunch that cuts through the richness of the meat. A squeeze of lime at the end ties everything together. This dish is incredibly versatile: you can serve it as tacos, over rice for a burrito bowl, or even stuffed into bell peppers for a low-carb option. It’s also a great meal prep staple—the meat reheats beautifully and tastes even better the next day as the flavors meld. I hope this recipe brings the joy of street tacos to your table with minimal effort. Enjoy every bite!

Slow Cooker Street Tacos

Slow Cooker Street Tacos
Easy Dinner Recipes • High Protein • Slow Cooker

⏱️ Prep: PT15M
🔥 Cook: PT480M
⏳ Total: PT495M
🍽️ Yield: 8 servings (2 tacos each)
⚡ Calories: 385 kcal
(284)
slow cooker street tacoseasy dinner recipeshigh protein tacoscrock pot tacosweeknight dinnerground beef tacoschicken tacos

These Slow Cooker Street Tacos are an easy dinner idea that the whole family will love. With minimal prep, this quick weeknight meal delivers juicy, high-protein tacos perfect for busy…

Ingredients

Toggle: Metric / US

Instructions

Step 1

Start by prepping your ingredients. Finely dice the white onion and chop the fresh cilantro, then set them aside in small bowls. This mise en place will make assembly a breeze later. For the meat, pat the chicken thighs dry with paper towels to ensure they brown nicely later (though we’re using a slow cooker, browning is optional but adds depth). If you have time, sear the ground beef in a skillet over medium-high heat for 3-4 minutes until browned, breaking it into crumbles. This step isn’t mandatory, but it enhances the flavor through the Maillard reaction. Transfer the beef to the slow cooker. Place the chicken thighs on top. Sprinkle the taco seasoning evenly over both meats. Use your hands or a spoon to toss and coat everything well. The seasoning will meld with the juices during cooking, creating a rich, savory broth.

Step 1 image
Step 2

Cover the slow cooker with its lid and set it to LOW heat for 7-8 hours or HIGH heat for 3-4 hours. The beauty of this method is that the collagen in the chicken thighs breaks down, making the meat incredibly tender and shreddable. The ground beef will also become very moist and flavorful. About 30 minutes before serving, use two forks to shred the chicken directly in the slow cooker. Stir the shredded chicken into the ground beef mixture so the flavors combine. Taste and adjust seasoning if needed—sometimes a pinch of salt or a squeeze of lime brightens everything up. If the mixture seems too liquidy, leave the lid off for the last 15 minutes to allow some evaporation.

Step 2 image
Step 3

While the meat finishes, warm the corn tortillas. You can do this in a dry skillet over medium heat for about 30 seconds per side, or wrap a stack in a damp paper towel and microwave for 45-60 seconds. Warm tortillas are pliable and less likely to crack. To assemble, double up the tortillas (street-style) for sturdiness. Place a generous spoonful of the meat mixture down the center of each tortilla. Top with a sprinkle of diced onion and fresh cilantro. Add a drizzle of salsa verde, a crumble of cotija cheese, and a squeeze of lime. Serve immediately with extra lime wedges and your favorite hot sauce. The combination of warm, juicy meat, crunchy onion, and bright cilantro is absolutely addictive.

Step 3 image

For best results

  • For the best flavor, use homemade taco seasoning. Combine 1 tablespoon chili powder, 1 1/2 teaspoons cumin, 1 teaspoon paprika, 1/2 teaspoon garlic powder, 1/2 teaspoon onion powder, 1/2 teaspoon oregano, 1/2 teaspoon salt, and 1/4 teaspoon black pepper. This blend is free of anti-caking agents and preservatives, and you can adjust the heat level by adding cayenne. Store any extra in an airtight jar for up to 3 months.
  • Don't skip the step of searing the ground beef if you have time. The browned bits (fond) that stick to the pan are packed with umami. Deglaze the pan with a splash of water or broth and pour that into the slow cooker to capture every bit of flavor. For the chicken, browning isn't necessary because it will be shredded, but if you want extra color, sear the thighs skin-side down first if using skin-on (though skinless is easier).
  • If you prefer a thicker, less saucy filling, remove the lid for the last 30 minutes of cooking. Alternatively, you can mix in 1-2 tablespoons of tomato paste or a slurry of cornstarch (1 tablespoon cornstarch + 2 tablespoons water) during the last hour to tighten the liquid. This is especially helpful if you're using ground beef with higher fat content.
  • Corn tortillas are traditional for street tacos, but you can use flour tortillas if you prefer. To make them more pliable, warm them directly over a gas flame for about 15 seconds per side using tongs—this gives a slight char and smoky flavor. If using a microwave, wrap them in a damp cloth to steam them soft.
  • Leftover meat can be stored in an airtight container in the refrigerator for up to 4 days or frozen for up to 3 months. To reheat, thaw overnight in the fridge if frozen, then warm in a skillet over medium heat with a splash of water or broth to restore moisture. The meat also makes excellent nachos, burrito bowls, or quesadillas.
  • For a lighter version, use ground turkey or chicken breast instead of beef and chicken thighs. Note that leaner meats may dry out more easily, so add a tablespoon of olive oil or a splash of broth before cooking. You can also add a can of diced green chiles for extra moisture and flavor without extra calories.

Variations

  • Vegetarian Street Tacos: Replace the meat with 2 cans (15 oz each) of black beans or pinto beans, drained and rinsed, plus 1 cup of crumbled tofu or tempeh. Add the taco seasoning and a tablespoon of olive oil, then cook on low for 3-4 hours. The beans will become tender and infused with spices. Top with avocado slices and pickled onions for a satisfying plant-based meal.
  • Spicy Chipotle Street Tacos: Add 2-3 chipotle peppers in adobo sauce (minced) along with the taco seasoning for a smoky, spicy kick. You can also stir in a tablespoon of adobo sauce. For extra heat, serve with a habanero salsa or pickled jalapeños. This variation is perfect for those who love bold, fiery flavors.
  • Pork Street Tacos: Substitute the ground beef and chicken with 2 lbs of boneless pork shoulder or pork loin, cut into 2-inch chunks. Cook on low for 8 hours until fork-tender, then shred. The pork pairs beautifully with a tangy tomatillo salsa and fresh radishes. You can also add a splash of orange juice and a pinch of cinnamon for a Yucatán-inspired twist.
  • Fish Street Tacos (Quick Version): While the slow cooker is great for meat, for fish tacos, cook 1 lb of flaky white fish (like cod or tilapia) separately. Season with chili powder and lime, then pan-sear for 3-4 minutes per side. Flake the fish and serve on tortillas with the same toppings. This variation is ready in under 15 minutes and is perfect for a lighter meal.
  • Breakfast Street Tacos: Use the leftover meat (or cook fresh) and scramble eggs into the mixture during the last 10 minutes of cooking. Serve on tortillas with a dollop of sour cream, shredded cheese, and a sprinkle of hot sauce. This is a fantastic way to repurpose leftovers into a hearty breakfast.

Nutrition

  • Calories385 kcal
  • Total Fat18g
  • Saturated Fat7g
  • Cholesterol110mg
  • Sodium620mg
  • Total Carbohydrates28g
  • Dietary Fiber4g
  • Sugars2g
  • Protein32g

Common Questions

Can I use only ground beef or only chicken?
Absolutely! You can use 2 lbs of either ground beef (preferably 85/15) or 2 lbs of boneless chicken thighs. If using only chicken, the cooking time remains the same. For ground beef alone, you might want to drain excess fat after cooking if you prefer a leaner filling. Both options work beautifully, so choose based on your preference or what you have on hand.
How do I store and reheat leftovers?
Store the meat mixture in an airtight container in the refrigerator for up to 4 days. To reheat, place it in a skillet over medium heat with a splash of water or broth, stirring occasionally until warmed through (about 5 minutes). You can also microwave it in a covered bowl for 2-3 minutes, stirring halfway. For longer storage, freeze the meat in a freezer-safe bag for up to 3 months. Thaw overnight in the fridge before reheating.
Can I make this recipe in an Instant Pot?
Yes! To make this in a pressure cooker, use the sauté function to brown the ground beef (optional), then add the chicken, taco seasoning, and 1/2 cup of broth. Pressure cook on high for 15 minutes, then allow a natural release for 10 minutes. Shred the chicken and serve. The cooking time is much shorter, making it a great option if you forgot to start the slow cooker in the morning.
What type of tortillas are best for street tacos?
Authentic street tacos use small corn tortillas (about 4-5 inches in diameter). They are traditionally doubled up to prevent tearing and to hold the filling better. White corn tortillas have a milder flavor, while yellow corn tortillas are slightly more robust. You can find them in the refrigerated section of most grocery stores. Flour tortillas are not traditional but can be substituted if you prefer a softer texture.
How can I make this recipe low-carb or keto-friendly?
To make low-carb street tacos, skip the tortillas and serve the meat over a bed of lettuce or in large lettuce wraps (romaine or butter lettuce work well). You can also use low-carb tortillas if available. The filling itself is high in protein and moderate in fat, making it suitable for keto. Add toppings like avocado, sour cream, and cheese for extra healthy fats.
Can I add vegetables to the slow cooker?
Certainly! Diced bell peppers, onions, and garlic can be added at the beginning for extra flavor and nutrition. Add them along with the meat and seasoning. For softer vegetables like zucchini or mushrooms, add them during the last hour of cooking to prevent them from becoming mushy. You can also stir in a can of diced tomatoes or green chiles for moisture and acidity.
Is it necessary to shred the chicken?
Shredding the chicken is recommended because it allows the meat to blend with the ground beef and soak up the flavorful juices. However, if you prefer chunkier meat, you can leave the chicken thighs whole or slice them. The texture will be different, but still delicious. For the ground beef, you can leave it in crumbles as is.
What are the best toppings for street tacos?
Classic street taco toppings include finely diced white onion, fresh cilantro, salsa verde or roja, crumbled cotija cheese, and a squeeze of lime. You can also add sliced radishes for crunch, pickled jalapeños for heat, or a drizzle of crema (Mexican sour cream). For a twist, try mango salsa or pickled red onions. The key is to keep toppings fresh and simple to let the meat shine.

Notes

I’ll never forget the first time I had street tacos. It was at a tiny taquería in Austin, Texas, where the tortillas were handmade and the meat was simmered for hours. That experience inspired me to recreate those flavors at home, but with a busy schedule, I needed a set-it-and-forget-it method. Enter the slow cooker. These Slow Cooker Street Tacos capture all the juicy, savory goodness of traditional street tacos without the fuss. The combination of ground beef and chicken thighs gives you the best of both worlds: the rich, beefy flavor of the ground meat and the tender, shreddable texture of the chicken. Plus, the slow cooker does all the work while you go about your day. Whether you’re feeding a crowd on game day or just need an easy weeknight dinner, these tacos are a winner. Serve them with a side of Mexican rice, refried beans, or a simple avocado salad. And don’t forget the extra limes—they really brighten everything up. I hope this recipe becomes a staple in your home as it has in mine. Happy cooking!

Easy Crock Pot Street Tacos recipe

Easy Crock Pot Street Tacos recipe
Slow Cooker Street Tacos • Easy Dinner Recipes • Casserole Recipes

⏱️ Prep: PT15M
🔥 Cook: PT480M
⏳ Total: PT495M
🍽️ Yield: 12 servings (about 24 tacos)
⚡ Calories: 285 kcal
(284)
crock pot street tacosslow cooker tacoseasy taco recipeground beef tacoschicken tacosweeknight dinnerfamily meal

These Easy Crock Pot Street Tacos feature tender, flavorful meat slow-cooked to perfection. A simple, delicious weeknight dinner the whole family will love.

Ingredients

Toggle: Metric / US

Instructions

Step 1

Begin by prepping your ingredients, which is key to a smooth cooking process. Dice the onion finely — aim for a uniform 1/4-inch dice so it melts into the meat during slow cooking. Chop the cilantro, separating stems from leaves; the stems can go into the slow cooker for extra flavor, while the leaves are reserved for garnish. If using homemade taco seasoning, combine all spices in a small bowl. Measure out the broth. Having everything ready before you start will make assembly effortless.

Step 1 image
Step 2

Place the ground beef and chicken pieces into the slow cooker. It’s fine to leave the chicken breasts whole; they will shred easily later. Sprinkle the taco seasoning evenly over the meat. Add the diced onion and the cilantro stems (if using). Pour the broth around the edges — do not stir, as the liquid will distribute during cooking. The broth creates steam that keeps the meat moist and helps the seasoning meld.

Step 2 image
Step 3

Cover the slow cooker with its lid and set to LOW for 8 hours or HIGH for 4 hours. For the most tender, shreddable meat, low and slow is best. About 30 minutes before serving, use two forks to shred the chicken directly in the cooker. Break up the ground beef into crumbles. Stir everything together to combine the juices and seasoning. Taste and adjust salt or spices if needed. The meat should be deeply savory with a hint of heat.

Step 3 image
Step 4

While the meat finishes, prepare the tortillas. Warm them individually on a dry comal or skillet over medium-high heat for about 30 seconds per side, until they are pliable and have slight char marks. Alternatively, wrap a stack in damp paper towels and microwave for 30-60 seconds. Keeping tortillas warm in a clean kitchen towel or tortilla warmer is ideal for serving.

Step 5

To assemble the street tacos, place a double layer of tortillas on a plate (this prevents tearing). Spoon about 2-3 tablespoons of the meat mixture into each taco. Top with fresh diced onion, chopped cilantro, and any other desired toppings like crumbled queso fresco, salsa verde, or a squeeze of lime. Serve immediately while warm. These tacos are best enjoyed fresh, but leftovers can be stored separately.

Step 5 image

For best results

  • For the most flavorful meat, consider browning the ground beef in a skillet before adding it to the slow cooker. While not required, this step adds deep, caramelized notes through the Maillard reaction. Simply cook the beef over medium-high heat until browned, breaking it into crumbles, then transfer to the slow cooker. The chicken can remain raw as it will cook thoroughly and shred beautifully.
  • To prevent soggy tacos, always warm your tortillas properly and avoid overfilling. Corn tortillas are more delicate than flour; double-layering them provides sturdiness. If you have time, lightly fry the tortillas in a bit of oil for a crispy edge that holds up better to juicy fillings.
  • Make-ahead tip: The meat mixture can be prepared up to 3 days in advance and stored in the refrigerator. Reheat gently on the stovetop or microwave, adding a splash of broth if needed to restore moisture. This makes weeknight dinners even quicker.
  • For a leaner option, use ground turkey or extra-lean beef (93/7). The cooking time remains the same, but you may want to add an extra tablespoon of oil to prevent dryness. Chicken thighs provide more flavor and moisture than breasts, but both work well.
  • Storage: Leftover meat keeps in an airtight container in the fridge for up to 4 days or in the freezer for up to 3 months. Thaw overnight in the fridge before reheating. The tortillas are best stored separately at room temperature and warmed just before serving.

Variations

  • Vegetarian Version: Substitute the meat with 2 cans (15 oz each) of black beans or pinto beans, drained and rinsed, plus 2 cups of frozen corn. Use vegetable broth and add 1 diced bell pepper. Cook on low for 4-6 hours. The beans will soften and absorb the seasoning, creating a hearty filling.
  • Spicy Chipotle Tacos: Add 2-3 chipotle peppers in adobo sauce (minced) along with the seasoning for a smoky, spicy kick. You can also stir in 1 tablespoon of adobo sauce. This variation pairs wonderfully with a cooling crema made from sour cream and lime.
  • Pork Street Tacos: Replace both beef and chicken with 2 pounds of boneless pork shoulder, cut into 2-inch chunks. Cook on low for 8-10 hours until fall-apart tender. Shred and use as directed. Pork shoulder is incredibly forgiving and becomes succulent with long cooking.
  • Breakfast Tacos: Use the leftover meat mixture as a filling for breakfast tacos. Scramble some eggs, add the meat, and top with cheese and salsa. A great way to repurpose leftovers into a new meal.
  • Keto/Low-Carb: Serve the meat in lettuce wraps (butter lettuce or romaine hearts) instead of tortillas. The filling is naturally low-carb; just skip the corn tortillas. Add extra toppings like avocado, cheese, and sour cream.

Nutrition

  • Calories285 kcal
  • Total Fat12g
  • Saturated Fat4g
  • Cholesterol65mg
  • Sodium520mg
  • Total Carbohydrates26g
  • Dietary Fiber3g
  • Sugars2g
  • Protein22g

Common Questions

Can I use only ground beef or only chicken?
Absolutely. This recipe is versatile. For all beef, use 2 pounds of ground beef (or a mix of ground beef and chuck). For all chicken, use 2 pounds of boneless chicken thighs for best flavor. Adjust cooking time slightly: all chicken may need an extra 30 minutes on low to become tender enough to shred.
Do I need to brown the meat first?
No, browning is optional. The slow cooker will fully cook the meat and the seasoning provides plenty of flavor. However, browning the ground beef adds a deeper, richer taste through caramelization. If you have the extra 5 minutes, it’s worth it.
Can I cook this on high instead of low?
Yes, you can cook on high for 4 hours. The texture will be slightly less tender, especially for the chicken, but it still works well for busy schedules. Avoid cooking on high for longer than 5 hours as the meat may become dry.
How do I store and reheat leftovers?
Store the meat mixture in an airtight container in the refrigerator for up to 4 days. For longer storage, freeze for up to 3 months. Reheat on the stovetop over medium-low heat, adding a splash of broth or water to restore moisture. Microwave in 30-second bursts, stirring in between.
What kind of tortillas are best for street tacos?
Small corn tortillas (about 6 inches) are traditional for street tacos. They have an authentic flavor and texture. Look for brands that list only corn, water, and lime. Flour tortillas can be used but are not traditional. Always warm tortillas before serving to prevent cracking.
Is this recipe gluten-free?
Yes, as long as you use gluten-free taco seasoning and corn tortillas. Many store-bought taco seasonings contain wheat flour or other gluten-containing additives, so check the label. You can easily make your own with the spice blend provided in the ingredients.
Can I add vegetables to the slow cooker?
Certainly. Diced bell peppers, tomatoes, or even zucchini can be added during the last 30 minutes of cooking to maintain some texture. If added at the beginning, they will become very soft. For a heartier meal, stir in a can of drained and rinsed black beans or corn.

Notes

These Easy Crock Pot Street Tacos have become a staple in my home, and I’m thrilled to share this recipe with you. The inspiration came from my love of authentic Mexican street food—simple, fresh, and bursting with flavor. I wanted to capture that magic in a way that fits into a busy weeknight, without sacrificing taste. The slow cooker does all the heavy lifting, transforming humble ingredients into something truly special. I remember the first time I made these for a family gathering; the aroma filled the house, and everyone gathered around the kitchen island, eagerly assembling their own tacos. It was a moment of pure joy—easy, communal, and delicious. That’s what this recipe is all about: bringing people together with minimal fuss. Serving suggestions: I love to set up a taco bar with all the fixings—salsas, cheeses, fresh veggies, and hot sauces—so everyone can customize their meal. Pair with a simple side of Mexican rice or a black bean salad for a complete feast. For drinks, a cold Mexican beer or a tangy margarita complements the flavors perfectly. Leftover meat is fantastic in burrito bowls, quesadillas, or even on top of a salad. I hope this recipe becomes a cherished part of your kitchen repertoire, just as it has in mine. Happy cooking!

Simple Ranch Pot Roast

Simple Ranch Pot Roast
Slow Cooker Dinner • Comfort Food • Easy Family Meal

⏱️ Prep: PT15M
🔥 Cook: PT480M
⏳ Total: PT495M
🍽️ Yield: 8 servings
⚡ Calories: 450 kcal
(284)
slow cookerpot roastranch seasoningcomfort foodfamily dinnereasy dinnercrockpot meal

This simple ranch pot roast combines chuck beef with ranch seasoning, brown gravy mix, and Italian dressing for effortless flavor. Add potatoes, carrots, and celery to your crockpot for a…

Ingredients

Toggle: Metric / US

Instructions

Step 1

First, gather all your ingredients and equipment. You will need a large slow cooker (at least 6-quart capacity), a heavy skillet or Dutch oven for searing, tongs, a sharp knife, and a cutting board. Pat the chuck roast dry with paper towels—this is crucial because moisture on the surface will steam rather than sear, preventing that deep brown crust that builds flavor. Season the roast generously on all sides with salt and black pepper. The salt not only seasons but also helps draw moisture to the surface, which then evaporates during searing, creating a better crust. Let the roast sit at room temperature for 15-20 minutes while you prepare the vegetables.

Step 1 image
Step 2

Now it’s time to sear the roast. Heat 2 tablespoons of olive oil in a heavy skillet over medium-high heat until the oil shimmers and just begins to smoke. Carefully place the seasoned roast in the hot oil—you should hear a loud sizzle. Do not move the roast for 3-4 minutes per side; let it develop a deep mahogany crust. Use tongs to turn the roast, searing all sides including the ends. The crust adds incredible depth of flavor through the Maillard reaction—a chemical reaction between amino acids and sugars that creates hundreds of savory compounds. This step is non-negotiable for a rich, beefy pot roast. Once seared, transfer the roast to a plate and set aside. Do not clean the skillet—the browned bits (fond) stuck to the bottom are pure flavor gold.

Step 2 image
Step 3

In a small bowl, combine the ranch seasoning mix, brown gravy mix, and dry Italian salad dressing mix. Stir to blend thoroughly. These three packets create a powerhouse of savory, tangy, and herbaceous flavors that will infuse the meat and vegetables as they slow cook. The ranch provides buttermilk and herb notes, the gravy mix adds a savory umami base and helps thicken the cooking liquid, and the Italian dressing brings a bright acidity that balances the richness of the beef.

Step 4

Arrange the halved baby potatoes, carrot chunks, and celery pieces in an even layer at the bottom of your slow cooker. This vegetable bed serves two purposes: it elevates the roast above the direct heat of the cooker’s bottom, preventing it from overcooking, and it absorbs the delicious drippings as they cook. The vegetables will become tender and infused with beefy flavor. Sprinkle about half of the seasoning mixture over the vegetables and toss gently to coat.

Step 5

Place the seared chuck roast on top of the vegetables in the slow cooker. Sprinkle the remaining seasoning mixture evenly over the top of the roast. Pour 1 cup of low-sodium beef broth around the roast—do not pour it directly over the seasoning, as that would wash it off. The broth will mix with the seasonings and the natural juices from the meat as it cooks, creating a rich, savory gravy. Cover the slow cooker with its lid and set to LOW heat. Cook for 8 hours, or on HIGH for 5-6 hours. Low and slow is preferable for tougher cuts like chuck because it allows the collagen in the connective tissue to break down into gelatin, resulting in fork-tender, melt-in-your-mouth meat. Avoid opening the lid during cooking—each time you do, heat escapes and adds 20-30 minutes to the cook time.

Step 6

After 8 hours on LOW, the roast should be fork-tender—you should be able to easily pull it apart with two forks. The vegetables should be soft but not mushy. Carefully remove the roast and vegetables to a serving platter using tongs and a slotted spoon. Tent loosely with foil to keep warm. To make the gravy, skim any excess fat from the surface of the cooking liquid. If you prefer a thicker gravy, whisk 2 tablespoons of cornstarch with 2 tablespoons of cold water to make a slurry, then stir it into the hot liquid in the slow cooker. Turn the heat to HIGH and let it simmer uncovered for 10-15 minutes until thickened. Taste and adjust seasoning with salt and pepper if needed. The gravy will be rich, savory, and packed with flavor from the seasonings and beef drippings.

Step 7

To serve, shred the beef into large chunks or slice it against the grain into thick pieces. Arrange the shredded beef and vegetables on plates, then ladle the gravy generously over the top. Garnish with fresh chopped parsley for a pop of color and freshness. This pot roast pairs beautifully with crusty bread, egg noodles, or mashed potatoes to soak up every last drop of gravy. Leftovers can be stored in an airtight container in the refrigerator for up to 4 days, and they actually taste even better the next day as the flavors continue to meld.

For best results

  • Choosing the right cut of beef is essential for a tender pot roast. Chuck roast is ideal because it comes from the shoulder area, which gets a lot of exercise and thus has abundant connective tissue. When cooked low and slow, that collagen breaks down into gelatin, giving the meat a luscious, moist texture. Look for a roast with good marbling—thin streaks of fat running through the meat—as this adds flavor and prevents dryness. If chuck isn't available, bottom round or brisket can work, but they may be leaner and slightly less tender.
  • Searing the roast is a step you should never skip. While it adds 10-15 minutes to prep time, the flavor payoff is enormous. The browned crust creates a depth of savory, almost caramelized taste that cannot be achieved by simply dumping raw meat into the slow cooker. For the best sear, make sure the pan is hot enough—the oil should be shimmering and nearly smoking. Pat the meat very dry before seasoning, as any moisture will cause steam and prevent browning. Use a heavy pan like cast iron or stainless steel for even heat distribution.
  • The three-packet seasoning blend is the secret to this recipe's ease and flavor. However, be mindful of the sodium content—each packet contains salt, so you may not need to add extra salt to the dish. To control sodium, look for low-sodium or reduced-sodium versions of the mixes. You can also make your own ranch seasoning blend using dried buttermilk, parsley, dill, garlic powder, onion powder, and salt. Homemade versions allow you to adjust the salt and avoid preservatives.
  • Don't overcrowd the slow cooker. For even cooking, the roast should have some space around it, and the vegetables should be in a single layer at the bottom. If you need to double the recipe, use two slow cookers or a larger 8-quart model. Overcrowding can lead to uneven cooking and a soupy consistency because the ingredients release moisture that has nowhere to evaporate. Also, resist the urge to add extra liquid—the meat and vegetables will release their own juices, and too much liquid will result in a thin, watery gravy.
  • To make the gravy extra rich, you can deglaze the searing pan after removing the roast. Pour a splash of beef broth or red wine into the hot skillet and scrape up all the browned bits with a wooden spoon. Add this liquid to the slow cooker at the beginning of cooking. Those browned bits are packed with concentrated beef flavor that will deepen the overall taste of the gravy. If using wine, choose a dry red like Cabernet Sauvignon or Merlot—it adds complexity and a subtle fruity note that pairs beautifully with the ranch seasoning.
  • Pot roast leftovers are incredibly versatile. Shred the leftover beef and use it in tacos, sandwiches, or over salads. The vegetables can be mashed into a rustic side dish or pureed into a soup with some broth. The gravy can be frozen in ice cube trays and used to flavor soups, stews, or pasta sauces. Store leftovers in airtight containers and refrigerate for up to 4 days, or freeze for up to 3 months. When reheating, add a splash of broth to restore moisture and heat gently on the stovetop or in the microwave.
  • If you prefer a thicker gravy without cornstarch, you can remove the lid during the last 30 minutes of cooking and turn the heat to HIGH. This allows some of the liquid to evaporate, naturally concentrating the flavors and thickening the sauce. Alternatively, you can mash a few of the cooked potatoes and stir them into the liquid to act as a natural thickener. This adds body and a subtle potato flavor that complements the dish.

Variations

  • For a low-carb or keto-friendly version, omit the potatoes and increase the amount of low-carb vegetables such as cauliflower florets, turnips, or radishes. Cauliflower absorbs the gravy beautifully and becomes tender without the starch. You can also add mushrooms, which add an earthy umami flavor that pairs well with the ranch seasoning. Serve the pot roast over cauliflower mash or zucchini noodles for a complete low-carb meal.
  • To give this pot roast a Mediterranean twist, replace the ranch seasoning with a blend of dried oregano, basil, rosemary, and garlic powder. Add a can of diced tomatoes (drained) and a handful of pitted Kalamata olives during the last hour of cooking. The tomatoes add acidity and the olives bring a briny, salty contrast. Serve with crusty bread or over couscous to soak up the Mediterranean-infused juices.
  • For a spicy version, add a diced jalapeño or serrano pepper along with the vegetables. You can also stir in 1-2 teaspoons of chipotle powder or smoked paprika to the seasoning mix. The smokiness of chipotle complements the beef and adds a gentle heat. Garnish with fresh cilantro and a squeeze of lime juice before serving. This variation works well in tacos or burrito bowls.
  • If you want to use a different protein, boneless beef short ribs are an excellent substitute for chuck roast. They are even more marbled and become incredibly tender. Alternatively, pork shoulder or pork butt can be used for a pulled pork-style pot roast—just reduce the cook time to 6-8 hours on LOW. The seasoning blend works beautifully with pork, creating a savory, tangy flavor profile. You can also use a whole chicken (about 4-5 lbs) for a lighter version; cook on LOW for 6-7 hours until the chicken is fall-apart tender.
  • To make this recipe dairy-free, ensure that the ranch seasoning mix you use is dairy-free (some contain buttermilk powder). You can make your own dairy-free ranch by combining dried dill, parsley, garlic powder, onion powder, salt, and pepper. The brown gravy mix typically contains wheat flour but no dairy, but check the label. The Italian dressing mix is usually dairy-free. Serve with dairy-free sides like roasted vegetables or a salad.
  • For a more traditional pot roast flavor, replace the Italian dressing mix with a packet of onion soup mix. This combination of ranch, gravy, and onion soup creates a classic French onion-inspired pot roast. Add a splash of Worcestershire sauce and a few sprigs of fresh thyme for extra depth. The result is a deeply savory, aromatic dish that tastes like it simmered all day in a French bistro kitchen.

Nutrition

  • Calories450 kcal
  • Total Fat22g
  • Saturated Fat8g
  • Cholesterol120mg
  • Sodium980mg
  • Total Carbohydrates28g
  • Dietary Fiber4g
  • Sugars6g
  • Protein38g

Common Questions

Can I cook this pot roast on HIGH instead of LOW?
Yes, you can cook this pot roast on HIGH for 5-6 hours instead of 8 hours on LOW. However, cooking on LOW is recommended for the most tender results because the lower temperature gives the collagen more time to break down gradually. Cooking on HIGH may result in slightly less tender meat, but it will still be delicious. If you’re short on time, HIGH is a good alternative. Just make sure the internal temperature of the meat reaches at least 190°F (88°C) for fork-tender texture.
Can I add other vegetables like onions or garlic?
Absolutely! Onions and garlic are wonderful additions. Add a large onion, cut into wedges, and 4-6 cloves of smashed garlic along with the other vegetables. The onions will become sweet and caramelized as they cook, and the garlic will infuse the gravy with a mellow, savory flavor. If you add garlic, be aware that it can become very soft and almost melt into the gravy, which is perfectly fine. You can also add parsnips, turnips, or sweet potatoes for variety.
How do I store leftovers and how long do they last?
Store leftovers in an airtight container in the refrigerator for up to 4 days. The pot roast actually tastes better the next day as the flavors continue to meld. To reheat, place the desired amount in a saucepan or microwave-safe dish and add a splash of beef broth or water to restore moisture. Heat gently on the stovetop over medium-low heat or in the microwave in 30-second intervals, stirring occasionally. You can also freeze leftovers for up to 3 months. Thaw overnight in the refrigerator before reheating.
Can I make this recipe gluten-free?
Yes, you can make this recipe gluten-free by using gluten-free versions of the seasoning packets. Many brands offer gluten-free ranch seasoning, brown gravy mix, and Italian dressing mix. Alternatively, you can make your own seasoning blends using gluten-free ingredients. For the gravy, use cornstarch or arrowroot powder as a thickener instead of flour. Ensure that the beef broth you use is labeled gluten-free as well. The recipe itself is naturally free of gluten-containing grains except for the packets, so substitutions are straightforward.
Why is my pot roast tough?
If your pot roast is tough, it likely didn’t cook long enough. Chuck roast requires a long cooking time to break down the connective tissue. Ensure you cook it on LOW for at least 8 hours, or until the meat easily shreds with a fork. Another possible reason is that the roast was not seared properly, which can affect texture. Also, cutting the meat against the grain after cooking is important—slicing with the grain can make even tender meat seem chewy. Finally, if your slow cooker runs hot, the meat may have cooked too quickly and become dry and tough. Use a meat thermometer to check for an internal temperature of at least 190°F (88°C).
Can I use a different cut of beef?
Yes, other cuts that work well for pot roast include bottom round, brisket, or rump roast. However, chuck roast is the most forgiving and yields the best results due to its higher fat content and marbling. Leaner cuts like bottom round may become dry if overcooked, so monitor the cooking time closely. For best results, choose a well-marbled cut and cook low and slow. You can also use boneless short ribs for an even richer flavor and incredibly tender meat.
How can I make the gravy thicker?
To thicken the gravy, you have several options. The easiest method is to make a cornstarch slurry: mix 2 tablespoons of cornstarch with 2 tablespoons of cold water until smooth, then stir into the hot cooking liquid. Simmer for 10-15 minutes until thickened. Alternatively, you can remove the lid during the last 30 minutes of cooking and turn the heat to HIGH to allow evaporation. Another method is to mash a few of the cooked potatoes and stir them into the liquid—this adds natural thickness and flavor. If you prefer a flour-based gravy, you can make a roux with butter and flour, then whisk in the cooking liquid.
Can I prepare this recipe in an Instant Pot or pressure cooker?
Yes, you can adapt this recipe for an Instant Pot. Sear the roast using the sauté function, then add the seasonings and broth. Cook on high pressure for 60-70 minutes for a 3-4 lb roast, followed by a natural pressure release (about 15-20 minutes). Add the vegetables after the meat is cooked, then pressure cook for an additional 5-10 minutes depending on the size of your vegetable chunks. Keep in mind that pressure cooking will yield a different texture than slow cooking—the meat will be tender but may not be as fall-apart. The gravy may also be thinner, so you may need to use the sauté function to reduce and thicken it after cooking.

Notes

This Simple Ranch Pot Roast is the epitome of comfort food made easy. I first discovered the magic of combining three seasoning packets—ranch, gravy, and Italian dressing—a few years ago when I was looking for a way to simplify pot roast without sacrificing flavor. The result was a revelation: the ranch adds a creamy, herbaceous note, the gravy mix provides deep umami and helps thicken the cooking liquid into a luscious sauce, and the Italian dressing brings a bright acidity that cuts through the richness of the beef. It’s a trifecta of convenience that tastes like you spent hours layering flavors, but it comes together in minutes.I love serving this pot roast on a chilly Sunday evening, when the whole house fills with the aroma of beef and herbs slowly simmering. It’s the kind of meal that brings everyone to the table, eager to dig in. The best part? The leftovers are even better. The flavors meld overnight, and the next day you can shred the beef and pile it onto sandwiches with a smear of horseradish sauce, or toss it with pasta and a splash of the gravy for a quick weeknight dinner.This recipe is also incredibly forgiving. If you don’t have baby potatoes, any waxy potato works—Yukon Golds hold their shape beautifully. No carrots? Try parsnips or sweet potatoes. You can even throw in a handful of mushrooms or a can of drained diced tomatoes for extra depth. The slow cooker does all the work, making it perfect for busy families or anyone who wants a hearty, home-cooked meal without hovering over the stove.One of my favorite memories is making this pot roast for a potluck at my son’s school. I doubled the recipe and brought it in a large slow cooker, and within an hour, the container was empty. Parents kept asking for the recipe, amazed that something so delicious could be so simple. That’s the beauty of this dish: it’s unpretentious, budget-friendly, and universally loved.When plating, I like to arrange the shredded beef and vegetables on a large platter, then drizzle the gravy over the top. A sprinkle of fresh parsley adds a pop of color and freshness. Serve with crusty bread or egg noodles to soak up every last drop of gravy. For a complete meal, add a simple green salad with a tangy vinaigrette to balance the richness.I hope this recipe becomes a staple in your home as it has in mine. Whether it’s a busy weeknight or a lazy Sunday, this Simple Ranch Pot Roast delivers comfort and flavor with minimal effort. Happy cooking!

Easy Crockpot Beef Dinner

Easy Crockpot Beef Dinner
Easy Dinner Recipes • Slow Cooker Meals • Family Dinner Ideas

⏱️ Prep: PT15M
🔥 Cook: PT5H
⏳ Total: PT5H15M
🍽️ Yield: 6 servings
⚡ Calories: 485 kcal
(284)
slow cooker pot roastcrockpot beef dinnereasy family dinnerchuck roast recipecomfort food

This easy crockpot beef dinner recipe combines chuck roast with ranch seasoning, brown gravy mix, and Italian dressing for incredible flavor. Perfect for busy weeknights!

Ingredients

Toggle: Metric / US

Instructions

Step 1

Pat the chuck roast dry with paper towels. This step is crucial because removing excess moisture allows the meat to develop a deep, flavorful crust when seared. Season the roast generously on all sides with salt and black pepper. Heat the olive oil in a large skillet over medium-high heat until it shimmers. Carefully place the roast in the hot oil and sear for 3-4 minutes per side, until a rich golden-brown crust forms. Do not crowd the pan; if necessary, sear in batches. The crust not only adds flavor through the Maillard reaction but also helps seal in juices during the long slow cook. Transfer the seared roast to your slow cooker.

Step 1 image
Step 2

In a small bowl, combine the ranch seasoning mix, brown gravy mix, and dry Italian salad dressing mix. Stir to blend evenly. Sprinkle this seasoning blend over all sides of the roast in the slow cooker, making sure to coat it thoroughly. The combination of these three packets creates a savory, tangy, and herby flavor profile that infuses the meat as it cooks. No additional liquid is needed at this point; the roast will release its own juices during cooking, creating a rich gravy.

Step 2 image
Step 3

Place the lid on the slow cooker and cook on LOW for 5 hours. Cooking on low heat is essential for breaking down the tough connective tissues in the chuck roast, resulting in fork-tender meat. After 5 hours, the roast should be easily shreddable with a fork. If you prefer a firmer texture, check at 4 hours. Avoid opening the lid frequently, as each release of steam adds 20-30 minutes to the cooking time. The aroma filling your kitchen will be irresistible!

Step 4

After 5 hours, carefully add the halved baby potatoes and carrot chunks to the slow cooker. Nestle them around the roast, submerging them slightly in the cooking liquid. Replace the lid and continue cooking on LOW for another 1-2 hours, or until the vegetables are tender when pierced with a fork. The exact time depends on the size of your vegetable chunks and your slow cooker model. The potatoes will absorb the savory gravy, becoming incredibly flavorful and soft.

Step 5

Once the vegetables are tender, remove the roast and vegetables to a serving platter. Use two forks to shred the beef into large chunks, discarding any excess fat. For a thicker gravy, you can transfer the cooking liquid to a saucepan, bring to a simmer, and whisk in a slurry of 1 tablespoon cornstarch mixed with 2 tablespoons cold water. Cook for 2-3 minutes until thickened. Alternatively, serve the juices as is—they are already packed with flavor. Spoon the gravy over the shredded beef and vegetables, and serve hot.

For best results

  • Choosing the right cut of beef is paramount for a successful pot roast. Chuck roast is ideal because it comes from the shoulder area, which contains a good amount of marbling and connective tissue. When cooked low and slow, the collagen breaks down into gelatin, creating a luscious, melt-in-your-mouth texture. Avoid lean cuts like round or sirloin, as they will become dry and tough. If you can, opt for a roast that is at least 1.5 inches thick for even cooking.
  • Searing the roast before slow cooking is not optional—it's a game-changer. The Maillard reaction that occurs during browning creates hundreds of complex flavor compounds that deepen the overall taste of the dish. Even a quick 2-minute sear per side makes a noticeable difference. For best results, use a heavy-bottomed skillet and avoid moving the meat too soon; let it develop a crust before flipping.
  • The three-packet seasoning blend is the secret to this recipe's incredible flavor. Ranch seasoning adds buttermilk, garlic, and onion notes; brown gravy mix provides savory depth and helps thicken the cooking liquid; Italian dressing contributes tangy herbs like oregano, basil, and rosemary. Feel free to adjust the ratios: for a milder flavor, use half a packet of Italian dressing. You can also make your own blends if you prefer to control sodium.
  • Vegetable placement matters. Add potatoes and carrots only during the last 1-2 hours of cooking. If added at the beginning, they will become mushy and disintegrate. Root vegetables cook faster than beef, so timing is key. For even cooking, cut carrots and potatoes into uniform sizes—about 2-inch chunks work perfectly. You can also add other vegetables like parsnips, celery, or mushrooms in the final hour.
  • If you prefer a thicker gravy, there are several methods. After removing the roast and vegetables, you can blend a portion of the cooked vegetables (especially potatoes) into the liquid using an immersion blender. This naturally thickens the gravy and adds body. Alternatively, make a cornstarch slurry (1 tablespoon cornstarch + 2 tablespoons cold water) and whisk it into the simmering liquid. Cook for a minute until thickened. For an ultra-rich gravy, stir in a tablespoon of butter at the end.
  • Leftovers are even better the next day! Store shredded beef and vegetables in an airtight container in the refrigerator for up to 4 days. The flavors meld and deepen overnight. Reheat gently on the stovetop or in the microwave with a splash of beef broth to restore moisture. This pot roast also freezes beautifully: portion it into freezer-safe bags, remove excess air, and freeze for up to 3 months. Thaw overnight in the fridge before reheating.

Variations

  • For a low-carb or keto-friendly version, omit the potatoes and add more low-carb vegetables such as cauliflower florets, radishes, or turnips. You can also thicken the gravy with xanthan gum instead of cornstarch. The seasoning packets are relatively low in carbs, but check labels for added sugars. Serve over cauliflower mash or zucchini noodles for a complete meal.
  • To make this recipe gluten-free, ensure that the ranch seasoning mix, brown gravy mix, and Italian dressing mix are certified gluten-free. Many brands offer gluten-free versions, or you can make your own blends using individual spices. Replace the brown gravy mix with a gluten-free gravy mix or use a slurry of arrowroot starch. Serve with gluten-free bread or over rice.
  • For a spicy twist, add 1-2 teaspoons of chipotle powder or a chopped jalapeño to the seasoning blend. You can also use a spicy ranch seasoning mix. The smoky heat pairs wonderfully with the savory beef. Add some black beans and corn in the last hour for a Southwestern-inspired pot roast. Garnish with fresh cilantro and a squeeze of lime.
  • If you prefer a different protein, this seasoning blend works beautifully with pork shoulder or lamb. For pork, cook on low for 6-8 hours until shreddable. For lamb, use a bone-in shoulder and cook for 7-8 hours. The flavors are equally delicious. You can also use boneless chicken thighs (cook for 4 hours on low), but reduce the cooking time accordingly.
  • For a dairy-free option, most ranch seasoning mixes contain buttermilk powder, so look for a dairy-free ranch blend or make your own using dried dill, parsley, garlic powder, onion powder, and a pinch of citric acid. The brown gravy mix often contains milk solids, so substitute with a dairy-free gravy mix or use a slurry of cornstarch and beef broth with herbs.

Nutrition

  • Calories485 kcal
  • Total Fat22g
  • Saturated Fat8g
  • Cholesterol120mg
  • Sodium980mg
  • Total Carbohydrates28g
  • Dietary Fiber4g
  • Sugars6g
  • Protein42g

Common Questions

Can I cook this on HIGH instead of LOW?
Yes, you can cook on HIGH for about 3-4 hours total, but the meat may not be as tender. Low heat allows the collagen to break down slowly, resulting in a more fork-tender texture. If you’re short on time, cook on HIGH for 3 hours, then add vegetables and cook for another hour. The flavor will still be great, but the texture may be slightly firmer.
Do I need to add liquid to the slow cooker?
No, you do not need to add any liquid at the start. The chuck roast releases its own juices during cooking, and the seasoning packets contribute moisture. However, if you prefer more gravy, you can add 1 cup of beef broth. Keep in mind that adding liquid may dilute the seasoning, so you might want to adjust by adding an extra half packet of gravy mix.
Can I use a different cut of beef?
Chuck roast is the best choice for this recipe due to its fat content and connective tissue. However, you can use brisket, bottom round, or pot roast. Avoid lean cuts like sirloin or eye of round, as they will become dry. If using a leaner cut, consider adding some beef tallow or butter to compensate for the lack of fat.
How do I store leftovers and how long do they last?
Store leftover pot roast in an airtight container in the refrigerator for up to 4 days. The flavors will continue to meld, making it even more delicious the next day. To reheat, place the desired amount in a saucepan with a splash of beef broth and warm over medium heat until heated through. You can also microwave in 30-second intervals. For longer storage, freeze for up to 3 months.
Can I add other vegetables?
Absolutely! This recipe is very versatile. In addition to potatoes and carrots, you can add celery, parsnips, turnips, mushrooms, or onions. Add hardy root vegetables at the same time as the potatoes. More delicate vegetables like mushrooms or zucchini should be added in the last 30 minutes to prevent them from becoming mushy.
Why is my pot roast dry?
Dry pot roast is usually the result of overcooking or using a lean cut of meat. Chuck roast should be cooked to an internal temperature of about 195°F (90°C) for the collagen to break down properly. If you cooked on HIGH, try LOW next time. Also, ensure that the roast is submerged in liquid; if the liquid evaporates, add a bit of beef broth. Finally, let the meat rest for 10 minutes before shredding to redistribute juices.

Notes

This easy crockpot beef dinner is a true lifesaver for busy families. I first discovered the magic of combining three seasoning packets when I was a broke college student trying to make a cheap cut of beef taste amazing. The result was so good that it became a staple in my home. Over the years, I’ve refined the technique—searing the meat is non-negotiable, and adding the vegetables later ensures they are perfectly tender without turning to mush. The beauty of this recipe is its simplicity: just a few pantry staples transform an inexpensive chuck roast into a restaurant-quality meal. I love serving it over creamy mashed potatoes or with crusty bread to soak up every drop of gravy. It’s also a fantastic meal prep option; I often double the recipe and freeze half for busy weeks. Whether it’s a Sunday family dinner or a weeknight comfort meal, this slow cooker pot roast never fails to impress. Enjoy!

Slow Cooker Pot Roast

Slow Cooker Pot Roast
Slow Cooker Recipes • Easy Dinner Ideas • Comfort Food

⏱️ Prep: PT20M
🔥 Cook: PT480M
⏳ Total: PT500M
🍽️ Yield: 8 servings
⚡ Calories: 385 kcal
(284)
slow cooker pot roasteasy family dinnercrockpot roastchuck beef recipecomfort foodweeknight dinnerranch seasoningbrown gravy

This incredibly tender slow cooker pot roast uses chuck beef, ranch seasoning, and brown gravy mix. Add potatoes, carrots, and celery for an easy weeknight dinner.

Ingredients

Toggle: Metric / US

Instructions

Step 1

Pat the chuck beef roast dry with paper towels. This step is crucial because moisture on the surface will steam the meat instead of searing it, preventing the development of the rich, deep flavors from the Maillard reaction. Season the roast generously on all sides with salt and black pepper. Heat 2 tablespoons of olive oil in a large heavy-bottomed skillet or Dutch oven over medium-high heat until it shimmers. Carefully place the roast in the hot oil and sear for 3-4 minutes per side, without moving it, until a deep brown crust forms. Use tongs to turn the roast, searing all sides including the ends. The crust locks in juices and adds incredible savory depth to the final gravy. Transfer the seared roast to a plate and set aside.

Step 1 image
Step 2

In a small bowl, combine the ranch seasoning mix, brown gravy mix, and dry Italian salad dressing mix. Whisk together until evenly blended. These three packets are the magic behind the ultra-flavorful, savory gravy that makes this pot roast so addictive. The ranch adds tangy buttermilk notes and herbs, the gravy mix provides rich beefy depth and thickening, and the Italian dressing brings a subtle zing of vinegar and garlic. Sprinkle about half of this seasoning mixture over the seared roast, pressing it into the crust. Reserve the remaining half for the cooking liquid.

Step 2 image
Step 3

Place the baby potatoes (halved if larger than golf ball), carrot chunks, and celery pieces into the bottom of a 6-quart or larger slow cooker. The vegetables create a natural rack for the roast to sit on, preventing it from stewing in the liquid and allowing even heat circulation. They also absorb the savory drippings and become incredibly tender. Pour the beef broth (or water) into the slow cooker, then sprinkle the remaining seasoning mixture over the vegetables and broth. Stir gently to combine.

Step 3 image
Step 4

Nestle the seasoned chuck roast on top of the vegetables, fat side up if possible. The fat cap will render slowly during cooking, basting the meat and adding moisture and flavor. Place the lid securely on the slow cooker. Cook on LOW for 8-9 hours or on HIGH for 5-6 hours. Low and slow is highly recommended for the most tender, fork-shreddable results. The roast is done when it pulls apart easily with two forks and the internal temperature reaches at least 195°F (90°C) for optimal collagen breakdown. Avoid opening the lid during cooking to maintain a steady temperature.

Step 5

Once cooked, carefully remove the roast and vegetables to a serving platter using a slotted spoon. Let the roast rest for 10-15 minutes loosely tented with foil. Meanwhile, skim any excess fat from the surface of the cooking liquid in the slow cooker. If you prefer a thicker gravy, transfer the liquid to a saucepan and bring to a simmer. Whisk in a slurry of 2 tablespoons cornstarch mixed with 2 tablespoons cold water, and cook for 2-3 minutes until thickened. Shred the roast into large chunks or slice against the grain. Serve the beef and vegetables drizzled with the rich, savory gravy. Garnish with fresh chopped parsley if desired.

Step 5 image

For best results

  • Choosing the right cut of beef is paramount for a successful pot roast. Chuck roast is the gold standard because it comes from the shoulder area, which contains a good amount of connective tissue and marbling. When cooked low and slow, the collagen breaks down into gelatin, creating that melt-in-your-mouth texture and enriching the gravy. Avoid lean cuts like sirloin or round, as they will dry out and become tough. Look for a roast with visible fat marbling throughout, ideally 3-4 pounds for a 6-quart slow cooker. If your roast has a thick fat cap, leave it on during cooking but trim any hard, yellow fat.
  • Do not skip the searing step! While it adds extra time, searing is essential for developing deep, complex flavors through the Maillard reaction. This browning creates hundreds of flavor compounds that cannot be achieved by slow cooking alone. For the best sear, pat the meat extremely dry, use a heavy pan (cast iron is ideal), and don't crowd the pan. If you're short on time, you can use a kitchen torch to brown the surface, but pan-searing yields the best crust. The fond (browned bits) left in the pan can be deglazed with a splash of broth and added to the slow cooker for even more flavor.
  • Layer your ingredients strategically in the slow cooker. Place root vegetables like potatoes, carrots, and celery at the bottom, as they take longer to cook and benefit from being submerged in the liquid. The roast sits on top, allowing the fat to render down over the vegetables. This arrangement also prevents the meat from becoming waterlogged. If you add softer vegetables like mushrooms or peas, do so during the last 30 minutes of cooking to keep them from turning mushy. For the best texture, cut all vegetables into uniform, bite-sized pieces.
  • To achieve a thick, restaurant-quality gravy without using cornstarch, you can rely on the natural starches from the potatoes. As the potatoes cook, they release some starch into the liquid, which naturally thickens it. If you prefer a clear, glossy gravy, skip the cornstarch slurry and instead mash a few of the cooked potato chunks directly into the liquid, then whisk until smooth. This adds body and a subtle earthy sweetness. For a silky finish, strain the gravy through a fine-mesh sieve before serving.
  • Leftover pot roast is a gift that keeps on giving. The flavors meld and deepen overnight, making it even more delicious the next day. Store leftovers in an airtight container in the refrigerator for up to 4 days. The congealed fat can be easily removed from the top before reheating. To reheat, place the beef and vegetables in a covered baking dish with a splash of broth and warm in a 300°F (150°C) oven for 20-30 minutes, or gently reheat on the stovetop in a saucepan over low heat. The meat can also be shredded and used in tacos, sandwiches, or over rice.
  • For a richer, more complex flavor profile, consider adding aromatics beyond the seasoning packets. A quartered onion, a few cloves of garlic (smashed), a sprig of fresh rosemary, and a couple of bay leaves placed in the slow cooker will infuse the meat and gravy with herbal notes. You can also add a tablespoon of Worcestershire sauce or balsamic vinegar to the broth for extra umami and acidity that balances the richness. If you enjoy a bit of heat, add a pinch of red pepper flakes or a chopped chipotle pepper in adobo sauce.
  • If you need to speed up the cooking process, you can cook on HIGH for 5-6 hours, but the meat will be slightly less tender than if cooked on LOW. The low setting allows the collagen to break down more gradually, resulting in a more succulent texture. If you're using a frozen roast, do not place it directly into the slow cooker, as it will take too long to reach a safe temperature and may result in uneven cooking. Instead, thaw it completely in the refrigerator before searing and cooking.

Variations

  • For a classic pot roast with a red wine twist, replace 1/2 cup of the beef broth with a dry red wine like Cabernet Sauvignon or Merlot. The wine adds acidity and depth that complements the beef beautifully. Add 2 tablespoons of tomato paste along with the seasoning packets for an even richer, more robust gravy. Follow the same cooking instructions, but note that the alcohol will cook off during the long simmer, leaving only the concentrated flavor. This variation pairs wonderfully with creamy mashed potatoes or crusty bread for dipping.
  • Make this recipe gluten-free by using certified gluten-free ranch seasoning, brown gravy mix, and Italian dressing mix. Many brands offer gluten-free versions, or you can make your own blends using herbs and spices. Ensure the beef broth is also gluten-free. The cooking method remains exactly the same, and the result is just as tender and flavorful. Serve with roasted or mashed potatoes to keep the meal entirely gluten-free and satisfying.
  • For a lighter, healthier version, use a leaner cut like bottom round or rump roast, though the meat will be less tender. To compensate, add 1 tablespoon of unflavored gelatin to the broth—this mimics the collagen from a fattier cut and improves texture. Reduce the olive oil used for searing to 1 teaspoon, and skip the gravy packet to lower sodium. Increase the vegetables, adding bell peppers, zucchini, or green beans during the last hour of cooking. This variation is perfect for those watching their calorie or fat intake without sacrificing flavor.
  • Transform this pot roast into a Mexican-inspired dish by swapping the Italian dressing mix for a packet of taco seasoning. Add a can of diced tomatoes with green chiles (Rotel) and a handful of chopped cilantro. Serve the shredded beef over rice, in warm tortillas, or as a filling for burrito bowls. Top with avocado, sour cream, and shredded cheese for a complete fiesta. The cooking time remains the same, and the result is a zesty, crowd-pleasing twist on the classic.
  • For an herby, French-inspired version, omit the ranch and Italian dressing packets. Instead, season the roast with salt, pepper, and herbes de Provence (or a mix of thyme, rosemary, and oregano). Add 2 cloves of minced garlic, 2 bay leaves, and a cup of beef broth. After cooking, stir in a tablespoon of Dijon mustard and a splash of heavy cream to the gravy for a luxurious finish. Serve with crusty baguette slices and a green salad for an elegant yet easy dinner.

Nutrition

  • Calories385 kcal
  • Total Fat18g
  • Saturated Fat7g
  • Cholesterol95mg
  • Sodium980mg
  • Total Carbohydrates22g
  • Dietary Fiber4g
  • Sugars5g
  • Protein34g

Common Questions

Can I use a different cut of beef for this pot roast?
Yes, but chuck roast is highly recommended for its marbling and collagen content. Other good options include brisket, bottom round, or rump roast. Leaner cuts will be less tender, so consider adding a tablespoon of unflavored gelatin to the cooking liquid to help mimic the texture. Avoid very lean cuts like sirloin tip or eye of round, as they will dry out. Regardless of the cut, always sear the meat first and cook on LOW for the best results.
How do I prevent my pot roast from turning out dry?
The key to a moist pot roast is cooking it low and slow until the internal temperature reaches at least 195°F (90°C). This allows the collagen to break down into gelatin, which keeps the meat juicy. Also, ensure there is enough liquid in the slow cooker—at least 1 cup—to create steam. Avoid opening the lid during cooking, as this releases heat and moisture. Finally, let the roast rest for 10-15 minutes after cooking before slicing or shredding to allow the juices to redistribute.
Can I cook this pot roast on HIGH instead of LOW?
Yes, you can cook on HIGH for 5-6 hours, but the meat will be slightly less tender than if cooked on LOW for 8-9 hours. The low setting allows the collagen to break down more gradually, resulting in a more succulent texture. If you’re short on time, HIGH is acceptable, but check for doneness by testing if the meat shreds easily with a fork. The internal temperature should still reach at least 195°F (90°C).
How should I store leftovers and how long do they last?
Store leftover pot roast in an airtight container in the refrigerator for up to 4 days. The gravy will thicken as it cools; you can thin it with a splash of broth or water when reheating. For longer storage, freeze the beef and vegetables in a freezer-safe container for up to 3 months. Thaw overnight in the refrigerator before reheating. Reheat gently in a covered dish in a 300°F (150°C) oven or on the stovetop over low heat to prevent drying out.
Can I add other vegetables like mushrooms or green beans?
Absolutely! Mushrooms, bell peppers, and green beans are great additions. However, add them at the right time to avoid overcooking. Mushrooms can be added during the last hour of cooking, as they release moisture and become tender quickly. Green beans and bell peppers should be added during the last 30 minutes to retain some crunch. Root vegetables like potatoes, carrots, and celery should go in at the beginning since they need longer cooking.
Is it necessary to sear the meat before putting it in the slow cooker?
While not strictly necessary, searing is highly recommended because it develops deep, complex flavors through the Maillard reaction. This browning creates a rich crust that enhances the overall taste of the pot roast and gravy. If you skip searing, the roast will still be tender, but the flavor will be less robust. For the best results, take the extra 10 minutes to sear all sides of the roast in a hot skillet.
Can I make this recipe in an Instant Pot or pressure cooker?
Yes! To make this in an Instant Pot, use the sauté function to sear the roast, then deglaze the pot with broth. Add the seasoning packets, vegetables, and 1 cup of broth. Pressure cook on HIGH for 60 minutes for a 3-pound roast (add 10 minutes per extra pound). Allow natural pressure release for 15 minutes, then quick release. The results are similar in tenderness but with a much shorter cooking time. Note that the gravy may be thinner; you can thicken it with a cornstarch slurry after cooking.

Notes

This slow cooker pot roast has been a staple in my family for years, and I’m so excited to share it with you! I first discovered the magic of combining ranch, gravy, and Italian dressing mixes when I was looking for a way to elevate a simple chuck roast without spending hours in the kitchen. The result was an instant hit—tender, flavorful, and incredibly easy. Over time, I’ve refined the recipe, adding the searing step for deeper flavor and perfecting the vegetable layering technique. This dish is perfect for busy weeknights when you want a hearty, comforting meal without the fuss. I love serving it with crusty bread to soak up every last drop of the savory gravy. For a complete meal, pair it with a simple green salad or steamed green beans. Leftovers are fantastic in sandwiches or over mashed potatoes. I hope this recipe becomes a favorite in your home too—happy cooking!

Yummy Slow Cooker Pot Roast Recipe (Super Easy Family Dinner Idea!)

Yummy Slow Cooker Pot Roast Recipe (Super Easy Family Dinner Idea!)
Slow Cooker Meals • Easy Dinner Recipes • Pot Roast

⏱️ Prep: PT15M
🔥 Cook: PT480M
⏳ Total: PT495M
🍽️ Yield: 8 servings
⚡ Calories: 450 kcal
(284)
slow cooker pot roasteasy dinner recipescrockpot mealsfamily dinner ideasbeef roastcomfort foodquick weeknight dinners

This easy slow cooker pot roast recipe creates a tender chuck beef roast using just ranch seasoning, brown gravy mix, and dry Italian dressing. Simply add potatoes, carrots, and celery…

Ingredients

Toggle: Metric / US

Instructions

Step 1

First, prepare your chuck beef roast by patting it dry with paper towels. This is a crucial step because removing excess moisture ensures a beautiful brown crust when searing. Moisture is the enemy of browning; if the meat is wet, it will steam rather than sear, and you’ll miss out on that deep, savory flavor from the Maillard reaction. Season the roast generously on all sides with salt and freshly ground black pepper. Let it sit at room temperature for about 20 minutes while you prepare the other ingredients. This allows the meat to come up slightly in temperature, promoting even cooking.

Step 1 image
Step 2

Heat 2 tablespoons of olive oil in a large skillet or Dutch oven over medium-high heat until the oil shimmers. Carefully place the seasoned chuck roast in the hot pan. Sear the meat without moving it for 3-4 minutes per side, until a deep, golden-brown crust forms. Use tongs to turn the roast and sear all sides, including the ends. The crust is where the flavor lives; it adds complexity and richness to the final gravy. Once seared, transfer the roast to a plate and set aside. Do not clean the skillet—the browned bits (fond) stuck to the bottom are gold for flavor.

Step 2 image
Step 3

In a small bowl, combine the ranch seasoning mix, brown gravy mix, and dry Italian salad dressing mix. Stir to blend evenly. This trio of seasoning packets creates an incredibly savory, herby, and slightly tangy flavor profile that infuses the meat and vegetables as they cook. If you like a thicker gravy, you can add an extra tablespoon of brown gravy mix. Set the seasoning blend aside.

Step 3 image
Step 4

Place the halved baby potatoes, carrot chunks, and celery pieces into the bottom of a 6-quart or larger slow cooker. These sturdy root vegetables act as a natural rack for the beef, lifting it off the bottom so it cooks evenly and doesn’t braise in its own fat. The vegetables will absorb the savory juices and become incredibly tender and flavorful. Spread them in an even layer. If you’re using beef broth, pour it over the vegetables now to add extra moisture, ensuring the roast stays juicy during the long cooking time.

Step 5

Place the seared chuck roast on top of the vegetables in the slow cooker. Sprinkle the seasoning blend evenly over the roast and vegetables. Use your hands or a spoon to rub the seasoning into the meat a bit, making sure it coats the surface. The dry mixes will meld with the natural juices of the beef and the moisture from the vegetables to create a rich, savory gravy as the roast cooks. No need to add extra liquid beyond the broth—the slow cooker will trap steam and keep everything moist.

Step 6

Cover the slow cooker with its lid and cook on LOW for 8-10 hours or on HIGH for 4-6 hours. Low and slow is highly recommended for chuck roast because it allows the tough connective tissues (collagen) to break down into gelatin, resulting in fork-tender, melt-in-your-mouth meat. The internal temperature of the roast should reach at least 195°F (90°C) for ideal tenderness. Avoid opening the lid during cooking, as each peek releases heat and adds 20-30 minutes to the cooking time.

Step 7

About 30 minutes before serving, carefully remove the roast and vegetables from the slow cooker using tongs and a slotted spoon. Place them on a serving platter and tent loosely with foil to keep warm. The meat should be so tender that it falls apart easily. If it’s not shredding effortlessly, let it cook another 30 minutes. Meanwhile, you can thicken the cooking liquid into a luscious gravy. If you prefer a thicker gravy, whisk together 2 tablespoons cornstarch with 2 tablespoons cold water to make a slurry, then stir it into the hot liquid in the slow cooker. Turn the heat to HIGH, cover, and cook for 15-20 minutes until thickened. Alternatively, you can transfer the liquid to a saucepan and simmer on the stovetop until reduced to your desired consistency. Season the gravy with salt and pepper to taste.

Step 8

To serve, shred the beef into large chunks using two forks or slice it against the grain into thick pieces. Arrange the vegetables around the meat on a platter or serve them in a separate bowl. Ladle the rich gravy over the top. Garnish with fresh chopped parsley for a pop of color and freshness. This pot roast pairs beautifully with crusty bread, egg noodles, or mashed potatoes to soak up every last drop of gravy. Enjoy your comforting, home-cooked meal!

For best results

  • **Selecting the Right Cut:** Chuck roast is the gold standard for pot roast because it comes from the shoulder area, which gets a lot of exercise. This means it has plenty of connective tissue and marbling that breaks down during slow cooking, resulting in incredibly tender, juicy meat. Look for a roast with good marbling (white streaks of fat throughout). Avoid lean cuts like top round or eye of round, as they will become dry and tough even after long cooking. If you can't find chuck, brisket or bottom round are acceptable alternatives, but they may be slightly leaner. For best results, choose a 3-4 pound roast that is evenly thick so it cooks uniformly.
  • **Searing is Non-Negotiable:** Do not skip searing the roast before placing it in the slow cooker. This step develops deep, complex flavors through the Maillard reaction—the browning of proteins and sugars that creates hundreds of flavor compounds. The browned crust also adds color and texture to the final dish. For the best sear, make sure the meat is patted very dry, the oil is hot, and you don't crowd the pan. If your skillet is too small, sear in batches or use a larger pan. The fond (browned bits) left in the pan can be deglazed with a splash of beef broth and added to the slow cooker for extra flavor.
  • **Layer Vegetables Properly:** Placing the vegetables at the bottom of the slow cooker serves two purposes: it prevents the meat from sitting directly on the hot surface (which can cause it to overcook on one side) and it allows the vegetables to cook in the flavorful juices that drip down from the beef. Root vegetables like potatoes and carrots take longer to soften than the meat, so cutting them into uniform 2-inch chunks ensures they are perfectly tender when the roast is done. If you prefer your vegetables firmer, add them halfway through cooking. For this recipe, adding them at the start yields soft, gravy-soaked veggies that are irresistible.
  • **Low and Slow vs. High Heat:** Cooking on LOW for 8-10 hours is ideal for chuck roast. The low, gentle heat allows collagen to break down into gelatin slowly, giving the meat a silky, moist texture. Cooking on HIGH for 4-6 hours is possible in a pinch, but the results may be slightly less tender. If you're short on time, sear the roast well and use HIGH, but check for doneness at the 4-hour mark. The meat should shred easily with a fork. Remember that slow cookers vary in temperature; older models may run hotter. If your roast is done early, switch to the WARM setting until serving.
  • **Thickening the Gravy:** The cooking liquid from this pot roast is already flavorful but thin. To transform it into a rich, glossy gravy, you have several options. The easiest is to use a cornstarch slurry (equal parts cornstarch and cold water) stirred into the hot liquid and simmered until thickened. For a more traditional method, melt 2 tablespoons butter in a saucepan, whisk in 2 tablespoons all-purpose flour, cook for 1 minute, then gradually whisk in the strained cooking liquid. Cook until thickened. If you prefer a gluten-free option, use arrowroot powder or potato starch. Always whisk the slurry into the hot liquid off the heat first to prevent lumps, then return to heat.
  • **Make-Ahead and Storage:** This pot roast tastes even better the next day as the flavors meld. To make ahead, cook the roast as directed, let it cool completely, then refrigerate the meat and vegetables separately from the gravy. When ready to serve, reheat gently on the stovetop or in the slow cooker. The roast can be stored in an airtight container in the refrigerator for up to 4 days. It also freezes beautifully for up to 3 months. To freeze, shred the meat and pack it with some gravy in freezer-safe bags or containers. Thaw overnight in the fridge and reheat slowly to maintain moisture.
  • **Troubleshooting Dry Meat:** If your pot roast comes out dry, it's usually due to one of three reasons: the cut was too lean, it was overcooked, or the slow cooker lid was opened too often. Always choose a well-marbled chuck roast. If you're using a leaner cut, consider adding extra beef broth or a splash of Worcestershire sauce for moisture. Avoid lifting the lid during cooking—every time you do, heat escapes and extends cooking time. If the meat is already cooked but dry, shred it and toss it with some of the gravy to add moisture back. Serve immediately.
  • **Serving Suggestions:** While this pot roast is a complete meal with vegetables, you can elevate it with simple sides. Creamy mashed potatoes or buttery egg noodles are classic choices to soak up the gravy. A side of steamed green beans or a crisp garden salad adds freshness. For a low-carb option, serve over cauliflower mash or with roasted broccoli. Leftover shredded beef makes amazing sandwiches on toasted buns with provolone cheese and a drizzle of gravy—think French dip style. The possibilities are endless!

Variations

  • **Herb and Garlic Pot Roast:** For a more aromatic version, add 4-5 cloves of minced garlic and 2 sprigs each of fresh rosemary and thyme to the slow cooker along with the vegetables. You can also substitute the dry Italian dressing with a homemade blend of dried oregano, basil, and parsley. The fresh herbs infuse the meat and gravy with a garden-fresh flavor that brightens the richness of the beef. Garnish with additional fresh herbs before serving for a beautiful presentation.
  • **Spicy Southwest Pot Roast:** Give this dish a Tex-Mex twist by replacing the dry Italian dressing with a packet of taco seasoning. Add a drained can of diced tomatoes with green chilies (like Rotel) and a chopped jalapeño (seeds removed for less heat) to the slow cooker. Serve the shredded beef in warm tortillas with toppings like avocado, sour cream, and cilantro for incredible tacos. The smoky, spicy flavors pair perfectly with the tender beef and make for a fun weeknight dinner the whole family will love.
  • **Red Wine and Mushroom Pot Roast:** For a more sophisticated flavor profile, deglaze the searing pan with 1 cup of dry red wine (like Cabernet Sauvignon or Merlot) before adding the liquid to the slow cooker. Scrape up all the browned bits and pour the wine into the crockpot. Add 8 ounces of sliced cremini or baby bella mushrooms along with the vegetables. The wine adds depth and acidity that cuts through the richness, while the mushrooms become meaty and umami-packed. This version is perfect for a Sunday dinner or holiday meal.
  • **Healthier Light Pot Roast:** To reduce calories and fat, trim any visible fat from the chuck roast before searing. Use low-sodium beef broth and skip the extra salt in the seasoning blends. Increase the vegetable ratio by adding parsnips, turnips, or celery root along with the potatoes and carrots. You can also swap the potatoes for cauliflower florets added during the last hour of cooking for a lower-carb option. The gravy can be thickened with a cornstarch slurry instead of a flour-based roux to keep it gluten-free and lighter.
  • **Asian-Inspired Pot Roast:** Transform the flavor profile with soy sauce, ginger, and star anise. Replace the Italian dressing mix with 2 tablespoons soy sauce, 1 tablespoon hoisin sauce, and 1 teaspoon grated fresh ginger. Add 2 star anise pods and a cinnamon stick to the slow cooker. The result is a deeply savory, slightly sweet pot roast with an aromatic twist. Serve over steamed rice or noodles with a sprinkle of green onions and sesame seeds. This fusion version is a delightful change of pace from the classic.
  • **Creamy Mushroom Pot Roast:** For an ultra-rich, creamy gravy, stir in 1 can (10.5 oz) of condensed cream of mushroom soup along with the seasoning packets. Omit the beef broth or reduce it to 1/2 cup. The soup adds a velvety texture and earthy mushroom flavor that coats the beef and vegetables beautifully. You can also add fresh mushrooms for extra texture. This variation is incredibly comforting and pairs wonderfully with mashed potatoes or wide egg noodles.

Nutrition

  • Calories450 kcal
  • Total Fat22g
  • Saturated Fat8g
  • Cholesterol120mg
  • Sodium980mg
  • Total Carbohydrates25g
  • Dietary Fiber4g
  • Sugars5g
  • Protein35g

Common Questions

Can I use a different cut of beef for this pot roast?
Yes, but for best results, choose a well-marbled cut from the shoulder or chuck area. Good alternatives include bottom round roast, brisket, or even a rump roast. However, leaner cuts like top round or eye of round will become dry and tough because they lack the intramuscular fat and collagen needed for tender shredding. If using a leaner cut, consider adding extra broth and cooking on LOW for the full time, but check for doneness earlier. For guaranteed tenderness, stick with chuck roast.
Do I have to sear the roast before putting it in the slow cooker?
While you can technically skip searing, it’s highly recommended. Searing creates a deep, caramelized crust that adds layers of flavor through the Maillard reaction. It also gives the meat a beautiful color. Without searing, the pot roast will still be tender, but the flavor will be less complex and the gravy may lack depth. If you’re short on time, at least season the meat well and consider browning it under the broiler for a few minutes per side as a quick alternative.
Can I add other vegetables like onions or bell peppers?
Absolutely! Onions are a fantastic addition—add 1 large onion, cut into wedges, to the bottom of the slow cooker. They will caramelize and sweeten the gravy. Bell peppers (red, yellow, or green) can be added, but they may become very soft; add them during the last 2 hours of cooking if you prefer them with some texture. Other great options include parsnips, turnips, celery root, or even sweet potatoes. Just cut them into similar-sized chunks for even cooking.
How do I store leftovers and how long do they last?
Store leftover pot roast in an airtight container in the refrigerator for up to 4 days. Keep the meat, vegetables, and gravy together or separately as you prefer. The flavors will meld and often taste even better the next day. To reheat, gently warm the roast and gravy in a covered skillet or saucepan over low heat, adding a splash of beef broth if needed to restore moisture. You can also reheat in the microwave in 30-second intervals. For longer storage, freeze the shredded beef and gravy in freezer-safe bags or containers for up to 3 months. Thaw overnight in the refrigerator before reheating.
Can I cook this pot roast on HIGH instead of LOW?
Yes, you can cook on HIGH for 4-6 hours, but the meat may not be as fork-tender as when cooked on LOW. The low, slow method allows collagen to break down gradually, resulting in a more succulent texture. If you’re pressed for time, sear the roast well and cook on HIGH, checking for doneness after 4 hours. The meat should shred easily when done. If it’s still tough, continue cooking on HIGH for another 30-60 minutes. Keep in mind that vegetables may become mushy on HIGH, so consider adding them halfway through cooking.
Why is my gravy too salty?
The seasoning packets (ranch, gravy, Italian dressing) contain salt, so it’s important not to add extra salt until the end. If your gravy turns out too salty, you can balance it by adding a splash of apple cider vinegar or lemon juice to cut the saltiness. Another trick is to add a peeled raw potato to the gravy and simmer for 15 minutes; the potato will absorb some of the salt. Alternatively, dilute the gravy with unsalted beef broth or water. To prevent oversalting in the future, use low-sodium beef broth and taste before adding any additional salt.
Can I make this pot roast gluten-free?
Yes, but you need to check the labels of the seasoning packets. Many ranch, gravy, and Italian dressing mixes contain wheat flour or other gluten-containing ingredients. Look for certified gluten-free versions or make your own blends using gluten-free flours and spices. For the gravy, use cornstarch or arrowroot powder as a thickener instead of flour. Ensure all other ingredients, like beef broth, are gluten-free. With these substitutions, you can enjoy a delicious gluten-free pot roast without compromising on flavor.
What if I don't have a slow cooker? Can I use an Instant Pot or Dutch oven?
Absolutely! For an Instant Pot, use the sauté function to sear the roast, then add the vegetables, seasoning, and 1 cup beef broth. Pressure cook on HIGH for 60-90 minutes (depending on roast size), then allow natural pressure release for 15 minutes. For a Dutch oven, preheat the oven to 300°F (150°C). Sear the roast in the Dutch oven, add vegetables and broth, cover tightly, and braise in the oven for 3-4 hours until tender. Both methods yield excellent results. Adjust cooking times as needed and check for tenderness.

Notes

This Yummy Slow Cooker Pot Roast recipe holds a special place in my heart because it’s the dish my mother made every Sunday when I was growing up. The aroma of beef and herbs filling the house was the ultimate comfort signal, promising a hearty family meal around the table. Over the years, I’ve tweaked her original recipe to make it even easier for busy weeknights, and the addition of ranch and Italian dressing mixes was a game-changer—it simplifies the seasoning while delivering incredible depth. I love that this recipe is practically hands-off: just sear the meat, toss in the veggies, sprinkle the packets, and let the slow cooker work its magic. It’s perfect for those days when you want a home-cooked dinner without spending hours in the kitchen. One of my favorite things about this pot roast is how versatile it is. You can serve it as a classic platter with mashed potatoes, shred it for sandwiches, or even use the leftovers in tacos or shepherd’s pie. The gravy is like liquid gold—I always make extra to drizzle over everything. For a truly memorable meal, pair this roast with a bold red wine like a Zinfandel or Syrah, which complements the rich beef flavors. And don’t forget the crusty bread to sop up every last drop! I hope this recipe becomes a staple in your home as it has in mine. Happy slow cooking!