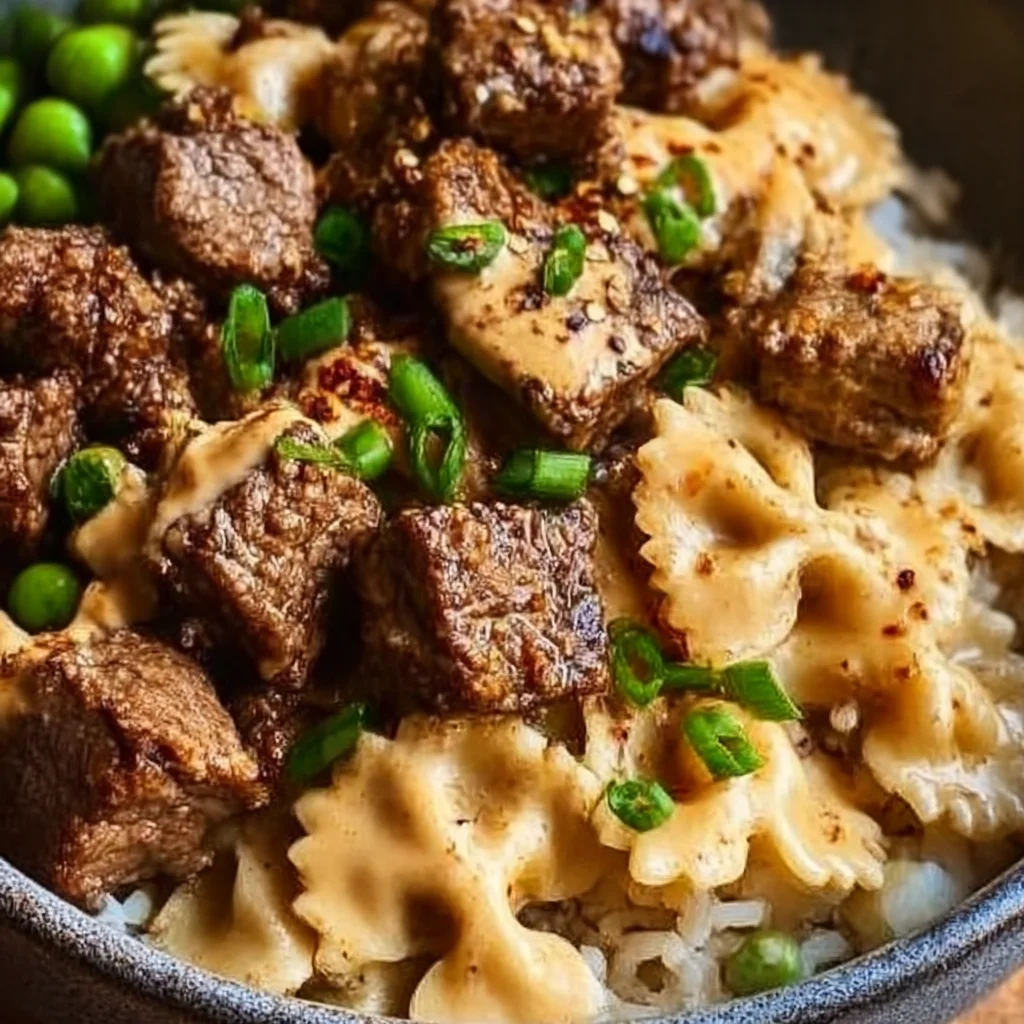
<

Creamy Pasta Side Dish

Creamy Pasta Side Dish
Easy Dinner Recipes • Quick Dinner Ideas • 30-Minute Meals

⏱️ Prep: PT10M
🔥 Cook: PT20M
⏳ Total: PT30M
🍽️ Yield: 6 servings
⚡ Calories: 385 kcal
(284)
creamy pasta side dishquick dinner ideaseasy weeknight dinners30-minute mealsbudget-friendly pastahigh-protein pasta

This creamy pasta side dish is the ultimate quick dinner idea for busy weeknights. Ready in 30 minutes, it's high-protein, budget-friendly, and delicious.

Ingredients

Toggle: Metric / US

Instructions

Step 1

Bring a large pot of salted water to a rolling boil. Add the elbow macaroni and cook according to package directions until al dente, typically 7-9 minutes. Stir occasionally to prevent sticking. Al dente pasta retains a slight firmness at the center, which is ideal because it will continue to cook slightly when combined with the hot sauce later. Overcooking leads to mushy pasta that can’t hold the creamy sauce. Once done, reserve about 1 cup of pasta water, then drain the pasta in a colander. Do not rinse; the residual starch on the pasta helps the sauce cling better. Set aside.

Step 1 image
Step 2

While the pasta cooks, start the sauce. In a large skillet or Dutch oven, melt the butter over medium heat. Add the minced garlic and sauté for 30 seconds until fragrant, stirring constantly to avoid burning. Burnt garlic can become bitter, so keep a close eye. Sprinkle the flour over the butter-garlic mixture and whisk continuously for 1-2 minutes until the flour is fully incorporated and the mixture turns a light golden color. This roux will thicken the sauce and give it a smooth, rich texture.

Step 2 image
Step 3

Gradually pour in the milk and heavy cream while whisking vigorously to prevent lumps. Continue whisking until the mixture is smooth and begins to thicken, about 3-4 minutes. The sauce should coat the back of a spoon when ready. If it’s too thick, you can thin it with a splash of reserved pasta water later. Lower the heat to medium-low and stir in the Dijon mustard, salt, pepper, and paprika if using. The mustard adds a subtle tang that balances the richness of the cream.

Step 4

Add the grated Parmesan and shredded mozzarella to the sauce, stirring gently until fully melted and smooth. The cheese should incorporate seamlessly, creating a luscious, velvety sauce. Avoid high heat at this stage to prevent the cheese from becoming grainy or separating. If the sauce seems too thick, stir in a tablespoon or two of reserved pasta water to achieve your desired consistency. Taste and adjust seasoning if needed.

Step 5

Add the drained pasta to the skillet with the cheese sauce, along with the diced bell peppers. Toss everything together using tongs or a spatula until every piece of pasta is evenly coated. The bell peppers add a refreshing crunch and a pop of color that contrasts beautifully with the creamy sauce. If the mixture seems dry, add more reserved pasta water a little at a time until it’s perfectly creamy.

Step 6

Remove from heat and stir in the fresh parsley. The parsley adds a fresh, herbaceous note that lifts the dish. Serve immediately as a side dish alongside grilled chicken, burgers, or your favorite protein. For best texture, enjoy while warm and creamy. If reheating leftovers, add a splash of milk to restore creaminess.

For best results

  • Choosing the right pasta shape is crucial for this creamy pasta side dish. Short, sturdy shapes like elbow macaroni, fusilli, or penne are ideal because they have nooks and crannies that trap the creamy sauce, ensuring every bite is flavorful. Long, thin pasta like spaghetti or linguine can work but won't hold the sauce as well, leading to a less cohesive dish. If you're feeling adventurous, try cavatappi or shells—they're fun and functional.
  • To achieve the silkiest sauce, always use freshly grated Parmesan cheese from a block rather than pre-shredded varieties. Pre-shredded cheese often contains anti-caking agents like cellulose or potato starch, which can prevent smooth melting and result in a gritty texture. Grating your own cheese takes an extra minute but guarantees a velvety, lump-free sauce that clings beautifully to the pasta.
  • Reserving pasta water before draining is a game-changer. The starchy water not only helps adjust the consistency of the sauce but also adds a subtle saltiness and helps emulsify the sauce, making it creamier. Start with a quarter cup and add more as needed. If you forget to reserve water, you can use a mixture of hot water and a pinch of salt as a substitute, though it won't have the same starch content.
  • For a richer flavor profile, let the sauce simmer gently for an extra minute after adding the cheese. This allows the flavors to meld and the sauce to thicken slightly. However, be careful not to overheat or boil the sauce, as high heat can cause the dairy to curdle. Keep the heat at medium-low and stir frequently. If you notice any separation, remove from heat immediately and whisk vigorously to bring it back together.
  • This creamy pasta side dish is incredibly versatile and can be prepped ahead for busy weeknights. Cook the pasta and prepare the sauce separately, then combine just before serving. Store the sauce in an airtight container in the refrigerator for up to 3 days. When reheating, warm the sauce gently on the stovetop with a splash of milk, then toss with freshly cooked pasta. This method prevents the pasta from absorbing too much sauce and becoming mushy.
  • If you want to add protein directly into the dish, consider stirring in shredded rotisserie chicken, crumbled cooked bacon, or sautéed shrimp at the end. This transforms the side dish into a complete one-pot meal. Adjust the seasoning accordingly, as meats often add saltiness. For a vegetarian boost, toss in a cup of steamed broccoli or peas for color and nutrients.

Variations

  • For a lighter version, swap the heavy cream for half-and-half or whole milk, and reduce the butter to 1 tablespoon. The sauce will be less rich but still creamy. You can also use Greek yogurt in place of some of the cream for a tangy, high-protein twist. Stir in the yogurt off the heat to prevent curdling. This variation cuts calories while maintaining a luscious texture.
  • Make it gluten-free by using gluten-free pasta (such as rice or corn-based) and substituting the all-purpose flour with a gluten-free all-purpose blend or cornstarch. For the roux, use 1 tablespoon of cornstarch mixed with 2 tablespoons of cold water to create a slurry, then whisk it into the milk mixture. The sauce will thicken just as well without gluten. Be sure to check that your Dijon mustard is gluten-free as well.
  • Add a spicy kick by incorporating 1/2 teaspoon of red pepper flakes or a diced jalapeño along with the garlic. You can also stir in 1 tablespoon of sriracha or chipotle paste for a smoky heat. The creaminess balances the spice beautifully, making it a crowd-pleaser for those who love a little heat. Serve with a side of cooling cucumber salad to complement the flavors.
  • For a cheesy herb variation, add 1/4 cup of chopped fresh basil or dill along with the parsley. You can also mix in 1/2 cup of grated Gruyère or Gouda for a more complex flavor profile. The nuttiness of Gruyère pairs wonderfully with the cream and Dijon mustard. This version feels extra indulgent and is perfect for special occasions or holiday dinners.
  • Turn this into a complete meal by adding protein and vegetables. Sauté 8 ounces of sliced mushrooms and 1 cup of chopped spinach after cooking the garlic, then proceed with the sauce. Stir in 2 cups of shredded rotisserie chicken and 1/2 cup of sun-dried tomatoes for a Mediterranean twist. This hearty version is satisfying enough to stand alone as a main course.

Nutrition

  • Calories385 kcal
  • Total Fat22g
  • Saturated Fat13g
  • Cholesterol70mg
  • Sodium520mg
  • Total Carbohydrates38g
  • Dietary Fiber2g
  • Sugars5g
  • Protein12g

Common Questions

Can I make this creamy pasta side dish ahead of time?
Yes, you can prepare the sauce and cook the pasta separately up to 3 days in advance. Store the sauce in an airtight container in the refrigerator and keep the pasta in a sealed bag. When ready to serve, reheat the sauce gently on the stovetop with a splash of milk to restore creaminess, then toss with the pasta. For best results, add the bell peppers and parsley fresh just before serving to maintain their crunch and color.
How do I prevent the sauce from becoming grainy?
Grainy sauce usually results from overheating or using pre-shredded cheese. Always grate cheese from a block and add it over low heat, stirring constantly until just melted. Avoid boiling the sauce after adding cheese. If the sauce does become grainy, remove it from heat immediately and whisk in a tablespoon of cold milk or cream to help smooth it out. Starting with a roux (butter and flour) also helps stabilize the emulsion.
Can I freeze this creamy pasta dish?
Freezing is not recommended because the creamy sauce can separate and become watery upon thawing. The pasta also tends to become mushy. If you have leftovers, store them in the refrigerator for up to 3 days. To reheat, add a splash of milk and warm gently on the stovetop or microwave in short bursts, stirring frequently. For best quality, enjoy fresh.
What can I use instead of heavy cream?
You can substitute heavy cream with half-and-half, whole milk, or evaporated milk for a lighter sauce. For a dairy-free option, use full-fat coconut milk or cashew cream. Keep in mind that the sauce will be less thick and rich. If using a thinner milk, you may need to increase the flour slightly or simmer longer to achieve the desired consistency.
How can I make this dish more budget-friendly?
This recipe is already budget-friendly, but you can save even more by using store-brand pasta, buying cheese in blocks and grating it yourself, and using frozen bell peppers if fresh are expensive. Skip the heavy cream and use whole milk with an extra tablespoon of butter. Also, serve it as a side dish to stretch pricier proteins like grilled chicken or burgers.
Is this recipe suitable for a gluten-free diet?
Yes, with simple substitutions. Use gluten-free pasta and replace the all-purpose flour with a gluten-free all-purpose blend or cornstarch. For a cornstarch slurry, mix 1 tablespoon cornstarch with 2 tablespoons cold water and whisk into the milk mixture after it simmers. Ensure your Dijon mustard and other ingredients are certified gluten-free. The taste and texture will be very similar.

Notes

This creamy pasta side dish has become a staple in my kitchen, and I’m so excited to share it with you. It all started one busy Tuesday evening when I needed a quick, comforting side to go with grilled chicken. I had a box of elbow macaroni, some cream, and a block of Parmesan—and this recipe was born. The first time I made it, my family devoured it, asking for seconds. That’s when I knew it was a keeper. Over the years, I’ve refined the technique: using a roux for stability, adding Dijon mustard for depth, and tossing in colorful bell peppers for crunch. Now, it’s my go-to for weeknight dinners, potlucks, and even holiday buffets. The beauty of this dish lies in its simplicity and adaptability. You can dress it up with fresh herbs, spice it up with chili flakes, or keep it classic. I love serving it alongside juicy burgers or a simple green salad. It’s also a fantastic base for adding leftover proteins—shredded rotisserie chicken, grilled shrimp, or crispy bacon take it to the next level. When I photograph this dish, I always use a shallow white bowl to show off the creamy sauce coating each piece of pasta. The bright red and green bell peppers add a pop of color that’s visually stunning. I hope this recipe becomes a favorite in your home too. Remember, cooking is about making it your own—adjust the seasonings, add your favorite veggies, and enjoy every creamy bite. Happy cooking!

Creamy Pasta Salad

Creamy Pasta Salad
Easy Dinner Recipes • Quick Weeknight Meals • Creamy Pasta Salad

⏱️ Prep: PT15M
🔥 Cook: PT10M
⏳ Total: PT25M
🍽️ Yield: 6 servings
⚡ Calories: 215 kcal
(284)
creamy pasta saladeasy dinner sidequick weeknight mealpasta salad recipesummer side dishpotluck recipebudget-friendly

This creamy pasta salad is a quick and easy dinner side dish perfect for weeknight meals. Made with a simple creamy dressing, tender pasta, and crunchy vegetables, it's a budget-friendly…

Ingredients

Toggle: Metric / US

Instructions

Step 1

Bring a large pot of generously salted water to a rolling boil. The water should taste like the sea—this is your only chance to season the pasta from within. Add 8 ounces of elbow macaroni and cook according to package directions until al dente, typically 7-9 minutes. Al dente means the pasta is tender but still has a slight bite at the center; this is crucial because the pasta will continue to soften slightly as it absorbs the creamy dressing later. Overcooking leads to mushy salad. Stir occasionally to prevent sticking. Once done, drain the pasta in a colander and rinse immediately under cold running water to stop the cooking process and remove excess starch. Shake the colander well to remove as much water as possible. Drizzle with a teaspoon of olive oil and toss gently to prevent the noodles from clumping together while they cool.

Step 1 image
Step 2

While the pasta cools, prepare the creamy dressing. In a medium mixing bowl, whisk together 1/2 cup heavy cream, 1/4 cup mayonnaise, 2 tablespoons apple cider vinegar, 1 tablespoon Dijon mustard, 1 teaspoon granulated sugar, 1/2 teaspoon salt, and 1/4 teaspoon black pepper. Whisk vigorously until the mixture is smooth, pale, and slightly thickened. The combination of cream and mayonnaise gives a rich, velvety base that clings beautifully to the pasta. The vinegar adds brightness and cuts through the richness, while the mustard provides a subtle tang and helps emulsify the dressing. Taste the dressing and adjust seasoning—it should be slightly more salty and tangy than you think, because it will mellow when mixed with the pasta and veggies. If you prefer a thinner dressing, add a tablespoon of milk; for a thicker, more decadent texture, add an extra tablespoon of mayonnaise.

Step 2 image
Step 3

Now it’s time to chop your vegetables. Dice 1/2 cup red bell pepper and 1/2 cup green bell pepper into small, uniform pieces about 1/4 inch in size. Uniformity ensures even distribution and a pleasant crunch in every bite. For the cucumber, halve it lengthwise, scoop out the watery seeds with a spoon (this prevents the salad from becoming watery), then dice into similar-sized pieces. Finely chop 1/4 cup red onion—if you find raw onion too pungent, soak the chopped onion in a bowl of ice water for 5 minutes, then drain; this tames the bite while keeping the crunch. Chop 2 tablespoons fresh parsley, stems removed. If you’re adding optional grilled chicken, dice it into bite-sized cubes. The chicken adds protein and turns this side dish into a satisfying main course.

Step 4

In a large mixing bowl, combine the cooled pasta, all the chopped vegetables, and the optional chicken or cheese if using. Pour the creamy dressing over the top. Using a rubber spatula or large spoon, gently fold everything together until every piece of pasta and vegetable is evenly coated. Be careful not to mash the pasta—fold rather than stir vigorously. The dressing should cling to the pasta, not pool at the bottom. If the salad looks dry, add a splash of milk or extra mayonnaise. Cover the bowl with plastic wrap and refrigerate for at least 30 minutes before serving. This chilling time allows the flavors to meld and the pasta to absorb the dressing, resulting in a more cohesive and flavorful salad.

Step 5

Before serving, give the pasta salad a good stir and taste for seasoning. You may want to add a pinch more salt or a squeeze of lemon juice to brighten it up. Transfer to a serving bowl and garnish with a sprinkle of fresh parsley and a few extra bell pepper dice for color. Serve chilled or at room temperature. This creamy pasta salad pairs beautifully with grilled chicken, burgers, or as a standalone light meal. Enjoy!

For best results

  • Choosing the right pasta shape matters more than you think. While elbow macaroni is classic, rotini, fusilli, or farfalle are excellent choices because their ridges and curves trap the creamy dressing, ensuring every bite is flavorful. Avoid long, thin pastas like spaghetti or angel hair, as they tend to clump and don't hold the dressing well. Cook the pasta to al dente—firm to the bite—because it will continue to soften as it sits in the dressing. Overcooked pasta becomes mushy and can break apart when stirred. Remember to rinse the pasta with cold water after draining to stop the cooking and remove surface starch, which prevents the salad from becoming gummy.
  • The key to a not-watery pasta salad is managing moisture from vegetables. Cucumbers, in particular, release a lot of water as they sit. To avoid a soggy salad, always remove the seeds from the cucumber by halving it lengthwise and scraping out the center with a spoon. Then dice the flesh and let it sit on a paper towel for a few minutes to absorb excess moisture. Similarly, if using tomatoes, remove the seeds and pulp before dicing. For bell peppers, there's no need to remove seeds beyond the core, but ensure they are dry. Also, make sure the pasta is thoroughly drained and cooled before mixing—any residual water will dilute the dressing.
  • Let the salad rest in the refrigerator for at least 30 minutes, but ideally 2 hours or even overnight. This resting period is crucial for flavor development. The pasta absorbs some of the dressing, becoming more flavorful, and the vegetables meld with the creamy base. However, if you plan to make this ahead, consider reserving a little dressing to stir in just before serving, as the pasta may absorb more than you'd like overnight. Also, keep in mind that the saltiness can intensify over time, so you may want to season lightly at first and adjust before serving.
  • For a dairy-free version, substitute the heavy cream with full-fat coconut milk (the canned kind, not the beverage) and use a vegan mayonnaise. The coconut milk adds a subtle sweetness that pairs surprisingly well with the tangy vinegar and mustard. If you're avoiding eggs, look for a vegan mayo made from aquafaba or avocado oil. The texture will still be creamy and satisfying. You can also use a dairy-free yogurt like plain coconut or soy yogurt for a lighter dressing. Just be aware that yogurt-based dressings tend to be thinner and may need a longer chilling time to thicken.
  • To add a protein boost and turn this side into a main dish, grilled chicken is a classic choice. But don't stop there—cooked shrimp, crumbled bacon, diced ham, or even canned tuna (drained and flaked) work wonderfully. For a vegetarian protein, add a can of drained chickpeas or white beans. If you're adding meat, make sure it's fully cooked and cooled before mixing to avoid warming the salad and promoting bacterial growth. The salad should remain chilled or at cool room temperature when served.
  • Storage and food safety: This creamy pasta salad can be stored in an airtight container in the refrigerator for up to 3 days. Because it contains dairy and mayonnaise, it should not be left at room temperature for more than 2 hours (1 hour if the ambient temperature is above 90°F). If you're taking it to a picnic or potluck, keep it in a cooler with ice packs. Do not freeze this salad—the dairy will separate and the texture will become grainy upon thawing. If you want to make it even more budget-friendly, use dried herbs instead of fresh, and substitute the heavy cream with whole milk plus a tablespoon of melted butter (though the texture will be less rich).

Variations

  • Mediterranean Twist: Replace the creamy dressing with a Greek yogurt-based dressing (1 cup plain Greek yogurt, 2 tablespoons lemon juice, 1 tablespoon olive oil, 1 clove minced garlic, salt, and pepper). Swap the bell peppers and cucumber for chopped Kalamata olives, sun-dried tomatoes, artichoke hearts, and crumbled feta cheese. Add a handful of fresh spinach or arugula for a peppery kick. This variation is lighter, higher in protein, and bursting with Mediterranean flavors. Serve it alongside grilled lamb or fish for a complete meal.
  • Southwest Fiesta: Transform the salad with a smoky, spicy twist. Use a dressing made from 1/2 cup sour cream, 1/4 cup mayonnaise, 2 tablespoons lime juice, 1 teaspoon chili powder, 1/2 teaspoon cumin, and a pinch of cayenne. Replace the bell peppers with fire-roasted corn (fresh or canned), black beans (rinsed), diced avocado, and chopped cilantro. Top with crushed tortilla chips for crunch. This version pairs perfectly with tacos, fajitas, or grilled chicken. It's also excellent as a filling for stuffed bell peppers.
  • Caprese-Inspired: For a fresh, Italian-style salad, use a simple vinaigrette instead of creamy dressing: 1/4 cup olive oil, 2 tablespoons balsamic vinegar, 1 teaspoon Dijon mustard, salt, and pepper. Add halved cherry tomatoes, fresh mozzarella pearls (or diced fresh mozzarella), and fresh basil leaves torn into pieces. Omit the bell peppers and cucumber. This variation is best served at room temperature and is a fantastic side for grilled meats or as a light lunch on its own. The balsamic glaze drizzled on top adds a beautiful sweet-tart finish.
  • Vegan Creamy Pasta Salad: Create a completely plant-based version by using vegan mayonnaise (or blending soaked cashews with water, lemon juice, and apple cider vinegar for a homemade cream). Use a plant-based cream alternative like oat cream or coconut cream. Add colorful vegetables like shredded carrots, snow peas, and cherry tomatoes. For extra protein, toss in some edamame or tofu cubes. This version is just as creamy and satisfying as the original, and it's perfect for vegan gatherings or those with dairy sensitivities.
  • Protein-Packed Power Salad: Boost the protein content significantly by using high-protein pasta (like chickpea or lentil pasta) and adding 1 cup of cooked quinoa or farro. Include a variety of protein sources: diced grilled chicken, hard-boiled eggs, and chickpeas. The dressing can be made with Greek yogurt and a scoop of unflavored protein powder (optional). This hearty salad will keep you full for hours and is ideal for post-workout meals or busy weeknight dinners. Serve it in a large bowl with a side of whole-grain bread.

Nutrition

  • Calories215 kcal
  • Total Fat12g
  • Saturated Fat7g
  • Cholesterol45mg
  • Sodium180mg
  • Total Carbohydrates26g
  • Dietary Fiber1g
  • Sugars17g
  • Protein3g

Common Questions

Can I make this creamy pasta salad ahead of time?
Absolutely! In fact, this salad tastes even better after a few hours in the refrigerator because the flavors have time to meld. You can prepare it up to 24 hours in advance. However, if you’re making it more than a few hours ahead, consider reserving about 1/4 cup of the dressing to stir in just before serving, as the pasta may absorb some of the liquid overnight, making the salad drier. Also, if you’re adding fresh herbs like parsley, add them right before serving for the brightest color and flavor.
How long does creamy pasta salad last in the fridge?
Stored in an airtight container, creamy pasta salad will keep in the refrigerator for 3 to 4 days. Because it contains mayonnaise and dairy, it’s important to keep it chilled at or below 40°F. Discard any salad that has been left out at room temperature for more than 2 hours (1 hour if the temperature is above 90°F). The texture may become slightly softer over time, but the flavor will remain good. Do not freeze this salad, as the dressing will separate and become watery upon thawing.
Can I use a different type of pasta?
Yes, you can use any short pasta shape you like. Good options include rotini, fusilli, farfalle, penne, or even small shells. The key is to choose shapes that have nooks and crannies to hold the creamy dressing. Avoid long, thin pastas like spaghetti or angel hair, as they tend to clump and don’t mix well with the chunky vegetables. Also, keep in mind that different pasta shapes have different cooking times, so always cook to al dente according to the package directions.
How can I make this salad healthier?
There are several easy swaps to lighten up this creamy pasta salad. Use whole-wheat or legume-based pasta for added fiber and protein. Replace the heavy cream with plain Greek yogurt or a combination of yogurt and light mayonnaise. You can also reduce the amount of mayonnaise and use more yogurt, or substitute half the mayo with mashed avocado for a nutrient boost. Load up on extra vegetables like cherry tomatoes, shredded carrots, or spinach. For a lower-calorie dressing, try a vinaigrette made with olive oil and vinegar. The salad will still be delicious and satisfying.
Can I add cheese to this pasta salad?
Yes, cheese is a wonderful addition. Shredded cheddar, crumbled feta, grated Parmesan, or small mozzarella pearls all work beautifully. If you add cheese, reduce the salt in the dressing slightly because many cheeses are salty. For the best texture, fold the cheese in gently after the dressing is mixed to avoid breaking it apart. If you’re making the salad ahead, consider adding the cheese just before serving to maintain its texture and appearance.
What should I serve with creamy pasta salad?
This versatile side dish pairs well with grilled meats like chicken, burgers, steak, or sausages. It’s also a great companion for barbecue favorites such as ribs, pulled pork, or grilled vegetables. For a lighter meal, serve it alongside a green salad or as a filling for wraps. It’s also perfect for potlucks, picnics, and summer cookouts. If you’re adding protein like grilled chicken or chickpeas, it can easily become a main course.
Why is my pasta salad watery?
A watery pasta salad is usually caused by excess moisture from the vegetables or from not draining the pasta thoroughly. To prevent this, make sure to cook the pasta al dente and rinse it with cold water after draining. Shake the colander well to remove excess water, and consider patting the pasta dry with a clean kitchen towel if it seems wet. For cucumbers, always remove the seeds before dicing. If using tomatoes, remove the seeds and pulp. Additionally, avoid adding the dressing while the pasta is still warm, as heat can cause the dressing to thin out. If your salad does become watery, you can try stirring in a tablespoon of mayonnaise or a sprinkle of grated Parmesan to thicken it, but prevention is best.
Can I use frozen vegetables?
Fresh vegetables are recommended for the best crunch and flavor, but you can use frozen if necessary. If using frozen bell peppers or peas, thaw them completely and pat them dry with paper towels to remove excess moisture. Frozen vegetables tend to release more water, so be extra diligent about drying. Avoid frozen cucumbers or tomatoes, as they become mushy when thawed. For a quick option, a frozen mixed vegetable blend (like peas, carrots, and corn) can work, but the texture will be softer.

Notes

This creamy pasta salad recipe holds a special place in my heart because it reminds me of summers spent at my grandmother’s house. She would always have a big bowl of this salad chilling in the refrigerator, ready for impromptu family gatherings or lazy afternoons by the pool. Her version was simple—just pasta, store-bought dressing, and a handful of frozen peas—but it was always the first dish to disappear at potlucks. Over the years, I’ve refined the recipe to include a homemade creamy dressing that is tangy, rich, and perfectly balanced, along with fresh, crunchy vegetables that add color and texture. The beauty of this salad is its adaptability: you can use whatever vegetables you have on hand, swap the protein, or adjust the dressing to suit your dietary needs. It’s a forgiving recipe that rewards creativity. I love serving this at summer barbecues alongside juicy grilled burgers or smoky chicken. The cool, creamy salad contrasts beautifully with the hot, charred meat. It’s also a lifesaver for busy weeknights—you can make it in the morning and have a delicious side ready to go when you get home. The key to a great pasta salad is not to overcomplicate it. Let the fresh ingredients shine, and don’t be afraid to taste and adjust the seasoning. A little extra vinegar or a pinch of salt can make all the difference. I hope this recipe becomes a staple in your home as it has in mine. Happy cooking!

Chicken Caesar Pasta Salad

Chicken Caesar Pasta Salad
Chicken Caesar Pasta Salad • Easy Dinner Recipes • Quick Weeknight Meals

⏱️ Prep: PT15M
🔥 Cook: PT15M
⏳ Total: PT30M
🍽️ Yield: 6 servings
⚡ Calories: 485 kcal
(284)
chicken caesar pasta saladeasy dinner recipesquick dinner ideashigh protein dinner30 minute mealssummer picnic foodpasta salad recipeweeknight dinner

This chicken Caesar pasta salad is an easy and healthy meal option for quick dinner ideas or summer picnic food. Made with fresh ingredients like chicken, pasta, and classic Caesar…

Ingredients

Toggle: Metric / US

Instructions

Step 1

Bring a large pot of generously salted water to a rolling boil. Add the 8 oz of rotini or penne pasta and cook according to package directions until al dente — typically 8-10 minutes. Stir occasionally to prevent sticking. Al dente pasta (firm to the bite) is essential here because it will continue to absorb dressing and soften slightly as it sits. Overcooked pasta becomes mushy and loses its structural integrity in the salad. Once done, reserve about 1/2 cup of pasta water (it can help thin the dressing if needed), then drain the pasta in a colander and rinse briefly with cool water to stop the cooking process. Set aside to cool completely. You can even toss it with a tiny drizzle of olive oil to keep the strands separate.

Step 1 image
Step 2

While the pasta cooks, prepare the chicken. Pat the two chicken breasts dry with paper towels — this step is crucial for achieving a beautiful golden sear. Season both sides evenly with 1 teaspoon garlic powder, 1/2 teaspoon salt, and 1/4 teaspoon black pepper. Heat 1 tablespoon olive oil in a large skillet over medium-high heat until shimmering. Carefully place the chicken breasts in the hot skillet. Cook without moving them for 5-6 minutes, until the bottom is deep golden brown and releases easily from the pan. Flip and cook another 5-6 minutes, until the internal temperature reaches 165°F (74°C) on an instant-read thermometer. The chicken should be juicy and tender, not dry. Transfer to a cutting board and let rest for 5 minutes — this allows the juices to redistribute. Then slice against the grain into thin strips or bite-sized cubes.

Step 2 image
Step 3

In a large mixing bowl, combine the cooled pasta, sliced chicken, and 1/2 cup Caesar dressing. Toss gently but thoroughly until everything is evenly coated. If the salad seems too thick, add a tablespoon of reserved pasta water at a time until you reach your desired consistency. The dressing should cling to every piece of pasta and chicken. Now add 1/4 cup grated Parmesan cheese and toss again. The Parmesan adds a salty, nutty depth that amplifies the Caesar flavor. At this point, you can cover and refrigerate the pasta mixture for up to 2 days if making ahead — just wait to add the lettuce and croutons until serving.

Step 4

Just before serving, fold in the 4 cups of chopped romaine lettuce. Romaine is the classic Caesar choice for its crisp texture and sturdy leaves that hold up well to dressing without wilting immediately. Toss until the lettuce is lightly coated but still crunchy. Finally, add the 1 cup of croutons and give it a gentle stir. Croutons should remain crunchy, so don’t overmix. Transfer to a serving platter or individual bowls. Garnish with shaved Parmesan and lemon wedges if desired. Serve immediately for the best texture contrast between creamy pasta, tender chicken, crunchy lettuce, and crispy croutons. Leftovers can be stored in an airtight container in the fridge for up to 2 days, but note that the croutons will soften.

For best results

  • For the best texture, cook the pasta to al dente and rinse it under cold water to stop the cooking process immediately. This prevents the pasta from becoming mushy when combined with the dressing. If you prefer a warmer salad, skip the rinse and let the pasta cool naturally while you cook the chicken — just toss with a little olive oil to prevent sticking.
  • Season the chicken generously and don't skip the resting step. Resting the cooked chicken for 5 minutes before slicing allows the juices to redistribute throughout the meat, resulting in tender, moist strips instead of dry, stringy pieces. Use a meat thermometer to ensure perfect doneness — 165°F (74°C) is the safe internal temperature for poultry.
  • Use a high-quality Caesar dressing for the best flavor. Store-bought dressings vary widely — look for one that lists Parmesan cheese, anchovy paste, and garlic as primary ingredients. Alternatively, make your own with mayonnaise, lemon juice, Dijon mustard, Worcestershire sauce, minced garlic, and anchovy paste for a fresher, more authentic taste.
  • Add the lettuce and croutons at the last possible moment to maintain their crunch. If you're meal-prepping, store the dressed pasta and chicken mixture separately from the lettuce and croutons. Combine everything just before serving. The salad will stay fresh and crunchy for up to 2 days if stored properly.
  • To turn this into a complete meal with extra protein, add a handful of cherry tomatoes, sliced avocado, or hard-boiled eggs. The healthy fats from avocado and eggs complement the Caesar dressing beautifully and boost satiety. You can also swap the chicken for grilled shrimp or tofu for variety.
  • For a lighter version, use a Greek yogurt-based Caesar dressing or reduce the amount of dressing and add a squeeze of lemon juice for brightness. You can also use whole wheat or chickpea pasta to increase fiber and protein content. The salad remains delicious and satisfying with these simple swaps.

Variations

  • Grilled Shrimp Caesar Pasta Salad: Replace the chicken with 1 lb of peeled and deveined shrimp. Toss the shrimp with olive oil, garlic powder, salt, and pepper, then grill or pan-sear for 2-3 minutes per side until pink and opaque. The shrimp adds a sweet, briny flavor that pairs wonderfully with Caesar dressing. Follow the same assembly steps, but reduce the cooking time for the protein.
  • Vegetarian Caesar Pasta Salad: Omit the chicken and add 1 can (15 oz) of chickpeas, drained and roasted until crispy. Toss chickpeas with olive oil and smoked paprika, then bake at 400°F (200°C) for 20 minutes. Alternatively, use grilled halloumi cheese or crispy tofu cubes. The chickpeas provide plant-based protein and a satisfying crunch that mimics croutons.
  • Keto/Low-Carb Caesar Pasta Salad: Swap the pasta for zucchini noodles (zoodles) or hearts of palm pasta. Spiralize 2 medium zucchinis and lightly sauté them for 2 minutes to remove excess moisture. Combine with the chicken, dressing, and Parmesan. Skip the croutons or use pork rinds for crunch. This version is low in carbs but still packed with flavor.
  • Spicy Cajun Chicken Caesar Pasta Salad: Season the chicken with a Cajun spice blend (paprika, cayenne, garlic powder, onion powder, thyme, oregano) instead of the simple garlic powder. The smoky heat adds a Southern twist. You can also add sliced red bell peppers and red onion for extra color and crunch. Use a chipotle Caesar dressing if available.
  • Mediterranean Caesar Pasta Salad: Add 1/2 cup of halved Kalamata olives, 1/2 cup of crumbled feta cheese, and 1/4 cup of chopped sun-dried tomatoes. Replace the romaine with a mix of arugula and spinach. The briny olives and tangy feta complement the creamy Caesar dressing. This variation is perfect for summer picnics or potlucks.

Nutrition

  • Calories485 kcal
  • Total Fat22g
  • Saturated Fat5g
  • Cholesterol85mg
  • Sodium720mg
  • Total Carbohydrates38g
  • Dietary Fiber3g
  • Sugars4g
  • Protein34g

Common Questions

Can I make this chicken Caesar pasta salad ahead of time?
Yes, you can prepare most components in advance. Cook the pasta and chicken, chop the lettuce, and make or buy the dressing up to 2 days ahead. Store the pasta and chicken tossed with dressing in the refrigerator in an airtight container. Keep the lettuce and croutons separate. When ready to serve, simply toss everything together. The salad is best consumed within 2 days for optimal texture.
How do I store leftovers?
Store leftovers in an airtight container in the refrigerator for up to 2 days. Note that the lettuce will wilt and the croutons will soften over time, so it’s best to add those fresh if you anticipate leftovers. If the salad seems dry after refrigeration, add a splash of Caesar dressing or a squeeze of lemon juice to revive it.
Can I use a different type of pasta?
Absolutely! Any short pasta shape works well — rotini, penne, farfalle, bowties, or even macaroni. The key is to cook it al dente so it holds up to the dressing. Avoid long pasta like spaghetti, as it can be difficult to mix with the other ingredients. Gluten-free pasta also works; just be careful not to overcook it.
Is this recipe gluten-free?
As written, this recipe contains gluten from the pasta and croutons. To make it gluten-free, use gluten-free pasta (such as brown rice or chickpea pasta) and gluten-free croutons. Check your Caesar dressing label as some brands may contain gluten. Most classic Caesar dressings are gluten-free, but it’s always best to verify.
Can I use rotisserie chicken to save time?
Yes, rotisserie chicken is a fantastic shortcut. Simply shred or chop the meat from a store-bought rotisserie chicken and add it to the salad. This reduces the prep time even further, making the dish come together in about 15 minutes. Just be aware that rotisserie chicken can be higher in sodium, so adjust the added salt accordingly.
What can I use instead of Caesar dressing?
If you don’t have Caesar dressing, you can substitute with a creamy Italian dressing, ranch dressing, or a homemade vinaigrette made with olive oil, lemon juice, Dijon mustard, and grated Parmesan. For a healthier option, use plain Greek yogurt mixed with lemon juice, garlic, and anchovy paste. The flavor will differ but still be delicious.
How can I make this recipe dairy-free?
To make dairy-free, use a vegan Caesar dressing (many are available in stores or you can make one with cashews, lemon, and capers). Omit the Parmesan cheese or use a dairy-free Parmesan alternative. Check that your croutons are dairy-free as well. The salad will still be creamy and flavorful without the dairy.

Notes

This Chicken Caesar Pasta Salad is one of those recipes that feels like a warm hug on a busy weeknight. I first created it when I needed a quick dinner that could also double as lunch for the next day. The combination of tender chicken, al dente pasta, crunchy romaine, and creamy Caesar dressing is simply irresistible. I love how versatile it is — you can serve it warm, cold, or at room temperature, making it perfect for picnics, potlucks, or meal prep. The key to this recipe is balance: not too much dressing, not too little, and the pasta should be the star. I recommend using a good quality Caesar dressing — my favorite is a homemade one with anchovy paste, but a store-bought brand like Ken’s or Cardini’s works beautifully. If you’re feeling adventurous, add some grilled artichoke hearts or roasted red peppers for extra flavor. This salad is also a great way to use up leftover chicken or even turkey after the holidays. I hope this becomes a staple in your kitchen as much as it is in mine. Happy cooking!

Easy Chicken Caesar Pasta Salad Recipe

Easy Chicken Caesar Pasta Salad Recipe
Easy Dinner Recipes • Quick Weeknight Meals • 30-Minute High-Protein Dinners

⏱️ Prep: PT15M
🔥 Cook: PT15M
⏳ Total: PT30M
🍽️ Yield: 4 servings
⚡ Calories: 485 kcal
(284)
chicken caesar pasta saladeasy dinner recipesquick weeknight mealshigh-protein dinner30-minute mealsummer picnic foodbudget-friendlymeal prep

This easy chicken Caesar pasta salad recipe is a quick and healthy meal option perfect for easy weeknight dinners or summer picnic food ideas. Ready in 30 minutes!

Ingredients

Toggle: Metric / US

Instructions

Step 1

Bring a large pot of generously salted water to a rolling boil. Add the pasta and cook according to package directions until al dente—usually 8-10 minutes for most shapes. Al dente pasta is firm to the bite, which is crucial because it will continue to absorb dressing as it sits, and you don’t want it to become mushy. Once cooked, drain the pasta in a colander and rinse briefly with cool water to stop the cooking process and remove excess starch. Shake off as much water as possible, then set aside to cool slightly. Tossing with a drizzle of olive oil can prevent sticking if you’re not dressing it immediately.

Step 1 image
Step 2

While the pasta cooks, prepare the chicken. Pat the chicken breasts dry with paper towels—this is essential for achieving a beautiful golden-brown sear. Season both sides evenly with olive oil, garlic powder, paprika, salt, and pepper. Rub the spices in so they adhere. Heat a large skillet over medium-high heat until hot (a drop of water should sizzle). Place the chicken in the skillet and cook for 5-7 minutes per side, without moving it, until the internal temperature reaches 165°F (74°C) and the exterior is deeply golden and crispy. The chicken should feel firm to the touch and release easily from the pan. Transfer to a cutting board and let rest for 5 minutes—this redistributes the juices so the meat stays moist. Then slice against the grain into thin strips or bite-sized cubes.

Step 2 image
Step 3

In a large mixing bowl, combine the cooled pasta, chopped romaine lettuce, shaved Parmesan cheese, and croutons. The romaine should be dry (use a salad spinner if needed) to prevent diluting the dressing. Pour the Caesar dressing over the top and toss gently but thoroughly with tongs or two large spoons until every ingredient is evenly coated. You want each piece of pasta and lettuce to glisten with dressing. Taste and adjust seasoning with extra salt, pepper, or a squeeze of lemon if you like more tang. Finally, add the sliced chicken and fold it in carefully so it stays in nice pieces.

Step 4

Serve immediately in chilled bowls for a refreshing crunch, or cover and refrigerate for later. The salad can be stored in an airtight container in the fridge for up to 3 days. If meal prepping, consider keeping the croutons and dressing separate until ready to eat to maintain maximum crunch. Garnish with extra Parmesan and a crack of black pepper just before serving.

For best results

  • For the best texture, cook your pasta one minute less than the package suggests. This is because the pasta will continue to absorb moisture from the dressing as it sits, and starting with a firmer bite ensures it won't turn mushy by the next day. If you're meal prepping, rinse the pasta with cold water after draining to stop cooking and remove surface starch, then toss with a tiny bit of olive oil to keep it from clumping.
  • Achieve perfectly cooked chicken every time by using a meat thermometer. Insert it into the thickest part of the breast; you're looking for 165°F (74°C). Letting the chicken rest for 5-10 minutes after cooking is non-negotiable—it allows the juices to redistribute so every slice is moist and flavorful. If you slice too soon, the juices will run out onto the cutting board, leaving dry meat.
  • The choice of Caesar dressing can make or break this salad. For a rich, authentic flavor, make your own with anchovy paste, garlic, Dijon mustard, lemon juice, egg yolk, and olive oil. If using store-bought, look for a brand that uses real Parmesan and has a creamy, not watery, consistency. You can also lighten it up by mixing half Caesar dressing with plain Greek yogurt—this adds protein and tang while reducing calories.
  • Romaine lettuce is the classic choice for Caesar salads because of its sturdy crunch and ability to hold up to dressing without wilting quickly. However, you can substitute or mix in kale, which is even heartier and adds extra nutrients. If using kale, massage it with a little olive oil and lemon juice before adding the dressing to soften its tough fibers.
  • Croutons are easy to make from stale bread. Cut day-old bread into cubes, toss with olive oil, garlic powder, and dried oregano, then bake at 375°F (190°C) for 10-12 minutes until golden and crunchy. Homemade croutons stay crisp longer than store-bought and let you control the seasoning. Store them in an airtight container at room temperature for up to a week.

Variations

  • Make it vegetarian by omitting the chicken and adding extra protein like chickpeas or white beans. For a vegan version, use a vegan Caesar dressing (cashew-based works wonderfully), replace Parmesan with nutritional yeast or vegan Parmesan, and use vegan croutons. The pasta and lettuce remain the same, making it a satisfying plant-based meal.
  • Swap the chicken for grilled shrimp, salmon, or steak for a surf-and-turf twist. Shrimp cooks in just 2-3 minutes per side, making this even faster. For a smoky flavor, grill the chicken or shrimp on an outdoor grill or a grill pan. The char adds a wonderful depth that complements the creamy dressing.
  • Add extra vegetables to boost nutrition and color. Cherry tomatoes, cucumber slices, roasted red peppers, or avocado chunks all pair beautifully with Caesar flavors. Avocado adds healthy fats and creaminess, allowing you to use less dressing. You can also throw in some blanched broccoli or asparagus for a seasonal touch.
  • Transform this into a wrap or sandwich by using the salad as a filling for large tortillas or crusty bread. Simply spoon the salad onto a wrap, roll tightly, and slice in half. It's perfect for packed lunches or picnics. For a low-carb option, serve the salad over a bed of spinach or in lettuce cups instead of pasta.

Nutrition

  • Calories485 kcal
  • Total Fat24g
  • Saturated Fat6g
  • Cholesterol85mg
  • Sodium720mg
  • Total Carbohydrates38g
  • Dietary Fiber3g
  • Sugars4g
  • Protein32g

Common Questions

Can I make this chicken Caesar pasta salad ahead of time?
Yes, this salad is great for meal prep! Prepare the pasta, chicken, and dressing separately, then combine when ready to eat. If you mix everything together, the croutons will lose their crunch and the lettuce may wilt after a day. For best results, store components in separate containers: cooked pasta and chicken together, dressing in a small jar, croutons in a ziplock bag, and lettuce in a container lined with paper towels. Assemble right before serving.
How long does chicken Caesar pasta salad last in the fridge?
If stored properly in an airtight container, the fully assembled salad will keep for 2-3 days. However, the croutons will soften significantly after the first day. The lettuce may also become less crisp. To extend freshness, keep the dressing and croutons separate and add them only to the portion you’re eating. The cooked chicken and pasta alone can last up to 4 days in the fridge.
Can I use a different type of pasta?
Absolutely! This recipe is very versatile. Short pasta shapes like penne, rotini, farfalle, or fusilli work best because they hold onto the dressing and mix well with other ingredients. You can also use gluten-free pasta if needed—just cook it according to package directions and be careful not to overcook, as gluten-free pasta can become mushy quickly.
Is there a way to reduce the calories in this dish?
Yes, several swaps can lighten it up. Use whole wheat or chickpea pasta for extra fiber and protein. Replace half the Caesar dressing with plain Greek yogurt to cut fat and add protein. Use grilled chicken breast without skin, and reduce the amount of Parmesan cheese. You can also add more lettuce and vegetables to bulk up the volume without many calories.
Can I use rotisserie chicken to save time?
Definitely! Rotisserie chicken is a fantastic shortcut. Simply shred or chop the meat from a store-bought rotisserie chicken, discarding the skin if you prefer. This reduces prep time to almost nothing. Just be aware that rotisserie chicken is often more seasoned and salty, so you may want to adjust the salt in the dressing accordingly.
What can I substitute for Caesar dressing?
If you don’t have Caesar dressing, you can make a quick version by mixing 1/2 cup mayonnaise, 2 tablespoons lemon juice, 1 teaspoon Dijon mustard, 1 minced garlic clove, and 2 tablespoons grated Parmesan. For a lighter option, use Greek yogurt as the base. Alternatively, a simple vinaigrette (olive oil, lemon juice, garlic, and Parmesan) works well if you prefer a tangier, less creamy salad.

Notes

This Easy Chicken Caesar Pasta Salad has quickly become one of my go-to meals for busy weeknights, and I’m thrilled to share it with you. I first created this recipe on a scorching summer evening when I wanted something hearty but not heavy, something that could be thrown together without heating up the whole kitchen. The combination of tender chicken, al dente pasta, crisp romaine, and creamy Caesar dressing is pure comfort, but with a fresh twist that makes it feel light and satisfying. I’ve always loved the classic Caesar salad, but adding pasta turns it into a complete meal that keeps you full for hours—perfect for fueling a busy day or for a picnic where you need something that travels well. The inspiration came from my love of one-bowl meals: everything comes together in a single mixing bowl, which means less cleanup and more time to enjoy dinner with family. I’ve tested this recipe with different pastas, dressings, and add-ins, and this version strikes the perfect balance of flavors and textures. The garlic and paprika on the chicken give it a subtle warmth that complements the tangy dressing, while the croutons add that indispensable crunch. For serving, I love to present it in a large wooden bowl with extra Parmesan shaved on top and a sprinkle of black pepper. It’s also fantastic for meal prep—just keep the components separate and assemble as needed. Whether you’re looking for a quick dinner, a picnic centerpiece, or a high-protein lunch, this chicken Caesar pasta salad delivers every time. I hope it becomes a staple in your kitchen as much as it has in mine. Happy cooking!

Low Carb Chicken Broccoli Bake

Low Carb Chicken Broccoli Bake
Low Carb Casserole • Easy Dinner Recipe • High Protein Comfort Food

⏱️ Prep: PT15M
🔥 Cook: PT25M
🍞 Baking: PT20M
⏳ Total: PT60M
🍽️ Yield: 6 servings
⚡ Calories: 385 kcal
(284)
low carbchicken casserolebroccoli bakehigh proteinhealthy dinnereasy weeknight mealketo friendlygluten free

This low carb chicken broccoli bake is an easy dinner recipe perfect for healthy weeknights, combining tender chicken and broccoli in a creamy cheese sauce. High protein, low carb comfort…

Ingredients

Toggle: Metric / US

Instructions

Step 1

Preheat your oven to 375°F (190°C). Grease a 9×13-inch baking dish with butter or non-stick spray. This ensures the casserole won’t stick and makes cleanup a breeze. While the oven heats, season the chicken pieces generously with salt, pepper, garlic powder, and onion powder. Let them sit for a few minutes to absorb the flavors. The seasoning will form a flavorful crust during searing.

Step 1 image
Step 2

In a large skillet over medium-high heat, add the olive oil. Once shimmering, add the seasoned chicken pieces in a single layer (work in batches if needed to avoid overcrowding). Sear for 4-5 minutes per side until golden brown and cooked through (internal temperature 165°F/74°C). Use a meat thermometer for accuracy. The browning adds deep savory notes through the Maillard reaction. Transfer chicken to a plate and set aside.

Step 2 image
Step 3

In the same skillet, reduce heat to medium. Add the diced onion and cook for 3-4 minutes until translucent, scraping up any browned bits from the bottom. Add the minced garlic and cook for 30 seconds until fragrant. This step builds the flavor foundation for the sauce.

Step 4

Add the broccoli florets to the skillet and cook for 2-3 minutes, stirring occasionally, until bright green and slightly tender. The broccoli will continue to cook in the oven, so avoid overcooking. Season with a pinch of salt and pepper. You can blanch the broccoli beforehand if you prefer a softer texture, but this quick sauté keeps it vibrant and crisp.

Step 4 image
Step 5

Pour the heavy cream into the skillet and bring to a gentle simmer. Add the softened cream cheese and stir until completely melted and smooth. The cream cheese thickens the sauce and adds a tangy richness. Stir in the Dijon mustard, garlic powder, onion powder, and paprika. Let the sauce simmer for 2-3 minutes until slightly thickened. Taste and adjust seasoning with salt and pepper.

Step 6

Return the cooked chicken to the skillet and stir to coat evenly with the sauce. Transfer the entire mixture to the prepared baking dish, spreading it into an even layer. Sprinkle the shredded cheddar cheese and grated Parmesan evenly over the top. The Parmesan will create a golden, crispy crust while the cheddar melts into a gooey layer.

Step 7

Bake in the preheated oven for 18-20 minutes, until the cheese is bubbly and lightly browned. For extra browning, switch to broil for the last 2 minutes, watching carefully to prevent burning. Let the casserole rest for 5 minutes before serving. This allows the sauce to set and makes serving easier. Garnish with fresh parsley for a pop of color and freshness.

Step 7 image

For best results

  • For the best texture, use fresh broccoli florets rather than frozen. Frozen broccoli releases excess water during cooking, which can make the casserole watery. If you must use frozen, thaw and pat dry thoroughly before sautéing. Cut the florets into uniform bite-sized pieces to ensure even cooking.
  • To make this dish even more low carb, you can substitute the heavy cream with full-fat coconut cream for a dairy-free option, or use a combination of cream cheese and sour cream for extra tang. The sauce will still be rich and creamy. For a thicker sauce, add a teaspoon of xanthan gum or glucomannan powder, but whisk well to avoid clumps.
  • Chicken thighs can be used instead of breasts for a juicier, more forgiving casserole. Thighs have a higher fat content, which keeps them moist even if slightly overcooked. Simply adjust cooking time as needed. You can also use leftover rotisserie chicken to save time – just shred and add in step 6.
  • For a crunchy topping, mix 1/2 cup of crushed pork rinds (or almond flour) with 2 tablespoons of melted butter and sprinkle over the cheese before baking. This adds a satisfying crunch without the carbs. Alternatively, use crushed cheese crisps or additional Parmesan.
  • This casserole can be assembled up to 24 hours in advance. Simply prepare through step 6, cover tightly with foil, and refrigerate. When ready to bake, add 10-15 minutes to the baking time since it starts cold. You can also freeze the unbaked casserole for up to 3 months; thaw in the refrigerator overnight before baking.
  • To prevent the sauce from breaking or curdling, ensure your cream cheese is at room temperature before adding. Cold cream cheese can result in lumps. Also, avoid boiling the cream sauce; a gentle simmer is sufficient. If the sauce does separate, whisk in a tablespoon of cold cream or a splash of chicken broth to bring it back together.

Variations

  • Keto-Friendly Version: Replace the onion with a smaller amount (1/4 cup) of chopped scallions or leeks to reduce net carbs. Use full-fat cream cheese and heavy cream. Add 1/2 cup of cooked, crumbled bacon for extra fat and flavor. This version fits perfectly into a ketogenic diet with under 8g net carbs per serving.
  • Dairy-Free Adaptation: Substitute the heavy cream with full-fat canned coconut milk (refrigerated and use only the thick cream). Use dairy-free cream cheese (like Kite Hill or Tofutti) and omit the cheddar cheese – instead, top with a mixture of nutritional yeast (3 tbsp) and almond flour (1/4 cup) for a cheesy flavor. The sauce will be slightly coconutty but delicious.
  • Vegetarian Twist: Omit the chicken and add 2 cups of cubed butternut squash (pre-roasted) and 1 can of drained chickpeas. The squash adds sweetness and creaminess, while chickpeas provide protein. You may need to increase the seasoning, especially smoked paprika and garlic, to compensate for the missing chicken flavor.
  • Spicy Southwest Version: Add 1 diced jalapeño (seeds removed for less heat) and 1 teaspoon of cumin to the sautéed onion. Replace the Dijon mustard with 1 tablespoon of lime juice and 1/2 teaspoon of chili powder. Top with a blend of pepper jack cheese and cheddar. Serve with sliced avocado and a dollop of sour cream (if not strictly low carb).
  • Protein-Packed Broccoli and Rice Casserole (Higher Carb): For those not strictly low carb, stir in 2 cups of cooked cauliflower rice (or regular rice) along with the sauce. This bulks up the casserole and adds a rice-like texture. Adjust liquid: if using cauliflower rice, you may need to reduce the cream by 1/4 cup to prevent sogginess.

Nutrition

  • Calories385 kcal
  • Total Fat28g
  • Saturated Fat16g
  • Cholesterol145mg
  • Sodium520mg
  • Total Carbohydrates8g
  • Dietary Fiber2g
  • Sugars3g
  • Protein32g

Common Questions

Can I use frozen broccoli instead of fresh?
Yes, but it’s best to thaw and drain it thoroughly first. Frozen broccoli contains more water, which can make the casserole watery if added directly. After thawing, pat the florets dry with paper towels and sauté briefly to remove excess moisture. Alternatively, you can roast the frozen broccoli at 400°F for 10 minutes before adding to the casserole.
How do I store leftovers and how long do they last?
Store leftovers in an airtight container in the refrigerator for up to 4 days. Reheat in the microwave or oven at 350°F until warmed through. The sauce may thicken upon refrigeration; add a splash of cream or broth when reheating to restore consistency. Freeze the fully baked casserole for up to 3 months. Thaw overnight in the fridge and reheat covered with foil to prevent drying.
Is this recipe gluten-free?
Yes, this low carb chicken broccoli bake is naturally gluten-free as it contains no flour, pasta, or other gluten-containing ingredients. However, always check the labels on your cream cheese and Dijon mustard to ensure they are certified gluten-free, as some brands may contain trace amounts. The recipe is also suitable for those with celiac disease if using certified gluten-free ingredients.
Can I make this casserole ahead of time?
Absolutely! Assemble the casserole completely (through step 6) but do not bake. Cover tightly with foil and refrigerate for up to 24 hours. When ready to bake, remove from the fridge while the oven preheats, then bake as directed, adding 10-15 minutes since starting cold. You can also freeze the unbaked casserole for up to 3 months; thaw overnight in the refrigerator before baking.
What can I use instead of heavy cream to reduce calories?
For a lighter version, you can substitute half-and-half or whole milk mixed with a tablespoon of cornstarch (if not strictly low carb) to thicken. However, the sauce will be less rich and may not be as creamy. Another option is to use unsweetened almond milk with a tablespoon of cream cheese to add body. Keep in mind that reducing fat may affect the overall flavor and texture.
How can I make this casserole spicier?
Add 1/2 teaspoon of red pepper flakes or cayenne pepper to the sauce along with the other spices. You can also include diced jalapeños or serrano peppers when sautéing the onion. For a smoky heat, use chipotle powder or adobo sauce. If you like it extra spicy, top the casserole with sliced fresh chili peppers before baking.
Can I use other vegetables besides broccoli?
Certainly! Cauliflower florets are a great low-carb substitute and pair beautifully with the creamy sauce. You can also add sautéed mushrooms, bell peppers, or spinach (add spinach at the end of sautéing until wilted). For a more colorful dish, use a mix of broccoli and cauliflower. Keep the total vegetable volume similar to maintain the right ratio.
Why did my sauce turn out grainy or curdled?
Grainy sauce usually results from adding cold cream cheese to hot liquid or overheating the cream. Always bring cream cheese to room temperature before adding. When simmering the sauce, keep the heat low and stir constantly. If the sauce curdles, whisk in a tablespoon of cold cream or a splash of chicken broth to smooth it out. Using full-fat ingredients also helps prevent separation.

Notes

This Low Carb Chicken Broccoli Bake holds a special place in my heart because it proves that comfort food doesn’t have to be loaded with carbs to be satisfying. I first created this recipe during a particularly busy winter when my family was craving something warm and cheesy, but we were all trying to cut back on pasta and bread. The challenge was to deliver that same cozy, indulgent feeling without the noodles. After several trials, I realized that the key was a luscious, velvety sauce made from heavy cream and cream cheese – it clings to every piece of chicken and broccoli just like a good alfredo, but without the gluten.What I love most about this dish is its versatility. It’s the kind of recipe that you can adapt based on what’s in your fridge. Sometimes I add a handful of spinach at the end, or swap the cheddar for gouda or gruyere for a more sophisticated flavor. The Dijon mustard is my secret ingredient – just a teaspoon brightens the entire sauce and cuts through the richness. And the Parmesan crust on top? That’s non-negotiable in my house. It gets perfectly golden and crispy, providing a textural contrast to the creamy interior.Serving suggestions: I like to serve this casserole with a simple side salad dressed with lemon vinaigrette to balance the richness. For a heartier meal, you can add cauliflower rice or steamed green beans. It’s also wonderful alongside roasted asparagus or a crisp cucumber salad. Leftovers are fantastic – the flavors meld even more overnight. I often double the recipe and freeze one dish for a busy weeknight. Just remember to let it cool completely before freezing, and cover tightly with foil and plastic wrap.I hope this recipe brings you the same warmth and comfort it has brought my family. Whether you’re following a low-carb lifestyle or simply looking for a delicious, easy dinner, this chicken broccoli bake is sure to become a regular in your rotation. Don’t be afraid to make it your own – cooking is all about experimentation and joy. Happy cooking!

Cheesy Low Carb Chicken

Cheesy Low Carb Chicken
Low Carb Dinner • High Protein Casserole • Easy Weeknight Meal

⏱️ Prep: PT15M
🔥 Cook: PT25M
⏳ Total: PT40M
🍽️ Yield: 6 servings
⚡ Calories: 385 kcal
(284)
low carb chicken casserolecheesy chicken broccolihigh protein dinnerketo casseroleeasy weeknight dinnergluten free casseroleno noodle casserole

Enjoy this cheesy low carb chicken casserole with tender chicken, fresh broccoli, and melted cheese. A healthy high-protein dinner that satisfies comfort food cravings without the carbs.

Ingredients

Toggle: Metric / US

Instructions

Step 1

Preheat your oven to 375°F (190°C). While the oven is heating, prepare all your ingredients. Cut the chicken breasts into uniform bite-sized pieces, about 1-inch cubes. This ensures even cooking. Season the chicken pieces with salt, black pepper, garlic powder, and onion powder. Toss well to coat. Also, cut the broccoli into small florets, making sure to include some of the tender stems for texture. The stems are packed with fiber and nutrients, and when cut small, they cook perfectly in the casserole.

Step 1 image
Step 2

Heat olive oil in a large oven-safe skillet or Dutch oven over medium-high heat. Once the oil shimmers, add the seasoned chicken pieces in a single layer. Do not overcrowd the pan; if necessary, cook in batches. Sear the chicken for 3-4 minutes per side until golden brown. The goal is to develop a brown crust for flavor, not to cook the chicken through. Use a meat thermometer to check for an internal temperature of 160°F (71°C) if you’re unsure. Transfer the seared chicken to a plate and set aside.

Step 2 image
Step 3

In the same skillet, reduce the heat to medium and add the broccoli florets. Sauté for 2-3 minutes, stirring occasionally, until they turn bright green and begin to soften slightly. The residual heat and bits from the chicken will add flavor to the broccoli. If the pan looks dry, add a splash of chicken broth or a little more olive oil. Remove the broccoli from the skillet and set aside with the chicken.

Step 3 image
Step 4

Now, make the creamy sauce. In the same skillet over medium heat, add the heavy cream, softened cream cheese, and chicken broth. Whisk continuously until the cream cheese is fully melted and the sauce is smooth. This should take about 2-3 minutes. Stir in the Dijon mustard, paprika, and optional red pepper flakes. The mustard adds a subtle tang that balances the richness of the cream. Let the sauce simmer gently for 2 minutes, then remove from heat. Taste and adjust seasoning with salt and pepper if needed.

Step 5

Return the seared chicken and sautéed broccoli to the skillet, stirring to coat everything evenly with the sauce. Spread the mixture into an even layer. Sprinkle the shredded cheddar, mozzarella, and grated Parmesan cheeses evenly over the top. The combination of cheeses gives a gooey, stretchy, and golden crust. For an extra crispy top, you can add a light sprinkle of paprika or additional Parmesan.

Step 6

Transfer the skillet to the preheated oven and bake for 15-20 minutes, or until the casserole is bubbly around the edges and the cheese is melted and lightly browned. If you prefer a deeper golden crust, switch the oven to broil for the last 2 minutes, watching closely to prevent burning. Let the casserole rest for 5 minutes before serving. This allows the sauce to set slightly, making serving easier. Garnish with fresh parsley or chives if desired. Serve hot and enjoy the creamy, cheesy goodness without any noodles!

Step 6 image

For best results

  • For the most tender chicken, avoid overcooking. Since the chicken will continue to cook in the oven, sear it only until golden brown on the outside, not fully cooked through. Using a meat thermometer is the best way to ensure you don't dry out the chicken. The final internal temperature should reach 165°F (74°C) after baking. If you have time, marinate the chicken in a little olive oil, garlic, and herbs for 30 minutes before cooking to infuse more flavor.
  • Broccoli can be substituted with other low-carb vegetables such as cauliflower, asparagus, or zucchini. If using zucchini, cut it into half-moons and sauté briefly to remove excess moisture before adding to the casserole. For frozen broccoli, thaw and pat dry thoroughly to avoid watering down the sauce. Fresh broccoli yields the best texture and flavor.
  • To make this casserole even creamier, use full-fat cream cheese and heavy cream. Low-fat versions may result in a thinner sauce and less satisfying mouthfeel. If you're dairy-sensitive, you can try using a dairy-free cream cheese alternative and full-fat coconut cream for the heavy cream, though the flavor will change slightly.
  • This casserole is naturally low carb and keto-friendly. To keep it truly low carb, ensure your chicken broth is free of added sugars. Some brands add sugar or maltodextrin. Also, check your Dijon mustard for any hidden carbs. Most are fine, but it's worth a quick label read.
  • For meal prep, assemble the casserole completely but do not bake. Cover tightly with foil or a lid and refrigerate for up to 2 days. When ready to bake, add an extra 10-15 minutes to the cooking time since you're starting from cold. Alternatively, you can freeze the unbaked casserole for up to 3 months. Thaw overnight in the refrigerator before baking.
  • If you want a crunchy topping without adding carbs, mix 1/2 cup of crushed pork rinds with 2 tablespoons of melted butter and sprinkle over the cheese before baking. This gives a wonderful texture reminiscent of breadcrumbs. You can also add a tablespoon of almond flour mixed with Parmesan for a nutty crust.

Variations

  • **Keto Version**: This recipe is already keto-friendly, but to reduce carbs even further, replace the broccoli with spinach or kale. Sauté the greens until wilted and squeeze out excess moisture before adding to the casserole. Also, use extra cheese and reduce the heavy cream slightly to increase fat content. Serve with a side of cauliflower rice to soak up the sauce.
  • **Dairy-Free Adaptation**: Substitute the heavy cream with full-fat coconut cream, use dairy-free cream cheese (like Kite Hill or Tofutti), and replace the cheeses with dairy-free shredded mozzarella and cheddar. Note that dairy-free cheeses may not melt as smoothly, so look for brands with tapioca starch for better melt. Add a tablespoon of nutritional yeast for a cheesy flavor.
  • **Spicy Southwest Twist**: Add 1 can (4 oz) of diced green chiles, 1 teaspoon of cumin, and 1/2 teaspoon of chili powder to the sauce. Top with pepper jack cheese instead of mozzarella. Serve with sliced avocado, a dollop of sour cream, and fresh cilantro. This variation gives a Tex-Mex flair that's still low carb.
  • **Buffalo Chicken Casserole**: Replace the Dijon mustard with 1/4 cup of buffalo hot sauce (like Frank's RedHot). Add 1/2 cup of crumbled blue cheese to the cheese topping. Omit the broccoli and use celery and carrot slices (if not strictly low carb) or just celery. Serve with a side of ranch or blue cheese dressing for dipping.
  • **Mushroom and Spinach Version**: Sauté 8 oz of sliced mushrooms along with the broccoli. Add a handful of fresh spinach at the end of sautéing until wilted. Use Swiss cheese instead of mozzarella for a nutty flavor. This variation pairs well with a side of roasted asparagus.
  • **Chicken Thigh Variation**: For juicier meat, use boneless skinless chicken thighs instead of breasts. Thighs have more fat and flavor, and they are harder to overcook. Adjust cooking time slightly as thighs may need a few extra minutes in the oven. The casserole will be even more succulent.

Nutrition

  • Calories385 kcal
  • Total Fat28g
  • Saturated Fat16g
  • Cholesterol145mg
  • Sodium620mg
  • Total Carbohydrates8g
  • Dietary Fiber2g
  • Sugars3g
  • Protein32g

Common Questions

Can I make this casserole ahead of time?
Yes, absolutely! You can assemble the entire casserole (without baking) up to 2 days in advance. Simply cover the skillet or baking dish tightly with foil or plastic wrap and store it in the refrigerator. When you’re ready to bake, remove it from the fridge while the oven preheats, then bake for 25-30 minutes (instead of 15-20) until bubbly and hot. If baking from frozen, thaw overnight in the fridge first for best results.
How do I store leftovers?
Leftovers can be stored in an airtight container in the refrigerator for up to 4 days. To reheat, place individual portions in the microwave for 1-2 minutes, or reheat in a 350°F oven for about 10 minutes until warmed through. You may need to add a splash of chicken broth or cream to restore the sauce’s creaminess, as it thickens upon cooling. This casserole also freezes well for up to 3 months.
Can I use frozen broccoli?
Yes, but it’s important to thaw and drain it thoroughly before adding to the casserole. Frozen broccoli contains more water than fresh, which can make the sauce watery. After thawing, pat the broccoli dry with paper towels. You can also sauté the thawed broccoli briefly to remove excess moisture. Alternatively, use fresh broccoli for the best texture and flavor.
Is this recipe gluten-free?
Yes, this recipe is naturally gluten-free as it contains no wheat, flour, or pasta. However, always double-check your chicken broth and Dijon mustard labels to ensure they are gluten-free, as some brands may contain gluten as a thickener or additive. Most are safe, but it’s a good practice to verify.
Can I add other vegetables?
Absolutely! This casserole is very versatile. You can add cauliflower florets, sliced bell peppers, zucchini, or spinach. Just be mindful of the water content: vegetables like zucchini and spinach release moisture, so sauté them first and squeeze out excess liquid. For a heartier casserole, add sliced mushrooms or diced bell peppers along with the broccoli.
How can I make this casserole lower in fat?
To reduce the fat content, you can use half-and-half instead of heavy cream, reduced-fat cream cheese, and low-fat shredded cheese. However, keep in mind that this will alter the creamy texture and may result in a thinner sauce. You can also increase the amount of broccoli and reduce the chicken to lower the overall calorie density. For a lighter version, consider using Greek yogurt in place of some of the cream, but be careful not to curdle it by adding it off the heat.
What can I serve with this casserole?
Since this is a complete meal with protein and vegetables, you can serve it as is. However, if you want a side, consider a simple green salad with a vinaigrette, cauliflower rice, or roasted asparagus. For a heartier meal, serve with a side of keto-friendly bread or almond flour biscuits. The creamy sauce also pairs wonderfully with steamed green beans or a side of sautéed mushrooms.

Notes

This Cheesy Low Carb Chicken Casserole was born out of my desire to create a comforting, creamy dish that didn’t rely on pasta or rice. As someone who follows a low-carb lifestyle, I often miss the heartiness of traditional casseroles. This recipe delivers all the satisfaction of a classic chicken and broccoli casserole but without the noodles, making it perfect for keto, low-carb, and gluten-free diets. The secret lies in the rich, velvety sauce made from heavy cream and cream cheese, which clings to every piece of chicken and broccoli. I love how the cheese on top gets golden and bubbly, creating a crust that’s both crispy and gooey. This dish has become a weeknight staple in my home because it comes together quickly and uses simple ingredients. I hope it brings you the same comfort and joy. Serve it straight from the skillet for a rustic presentation, or transfer to a serving dish for a more elegant look. Pair it with a crisp green salad or some roasted vegetables for a complete meal. Enjoy!

Keto Chicken Casserole Dish

Keto Chicken Casserole Dish
Keto Casserole • Low Carb Dinner • Easy Weeknight Meal

⏱️ Prep: PT10M
🔥 Cook: PT20M
🍞 Baking: PT15M
⏳ Total: PT30M
🍽️ Yield: 6 servings
⚡ Calories: 410 kcal
(284)
keto casserolelow carb dinnerchicken casserolequick dinner ideaseasy weeknight dinnershigh proteinbroccoli casserolecheesy casserole30 minute mealno noodle

This keto chicken casserole dish is a quick dinner idea packed with high-protein chicken, broccoli, and melted cheese for a satisfying low-carb meal. Ready in 30 minutes!

Ingredients

Toggle: Metric / US

Instructions

Step 1

Preheat your oven to 375°F (190°C). While the oven is heating, prepare the chicken and broccoli. Cut the chicken breasts into uniform bite-sized pieces, about 1-inch cubes. This ensures even cooking and a nice texture in every bite. Fresh broccoli should be washed and cut into small florets; if you prefer, you can also use frozen broccoli (thawed and patted dry). The key is to have the broccoli pieces similar in size to the chicken so they cook evenly. Set both aside.

Step 1 image
Step 2

In a large oven-safe skillet (or a regular skillet if you’ll transfer to a baking dish), heat 1 tablespoon of olive oil over medium-high heat. Once the oil shimmers, add the chicken pieces in a single layer. Do not overcrowd the pan; if necessary, cook in batches. Sear the chicken for 3-4 minutes per side until golden brown and cooked through (internal temperature reaches 165°F/74°C). The browning adds flavor through the Maillard reaction. Remove the chicken from the skillet and set aside on a plate. The skillet will have browned bits (fond) that add depth to the sauce.

Step 2 image
Step 3

In the same skillet, reduce the heat to medium. Add the minced garlic and sauté for about 30 seconds until fragrant, being careful not to burn it. Then add the softened cream cheese, heavy cream, and chicken broth. Stir continuously with a wooden spoon or whisk until the cream cheese is fully melted and the sauce is smooth. The mixture should be creamy and slightly thickened. Season with onion powder, salt, black pepper, and red pepper flakes if using. Taste and adjust seasoning. This creamy sauce is the heart of the casserole, providing rich flavor without any noodles.

Step 4

Return the cooked chicken to the skillet, along with the broccoli florets. Stir gently to coat everything evenly with the creamy sauce. The broccoli will still be raw at this point but will cook perfectly in the oven. If your skillet is not oven-safe, transfer the mixture to a greased 9×13-inch baking dish at this point.

Step 5

Top the casserole with the shredded cheddar and mozzarella cheeses, spreading them evenly over the surface. The cheese will create a golden, bubbly crust as it bakes. Sprinkle the grated Parmesan on top for an extra savory, nutty flavor that complements the creamy sauce beautifully.

Step 6

Bake in the preheated oven for 15-20 minutes, until the cheese is melted and bubbly and the broccoli is tender-crisp. If you prefer a deeper golden crust, you can switch the oven to broil for the last 2 minutes, watching closely to prevent burning. The casserole should be bubbling around the edges and the cheese should have a beautiful golden brown color. Remove from the oven and let it rest for 5 minutes before serving. This allows the sauce to set slightly, making it easier to serve.

Step 7

Garnish with fresh chopped parsley for a pop of color and freshness. Serve hot as a complete meal. This casserole is satisfying on its own, but you can also pair it with a side salad or steamed vegetables if desired. Leftovers can be stored in an airtight container in the refrigerator for up to 4 days. Reheat gently in the microwave or oven.

For best results

  • For the best texture, use fresh broccoli instead of frozen. Fresh broccoli retains its crunch and doesn't release excess water that can make the casserole watery. If you must use frozen, thaw it completely and pat it dry with paper towels to remove as much moisture as possible. Overcooked broccoli can become mushy, so aim for tender-crisp after baking.
  • To ensure the chicken stays juicy, avoid overcooking it during the initial sear. Cook just until it reaches 165°F (74°C) internally. The chicken will continue to cook slightly in the oven, so slightly undercooking at the stovetop stage is fine. Use a meat thermometer for accuracy.
  • The cream cheese must be at room temperature to blend smoothly into the sauce. Cold cream cheese will create lumps. Take it out of the refrigerator 30 minutes before starting, or microwave it in 10-second intervals until softened but not melted. This ensures a silky, lump-free sauce.
  • You can customize the cheese blend to your preference. Gruyère or Gouda adds a smoky depth, while Monterey Jack gives a milder flavor. For a sharper taste, use extra sharp cheddar. The Parmesan is essential for umami, but you can substitute with Pecorino Romano for a saltier kick.
  • If you prefer a thicker sauce, mix 1 teaspoon of xanthan gum with the heavy cream before adding it to the skillet. This is a common low-carb thickener that won't add carbs. Alternatively, let the sauce simmer for an extra 2-3 minutes to reduce and concentrate flavors.
  • This casserole is naturally low carb and keto-friendly. Each serving contains about 6g net carbs (total carbs minus fiber). To keep it truly low carb, ensure your chicken broth is unsweetened and check labels on cream cheese for hidden sugars.
  • For meal prep, assemble the casserole completely but do not bake. Cover and refrigerate for up to 24 hours. When ready to bake, add 5-10 minutes to the baking time since the dish starts cold. You can also freeze the unbaked casserole for up to 3 months; thaw overnight in the fridge before baking.

Variations

  • Vegetarian Version: Replace chicken with 1.5 lbs of firm tofu (pressed and cubed) or a mix of mushrooms (cremini, shiitake, and oyster) for a hearty vegetarian alternative. Sauté the tofu or mushrooms until golden brown before adding the sauce. The creamy sauce and cheese provide plenty of protein and flavor. You can also add cauliflower florets for extra bulk.
  • Spicy Southwest Twist: Add 1 diced jalapeño (seeds removed for less heat) along with the garlic, and substitute the cheddar with pepper jack cheese. Stir in 1/2 teaspoon of cumin and 1/2 teaspoon of chili powder into the sauce. Top with sliced avocado and a dollop of sour cream before serving. This variation brings a smoky, spicy kick.
  • Bacon and Mushroom Upgrade: Cook 4 slices of bacon until crispy, then crumble. Sauté 8 oz sliced mushrooms in the bacon fat until golden. Add the mushrooms and bacon to the casserole along with the chicken. The bacon adds a salty crunch, while mushrooms bring an earthy umami depth that pairs beautifully with the creamy sauce.
  • Dairy-Free Adaptation: Use full-fat canned coconut milk instead of heavy cream, and dairy-free cream cheese alternative. Replace the shredded cheeses with a dairy-free melting shreds (look for those based on coconut or cashew). Nutritional yeast can be added for a cheesy flavor. The texture will be slightly different but still creamy and delicious.
  • Add More Veggies: Boost the vegetable content by adding 1 cup of chopped cauliflower, 1/2 cup of diced bell peppers, or a handful of spinach stirred in just before baking. These vegetables add color, fiber, and nutrients without significantly increasing carbs. Just ensure any watery vegetables (like zucchini) are sautéed first to remove excess moisture.

Nutrition

  • Calories410 kcal
  • Total Fat28g
  • Saturated Fat15g
  • Cholesterol145mg
  • Sodium680mg
  • Total Carbohydrates8g
  • Dietary Fiber2g
  • Sugars3g
  • Protein34g

Common Questions

Can I use frozen chicken breasts?
Yes, but you must thaw them completely before cooking. Frozen chicken will release excess water and steam instead of searing, leading to a less flavorful and potentially watery casserole. For best results, thaw in the refrigerator overnight. If you’re short on time, you can poach the chicken directly in the sauce, but you’ll miss the browning flavor.
How do I store leftovers and how long do they last?
Store leftovers in an airtight container in the refrigerator for up to 4 days. The flavors meld and deepen overnight, making it even tastier the next day. To reheat, microwave individual portions for 1-2 minutes or warm in a 350°F oven for about 10 minutes. You can also freeze the casserole for up to 3 months. Thaw overnight in the fridge and reheat as directed.
Can I make this casserole ahead of time?
Absolutely! Assemble the casserole completely (without baking), cover tightly with foil or plastic wrap, and refrigerate for up to 24 hours. When ready to bake, remove from the fridge while the oven preheats, then bake as directed, adding 5-10 minutes to the baking time. You can also freeze it unbaked for up to 3 months; thaw overnight in the refrigerator before baking.
Is this recipe gluten-free?
Yes, this recipe is naturally gluten-free as it contains no wheat, flour, or pasta. However, always check the labels on your chicken broth and cream cheese to ensure they are certified gluten-free, as some brands may contain additives with gluten. The dish is also low carb and keto-friendly.
Can I substitute the heavy cream with something lighter?
For a lower-fat option, you can use half-and-half or whole milk, but the sauce will be thinner and less rich. To maintain creaminess without heavy cream, you can use a mixture of 1/4 cup cream cheese and 1/4 cup milk, or try unsweetened almond milk thickened with a little xanthan gum. Keep in mind that the calorie and fat content will decrease, but so will the indulgent texture.
My casserole turned out watery. What went wrong?
Watery casserole is usually due to excess moisture from broccoli or not draining the chicken properly. If using frozen broccoli, thaw and pat dry thoroughly. Avoid overcooking the sauce before baking; it should be thick enough to coat the back of a spoon. Also, ensure your chicken is patted dry before searing. If the casserole is still watery after baking, you can place it back in the oven uncovered for 5-10 minutes to evaporate some liquid.
Can I add rice or pasta to make it more filling?
This recipe is designed to be low carb and noodle-free, but you can certainly add cooked cauliflower rice or shirataki noodles (rinsed and drained) for a low-carb option. If you’re not concerned about carbs, stir in 2 cups of cooked rice or small pasta shapes like elbow macaroni before baking. Adjust seasoning accordingly, as the added starch may dilute the flavor.

Notes

This Creamy Low Carb Chicken Casserole has become a staple in my kitchen, and I’m thrilled to share it with you. The inspiration came from a classic chicken and broccoli casserole, but I wanted to create a version that fits into a low-carb or keto lifestyle without sacrificing any of the comforting, creamy goodness. The first time I made it, I was amazed at how the cream cheese and heavy cream created a sauce that was just as rich and satisfying as any traditional cream-of-mushroom-soup-based casserole. The best part? No one even missed the noodles! This dish is perfect for busy weeknights when you need a quick, healthy meal that the whole family will love. It’s also great for meal prep—make a big batch on Sunday and enjoy it throughout the week. I love serving this casserole with a simple side salad dressed with lemon vinaigrette to cut through the richness. For a truly indulgent meal, pair it with some roasted asparagus or sautéed green beans. The leftovers are even better the next day as the flavors meld together. I hope this recipe brings you as much joy and comfort as it has brought me. Happy cooking!

Creamy Chicken Broccoli Bake

Creamy Chicken Broccoli Bake
Easy Dinner Recipes • Low Carb Casserole • 30-Minute Meal

⏱️ Prep: PT10M
🔥 Cook: PT20M
🍞 Baking: PT0S
⏳ Total: PT30M
🍽️ Yield: 6 servings
⚡ Calories: 385 kcal
(284)
low carbchicken casserolebroccoli bakeeasy dinner30 minute mealhigh proteinketo friendlyfamily friendly

This creamy chicken broccoli bake is the perfect easy dinner recipe for busy weeknights, combining tender chicken and fresh broccoli in a rich, cheesy sauce. A quick and simple dinner…

Ingredients

Toggle: Metric / US

Instructions

Step 1

Preheat your oven to 375°F (190°C). While the oven is heating, prepare your ingredients. Cut the chicken breasts into uniform bite-sized pieces, about 1-inch cubes. This ensures even cooking. Wash and cut the broccoli into small florets, discarding any tough stems. Finely dice the onion and mince the garlic. Having everything prepped and ready before you start cooking (mise en place) will make the process smooth and stress-free. The oven heat will be used later to bake the casserole, but we start on the stovetop to build the creamy sauce.

Step 1 image
Step 2

Heat 2 tablespoons of olive oil in a large oven-safe skillet or Dutch oven over medium-high heat. Once the oil shimmers, add the chicken pieces in a single layer. Season with 1/2 teaspoon of salt, 1/4 teaspoon of black pepper, and 1/2 teaspoon of paprika. Cook for 5-7 minutes, stirring occasionally, until the chicken is golden brown on all sides and cooked through (internal temperature of 165°F / 74°C). Avoid overcrowding the pan; if necessary, cook in batches. The browning adds flavor through the Maillard reaction, creating a savory depth. Once cooked, transfer the chicken to a plate and set aside.

Step 2 image
Step 3

In the same skillet, add the diced onion. Sauté over medium heat for 3-4 minutes until soft and translucent, scraping up any browned bits from the bottom of the pan. Add the minced garlic and cook for 30 seconds until fragrant, being careful not to burn the garlic. The fond (browned bits) left from the chicken will infuse the sauce with extra flavor. If the skillet looks dry, add a splash of chicken broth.

Step 3 image
Step 4

Reduce the heat to low. Add the cream cheese to the skillet and stir until completely melted and smooth. Then pour in the heavy cream and chicken broth, whisking continuously to combine. Bring the mixture to a gentle simmer, stirring often, until the sauce thickens slightly, about 2-3 minutes. The cream cheese gives the sauce a velvety richness while the broth balances the heaviness. Season with the remaining salt, pepper, onion powder, and garlic powder. Taste and adjust seasoning if needed.

Step 5

Remove the skillet from the heat. Stir in 1 cup of shredded cheddar cheese and the Parmesan cheese until melted and fully incorporated. The sauce should be smooth and creamy. Return the cooked chicken to the skillet, along with the broccoli florets. Gently fold everything together until the chicken and broccoli are evenly coated in the sauce. The broccoli will continue to cook in the oven, so it should still be crisp-tender at this point.

Step 6

Top the casserole with the remaining 1 cup of shredded cheddar cheese, spreading it evenly over the surface. Transfer the skillet to the preheated oven and bake for 15-20 minutes, until the cheese is melted and bubbly and the broccoli is tender. For a golden brown top, switch to broil for the last 2 minutes, watching closely to prevent burning. The casserole should be bubbling around the edges and the cheese lightly browned. Remove from the oven and let it rest for 5 minutes before serving. This allows the sauce to set slightly for easier serving.

Step 7

Garnish with fresh chopped parsley for a pop of color and freshness. Serve the creamy chicken broccoli bake hot, straight from the skillet or spooned onto plates. This dish pairs wonderfully with a side salad or steamed rice for those not watching carbs. Enjoy the comforting, cheesy goodness that comes together in just 30 minutes. Store any leftovers in an airtight container in the refrigerator for up to 4 days. Reheat gently in the microwave or oven.

For best results

  • For the best flavor and texture, use freshly shredded cheddar cheese instead of pre-shredded bagged cheese. Pre-shredded cheese contains anti-caking agents like cellulose, which can prevent the cheese from melting smoothly and result in a grainy sauce. Shredding a block of cheddar yourself takes only a few extra minutes but yields a creamier, more cohesive sauce. Additionally, using a mix of sharp cheddar and Parmesan adds complexity—the sharpness of cheddar cuts through the richness while Parmesan brings a nutty, salty depth.
  • Broccoli preparation matters: cut the florets into similar-sized pieces to ensure even cooking. If you prefer your broccoli with a bit more bite, blanch the florets in boiling salted water for 2 minutes, then shock them in ice water before adding to the casserole. This preserves a vibrant green color and crisp-tender texture. Alternatively, if you like softer broccoli, simply steam it for 3-4 minutes before mixing. The key is to avoid overcooking in the oven, as the broccoli will continue to soften as the casserole bakes.
  • To keep this recipe truly low-carb and keto-friendly, be mindful of the onion and garlic quantities. While they add essential flavor, they do contain some carbs. You can reduce the onion to half a small onion or use a pinch of onion powder instead. Also, ensure your chicken broth is unsweetened and free of added sugars. For an even lower carb count, swap the heavy cream for full-fat coconut cream (for a dairy-free option) or use a combination of cream cheese and sour cream to maintain thickness.
  • If you don't have an oven-safe skillet, you can transfer the mixture to a greased 9×13-inch baking dish before topping with cheese and baking. This also works well if you're doubling the recipe for a crowd. To save time on a busy weeknight, you can prep the entire casserole (without baking) up to 24 hours in advance. Simply cover and refrigerate, then add 5-10 minutes to the baking time since you'll be starting from cold. This make-ahead strategy makes dinner a breeze—just pop it in the oven when you get home.
  • For a crispy, golden topping that adds texture, consider mixing the remaining cheddar with 1/4 cup of crushed pork rinds or almond flour before sprinkling over the casserole. This creates a low-carb “breadcrumb” effect that mimics a traditional casserole topping without the carbs. You can also add a pinch of smoked paprika or cayenne to the topping for a subtle heat that complements the creamy sauce beautifully.
  • Leftovers can be reinvented: chop the casserole and use it as a filling for low-carb wraps, stuffed bell peppers, or even as a topping for cauliflower rice. The creamy sauce acts as a built-in binder, making it versatile for meal prep. To freeze, assemble the casserole in a freezer-safe dish but do not bake. Wrap tightly in plastic wrap and foil, then freeze for up to 3 months. When ready to eat, thaw overnight in the refrigerator and bake as directed, adding 10-15 minutes to the cooking time.

Variations

  • Vegetarian Version: Replace the chicken with 2 cups of hearty vegetables like cauliflower florets, mushrooms, and bell peppers. For protein, add 1 can of drained chickpeas or 8 oz of cubed extra-firm tofu (pressed and sautéed until golden). The creamy sauce works beautifully with vegetables, and you can use vegetable broth instead of chicken broth. This variation is perfect for Meatless Monday and still delivers the same comforting, cheesy satisfaction.
  • Spicy Southwest Twist: Add 1 diced jalapeño (seeds removed for less heat) along with the onion, and stir in 1 teaspoon of cumin and 1/2 teaspoon of chili powder with the seasonings. Use pepper jack cheese instead of cheddar for a spicy kick. Top with fresh cilantro and a squeeze of lime juice before serving. This version pairs well with a side of avocado slices or a dollop of sour cream. It's a fun way to change up the flavor profile while keeping it low-carb.
  • Keto Bacon Cheeseburger Casserole: Swap the chicken for 1.5 lbs of ground beef, cooked and crumbled. Omit the broccoli and instead add 1/2 cup of diced pickles and 1 tablespoon of yellow mustard to the sauce. Use a mix of cheddar and mozzarella, and top with cooked bacon bits. This variation captures all the flavors of a bacon cheeseburger in a casserole form, with only about 5g net carbs per serving. Serve with lettuce wraps or a side of pickles.
  • Dairy-Free Adaptation: Use full-fat canned coconut milk instead of heavy cream, and a dairy-free cream cheese alternative (such as Kite Hill or Tofutti). For the cheese, opt for a dairy-free shredded cheddar that melts well, like Daiya or Follow Your Heart. Nutritional yeast can be added to enhance the cheesy flavor. The sauce may be slightly thinner, so simmer a bit longer to thicken. This version is perfect for those with lactose intolerance or following a paleo diet.
  • Protein-Packed with Turkey: Substitute chicken with ground turkey or turkey breast cutlets for a leaner option. Turkey has a milder flavor, so consider adding extra seasonings like thyme, rosemary, or a splash of Worcestershire sauce. The cooking time remains the same, but ensure the turkey reaches an internal temperature of 165°F. This variation reduces the fat content while keeping the protein high, ideal for macro-conscious eaters.

Nutrition

  • Calories385 kcal
  • Total Fat28g
  • Saturated Fat16g
  • Cholesterol145mg
  • Sodium720mg
  • Total Carbohydrates8g
  • Dietary Fiber2g
  • Sugars3g
  • Protein32g

Common Questions

Can I use frozen broccoli instead of fresh?
Yes, you can use frozen broccoli florets. There’s no need to thaw them first; simply add them directly to the sauce. However, keep in mind that frozen broccoli releases more water as it cooks, which may thin out the sauce slightly. To compensate, you can reduce the chicken broth by 2 tablespoons or simmer the sauce for an extra minute before baking to thicken it. Also, frozen broccoli tends to be softer, so the final texture will be more tender than with fresh. If you prefer a firmer bite, blanch fresh broccoli instead.
How do I store leftovers and how long do they last?
Store leftover creamy chicken broccoli bake in an airtight container in the refrigerator for up to 4 days. To reheat, microwave individual portions for 1-2 minutes, stirring halfway through. For best results, reheat in a 350°F oven for 10-15 minutes, covered with foil to prevent drying out. The sauce may thicken upon refrigeration; add a splash of milk or chicken broth when reheating to restore the creamy consistency. Freezing is also possible: assemble the casserole without baking, wrap tightly, and freeze for up to 3 months. Thaw overnight in the fridge before baking as directed.
Can I make this casserole ahead of time?
Absolutely! This casserole is perfect for meal prep. Prepare the entire dish up to the point of baking, but do not add the final cheese topping. Cover and refrigerate for up to 24 hours. When ready to bake, remove from the fridge, add the cheese topping, and bake at 375°F for 25-30 minutes (since starting from cold). You may need to add 5-10 minutes to the original baking time. Alternatively, you can bake it completely, let it cool, then refrigerate and reheat individual servings throughout the week.
Is this recipe gluten-free?
Yes, this creamy chicken broccoli bake is naturally gluten-free as written. The sauce is thickened with cream cheese and heavy cream, without any flour or gluten-containing ingredients. However, always double-check your chicken broth and any pre-shredded cheese labels for potential gluten additives. If you are serving with a side like rice or bread, make sure those are certified gluten-free as well. This recipe is also suitable for those with celiac disease or gluten sensitivity.
What can I use instead of heavy cream to reduce calories?
To lower the calorie and fat content, you can substitute half-and-half or whole milk mixed with a tablespoon of cornstarch to mimic the thickness of heavy cream. For a dairy-free option, unsweetened almond milk or oat milk can be used, but the sauce will be thinner. In that case, add an extra ounce of cream cheese or a teaspoon of xanthan gum to help thicken. Keep in mind that reducing the fat will also reduce the richness and creaminess, so adjust your expectations accordingly.
How can I add more vegetables to this casserole?
This casserole is very versatile and welcomes extra veggies. Consider adding sliced mushrooms, diced bell peppers, chopped spinach, or zucchini. For mushrooms and bell peppers, sauté them along with the onion. For spinach, stir in a few handfuls after the sauce is made and let it wilt before adding the chicken and broccoli. Zucchini should be diced and lightly salted to draw out moisture, then patted dry before adding. Adding more vegetables may increase the carb count slightly but boosts the fiber and nutrient content.
My sauce turned out lumpy. What went wrong?
A lumpy sauce is usually caused by adding the cream cheese too quickly or not allowing it to soften adequately. Always soften the cream cheese to room temperature before adding to the pan. Cut it into small cubes and stir continuously over low heat until fully melted. If lumps persist, you can use an immersion blender to smooth the sauce, or strain it through a fine-mesh sieve. Another common culprit is overheating the dairy, which can cause it to separate. Keep the heat on low when adding dairy and avoid boiling the sauce vigorously.

Notes

I developed this creamy chicken broccoli bake on a chilly autumn evening when I was craving something deeply comforting but didn’t want to derail my low-carb lifestyle. The challenge was to create a casserole that felt indulgent—rich, cheesy, and satisfying—without relying on pasta or potatoes. After several tests, I landed on a velvety cream cheese and cheddar sauce that clings beautifully to tender chicken and crisp-tender broccoli. The result ifs a dish that tastes like a hug in a bowl, yet keeps carbs to a minimum.This recipe has become a staple in my weekly meal prep rotation because it comes together in just 30 minutes and uses simple, wholesome ingredients. I love that I can make it on a busy Tuesday and still have leftovers for lunch the next day. The beauty of this casserole lies in its adaptability: you can swap in whatever vegetables are languishing in your fridge, adjust the cheese to your preference, or add a pinch of red pepper flakes for heat. It’s forgiving and foolproof, perfect for novice cooks and seasoned home chefs alike.When serving, I like to present it straight from the skillet for a rustic, family-style meal. A sprinkle of fresh parsley and a side of crisp green salad with a lemon vinaigrette balances the richness. For those not watching carbs, a side of crusty bread or fluffy rice is wonderful for soaking up every last drop of the creamy sauce. This dish also freezes beautifully, making it a lifesaver for those nights when you need a homemade meal but have zero energy to cook.I hope this creamy chicken broccoli bake brings as much comfort and joy to your table as it does to mine. Remember, cooking is about experimentation and making recipes your own, so feel free to tweak and tailor it to your taste. Happy cooking!

Quick Crunchy Beef Tacos

Quick Crunchy Beef Tacos
Easy Dinner Recipes • Quick Weeknight Meals • Beef Tacos

⏱️ Prep: PT10M
🔥 Cook: PT15M
⏳ Total: PT25M
🍽️ Yield: 8 tacos
⚡ Calories: 385 kcal
(284)
quick dinnereasy tacoscrunchy tacosbeef tacosweeknight dinner30 minute mealfamily dinnergame day food

These quick crunchy beef tacos feature juicy seasoned ground beef and melty cheese in a crispy shell. Perfect for busy weeknights or game day!

Ingredients

Toggle: Metric / US

Instructions

Step 1

First, gather all your ingredients and prep them. Shred the lettuce finely using a sharp knife or a box grater—thin strips give the best texture and allow the lettuce to nestle into the taco shell without overwhelming the other fillings. Dice the tomato into small, even cubes (about 1/4 inch) so they distribute evenly. If you’re using additional toppings like sour cream or salsa, have them ready in small bowls. This mise en place ensures a smooth cooking process, especially on busy weeknights when every minute counts.

Step 1 image
Step 2

Place a large non-stick skillet over medium-high heat. Add the ground beef to the cold pan—this helps it brown more evenly. Break the meat into large chunks with a wooden spoon or spatula, then let it sear undisturbed for about 2 minutes. This step is crucial for developing a rich, savory flavor through the Maillard reaction. Once the bottom is deeply browned, start breaking the meat into crumbles and stir. Continue cooking until no pink remains, about 4-5 minutes. If there’s excess grease (more than 1 tablespoon), carefully drain it off, but leave a little for flavor and moisture. For lean 85/15 beef, you may not need to drain at all.

Step 2 image
Step 3

Reduce the heat to low. Sprinkle the taco seasoning evenly over the cooked beef, then pour in the water. Stir vigorously to combine, making sure every crumb is coated. Let the mixture simmer gently for 2-3 minutes, stirring occasionally, until the liquid has thickened into a glossy, clingy sauce. The meat should be moist but not soupy—if it looks dry, add a splash more water. Taste and adjust seasoning if needed (some store-bought blends are saltier than others). Remove from heat and cover to keep warm while you prepare the taco shells.

Step 4

Preheat your oven to 350°F (175°C). Arrange the hard taco shells upright on a baking sheet, either nestled together for support or using a taco holder. Bake for 3-5 minutes until they are warm and extra crispy. Watch carefully—they can go from golden to burnt quickly. Alternatively, you can heat them in a dry skillet for about 30 seconds per side. Warm shells are less likely to crack when filled and provide that satisfying crunch in every bite.

Step 5

Now it’s assembly time. Lay the warm taco shells on a serving platter. Using a slotted spoon to avoid excess liquid, divide the seasoned beef evenly among the shells (about 2 tablespoons each). Immediately sprinkle the shredded cheese over the hot beef so it starts to melt into the meat—this helps bind the filling and prevents the cheese from sliding out. Top with a generous pinch of shredded lettuce and a spoonful of diced tomatoes. If desired, add a dollop of sour cream, a drizzle of salsa, or sliced jalapeños. Serve immediately while the shells are still crisp and the beef is warm. The contrast of the crunchy shell, savory beef, cool lettuce, and juicy tomato is irresistible.

For best results

  • For the best texture, use hard taco shells that are fresh and not stale. Check the expiration date on the package and give them a quick sniff—they should smell like toasted corn, not cardboard. If your shells are a bit old, revive them by baking at 350°F for 3-4 minutes; this restores crunch and removes any staleness. For an even crispier experience, brush the inside of the shells lightly with oil before baking, but be careful not to oversaturate or they'll become greasy.
  • Don't skip the water when cooking the beef with taco seasoning. The water helps dissolve the seasoning and creates a light sauce that coats the meat. Without it, the seasoning can burn and become bitter. If you prefer a thicker sauce, use a little less water (about 1/4 cup) and simmer longer. For a thinner, more saucy filling, add up to 1/2 cup water and let it reduce. The goal is a consistency that clings to the meat without pooling in the taco shell.
  • Shred your own cheese from a block for the best melting and flavor. Pre-shredded cheese is coated with anti-caking agents like cellulose or potato starch, which prevent clumping but also hinder smooth melting. A block of sharp cheddar (or a Mexican blend) shredded fresh on a box grater will melt into a creamy, cohesive layer that adheres to the beef. Plus, the flavor is much more pronounced. For a fun twist, try a mix of cheddar and Monterey Jack for extra creaminess.
  • To prevent soggy taco shells, layer strategically: place the hot beef directly into the shell first, then add cheese so it melts and acts as a barrier. Lettuce and tomatoes should go on top, not underneath the meat. If you're making tacos ahead of time (for a party, for example), keep the shells, beef, and toppings separate until just before serving. Assemble only as many as you'll eat immediately. Leftover components can be stored separately and reheated.
  • Customize the heat level to your taste. For a mild family-friendly version, use a standard taco seasoning and mild cheddar. For more kick, add a pinch of cayenne or chipotle powder to the beef while cooking, or use pepper jack cheese. You can also stir in a tablespoon of pickled jalapeño brine for acidity and heat. For a smoky depth, substitute half the beef with chorizo, but note that chorizo is fattier, so drain well.
  • Make it a complete meal by serving with Mexican rice, refried beans, or a simple side of black beans seasoned with cumin and lime. For a lighter option, serve the taco filling over a bed of greens as a taco salad—crush a few shells on top for crunch. The beef also freezes beautifully: cool completely, transfer to a freezer-safe bag, and freeze for up to 3 months. Thaw in the fridge overnight and reheat in a skillet with a splash of water.

Variations

  • For a healthier twist, use ground turkey or chicken instead of beef. Turkey is leaner, so add a tablespoon of olive oil to the pan before cooking to prevent dryness. Increase the water to 1/2 cup and simmer a bit longer to keep the meat moist. You can also add a handful of finely chopped mushrooms or shredded zucchini to the meat while cooking—they blend in seamlessly and add extra veggies without altering the flavor.
  • Make it vegetarian by substituting the ground beef with a plant-based meat alternative or crumbled firm tofu. For tofu, press and crumble it, then sauté with the taco seasoning and water until heated through. Alternatively, use black beans or lentils: cook 1 cup of cooked beans or lentils with the seasoning and 1/4 cup water, mashing slightly for a meaty texture. Top with avocado slices for healthy fats.
  • For a low-carb or keto version, skip the hard taco shells and serve the beef mixture in large lettuce cups (romaine or butter lettuce). Use full-fat cheese and sour cream, and add guacamole for richness. You can also bake cheese shells by melting piles of shredded cheese on a parchment-lined baking sheet at 400°F for 5-7 minutes until lacy and golden, then draping them over a rolling pin to cool into taco shapes.
  • Switch up the flavor profile with a different seasoning blend. Try a smoky chipotle seasoning (adobo powder, cumin, smoked paprika) for a barbecue vibe, or go for a spicy Thai twist with ginger, garlic, soy sauce, and a dash of sriracha. For a breakfast taco, use the beef with scrambled eggs, cheese, and salsa in a warm tortilla. The possibilities are endless!

Nutrition

  • Calories385 kcal
  • Total Fat22g
  • Saturated Fat9g
  • Cholesterol85mg
  • Sodium720mg
  • Total Carbohydrates18g
  • Dietary Fiber2g
  • Sugars2g
  • Protein28g

Common Questions

Can I use homemade taco seasoning instead of a packet?
Absolutely! Homemade taco seasoning is easy to make and lets you control the salt and spice levels. A basic blend includes 1 tablespoon chili powder, 1 teaspoon each of cumin and paprika, 1/2 teaspoon each of garlic powder, onion powder, and oregano, and 1/4 teaspoon cayenne (optional). Mix with 1/3 cup water and add to the cooked beef. You may need to adjust the salt to taste since store-bought packets often contain more salt. This blend works perfectly for 1 pound of meat.
How do I keep hard taco shells from breaking?
Hard taco shells are delicate, but a few tricks can help. First, warm them in the oven (350°F for 3-5 minutes) to make them more pliable and less likely to crack. Fill them gently—use a spoon to place the filling, don’t pack it tightly. Also, avoid overfilling; about 2-3 tablespoons of beef is plenty. If you’re making many tacos, consider using a taco holder or nesting the shells together on a baking sheet for support. For the crunchiest experience, serve immediately after filling.
Can I make these tacos ahead of time?
These tacos are best assembled fresh, but you can prep components in advance. Cook the beef up to 3 days ahead and store it in an airtight container in the fridge. Reheat in a skillet with a splash of water to restore moisture. Shred lettuce and dice tomatoes up to a day ahead, but keep them dry—store lettuce in a paper towel-lined container and tomatoes in a separate bowl. Warm the taco shells just before serving. Assemble only the tacos you plan to eat immediately to avoid sogginess.
What's the best cheese for tacos?
Sharp cheddar is a classic choice for its bold flavor and good melting properties. A Mexican blend (cheddar, Monterey Jack, asadero, and queso quesadilla) is also excellent and widely available. For an authentic touch, try crumbled queso fresco or cotija cheese sprinkled on top after cooking—they don’t melt but add a salty, creamy finish. Avoid pre-shredded cheese if possible, as the anti-caking agents can affect melting. Always grate your own for the best results.
How can I make this recipe dairy-free?
To make dairy-free tacos, use a plant-based cheese alternative that melts well (look for brands like Daiya or Violife) or simply omit the cheese and add extra toppings like avocado, salsa, and dairy-free sour cream (Tofutti or Kite Hill). The beef itself is dairy-free, so the main swap is the cheese. For the taco shells, check the label—most are vegan. Serve with refried beans made with oil instead of lard, and you have a fully dairy-free meal.
What can I serve with these tacos?
These tacos pair wonderfully with classic Mexican sides. Mexican rice (arroz rojo) is a favorite—sauté rice with onion and garlic, then simmer with tomato sauce and broth. Refried beans (black or pinto) are another staple; canned versions are convenient, but homemade are even better. For a fresh side, make a quick corn salad with grilled corn, lime, cilantro, and cotija cheese. A simple side of sliced avocado or a green salad with lime vinaigrette also works well.
How do I store leftover taco filling?
Leftover beef filling can be stored in an airtight container in the refrigerator for up to 4 days. To reheat, place it in a skillet over medium heat with a tablespoon of water, stirring until hot. You can also microwave it in a covered bowl for 1-2 minutes. The filling freezes beautifully for up to 3 months—cool completely, transfer to a freezer bag, and flatten for easy storage. Thaw overnight in the fridge before reheating. Leftover taco shells are best stored in a sealed bag at room temperature and crisped in the oven before reuse.

Notes

These Quick Crunchy Beef Tacos are a weeknight lifesaver in my household. I first discovered the magic of hard-shell tacos during a college road trip through Texas, where a tiny taqueria served them piping hot with a side of pickled jalapeños. The crunch was so satisfying that I’ve been perfecting my own version ever since. This recipe is inspired by that memory but streamlined for busy families—no fancy equipment, no obscure ingredients, just pure, unapologetic flavor.I love that this dish comes together in under 30 minutes, making it a go-to for those evenings when everyone is hungry and patience is thin. The key is in the details: browning the beef well for depth, using just enough water to create a saucy coating, and warming the shells to ensure they stay crisp. My kids love building their own tacos, which makes dinner interactive and fun. I often set up a taco bar with bowls of toppings—shredded lettuce, diced tomatoes, sour cream, salsa, and sliced olives—so everyone can customize their perfect bite.For the best results, use fresh, high-quality ingredients. If you have access to a farmers’ market, grab ripe Roma tomatoes and crisp iceberg lettuce for that classic crunch. The cheese should be sharp and freshly grated—it makes a noticeable difference. And don’t be afraid to experiment with the seasoning: a dash of smoked paprika or a pinch of cayenne can elevate the flavor profile.These tacos are also incredibly versatile. They’re perfect for Cinco de Mayo celebrations, game day gatherings, or a simple Tuesday dinner. Pair them with a cold beer or a tangy margarita for adults, or serve with a glass of milk for the kids. Leftover filling is fantastic stuffed into bell peppers for a low-carb twist, or spooned over nachos with extra cheese.I hope this recipe brings as much joy to your table as it does to mine. Happy cooking, and remember: the best tacos are the ones made with love and shared with family. ¡Buen provecho!

Juicy Seasoned Beef Tacos

Juicy Seasoned Beef Tacos
Beef Tacos • Easy Dinner Recipes • 30-Minute Meals

⏱️ Prep: PT10M
🔥 Cook: PT15M
⏳ Total: PT25M
🍽️ Yield: 8 tacos
⚡ Calories: 350 kcal
(284)
beef tacoseasy dinner30-minute mealground beef recipetaco nightquick weeknight dinner

These juicy seasoned beef tacos are loaded with flavorful ground beef and melty cheese for a quick weeknight dinner. An easy 30-minute meal perfect for family dinner or busy nights.…

Ingredients

Toggle: Metric / US

Instructions

Step 1

Begin by gathering all your ingredients. Take the ground beef out of the refrigerator and let it sit at room temperature for about 5 minutes—this helps it cook more evenly. Meanwhile, prepare your toppings: shred the lettuce, dice the tomato, and grate the cheese if not pre-shredded. Having everything prepped (mise en place) ensures a smooth cooking process. If you’re using hard taco shells, preheat your oven to 350°F (175°C) and warm them on a baking sheet for 3-5 minutes, or follow package instructions. For soft tortillas, you can warm them in a dry skillet over medium heat for about 30 seconds per side. Set the toppings aside.

Step 1 image
Step 2

Place a large skillet or frying pan over medium-high heat. Add the ground beef, breaking it apart with a wooden spoon or spatula. Cook for about 5-6 minutes, stirring occasionally, until the beef is browned and no longer pink. You want a nice deep brown color—this is where flavor develops through the Maillard reaction. If there’s excess fat, carefully drain it off using a colander or by tilting the pan and spooning it out (leave about 1 tablespoon for moisture). Reduce the heat to low.

Step 2 image
Step 3

Sprinkle the taco seasoning evenly over the cooked beef. Add the 1/2 cup of water and stir well to combine. Bring the mixture to a gentle simmer over medium heat, then reduce heat to low and let it cook for 3-4 minutes, stirring occasionally. The sauce will thicken as the water reduces and the spices meld with the beef. You’ll know it’s ready when the mixture is glossy and most of the liquid has evaporated, leaving a rich, savory coating on the meat. Taste and adjust seasoning if needed (add a pinch of salt or chili powder if desired).

Step 3 image
Step 4

Now it’s time to assemble your tacos. Take a warm taco shell and spoon about 2-3 tablespoons of the seasoned beef into the center. Top with a generous sprinkle of shredded cheese—the residual heat from the beef will melt it slightly. Add a handful of shredded lettuce and a spoonful of diced tomato. For extra flavor, add a dollop of sour cream, a spoonful of salsa, or a squeeze of fresh lime juice. Garnish with chopped cilantro if you like. Serve immediately while the shells are still warm and the beef is hot. Repeat with remaining shells.

Step 4 image

For best results

  • For the most flavorful beef, use a blend of spices instead of a store-bought packet. Mix 1 tablespoon chili powder, 1 teaspoon cumin, 1 teaspoon smoked paprika, 1/2 teaspoon garlic powder, 1/2 teaspoon onion powder, 1/2 teaspoon dried oregano, 1/2 teaspoon salt, and 1/4 teaspoon black pepper. This allows you to control the sodium and heat level. Toast the spices in the pan for 30 seconds before adding the water to deepen their flavor.
  • If you prefer a leaner taco, use ground turkey or chicken instead of beef. Since poultry is leaner, add a tablespoon of olive oil when cooking to prevent dryness. The cooking time will be similar, but ensure the internal temperature reaches 165°F (74°C). You can also use plant-based crumbles for a vegetarian version—cook according to package directions and season as above.
  • To avoid soggy taco shells, warm them in the oven rather than the microwave. For hard shells, place them upright in a muffin tin to hold their shape while heating. For soft tortillas, char them directly over a gas flame or on a hot griddle for a smoky flavor. If you're making a taco salad, skip the shells and serve the beef over a bed of lettuce with all the toppings.
  • Make the taco meat ahead of time: cook and season the beef, let it cool completely, then store in an airtight container in the refrigerator for up to 4 days. Reheat in a skillet over medium heat with a splash of water to restore moisture. You can also freeze the cooked meat for up to 3 months—thaw overnight in the fridge before reheating. This is perfect for meal prep or busy weeknights.
  • Customize your toppings to suit your taste. Try pickled jalapeños for heat, sliced avocado or guacamole for creaminess, pickled red onions for tang, or a drizzle of crema (sour cream thinned with lime juice). For a crunch factor, add crushed tortilla chips or toasted pepitas. The beauty of tacos is that everyone can build their own, so set out a spread and let your family or guests choose.

Variations

  • For a low-carb or keto-friendly version, use large lettuce leaves (like butter lettuce or romaine hearts) as wraps instead of tortillas. Increase the fat content by using 80/20 ground beef and adding full-fat sour cream and cheese. You can also add sautéed bell peppers and onions for extra flavor without many carbs. This variation is just as satisfying and keeps the meal light.
  • To make these tacos spicy, add 1-2 minced chipotle peppers in adobo sauce along with the taco seasoning. You can also mix in a diced jalapeño (seeds removed for milder heat) when cooking the beef. For extra heat, top with sliced fresh serrano peppers or a drizzle of hot sauce like Cholula or Tapatío. Adjust the spice level to your preference—start with less and add more as you go.
  • For a smoky twist, use ground beef that's been mixed with crumbled cooked chorizo (about 1/2 cup chorizo per pound of beef). Cook the chorizo first, then add the beef. The chorizo infuses the meat with deep, smoky, and slightly spicy flavors. Alternatively, swap the beef entirely for carnitas (shredded pork) or barbacoa (shredded beef) for a different texture and taste.

Nutrition

  • Calories350 kcal
  • Total Fat18g
  • Saturated Fat8g
  • Cholesterol65mg
  • Sodium620mg
  • Total Carbohydrates22g
  • Dietary Fiber3g
  • Sugars3g
  • Protein25g

Common Questions

Can I use a different type of ground meat?
Absolutely. Ground turkey, chicken, or pork work well. For a vegetarian option, use plant-based crumbles or cooked lentils. Adjust cooking times as needed—poultry should reach 165°F (74°C) internally. For lentils, cook separately and season generously.
How do I store leftover taco meat?
Allow the cooked beef to cool completely, then transfer to an airtight container. Refrigerate for up to 4 days. Reheat in a skillet over medium heat with a splash of water or broth to bring back moisture. You can also freeze the meat for up to 3 months—thaw overnight in the fridge before reheating.
Can I make this recipe gluten-free?
Yes, ensure your taco shells are gluten-free (corn tortillas are naturally gluten-free) and check that your taco seasoning doesn’t contain wheat starch or flour. Most store-bought seasonings are gluten-free, but always read labels. Serve with gluten-free toppings like fresh salsa, guacamole, and cheese.
Why is my taco meat dry?
Overcooking the beef or draining too much fat can lead to dryness. Use ground beef with at least 85% lean (15% fat) and don’t drain all the fat—leave about 1 tablespoon for moisture. Also, make sure to add the water when seasoning and simmer just until thickened. If the meat seems dry, stir in a tablespoon of tomato sauce or additional water.
Can I prepare the taco meat in advance?
Definitely. Cook and season the beef, cool it, and store in the fridge for up to 4 days. Reheat gently on the stovetop or microwave. This makes taco night a breeze—just warm the shells and prep fresh toppings when you’re ready to serve. The flavors often meld and improve overnight.
What are the best taco shells for this recipe?
It’s a matter of preference. Hard corn shells offer a satisfying crunch, while soft flour tortillas are pliable and hold more fillings. For a gluten-free option, use corn tortillas. You can also make your own shells by baking or frying corn tortillas. For a low-carb alternative, use lettuce wraps.
How can I make this recipe dairy-free?
Simply omit the cheese or use a dairy-free shredded cheese alternative. For sour cream, use a plant-based version or make a quick cashew cream. The rest of the recipe is naturally dairy-free. The tacos will still be delicious and satisfying without the dairy.

Notes

I’ve always believed that the best meals are the ones that bring people together, and tacos are the ultimate communal food. This recipe for juicy seasoned beef tacos is a staple in my kitchen because it’s incredibly easy, endlessly customizable, and ready in under 30 minutes. Whether it’s a busy weeknight or a casual gathering with friends, these tacos never fail to satisfy. The key is using quality ingredients and not rushing the browning of the meat—that deep, savory flavor is what makes these tacos stand out. I love to set up a taco bar with all the fixings so everyone can build their perfect taco. For a complete meal, serve with Mexican rice, refried beans, or a simple side of grilled corn. These tacos also pair wonderfully with a cold beer or a tangy margarita. I hope this recipe becomes a favorite in your home as it has in mine. Happy cooking!