<

Cajun Alfredo Steak Bites

Cajun Alfredo Steak Bites
High-Protein Dinners • 30-Minute Meals • Creamy Pasta Recipes

⏱️ Prep: PT10M
🔥 Cook: PT18M
⏳ Total: PT28M
🍽️ Yield: 4 servings
⚡ Calories: 620 kcal
(284)
Cajun Alfredo Steak BitesCreamy Garlic Butter SteakHigh-Protein Dinner30-Minute MealsSteak Pasta RecipeSpicy AlfredoQuick Weeknight Dinner

Spicy Cajun alfredo steak bites tossed with tender pasta in a creamy garlic butter sauce. This 30-minute high-protein dinner is bold, satisfying, and perfect for busy weeknights.

Ingredients

Toggle: Metric / US

Instructions

Step 1

Bring a large pot of salted water to a rolling boil. Add the pasta and cook according to package directions until al dente—typically 8-10 minutes for dried pasta. Stir occasionally to prevent sticking. While the pasta cooks, reserve about 1/2 cup of the starchy pasta water before draining. The starch in this water will help emulsify the sauce later, giving it a silky, clingy texture that coats every piece of steak and pasta beautifully. Drain the pasta in a colander, but do not rinse—rinsing removes the starch that helps the sauce adhere. Set the pasta aside, tossing it with a tiny drizzle of olive oil if you’re worried about sticking, though the sauce will be added soon.

Step 1 image
Step 2

While the pasta cooks, pat the steak cubes completely dry with paper towels. Moisture is the enemy of a good sear—any surface moisture will steam the meat instead of browning it, robbing you of that deep, savory crust. Season the steak cubes generously with Cajun seasoning, salt, and black pepper. Toss to coat evenly. If you like an extra kick, add the optional cayenne pepper at this stage. Let the seasoned steak sit at room temperature for 5-10 minutes; this takes the chill off the meat and promotes even cooking.

Step 2 image
Step 3

Heat a large heavy-bottomed skillet (cast iron or stainless steel works best) over medium-high heat. Add 1 tablespoon of the butter and let it melt until it sizzles and foams, but do not let it brown. Carefully place the steak cubes in a single layer—do not overcrowd the pan. If your skillet is too small, cook in batches to ensure each piece gets direct contact with the hot surface. Sear the steak for 2-3 minutes per side, until a deep golden-brown crust forms. The internal temperature should reach about 130°F (54°C) for medium-rare. Use an instant-read thermometer for precision. Transfer the seared steak to a plate and tent loosely with foil. The steak will continue to carryover cook while resting.

Step 3 image
Step 4

Reduce the heat to medium. Add the remaining 2 tablespoons of butter to the same skillet, scraping up any browned bits from the bottom with a wooden spoon—those bits are packed with flavor. Add the minced garlic and sauté for 30-60 seconds, just until fragrant. Garlic burns quickly, so keep it moving. The aroma should be nutty and sweet, not sharp or acrid.

Step 5

Pour in the heavy cream, stirring constantly to incorporate the garlic and browned bits. Bring the sauce to a gentle simmer, then reduce the heat to low. Let it cook for 2-3 minutes, stirring occasionally, until it thickens slightly. The sauce should coat the back of a spoon. If it seems too thick, add a splash of the reserved pasta water to thin it out. Whisk in the grated Parmesan cheese until melted and smooth. The cheese not only adds savory depth but also helps thicken the sauce further. Taste and adjust seasoning with salt and pepper if needed.

Step 6

Add the cooked pasta to the skillet with the creamy sauce. Toss gently with tongs to coat every strand. If the sauce is too thick, add more pasta water a tablespoon at a time until you reach your desired consistency. The sauce should cling to the pasta but still flow slightly. Return the seared steak cubes to the skillet, along with any accumulated juices from the plate. Toss everything together for about a minute, just until the steak is heated through. Be careful not to overcook the steak—you want it to stay tender and juicy.

Step 7

Remove the skillet from the heat. Sprinkle generously with chopped fresh parsley for a pop of color and freshness. Serve immediately in warm bowls, making sure each serving gets a good mix of pasta, steak, and sauce. For an extra touch, grate additional Parmesan on top or add a pinch of smoked paprika. Enjoy your Cajun Alfredo Steak Bites while they’re hot and creamy!

Step 7 image

For best results

  • Choosing the right steak cut is crucial for tenderness. Sirloin is lean, affordable, and cooks quickly, but ribeye offers more marbling and a richer flavor. For the best results, look for steaks that are at least 1 inch thick so you can cut nice bite-sized cubes. If using a leaner cut like sirloin, be extra careful not to overcook; medium-rare to medium is ideal. For extra tenderness, you can also use flank steak cut against the grain into cubes. Always let the steak rest after searing—this redistributes the juices and prevents them from spilling out onto the plate.
  • Cajun seasoning blends vary widely in heat and salt content. If your blend is particularly salty, reduce the added salt accordingly. To make your own Cajun seasoning, combine 1 tablespoon paprika, 1 teaspoon garlic powder, 1 teaspoon onion powder, 1 teaspoon dried oregano, 1 teaspoon dried thyme, 1/2 teaspoon cayenne pepper, 1/2 teaspoon black pepper, and 1/2 teaspoon salt. Adjust the cayenne to your heat preference. Homemade seasoning allows you to control the sodium and spice level perfectly.
  • For the creamiest sauce, use full-fat heavy cream with at least 36% milk fat. Light cream or half-and-half will result in a thinner sauce that may curdle when simmered. If you need a lighter option, you can substitute half-and-half but be prepared to add a slurry of cornstarch and water (1 tablespoon cornstarch mixed with 2 tablespoons cold water) to thicken the sauce. Stir it in after adding the Parmesan and simmer until thickened.
  • To achieve a perfect sear on the steak, make sure the skillet is hot before adding the butter. A drop of water should sizzle and evaporate immediately. Use a high smoke-point oil like avocado or canola if you prefer, but butter adds irreplaceable flavor. If using butter alone, watch it closely to prevent burning. You can also use a combination of oil and butter: start with oil for the initial sear, then add butter and garlic for the last minute of cooking.
  • Reserved pasta water is a secret weapon for creamy sauces. The starch in the water helps emulsify the sauce, making it silky and cohesive. Add it a splash at a time until the sauce reaches the perfect consistency—it should coat the pasta but not be soupy. If you forget to reserve pasta water, you can use a mixture of 1/4 cup water and 1 teaspoon cornstarch as a last resort, but the texture won't be quite as luxurious.
  • Don't skip the resting step for the steak. Resting allows the muscle fibers to relax and reabsorb the juices that were forced out during cooking. If you cut into the steak immediately, those juices will run out onto the plate, leaving the meat dry. A 5-minute rest under foil is sufficient for bite-sized cubes. The steak will also continue to cook slightly during this time, so take it off the heat just before it reaches your desired doneness.

Variations

  • For a low-carb or keto-friendly version, replace the pasta with zucchini noodles (zoodles) or shirataki noodles. Spiralize 2 medium zucchinis and sauté them in a separate pan for 2-3 minutes until just tender, then toss with the creamy Cajun sauce and steak. This cuts the carbs significantly while keeping the dish satisfying. You can also serve the steak bites and sauce over cauliflower rice or steamed broccoli for a complete low-carb meal.
  • To make this dish dairy-free, substitute the heavy cream with full-fat canned coconut milk (shake well before opening) and use a dairy-free butter alternative or olive oil. Omit the Parmesan cheese or use a vegan Parmesan made from cashews and nutritional yeast. The coconut milk adds a subtle sweetness that pairs surprisingly well with Cajun spices. Be sure to simmer the sauce a bit longer to thicken it, as coconut milk is thinner than heavy cream.
  • For a chicken version, swap the steak for boneless skinless chicken thighs or breasts cut into bite-sized pieces. Chicken thighs stay juicier and are more forgiving with cooking time. Adjust the cooking time: sear chicken pieces for 4-5 minutes per side until golden and cooked through (internal temperature 165°F/74°C). The rest of the recipe remains the same. You can also use shrimp: sauté peeled shrimp for 2-3 minutes per side until pink and opaque, then follow the sauce steps.
  • Add vegetables to boost nutrition and color. Sauté sliced bell peppers, onions, and mushrooms in the skillet after removing the steak, before adding the garlic. Cook for 3-4 minutes until softened and lightly browned. Then proceed with the garlic and cream. You can also stir in a handful of fresh spinach at the end, letting it wilt in the residual heat. This makes the dish more balanced and adds fiber.
  • For a smoky twist, use smoked paprika in the Cajun seasoning or add 1/2 teaspoon of smoked paprika to the sauce. You can also substitute the steak with smoked sausage or andouille sausage for a Creole-inspired version. Slice the sausage into rounds and brown them in the skillet before making the sauce. This variation is especially quick and pairs well with penne or rigatoni.

Nutrition

  • Calories620 kcal
  • Total Fat38g
  • Saturated Fat22g
  • Cholesterol145mg
  • Sodium890mg
  • Total Carbohydrates34g
  • Dietary Fiber2g
  • Sugars3g
  • Protein38g

Common Questions

Can I use a different type of pasta?
Absolutely! While fettuccine is classic for Alfredo-style sauces, this recipe works beautifully with penne, rigatoni, fusilli, or even spaghetti. The key is to choose a pasta shape that can hold onto the creamy sauce. Short, ridged pastas like penne rigate or cavatappi are especially good because the sauce gets trapped in the ridges and hollows. Just be sure to cook the pasta al dente according to package directions and reserve some pasta water before draining.
How do I store leftovers and reheat them?
Store any leftovers in an airtight container in the refrigerator for up to 3 days. The sauce will thicken as it cools, so when reheating, add a splash of milk, cream, or pasta water to loosen it up. Reheat gently in a skillet over medium-low heat, stirring frequently, or in the microwave in 30-second bursts. Avoid high heat, as it can cause the cream sauce to separate. The steak may become more well-done upon reheating, so it’s best to enjoy this dish fresh.
Can I make this recipe gluten-free?
Yes, to make it gluten-free, simply use gluten-free pasta (such as brown rice pasta, chickpea pasta, or lentil pasta) and ensure your Cajun seasoning and other ingredients are certified gluten-free. Many Cajun spice blends are naturally gluten-free, but it’s always good to check the label. The rest of the ingredients—steak, butter, cream, cheese—are naturally gluten-free. Follow the same cooking instructions, adjusting pasta cooking time as needed.
What is the best way to cut the steak for bite-sized pieces?
For tender, evenly cooked steak bites, cut the steak against the grain into 1-inch cubes. To find the grain, look for the lines of muscle fibers running through the meat. Slice perpendicular to those lines to shorten the fibers, which makes each bite more tender. If using a whole steak like sirloin or ribeye, first cut it into 1-inch thick strips across the grain, then cut those strips into 1-inch cubes. Pat the cubes dry before seasoning.
Can I make this dish ahead of time?
This dish is best enjoyed immediately after cooking, as the pasta can absorb the sauce and become mushy if left to sit. However, you can prep components ahead: cut and season the steak up to 24 hours in advance (store covered in the fridge), and cook the pasta just before serving. You can also make the sauce ahead and refrigerate it for up to 2 days; reheat gently and add a splash of cream or pasta water to restore consistency before combining with freshly cooked pasta and seared steak.
What if I don't have Cajun seasoning?
No problem! You can make a quick substitute by combining 1 teaspoon paprika, 1/2 teaspoon garlic powder, 1/2 teaspoon onion powder, 1/2 teaspoon dried oregano, 1/2 teaspoon dried thyme, 1/4 teaspoon cayenne pepper (or to taste), and 1/4 teaspoon black pepper. If you have Old Bay seasoning, that works too, though it’s slightly different. The key spices are paprika and cayenne for color and heat, plus garlic and onion powder for savory depth.
Is this recipe spicy? How can I adjust the heat?
The heat level depends on your Cajun seasoning. Most store-bought blends have a mild to medium kick. If you’re sensitive to spice, use only 1/2 tablespoon of Cajun seasoning and omit the optional cayenne. For a milder version, you can also add a tablespoon of cream cheese to the sauce to mellow the heat. To make it spicier, increase the cayenne or add a dash of hot sauce at the end. Remember, you can always add more heat, but you can’t take it away!

Notes

I first stumbled upon the idea of Cajun Alfredo steak bites during a late-night craving for something creamy, spicy, and protein-packed. I wanted the comfort of a classic Alfredo but with a bold Louisiana-inspired twist that would wake up my taste buds. After several tests in my tiny kitchen—varying the spice blend, the cream ratio, and the searing technique—I landed on this version that hits all the right notes: the steak is crusty on the outside and tender within, the sauce is velvety with a gentle heat that builds, and the pasta ties it all together. This dish has become a staple in my 30-minute high-protein dinner rotation, especially on nights when I need something satisfying without spending hours at the stove.The beauty of this recipe is its adaptability. Whether you’re cooking for a family or meal-prepping for the week, the components come together quickly and can be tweaked to suit your pantry. I love that it uses simple ingredients—steak, butter, cream, pasta—but elevates them with a punchy seasoning blend. The key is to not rush the sear: that golden crust is where the magic happens. And don’t skip the reserved pasta water; it’s a little trick that transforms the sauce from good to restaurant-quality.For serving, I like to plate the pasta in shallow bowls and arrange the steak bites on top, then drizzle a little extra sauce over everything. A side of crusty bread to mop up the remaining sauce is almost mandatory. Pair it with a simple green salad dressed with lemon vinaigrette to cut through the richness. And if you have leftovers (unlikely!), the sauce makes an amazing dip for bread or a topping for baked potatoes.I hope this recipe becomes as beloved in your kitchen as it is in mine. Don’t be afraid to make it your own—adjust the spice, swap the protein, or add your favorite veggies. Cooking is about intuition and joy, and this dish is a perfect canvas for both. Happy cooking!

Creamy Garlic Steak Pasta

Creamy Garlic Steak Pasta
Easy Dinner Recipes • Quick Dinner Ideas • 30-Minute Meals

⏱️ Prep: PT10M
🔥 Cook: PT20M
⏳ Total: PT30M
🍽️ Yield: 4 servings
⚡ Calories: 685 kcal
(284)
steak pastacreamy garlic pastasteak bitesquick dinner30 minute mealalfredo sauceeasy weeknight dinnerhigh protein dinner

Juicy steak bites meet creamy garlic Alfredo pasta in this quick 30-minute dinner. Perfect for busy weeknights, this easy recipe is packed with flavor and ready in no time.

Ingredients

Toggle: Metric / US

Instructions

Step 1

Begin by bringing a large pot of generously salted water to a rolling boil. The water should taste like the sea — this is your only chance to season the pasta from within. Add the fettuccine and cook according to package directions until al dente, typically 8-10 minutes. Reserve about 1/4 cup of the starchy pasta water before draining; this liquid gold will help emulsify your sauce later. Drain the pasta and set aside, tossing with a tiny drizzle of olive oil to prevent sticking.

Step 1 image
Step 2

While the pasta cooks, pat the steak cubes dry with paper towels. Moisture is the enemy of a good sear — any surface moisture will steam the meat instead of browning it. Season the cubes generously with salt, black pepper, and Cajun seasoning. Toss to coat evenly. The Cajun seasoning adds a smoky, slightly spicy kick that complements the creamy sauce beautifully. Let the steak rest at room temperature for 5-10 minutes to take the chill off; this promotes even cooking.

Step 2 image
Step 3

Heat a large, heavy-bottomed skillet (cast iron is ideal) over medium-high heat until it’s smoking hot. Add the olive oil and 1 tablespoon of butter, swirling to coat. Carefully add the steak cubes in a single layer — do not overcrowd the pan, or the temperature will drop and the meat will steam. Sear the steak bites for 2-3 minutes per side, without moving them, until a deep golden-brown crust forms. Use tongs to flip. The internal temperature should reach 130°F (54°C) for medium-rare. Remove the steak from the skillet and set aside on a plate; do not wipe the pan clean — those browned bits are pure flavor.

Step 4

Reduce the heat to medium-low. Add the remaining 2 tablespoons of butter to the skillet. Once melted, add the minced garlic. Sauté for about 30 seconds, stirring constantly, until fragrant. Be careful not to burn the garlic — it turns bitter quickly. The sizzling sound should be gentle, not aggressive. The aroma should be intoxicating, filling your kitchen with the promise of a luxurious sauce.

Step 5

Pour in the heavy cream, stirring to scrape up all the browned bits from the bottom of the pan. This deglazing step infuses the sauce with deep, savory flavor. Bring the cream to a gentle simmer, then reduce the heat to low. Stir in the grated Parmesan cheese until fully melted and the sauce is smooth and creamy. If the sauce seems too thick, add a splash of the reserved pasta water to loosen it. Taste and adjust seasoning with salt and pepper. The sauce should coat the back of a spoon — rich, velvety, and luscious.

Step 6

Add the cooked pasta to the skillet, tossing with tongs to coat every strand in the creamy garlic sauce. Let the pasta soak up the sauce for 1-2 minutes over low heat, allowing the flavors to meld. If the sauce thickens too much, add a little more pasta water. Finally, return the seared steak bites to the pan, gently folding them in. Be careful not to overcook the steak — you just want to warm it through. Serve immediately, garnished with fresh parsley and extra Parmesan if desired. The contrast between the tender, juicy steak and the silky pasta is pure magic.

For best results

  • Choosing the right steak is crucial for this dish. Sirloin is a great balance of tenderness and flavor without breaking the bank, but ribeye or New York strip will yield even more buttery, melt-in-your-mouth results. Look for steaks with good marbling — those thin white streaks of fat render during cooking, basting the meat from within and ensuring every bite is juicy. Avoid lean cuts like tenderloin, which can dry out quickly when cut into small pieces.
  • Patting the steak dry before seasoning is a step you absolutely cannot skip. Moisture creates steam, and steam prevents browning. The Maillard reaction — that beautiful golden crust — only occurs at temperatures above 300°F (150°C), and water boils at 212°F (100°C). So any surface water will keep the meat below that threshold until it evaporates. Use paper towels to blot the cubes thoroughly, then season immediately.
  • Don't skip the pasta water! The starchy water is a secret weapon for perfect pasta sauces. It contains dissolved starches that help emulsify the sauce, creating a silky, cohesive coating that clings to every strand. Add it a tablespoon at a time until the sauce reaches your desired consistency. The salt in the water also seasons the sauce from within, making every bite perfectly balanced.
  • For the best sear, use a cast-iron skillet or stainless steel pan. Nonstick pans are not ideal for high-heat searing because they can't reach the temperatures needed for a good crust and may release harmful fumes. Cast iron retains heat beautifully and gives you that restaurant-quality sear. If using stainless steel, be sure to preheat the pan thoroughly — a drop of water should dance across the surface before you add the oil.
  • Let the steak rest after searing. When you cook meat, the juices are pushed toward the center. Resting allows them to redistribute evenly throughout the meat, so every bite is moist and flavorful. If you cut into the steak immediately, those juices will run out onto the plate, leaving dry meat behind. A 5-minute rest on a warm plate is sufficient for steak bites.
  • Freshly grate your Parmesan cheese from a block. Pre-shredded cheese often contains anti-caking agents like cellulose, which prevent it from melting smoothly. For a silky, lump-free sauce, always grate your own. Use a microplane or the fine side of a box grater. The cheese should melt into the cream almost instantly, creating a cohesive sauce without any grittiness.

Variations

  • For a lighter version, substitute the heavy cream with half-and-half or a mixture of milk and a tablespoon of flour (to thicken). The sauce will be less rich but still flavorful. You can also use Greek yogurt, but be careful not to boil it, or it may curdle. Stir it in at the very end off the heat.
  • Make it gluten-free by using your favorite gluten-free pasta. Brown rice pasta or chickpea pasta work well. Be sure to cook it al dente and reserve extra pasta water, as gluten-free pasta tends to absorb more liquid. The sauce itself is naturally gluten-free as long as you skip any flour thickeners.
  • Add vegetables for a more balanced meal. Sautéed mushrooms, spinach, or sun-dried tomatoes are excellent additions. For mushrooms, cook them in the skillet after removing the steak, adding a little extra butter, until they release their moisture and turn golden. Stir in a handful of fresh spinach at the end of the sauce step and let it wilt before adding the pasta.
  • Switch up the protein: chicken breast or thighs, shrimp, or even firm tofu work beautifully. For chicken, cut into bite-sized pieces and cook similarly to the steak, adjusting time as needed. Shrimp only needs 2-3 minutes total. For tofu, press it dry, cube, and pan-fry until crispy before adding to the sauce.
  • Experiment with different flavor profiles. Swap the Cajun seasoning for Italian herbs (oregano, basil, thyme) or a pinch of red pepper flakes for heat. You can also add a splash of white wine or chicken broth to the pan after deglazing for extra depth. For a smoky twist, use smoked paprika instead of Cajun seasoning.
  • For a dairy-free version, use full-fat coconut cream instead of heavy cream and a dairy-free butter alternative. The coconut flavor will subtly change the profile, but it pairs surprisingly well with garlic and steak. Use nutritional yeast in place of Parmesan for a cheesy flavor without dairy.

Nutrition

  • Calories685 kcal
  • Total Fat38g
  • Saturated Fat20g
  • Cholesterol165mg
  • Sodium720mg
  • Total Carbohydrates48g
  • Dietary Fiber2g
  • Sugars4g
  • Protein42g

Common Questions

Can I use a different cut of steak?
Absolutely. While sirloin is recommended for its balance of tenderness and affordability, ribeye, New York strip, or filet mignon are excellent choices. Just adjust cooking time based on thickness. For tougher cuts like flank or skirt steak, slice against the grain after cooking to ensure tenderness. Avoid very lean cuts like top round, which can become tough when cubed.
How do I store leftovers and reheat them?
Store leftovers in an airtight container in the refrigerator for up to 3 days. To reheat, place the pasta in a skillet over medium-low heat with a splash of milk or cream to revive the sauce. Stir gently until warmed through. Avoid the microwave, which can make the steak tough and the sauce separate. For best results, enjoy fresh.
Can I make this recipe dairy-free?
Yes! Substitute the heavy cream with full-fat coconut cream or a dairy-free heavy cream alternative. Use a plant-based butter and nutritional yeast or dairy-free Parmesan for the cheese. The sauce will have a slightly different flavor, but it will still be creamy and delicious. Be sure to simmer gently to avoid separation.
Why did my sauce turn out grainy?
Grainy sauce is usually caused by overheating or using pre-shredded cheese. High heat can cause the dairy proteins to curdle and the cheese to clump. Always use freshly grated Parmesan and keep the heat low when adding the cheese. If the sauce does separate, try whisking in a tablespoon of cold butter or a splash of pasta water to bring it back together.
Can I substitute the heavy cream with something lighter?
Yes, half-and-half or whole milk mixed with a tablespoon of all-purpose flour (to thicken) can be used. The sauce will be less rich but still flavorful. For a keto-friendly option, use cream cheese mixed with a little milk. For a vegan version, cashew cream is an excellent substitute.
How do I prevent the steak from becoming tough?
Tough steak is often a result of overcooking. Use a meat thermometer to ensure the internal temperature reaches 130°F (54°C) for medium-rare. Also, let the steak rest after searing. Cutting the steak against the grain (if using a cut like flank) also helps. For cubes, sear quickly over high heat and don’t crowd the pan.
Can I add vegetables to this dish?
Definitely. Sautéed mushrooms, spinach, cherry tomatoes, or roasted bell peppers are great additions. Add mushrooms after searing the steak, cooking until golden. Stir in spinach at the end of the sauce step until wilted. For a complete one-pot meal, you can even add steamed broccoli or asparagus.
Is this recipe freezer-friendly?
Cream-based sauces do not freeze well, as they can separate and become grainy upon thawing. If you want to freeze, make the steak and pasta separately, then combine fresh sauce when reheating. Alternatively, freeze the cooked steak bites alone and make the sauce fresh when ready to serve.

Notes

This Creamy Garlic Butter Steak Bites with Pasta is a dish born from my love of quick, indulgent meals that don’t require hours in the kitchen. I remember the first time I made it — a frantic Tuesday night after a long day, craving something hearty and comforting. The sizzle of steak hitting a hot pan, the aroma of garlic melting into butter, and the silky cream swirling into a sauce that hugged every strand of pasta — it was pure magic. This recipe has since become a staple in my household, a go-to for when we need a restaurant-quality dinner in under 30 minutes.The inspiration came from classic steakhouse flavors: a perfectly seared steak, garlic butter, and a creamy Alfredo-like sauce. But I wanted to make it accessible for home cooks. No complicated techniques, no obscure ingredients — just simple, bold flavors that come together quickly. The Cajun seasoning adds a subtle warmth that cuts through the richness of the cream, while the fresh parsley adds a pop of color and freshness.Serving suggestions: This dish is hearty enough to stand alone, but a simple side salad with a lemon vinaigrette or some roasted green beans makes a lovely accompaniment. For a truly indulgent meal, serve with crusty bread to soak up any leftover sauce. A glass of full-bodied red wine, like a Cabernet Sauvignon or a Zinfandel, pairs beautifully with the steak and cream.One of the things I love most about this recipe is its versatility. It’s perfect for a busy weeknight, but also special enough for date night or a small dinner party. The key is to not rush the sear — that golden crust is the foundation of flavor. And remember, the sauce will thicken as it sits, so serve immediately for the best texture.I hope this recipe becomes a favorite in your kitchen as it has in mine. Cooking is about more than just feeding ourselves — it’s about creating moments of joy, warmth, and connection. So gather your ingredients, heat up that skillet, and let the aroma fill your home. Happy cooking!

The Best Creamy Garlic Butter Steak Bites with Pasta

The Best Creamy Garlic Butter Steak Bites with Pasta
Easy Dinner Recipes • 30-Minute Meals • Cajun Alfredo Pasta

⏱️ Prep: PT10M
🔥 Cook: PT20M
⏳ Total: PT30M
🍽️ Yield: 4 servings
⚡ Calories: 685 kcal
(284)
steak bitescreamy garlic butter steakCajun alfredo pastaeasy dinner30-minute mealhigh-protein dinner

Tender steak bites in garlic butter over pasta with a spicy Cajun alfredo sauce. This easy 30-minute dinner is rich, creamy, and perfect for weeknights.

Ingredients

Toggle: Metric / US

Instructions

Step 1

Start by bringing a large pot of salted water to a rolling boil. Add the pasta and cook according to package directions until al dente (typically 8-10 minutes). Reserve about 1 cup of pasta cooking water before draining, as the starchy water will help thicken the sauce later. Drain the pasta and set aside. While the pasta cooks, pat the steak cubes dry with paper towels. Moisture is the enemy of a good sear; removing excess moisture ensures a deep brown crust. Season the steak generously with salt, pepper, and half of the Cajun seasoning. Toss to coat evenly.

Step 1 image
Step 2

Heat a large skillet over medium-high heat. Add 2 tablespoons of butter and let it melt until it sizzles and foams. Carefully add the steak bites in a single layer without overcrowding the pan. If necessary, work in batches to maintain a high temperature. Sear the steak for 2-3 minutes per side until a deep golden-brown crust forms. The internal temperature should reach 130°F (54°C) for medium-rare. Use tongs to flip each piece. Once cooked, transfer the steak to a plate and tent loosely with foil to keep warm.

Step 2 image
Step 3

Reduce the heat to medium. Add the remaining 1 tablespoon of butter to the same skillet. Once melted, add the minced garlic and sauté for about 30 seconds until fragrant, stirring constantly to prevent burning. The garlic should become golden and aromatic. Sprinkle in the remaining Cajun seasoning and stir for another 10 seconds to bloom the spices in the fat.

Step 4

Pour in the heavy cream, scraping the bottom of the skillet with a wooden spoon to deglaze and incorporate any browned bits (fond). These bits are packed with flavor. Bring the cream to a gentle simmer, then reduce heat to low. Whisk in the grated Parmesan cheese until fully melted and the sauce is smooth. If the sauce is too thick, add reserved pasta water a tablespoon at a time until desired consistency is reached. Taste and adjust seasoning with salt and pepper.

Step 5

Add the cooked pasta and the seared steak bites (along with any accumulated juices) to the skillet. Toss everything together gently using tongs, ensuring the pasta and steak are evenly coated in the creamy Cajun sauce. Let it cook for 1-2 minutes over low heat to allow the flavors to meld. Garnish with fresh chopped parsley and serve immediately.

For best results

  • Choose the right steak: For tender steak bites, opt for sirloin, ribeye, or tenderloin. These cuts have enough marbling to stay juicy during quick searing. Avoid lean cuts like round steak, which can become tough. Cut the steak into uniform 1-inch cubes for even cooking. Let the steak come to room temperature for 15 minutes before cooking to promote even searing.
  • Master the sear: High heat is crucial. Use a heavy-bottomed skillet like cast iron or stainless steel to retain heat. Pat the steak extremely dry; any moisture will steam the meat instead of searing. Do not move the steak while searing; let it form a crust undisturbed. If the pan is too crowded, the temperature drops, so cook in batches if needed.
  • Bloom the spices: Toasting the Cajun seasoning in butter for a few seconds before adding cream intensifies its flavor. This technique, called blooming, releases essential oils from the spices, making the sauce more aromatic and complex. Be careful not to burn the garlic; it should be golden, not brown.
  • Perfect the sauce consistency: Heavy cream provides richness, but if you prefer a lighter sauce, substitute half-and-half. The sauce will thicken as it simmers; if it becomes too thick, add reserved pasta water gradually. The starch in the water helps emulsify the sauce, giving it a silky texture that clings to the pasta.
  • Rest the steak: After searing, let the steak bites rest for a few minutes before adding to the sauce. This allows the juices to redistribute, ensuring each bite stays moist. If you add them immediately, the juices may leak into the sauce, thinning it out.
  • Use fresh garlic: Freshly minced garlic provides a pungent, sweet flavor that powdered garlic cannot replicate. Pre-minced jarred garlic often has a bitter taste and lacks the same aromatic quality. For best results, mince your own cloves just before cooking.

Variations

  • Chicken version: Substitute the steak with boneless, skinless chicken thighs or breasts. Cut into bite-sized pieces and cook until golden and cooked through (165°F internal temperature). The cooking time may be slightly longer, about 4-5 minutes per side. The creamy Cajun sauce pairs beautifully with chicken.
  • Spice level adjustment: For a milder dish, reduce Cajun seasoning to 1 teaspoon or use a mild Cajun blend without cayenne. For extra heat, add 1/2 teaspoon of cayenne pepper or red pepper flakes along with the seasoning. You can also serve with hot sauce on the side.
  • Dairy-free option: Replace heavy cream with full-fat coconut milk (canned) and use a dairy-free butter substitute like vegan butter. Omit the Parmesan or use a dairy-free Parmesan alternative. The sauce will have a slight coconut flavor that complements the Cajun spices.
  • Pasta swap: Fettuccine is classic, but any pasta shape works. Penne, rigatoni, or farfalle hold the sauce well. For a low-carb option, serve over zucchini noodles (zoodles) or spaghetti squash. Adjust cooking time accordingly.
  • Vegetable add-ins: Boost nutrition by adding sautéed bell peppers, onions, or mushrooms. After removing the steak, sauté sliced mushrooms and diced bell peppers in the skillet for 3-4 minutes before adding garlic. Proceed with the sauce. Spinach can be stirred in at the end until wilted.

Nutrition

  • Calories685 kcal
  • Total Fat42g
  • Saturated Fat24g
  • Cholesterol175mg
  • Sodium890mg
  • Total Carbohydrates38g
  • Dietary Fiber2g
  • Sugars4g
  • Protein38g

Common Questions

Can I use a different cut of beef?
Absolutely! Ribeye, New York strip, or tenderloin all work well due to their tenderness and marbling. For a more budget-friendly option, use sirloin or flank steak, but be careful not to overcook as they can become tough. Cut against the grain for maximum tenderness.
How do I store leftovers?
Store leftovers in an airtight container in the refrigerator for up to 3 days. The steak may lose some tenderness upon reheating. To reheat, warm gently in a skillet over medium-low heat with a splash of milk or cream to restore the sauce’s creaminess. Avoid microwaving as it can make the steak rubbery.
Can I make this gluten-free?
Yes! Simply use gluten-free pasta (such as rice or corn-based pasta) and ensure your Cajun seasoning is gluten-free (some blends contain wheat flour as a filler). The rest of the ingredients are naturally gluten-free. Be careful with cross-contamination if you have celiac disease.
What is the best Cajun seasoning brand?
Popular brands include Tony Chachere’s, Slap Ya Mama, and Zatarain’s. You can also make your own by combining paprika, garlic powder, onion powder, cayenne, oregano, thyme, salt, and black pepper. Homemade allows you to control the salt and spice levels.
Why is my sauce grainy?
A grainy sauce usually results from overheating the cream or adding Parmesan too quickly. Always simmer cream gently, not boil. Add Parmesan gradually while whisking constantly. Pre-shredded cheese contains anti-caking agents that can cause graininess; grate your own from a block for a smoother sauce.
Can I freeze this dish?
Freezing is not recommended because the creamy sauce may separate upon thawing, and the steak can become tough. If you must freeze, store the sauce and pasta separately from the steak. Thaw overnight in the fridge, reheat gently, and add freshly seared steak for best results.
How can I thicken the sauce without pasta water?
If you don’t have reserved pasta water, you can use a cornstarch slurry (1 tablespoon cornstarch mixed with 2 tablespoons cold water) whisked into the simmering sauce. Alternatively, let the sauce simmer uncovered for a few extra minutes to reduce and thicken naturally.

Notes

This recipe is a personal favorite that I’ve refined over many busy weeknights. The inspiration came from a craving for steak and pasta, but I wanted something faster than a traditional steak dinner. The combination of garlic butter and Cajun seasoning creates a bold, savory sauce that coats every bite. I love that it comes together in just 30 minutes, making it perfect for those evenings when you want something indulgent without spending hours in the kitchen. Serve with a simple green salad or roasted vegetables to round out the meal. The leftovers (if any) make a fantastic lunch the next day. Remember, the key to success is a hot pan and dry steak – don’t skip those steps! Enjoy every creamy, garlicky, spicy forkful.

Cheese Steak Pasta Dinner

Cheese Steak Pasta Dinner
Easy Dinner Recipes • Philly Cheese Steak Pasta • Cheesy Pasta Recipes

⏱️ Prep: PT20M
🔥 Cook: PT25M
⏳ Total: PT45M
🍽️ Yield: 6 servings
⚡ Calories: 585 kcal
(284)
easy dinner recipesquick dinner ideasphilly cheesesteak pastacheesy pasta30-minute mealsbudget mealsfamily dinnercomfort food

This Cheese Steak Pasta Dinner is a budget-friendly meal that combines tender steak, bell peppers, and creamy cheese sauce over pasta. An easy weeknight dinner the whole family loves.

Ingredients

Toggle: Metric / US

Instructions

Step 1

Bring a large pot of generously salted water (about 1 tablespoon salt per 4 quarts) to a rolling boil. Add the pasta and cook according to package directions until al dente, typically 8-10 minutes. Al dente pasta will have a slight resistance when bitten, which is important because it will continue to absorb some sauce later. Reserve about 1 cup of pasta water before draining – this starchy liquid can be used to thin the sauce if needed. Drain the pasta in a colander and set aside. Do not rinse the pasta; the starch on the surface helps the sauce cling better.

Step 1 image
Step 2

While the pasta cooks, pat the sliced steak dry with paper towels. Moisture is the enemy of browning – excess steam will prevent a good sear. Season the steak generously with salt and pepper. In a large skillet or Dutch oven, heat 1 tablespoon of olive oil over high heat until shimmering (just before the smoking point). Add the steak in a single layer – do not overcrowd the pan, work in batches if necessary. Sear for 1-2 minutes per side until a deep brown crust forms. The crust is where the rich, beefy flavor lives. Remove the steak to a plate and set aside. The steak will finish cooking later in the sauce, so it’s okay if it’s slightly underdone now.

Step 2 image
Step 3

Reduce heat to medium-high and add the remaining 1 tablespoon olive oil. Add the sliced onion and bell peppers. Sauté for 5-7 minutes, stirring occasionally, until the vegetables are softened and beginning to caramelize. The natural sugars in the onions and peppers will deepen in flavor, creating that classic Philly cheesesteak taste. You want the onions to be translucent with golden edges. Add the minced garlic and cook for 30 seconds until fragrant, stirring constantly to prevent burning.

Step 4

Push the vegetables to one side of the pan and reduce heat to medium. Add the butter to the empty space. Once melted, whisk in the flour to form a roux. Cook the roux for 1-2 minutes, stirring constantly, until it turns a light golden color and smells nutty. This cooks out the raw flour taste and ensures a smooth, lump-free sauce. The roux will thicken the sauce and give it a velvety texture.

Step 5

Slowly pour in the milk and beef broth while whisking continuously to incorporate the roux. Bring the mixture to a gentle simmer, then reduce heat to low. Let it simmer for 2-3 minutes, whisking occasionally, until the sauce thickens enough to coat the back of a spoon. If you run your finger across the spoon, the line should hold. Now add the softened cream cheese, breaking it into pieces for easier melting. Whisk until completely smooth. The cream cheese adds richness and a slight tang that balances the savory elements.

Step 6

Add the shredded provolone cheese a handful at a time, stirring until each addition is fully melted before adding more. Provolone melts beautifully and gives that iconic stretchy, gooey texture. Stir in the Worcestershire sauce and smoked paprika. Season with salt and pepper to taste. The sauce should be well-seasoned, as the pasta will absorb some salt. If the sauce is too thick, add a splash of the reserved pasta water to reach desired consistency.

Step 7

Return the seared steak (and any accumulated juices) to the skillet, along with the sautéed vegetables. Stir to combine and let everything warm through for 1-2 minutes over low heat. The steak will finish cooking gently in the hot sauce, remaining tender. Add the cooked pasta and toss until every piece is coated in the creamy cheese sauce. If the sauce seems too thick, add a little more pasta water. Garnish with fresh parsley and serve immediately while hot and creamy.

For best results

  • Slicing the Steak: For the most tender bites, slice the steak against the grain (perpendicular to the muscle fibers). This shortens the fibers, making each piece easier to chew. Partially freezing the steak for 15-20 minutes before slicing makes it much easier to cut thin, even strips. Aim for 1/8-inch thick slices. If using ribeye, the marbling will keep the meat juicy even after reheating.
  • Choosing the Right Cheese: Provolone is classic for Philly cheesesteak flavor, but you can substitute with provolone and mozzarella blend, or use white American cheese for extra creaminess. Avoid pre-shredded cheese as it contains anti-caking agents that prevent smooth melting. Always shred your own cheese from a block for a silky sauce. For a sharper bite, mix in some shredded cheddar.
  • Pasta Shape Matters: Short, sturdy pasta shapes like penne, rotini, or rigatoni are ideal because they hold onto the chunky sauce and pieces of meat and vegetables. Long pasta like spaghetti can work but the sauce may not cling as well. Cook the pasta al dente since it will continue cooking slightly when tossed with the hot sauce.
  • Make It Ahead: This dish is best served fresh, but leftovers can be stored in an airtight container in the refrigerator for up to 3 days. To reheat, add a splash of milk or beef broth and warm gently in a skillet over medium-low heat, stirring often, to restore the creamy consistency. Avoid microwaving on high as it can make the cheese sauce grainy.
  • Double the Sauce: If you prefer an extra saucy pasta, increase the sauce ingredients by 50% (3 cups milk, 1.5 cups broth, 12 oz cheese). The recipe as written provides a generous coating but not an overly wet dish. You can always reserve extra sauce and add as needed.
  • Vegetable Variations: While green and red bell peppers are traditional, you can add sliced mushrooms (cremini or button) along with the peppers for an earthy flavor. Sauté them until they release their moisture and turn golden brown. Mushrooms also boost the umami profile without adding extra cost.

Variations

  • Chicken Philly Pasta: Substitute the beef with boneless, skinless chicken thighs or breasts. Slice the chicken thinly and season with salt, pepper, and a pinch of paprika. Sear until golden and cooked through, then proceed with the recipe. Chicken is often more budget-friendly and still delivers a hearty protein punch.
  • Vegetarian Philly Pasta: Omit the steak and double the bell peppers and onions. Add 8 oz of sliced portobello mushrooms for a meaty texture. Use vegetable broth instead of beef broth. The mushrooms provide umami and a satisfying chew. You can also add a can of drained chickpeas for extra protein.
  • Spicy Philly Pasta: Add 1-2 teaspoons of hot sauce (like sriracha or Tabasco) to the cheese sauce, or stir in 1/2 teaspoon of red pepper flakes along with the smoked paprika. For extra heat, use pepper jack cheese in place of half the provolone. The spicy kick balances the richness of the cream sauce.
  • Low-Carb/Keto Version: Replace the pasta with zucchini noodles (zoodles) or cauliflower florets. For zoodles, sauté them lightly after making the sauce and toss together just until heated (zoodles release water quickly). For cauliflower, roast florets at 400°F for 20 minutes until tender, then toss with the sauce and steak. This version is gluten-free and low-carb.
  • Philly Cheesesteak Casserole: Turn this into a baked casserole by tossing the cooked pasta, steak, vegetables, and sauce in a 9×13 baking dish. Top with extra shredded provolone and bake at 375°F for 15-20 minutes until bubbly and golden. This is perfect for feeding a crowd or meal prep.

Nutrition

  • Calories585 kcal
  • Total Fat28g
  • Saturated Fat14g
  • Cholesterol95mg
  • Sodium680mg
  • Total Carbohydrates52g
  • Dietary Fiber3g
  • Sugars8g
  • Protein32g

Common Questions

Can I use a different cut of beef?
Absolutely. While ribeye is traditional for its marbling and tenderness, sirloin, flank steak, or even top round work well. For tougher cuts, consider marinating the sliced beef in a little baking soda (1/2 teaspoon per pound mixed with 2 tablespoons water) for 15 minutes, then rinsing. This tenderizes the meat. Avoid ground beef as it changes the texture significantly.
How do I prevent the cheese sauce from becoming grainy?
Graininess usually happens when cheese is overheated or added too quickly. Always melt cheese over low heat and stir continuously. Use freshly shredded cheese (not pre-shredded) as anti-caking agents can cause graininess. If the sauce does become grainy, try whisking in a tablespoon of cold cream or a splash of lemon juice to help smooth it out.
Can I make this gluten-free?
Yes! Use gluten-free pasta (such as brown rice or chickpea pasta) and substitute the all-purpose flour with a gluten-free all-purpose blend or cornstarch. For the roux, use 1 tablespoon cornstarch mixed with 2 tablespoons cold water (slurry) added at the end instead of flour. Cook the slurry for a minute to thicken. Ensure Worcestershire sauce is gluten-free (some brands contain malt vinegar).
How long do leftovers last and how should I reheat them?
Leftovers can be stored in an airtight container in the refrigerator for up to 3 days. To reheat, place in a skillet over medium-low heat with a splash of milk or beef broth. Stir gently until warmed through, about 5-7 minutes. Microwaving is okay but use medium power in 30-second intervals, stirring in between, to avoid overcooking the pasta or separating the sauce.
Can I freeze this dish?
Freezing is not recommended because the cheese sauce may separate and become grainy upon thawing. The pasta can also become mushy. If you must freeze, undercook the pasta slightly and freeze the sauce separately. Thaw overnight in the refrigerator, then reheat and combine with freshly cooked pasta.
What can I substitute for provolone cheese?
Provolone gives a mild, buttery flavor with excellent melt. Good substitutes include mozzarella (for stretchiness), white American cheese (for ultra-creaminess), or a mix of mozzarella and sharp cheddar. For a smoky twist, use smoked gouda. Avoid hard cheeses like Parmesan alone as they don’t melt smoothly.
Is this recipe spicy?
No, this recipe is not spicy. It has a rich, savory flavor with a hint of smokiness from the paprika. If you prefer heat, you can add red pepper flakes, cayenne pepper, or hot sauce to taste. The recipe is family-friendly and can be easily adjusted for different spice levels.

Notes

This Philly Cheese Steak Pasta is my go-to when I need a hearty, comforting dinner that comes together in under an hour without breaking the bank. Inspired by the classic Philadelphia cheesesteak sandwich, this pasta version transforms the iconic flavors into a one-pot meal that’s perfect for busy weeknights. I love how the creamy provolone sauce coats every piece of pasta, while the tender steak and caramelized peppers add texture and depth. It’s the kind of dish that feels indulgent but uses simple, affordable ingredients. I recommend serving it with a crisp green salad tossed in a tangy vinaigrette to cut through the richness, or some roasted broccoli on the side. Leftovers make a fantastic lunch the next day – just add a splash of milk when reheating to bring back the creamy consistency. This recipe has been a hit with my family and friends, and I hope it becomes a favorite in your home too. Happy cooking!

Philly Cheesesteak Pasta

Philly Cheesesteak Pasta
Easy Dinner Recipes • Quick Pasta Recipes • 30-Minute Meals

⏱️ Prep: PT15M
🔥 Cook: PT20M
⏳ Total: PT35M
🍽️ Yield: 4 servings
⚡ Calories: 545 kcal
(284)
Philly Cheesesteak PastaEasy Dinner RecipesQuick Pasta30-Minute MealsCheesy PastaBeef PastaWeeknight Dinner

Philly Cheesesteak Pasta is a quick dinner idea that transforms classic cheesesteak flavors into a hearty pasta dish. This easy weeknight dinner features tender beef, caramelized onions, and peppers in…

Ingredients

Toggle: Metric / US

Instructions

Step 1

Bring a large pot of salted water to a rolling boil. Add the pasta and cook according to package directions until al dente, usually 10-12 minutes. Reserve about 1 cup of pasta water before draining. The starchy pasta water is liquid gold—it can help loosen the sauce later if it becomes too thick. Drain the pasta and set aside. While the pasta cooks, you can prepare the other components to save time.

Step 1 image
Step 2

While the pasta boils, season the thinly sliced steak with salt and pepper. In a large skillet or Dutch oven, heat 1 tablespoon of olive oil over high heat until shimmering. Add the steak in a single layer (work in batches if needed to avoid overcrowding). Sear for 1-2 minutes per side until nicely browned but still tender. Transfer the cooked steak to a plate and set aside. Overcrowding the pan would steam the meat instead of searing it, so be patient and give each piece room to develop that deep, savory crust.

Step 2 image
Step 3

Reduce the heat to medium-high and add the remaining 1 tablespoon olive oil. Add the sliced onion and bell peppers. Sauté for 5-7 minutes, stirring occasionally, until the vegetables are softened and beginning to caramelize. The onions should turn translucent and develop sweet, golden edges. Add the minced garlic and cook for another 30 seconds until fragrant. The aroma of garlic blooming in the oil is your cue to move on to the next step.

Step 4

Push the vegetables to one side of the skillet and add the butter. Once melted, sprinkle the flour over the butter and whisk continuously for 1 minute to form a roux. This cooks out the raw flour taste and creates a smooth base for the sauce. Gradually pour in the milk and beef broth while whisking constantly to prevent lumps. Bring the mixture to a gentle simmer, then reduce the heat to low. The sauce will thicken as it heats—look for a consistency that coats the back of a spoon.

Step 5

Add the softened cream cheese and shredded provolone to the sauce. Stir until fully melted and smooth. The cream cheese adds a velvety richness, while provolone delivers that classic Philly cheesesteak tang. Season with salt, pepper, and smoked paprika if using. Taste and adjust seasoning—the cheese sauce should be boldly flavored, as it will coat the pasta and beef.

Step 6

Return the cooked steak and any accumulated juices to the skillet along with the drained pasta. Toss everything together until evenly coated in the cheese sauce. If the sauce is too thick, add a splash of the reserved pasta water to reach your desired consistency. The starchy water not only thins the sauce but also helps it cling beautifully to every noodle.

Step 7

Serve immediately in warmed bowls, garnished with fresh chopped parsley for a pop of color and freshness. For an extra indulgent touch, top with additional shredded provolone and broil for 2-3 minutes until bubbly and golden. This final step creates a glorious cheese crust that will have everyone reaching for seconds.

For best results

  • For the most tender beef, choose ribeye or sirloin and slice it very thinly against the grain. Partially freezing the steak for 20-30 minutes makes slicing a breeze—you'll get paper-thin slices that cook in seconds and stay juicy. If you're on a budget, flank steak or even pre-sliced stir-fry beef works well; just avoid tough cuts like chuck or round.
  • Don't skip the step of reserving pasta water. The starch in that water is a natural thickener and emulsifier that can rescue a sauce that's too thick or help it coat the pasta evenly. Add it a tablespoon at a time until the sauce flows like heavy cream. It's a secret weapon used by Italian grandmothers and professional chefs alike.
  • To maximize flavor, use low-sodium beef broth so you can control the saltiness. If you only have regular broth, reduce the added salt by half. The cheese and cream cheese also contribute salt, so always taste before adding more. A pinch of smoked paprika or a dash of Worcestershire sauce can elevate the savory notes without extra sodium.
  • For a truly authentic Philly cheesesteak experience, use provolone cheese—it melts beautifully and has that signature tang. However, you can substitute with mozzarella for a milder, stretchier melt, or use white American cheese for a creamier, more nostalgic sauce. Avoid pre-shredded cheese as it contains anti-caking agents that can make the sauce grainy.
  • This dish is best enjoyed fresh, but leftovers can be stored in an airtight container in the refrigerator for up to 3 days. To reheat, add a splash of milk or water and warm gently on the stovetop or in the microwave, stirring occasionally. The pasta may absorb some sauce, so don't be shy about adding a little liquid to revive it.
  • If you're meal-prepping, cook the pasta al dente and undercook it slightly—it will finish cooking when you reheat it with the sauce. Store the sauce and pasta separately to prevent sogginess. When ready to eat, simply reheat the sauce, toss with the pasta, and enjoy a quick, satisfying meal.

Variations

  • Chicken Philly Cheesesteak Pasta: Swap the beef for boneless, skinless chicken thighs or breasts. Slice the chicken thinly and cook until no longer pink, about 4-5 minutes. The rest of the recipe remains the same. This version is slightly leaner and pairs wonderfully with the same cheese sauce and veggies.
  • Vegetarian Philly Cheesesteak Pasta: Omit the beef entirely and double the vegetables—use portobello mushrooms, zucchini, and extra bell peppers for a hearty, meaty texture. The umami from the mushrooms will satisfy even carnivores. You can also add a can of drained chickpeas for protein. The cheese sauce is already vegetarian-friendly.
  • Spicy Philly Cheesesteak Pasta: Add 1-2 chopped jalapeños or serrano peppers along with the onions and bell peppers. For extra heat, stir in 1/2 teaspoon red pepper flakes or a dash of cayenne pepper with the garlic. Top with pickled jalapeños for a tangy kick that cuts through the richness.
  • Low-Carb/Keto Version: Replace the pasta with zucchini noodles (zoodles) or cauliflower florets. Sauté the zoodles for 2-3 minutes until just tender, or roast cauliflower until golden. The cheese sauce is naturally low-carb, making this a perfect keto-friendly comfort meal. Use full-fat cream cheese and heavy cream instead of milk for extra richness.
  • Philly Cheesesteak Casserole: Turn this into a baked casserole by combining the cooked pasta, beef, and vegetables in a 9×13-inch baking dish. Pour the cheese sauce over the top, sprinkle with extra provolone, and bake at 375°F (190°C) for 15-20 minutes until bubbly and golden. This is perfect for feeding a crowd or meal prep.

Nutrition

  • Calories545 kcal
  • Total Fat32g
  • Saturated Fat16g
  • Cholesterol105mg
  • Sodium820mg
  • Total Carbohydrates38g
  • Dietary Fiber3g
  • Sugars8g
  • Protein35g

Common Questions

Can I use a different cut of beef?
Yes, you can use sirloin, flank steak, or even pre-sliced stir-fry beef. For the most tender results, choose a cut with good marbling and slice it thinly against the grain. Avoid tough cuts like chuck or round, unless you plan to slow-cook them separately before adding to the dish.
Can I make this dairy-free?
Absolutely. Use a dairy-free butter substitute (like vegan butter or coconut oil), unsweetened almond or oat milk for the milk, and dairy-free cream cheese and shredded cheese (many brands melt well). The flavor will be slightly different but still delicious. Nutritional yeast can add a cheesy note if desired.
How do I prevent the sauce from becoming grainy?
Grainy sauce often results from overheating or using pre-shredded cheese. Always melt cheese over low heat and stir continuously. Use block cheese that you shred yourself—it contains no anti-caking agents. Also, add cream cheese at room temperature and whisk until smooth before adding the shredded cheese.
Can I freeze Philly Cheesesteak Pasta?
Yes, but the texture of the sauce may change upon thawing. For best results, freeze the sauce and pasta separately in airtight containers for up to 3 months. Thaw overnight in the refrigerator, then reheat gently with a splash of milk or broth to restore creaminess. The beef and vegetables freeze well too.
What pasta shapes work best?
Short, sturdy shapes like penne, rigatoni, fusilli, or cavatappi are ideal because they hold the sauce well in their ridges and curves. Long pasta like spaghetti or fettuccine can work, but the sauce may not cling as effectively. Avoid delicate shapes that might break apart when stirred.
How can I make this dish spicier?
Add sliced jalapeños or serrano peppers when sautéing the vegetables, or stir in red pepper flakes, cayenne pepper, or a drizzle of hot sauce to the cheese sauce. You can also use pepper jack cheese in place of some of the provolone for an extra kick.
Is this recipe gluten-free?
Yes, simply use gluten-free pasta (such as rice, corn, or lentil-based) and replace the all-purpose flour with a gluten-free flour blend or cornstarch. For the roux, whisk 1 tablespoon cornstarch with 2 tablespoons cold milk to make a slurry, then add it to the sauce after the milk and broth. Simmer until thickened.

Notes

Philly Cheesesteak Pasta is the ultimate comfort food mashup that brings together two beloved classics: the iconic Philly cheesesteak sandwich and a creamy, indulgent pasta dish. I first created this recipe on a busy weeknight when I was craving the flavors of my favorite cheesesteak from a local deli but didn’t have any hoagie rolls on hand. The result was an instant hit with my family, and it’s been a staple in our dinner rotation ever since.What I love most about this dish is its versatility. You can easily adapt it to what you have in your fridge—swap the beef for chicken, add mushrooms, or use whatever cheese you have melting in the drawer. The creamy, cheesy sauce comes together in minutes and coats every piece of pasta beautifully. The caramelized onions and peppers add a touch of sweetness and a pop of color, while the tender beef brings that savory, meaty satisfaction.Serving suggestions: Pair this pasta with a simple green salad dressed with a tangy vinaigrette to cut through the richness. Garlic bread or a crusty baguette is also wonderful for sopping up any extra sauce. For a complete meal, add a side of roasted broccoli or asparagus. Leftovers make a fantastic lunch the next day—just reheat gently and enjoy.I hope this recipe brings as much joy to your table as it does to mine. Don’t be afraid to make it your own—cooking is all about experimenting and having fun. Happy cooking!

DELICIOUS PHILLY CHEES STEAK PASTA

DELICIOUS PHILLY CHEES STEAK PASTA
Philly Cheesesteak Pasta • Easy Dinner Recipes • 30-Minute Meals

⏱️ Prep: PT10M
🔥 Cook: PT20M
⏳ Total: PT30M
🍽️ Yield: 4 servings
⚡ Calories: 650 kcal
(284)
Philly Cheesesteak PastaEasy Dinner Recipes30-Minute MealsCreamy PastaBeef PastaWeeknight Dinner

This quick and easy Philly Cheesesteak Pasta recipe combines tender steak, bell peppers, and onions in a creamy cheese sauce for a delicious family dinner. Ready in 30 minutes, it's…

Ingredients

Toggle: Metric / US

Instructions

Step 1

Bring a large pot of salted water to a rolling boil. Add 8 ounces of pasta (penne or rigatoni work beautifully because their ridges and hollow centers catch the creamy sauce). Cook according to package directions until al dente—usually about 8-10 minutes. You want the pasta to have a slight bite, as it will continue to cook slightly when tossed with the hot sauce. Reserve 1 cup of pasta water before draining; the starchy water is liquid gold for thinning the sauce if needed. Drain the pasta and set aside. While the pasta cooks, you can prepare the other components to maximize efficiency.

Step 1 image
Step 2

While the pasta cooks, season the thinly sliced steak generously with salt and pepper. The key to tender steak in a quick-cooking dish is to slice it very thin—about 1/8-inch thick. For easier slicing, place the steak in the freezer for 15-20 minutes before cutting; this firms it up without freezing solid. Heat 1 tablespoon of olive oil in a large skillet or Dutch oven over medium-high heat until shimmering. Add the steak in a single layer (work in batches if needed to avoid overcrowding). Sear for 1-2 minutes per side until browned but still pink in the center. Overcooking at this stage will result in tough meat later. Transfer the seared steak to a plate and set aside.

Step 2 image
Step 3

Reduce the heat to medium and add the remaining 1 tablespoon of olive oil to the same skillet. Add the sliced onion and bell pepper. Sauté for 4-5 minutes, stirring occasionally, until the vegetables are softened and beginning to caramelize. The edges of the onion should turn golden brown, adding a sweet, savory depth that mimics the classic cheesesteak experience. Add the minced garlic and cook for 30 seconds until fragrant, stirring constantly to prevent burning. The aroma of garlic blooming in the oil is your cue to move to the next step.

Step 4

Push the vegetables to one side of the skillet and add the butter. Once melted, sprinkle the flour over the butter and whisk continuously for 1 minute to form a roux. This cooks out the raw flour taste and thickens the sauce. Slowly pour in the milk while whisking vigorously to prevent lumps. Then add the beef broth, continuing to whisk until the mixture is smooth. Bring to a gentle simmer; the sauce will start to thicken after about 2-3 minutes. It should coat the back of a spoon—if it seems too thick, add a splash of reserved pasta water.

Step 5

Reduce the heat to low and add the cream cheese, breaking it into pieces as you stir. Whisk until fully melted and incorporated, creating a velvety base. Gradually add the shredded provolone cheese, a handful at a time, stirring until each addition is melted before adding more. The sauce will become rich, creamy, and slightly stringy—a hallmark of a great cheesesteak. Season with smoked paprika, salt, and pepper to taste. If the sauce is too thick, thin with pasta water 1 tablespoon at a time.

Step 6

Return the cooked steak and any accumulated juices to the skillet. Add the drained pasta and toss everything together using tongs or a wooden spoon until the pasta and steak are evenly coated in the creamy cheese sauce. Cook for 1-2 minutes over low heat to let the flavors meld. The sauce will cling to every nook and cranny of the pasta. Taste and adjust seasoning if needed. Serve immediately, garnished with fresh parsley and extra shredded provolone if desired.

For best results

  • For the most tender steak, choose ribeye or sirloin and slice it against the grain into thin strips. Freezing the steak for 15-20 minutes before slicing makes this task easier and yields uniform pieces that cook evenly. If you're short on time, you can also use pre-sliced stir-fry beef from the grocery store, but be aware that it may be less tender. Avoid overcooking the steak during the initial sear; it will finish cooking when tossed with the hot sauce.
  • The cheese sauce is the soul of this dish. Use high-quality provolone that melts well—avoid pre-shredded cheese, which contains anti-caking agents that can make the sauce grainy. Shred the provolone yourself from a block for the smoothest result. Cream cheese adds richness and helps stabilize the sauce, preventing it from breaking. If you prefer a sharper flavor, substitute half the provolone with aged white cheddar.
  • Pasta choice matters: short, sturdy shapes like penne, rigatoni, or fusilli are ideal because they hold up to the hearty sauce and meat. Avoid delicate pastas like angel hair or spaghetti, which can become mushy. Cook the pasta al dente—it will absorb some sauce as it sits, so starting with a firm texture ensures it doesn't turn into mush.
  • To save time, prep all ingredients before you start cooking. Slice the steak and vegetables, shred the cheese, and measure the liquids. This mise en place approach makes the 30-minute timeline achievable without stress. The entire dish comes together quickly, so having everything at arm's length prevents burning or overcooking.
  • Leftovers can be stored in an airtight container in the refrigerator for up to 3 days. Reheat gently on the stovetop with a splash of milk or beef broth to restore the creamy consistency. Avoid microwaving, as it can make the sauce separate and the steak chewy. This pasta also freezes well for up to 2 months—thaw overnight in the fridge and reheat as directed.
  • For a lighter version, you can use half-and-half instead of whole milk, and reduce the cream cheese to 2 ounces. The sauce will be less rich but still creamy. Alternatively, swap the provolone for part-skim mozzarella to cut some fat without sacrificing meltability. To boost protein, add a scoop of unflavored collagen peptides or use high-protein pasta.

Variations

  • Chicken Cheesesteak Pasta: Replace the beef with boneless, skinless chicken thighs or breasts. Slice them thin and cook just until no longer pink. Chicken pairs beautifully with the creamy provolone sauce and sautéed peppers and onions. For extra flavor, season the chicken with garlic powder and onion powder before searing.
  • Mushroom and Swiss Variation: Omit the steak for a vegetarian version. Sauté 8 ounces of sliced cremini mushrooms along with the onions and peppers. Use Swiss cheese instead of provolone for a nutty, earthy flavor. The mushrooms provide a meaty texture that satisfies even carnivores. Add a splash of Worcestershire sauce (or soy sauce for vegetarian) to deepen the umami.
  • Spicy Cajun Philly Pasta: Add 1 teaspoon of Cajun seasoning to the steak before searing and another 1/2 teaspoon to the sauce. Replace the green bell pepper with a poblano pepper for a mild heat. Top with sliced jalapeños and a drizzle of hot sauce before serving. This variation brings a Louisiana kick to the classic cheesesteak profile.
  • Low-Carb/Keto Version: Substitute the pasta with zucchini noodles (zoodles) or cauliflower florets. For zoodles, sauté them briefly after cooking the sauce and toss gently to warm through—overcooking will make them watery. For cauliflower, roast the florets at 400°F for 20 minutes until tender, then fold into the sauce with the steak. Use heavy cream instead of milk and increase the cream cheese to 4 ounces to keep the sauce keto-friendly.
  • Cheesesteak Stuffed Shells: Cook jumbo pasta shells according to package directions. Prepare the steak and vegetable mixture as directed, but chop the steak into small pieces. Mix the filling with half the cheese sauce, stuff into the shells, and arrange in a baking dish. Pour the remaining sauce over the top, sprinkle with extra provolone, and bake at 375°F for 15-20 minutes until bubbly. This is a fun, interactive twist for dinner parties.

Nutrition

  • Calories650 kcal
  • Total Fat38g
  • Saturated Fat20g
  • Cholesterol145mg
  • Sodium820mg
  • Total Carbohydrates42g
  • Dietary Fiber3g
  • Sugars8g
  • Protein35g

Common Questions

Can I use a different cut of beef?
Absolutely. While ribeye is traditional for its marbling and tenderness, you can use sirloin, flank steak, or even top round. For tougher cuts, consider marinating the sliced meat in a little baking soda (1/2 teaspoon per pound mixed with 2 tablespoons water) for 15 minutes, then rinsing and patting dry. This tenderizing trick works wonders. Avoid pre-ground beef, as it will change the texture and flavor profile.
How do I prevent the cheese sauce from becoming grainy?
Graininess usually results from overheating or using pre-shredded cheese with anti-caking agents. Always shred cheese from a block. Melt the cheese over low heat and stir constantly. If the sauce does become grainy, try whisking in a teaspoon of lemon juice or a splash of white wine—the acidity can help smooth it out. Alternatively, use an immersion blender to re-emulsify the sauce.
Can I make this dairy-free?
Yes, with some adjustments. Use a high-quality dairy-free provolone or mozzarella-style shreds (look for brands that melt well, like Violife or Miyoko’s). Replace the butter with vegan butter or olive oil, the milk with unsweetened oat milk or cashew milk, and the cream cheese with a vegan cream cheese alternative. The sauce may be slightly thinner, so add an extra tablespoon of flour or a teaspoon of cornstarch slurry to thicken.
What can I use instead of provolone?
Provolone is traditional, but you can substitute with mozzarella (for a milder, stretchier sauce), white cheddar (for sharper flavor), or Gouda (for a smoky twist). A combination of mozzarella and a little Parmesan adds depth. Avoid using only hard cheeses like Parmesan, as they don’t melt smoothly on their own.
How do I store and reheat leftovers?
Store leftovers in an airtight container in the refrigerator for up to 3 days. To reheat, place the pasta in a skillet over medium-low heat with a splash of milk or beef broth. Stir gently until warmed through. You can also microwave in 30-second bursts, stirring between each, but the stovetop method better preserves the sauce’s creamy texture. Freeze for up to 2 months; thaw in the fridge overnight before reheating.
Can I add other vegetables?
Certainly. Mushrooms, zucchini, or spinach are great additions. Sauté mushrooms with the onions and peppers. For spinach, stir in a handful at the end and let it wilt before adding the steak and pasta. Roasted red peppers or banana peppers can add a tangy kick. Just be careful not to overcrowd the pan, which can steam the vegetables instead of sautéing them.
Is this recipe gluten-free?
To make it gluten-free, use gluten-free pasta (such as brown rice or chickpea pasta) and substitute the all-purpose flour with a gluten-free all-purpose blend or cornstarch. For a cornstarch slurry, mix 1 tablespoon cornstarch with 2 tablespoons cold water and stir into the sauce after adding the liquids. Ensure your beef broth is gluten-free as well.

Notes

This Philly Cheesesteak Pasta is a dish born from my love of two comfort food icons: the classic Philly cheesesteak sandwich and a big bowl of creamy pasta. Growing up in Philadelphia, I spent countless weekends grabbing a cheesesteak from a corner shop—the combination of thinly sliced ribeye, caramelized onions, and melted provolone on a crusty roll was pure magic. When I moved away, I craved those flavors but wanted something that could feed a family on a busy weeknight without the hassle of hoagie rolls. This pasta is my solution: it captures the essence of the cheesesteak—the savory beef, the sweet peppers and onions, the gooey cheese—in a one-pot meal that comes together in just 30 minutes.I first developed this recipe for my own weeknight dinners, and it quickly became a household favorite. The key was getting the sauce right: creamy enough to coat every piece of pasta but not so heavy that it masks the beef. Using both provolone and cream cheese gives a silky texture with a subtle tang that brightens the dish. I love that this recipe is endlessly adaptable—you can swap in chicken, go vegetarian with mushrooms, or spice it up with Cajun seasoning. It’s the kind of meal that feels indulgent but is surprisingly straightforward to make.When serving, I like to garnish with fresh parsley and a sprinkle of extra provolone that melts from the heat of the pasta. Pair it with a simple side salad dressed with a lemony vinaigrette to cut through the richness, or serve with crusty bread to soak up any leftover sauce. For a complete meal, add a steamed green vegetable like broccoli or asparagus. This dish is also a hit at potlucks and family gatherings—it travels well and reheats beautifully.I hope this recipe brings the same comfort and joy to your table that it does to mine. Don’t be afraid to make it your own—cooking is about intuition and taste. If you love bold flavors, try adding a splash of Worcestershire sauce or a pinch of red pepper flakes. And remember, the best meals are the ones shared with the people you love. Enjoy!

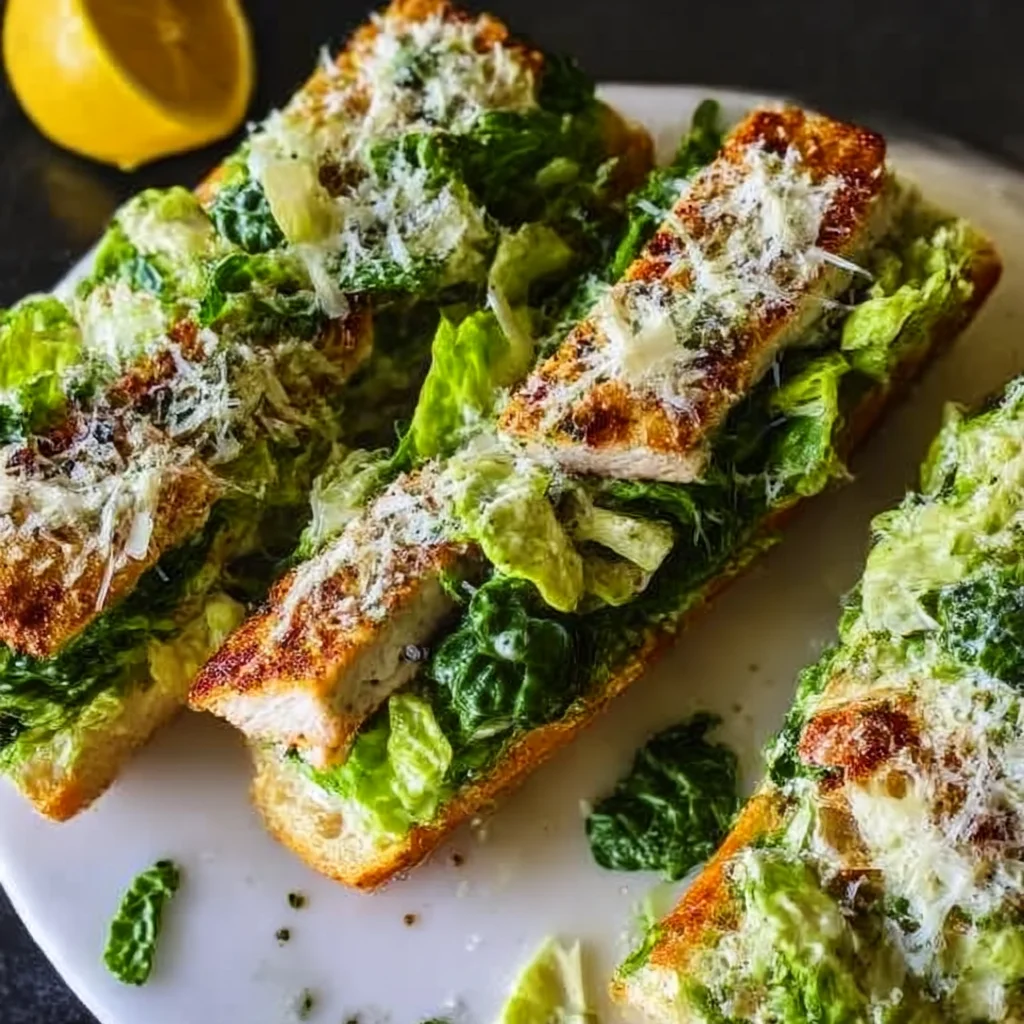
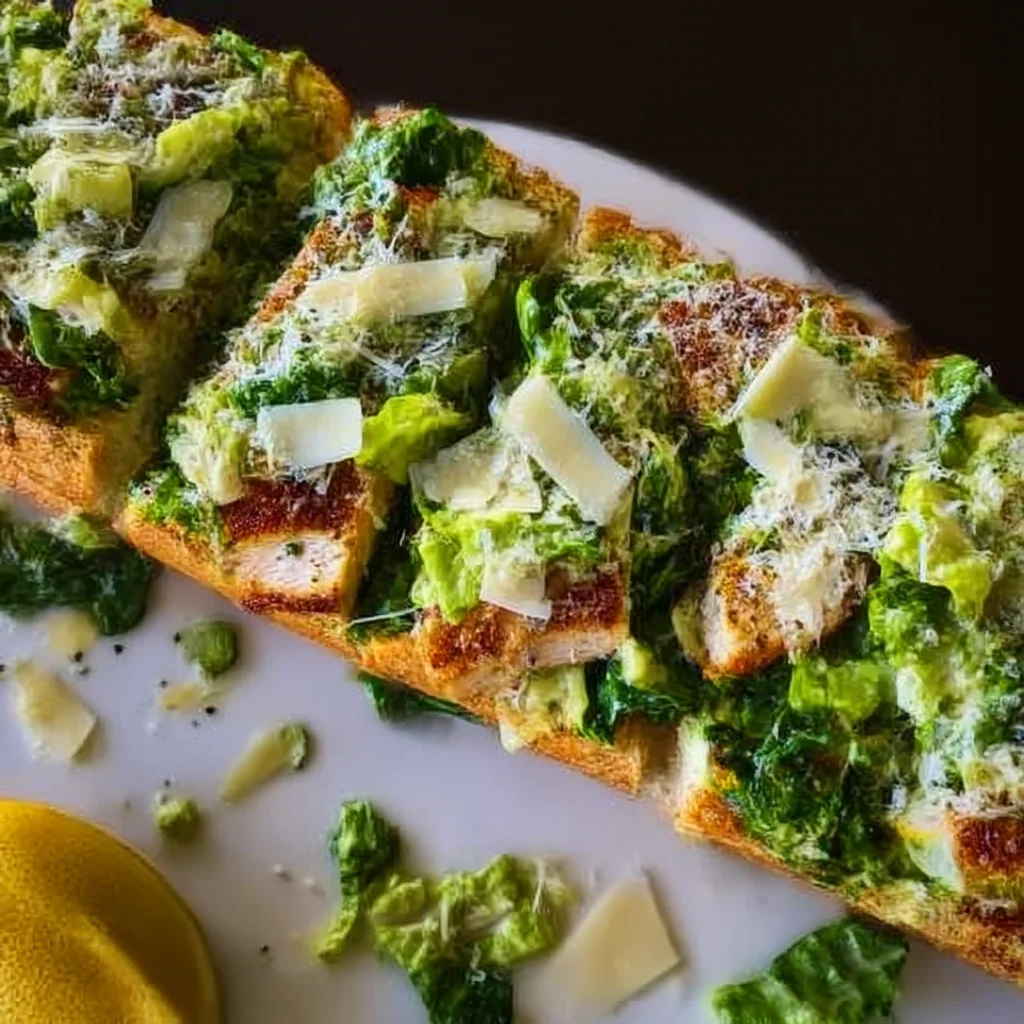
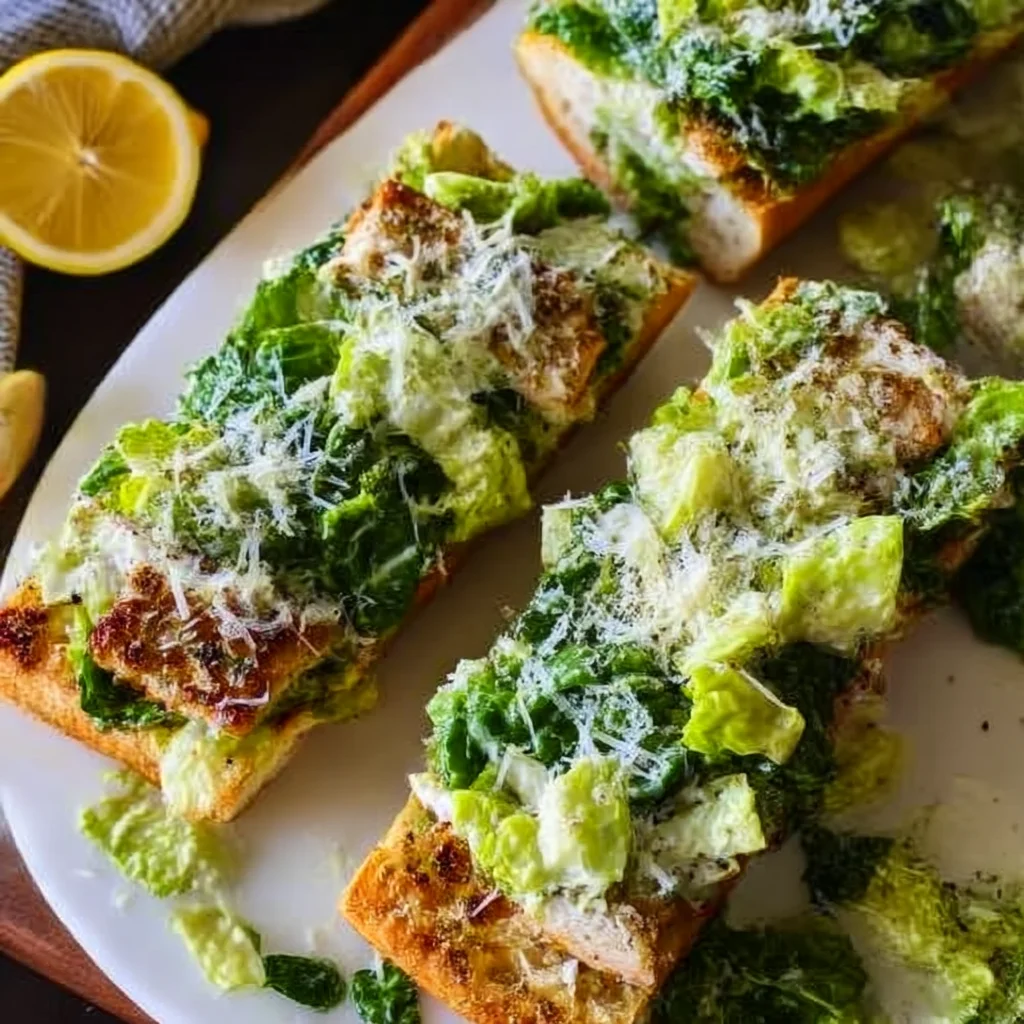
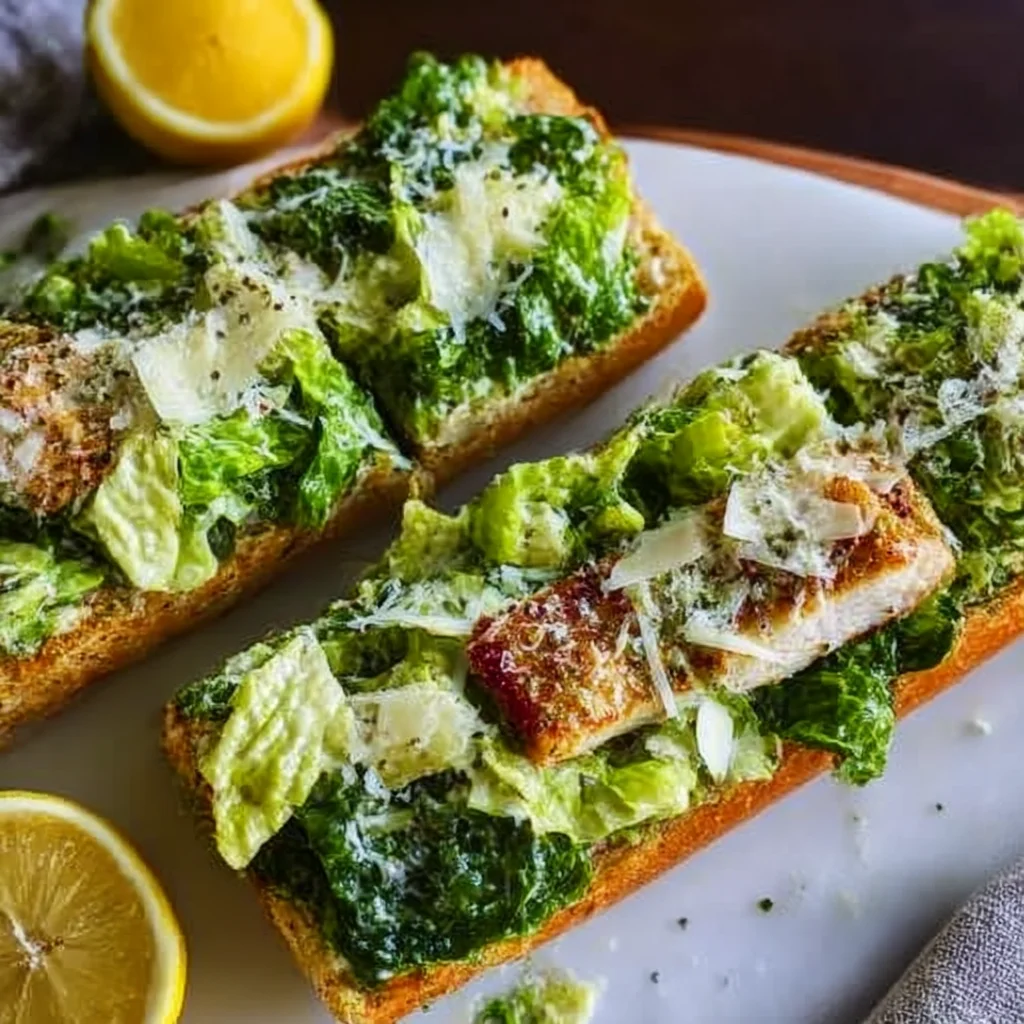
Kale Caesar Pasta Bowl

Kale Caesar Pasta Bowl
Easy Dinner Recipes • 30-Minute Meals • High-Protein Pasta

⏱️ Prep: PT10M
🔥 Cook: PT20M
⏳ Total: PT30M
🍽️ Yield: 4 servings
⚡ Calories: 420 kcal
(284)
kale caesar pasta bowl30-minute dinnerhigh-protein pastaeasy weeknight dinnermeal preproasted chickpeascaesar salad pasta

This Kale Caesar Pasta Bowl is a hearty 30-minute meal with pasta, kale, crispy roasted chickpeas, and creamy Caesar dressing. Perfect for easy weeknight dinners and meal prep.

Ingredients

Toggle: Metric / US

Instructions

Step 1

Preheat your oven to 400°F (200°C). While the oven heats, bring a large pot of salted water to a rolling boil. The salt should make the water taste like the sea—this is your only chance to season the pasta from within. Add the pasta and cook according to package directions until al dente, usually about 8-10 minutes. Al dente means the pasta is tender but still has a slight bite; this texture holds up better when tossed with dressing and kale. Reserve about 1 cup of pasta water before draining—the starchy water can help emulsify the dressing later if needed. Drain the pasta and rinse briefly with cool water to stop the cooking process and prevent sticking. Set aside.

Step 1 image
Step 2

While the pasta cooks, prepare the chickpeas. Drain the canned chickpeas in a colander and rinse thoroughly under cold water to remove excess sodium and any metallic taste. Spread them on a clean kitchen towel or paper towels and pat them very dry—moisture is the enemy of crispiness. The drier they are, the better they will roast. Transfer the chickpeas to a baking sheet. Drizzle with 1 tablespoon of olive oil, then sprinkle with smoked paprika, garlic powder, and a pinch of salt and black pepper. Toss well to coat evenly. Spread them in a single layer; overcrowding will cause steaming instead of roasting. Roast for 15-20 minutes, shaking the pan halfway through, until the chickpeas are golden brown and crunchy. They will continue to crisp as they cool. Set aside to cool slightly.

Step 2 image
Step 3

While the chickpeas roast, prepare the kale. Remove the tough stems from the kale leaves by holding the stem with one hand and stripping the leaves off with the other. Discard stems (or save for another use). Stack the leaves and chop them into bite-sized pieces. Place the chopped kale in a large mixing bowl. Drizzle with the remaining 1 tablespoon of olive oil and a pinch of salt. Using your hands, massage the kale for 2-3 minutes. This step is crucial: massaging breaks down the fibrous cell walls and softens the leaves, transforming them from tough and bitter to tender and slightly sweet. You’ll notice the kale darkens in color and reduces in volume. This also helps the dressing adhere better.

Step 4

In the large bowl with the massaged kale, add the cooked pasta. Pour the Caesar dressing over the top. Use a spatula or tongs to toss everything together until the kale and pasta are evenly coated. If the mixture seems dry, add a splash of the reserved pasta water (start with 2 tablespoons) and toss again—the starch helps the dressing cling. Add the grated Parmesan cheese and toss once more. Taste and adjust seasoning: add more salt, pepper, or a squeeze of lemon juice for brightness. The lemon cuts through the richness of the dressing and adds a fresh note.

Step 5

Divide the pasta salad among serving bowls. Top each bowl with a generous handful of crispy roasted chickpeas. Sprinkle extra Parmesan cheese on top if desired. Serve immediately while the chickpeas are still crunchy. If you’re meal prepping, store the chickpeas separately and add them just before serving to maintain their texture. This dish can be served warm, at room temperature, or cold—it’s versatile and delicious any way.

For best results

  • Massaging the kale is non-negotiable for this recipe. Raw kale can be tough and bitter, but a thorough massage with olive oil and salt breaks down its cellular structure, making it tender and palatable. Don’t rush this step—spend a full 2-3 minutes working the leaves with your hands. You’ll see the color deepen and the volume shrink by about half, which is a sign it’s ready. This technique is often used in kale salads and is essential for a pleasant texture.
  • For the crispiest chickpeas, pat them extremely dry after rinsing. Any residual moisture will cause them to steam rather than roast. You can even let them air-dry on the counter for 10 minutes. Also, avoid overcrowding the baking sheet—use a large sheet or two smaller ones so the chickpeas have space. The high heat of 400°F (200°C) ensures they get crunchy on the outside while staying tender inside. If you want extra crunch, you can roast them for up to 25 minutes, but watch them closely to prevent burning.
  • Choose a short pasta shape with nooks and crannies, like fusilli, rotini, or cavatappi. These shapes trap the dressing and bits of Parmesan, ensuring every bite is flavorful. Long pasta like spaghetti can work but won’t hold the dressing as well. Cook the pasta al dente because it will continue to absorb dressing as it sits; if it’s overcooked, it may become mushy. Reserve pasta water before draining—it’s a secret weapon for adjusting consistency.
  • Homemade Caesar dressing takes this dish to the next level, but a high-quality store-bought brand works great in a pinch. Look for one made with real Parmesan, anchovies (or Worcestershire sauce), and good olive oil. If you prefer a lighter option, you can use a Greek yogurt-based Caesar dressing to boost protein and reduce fat. For a vegan version, use a creamy tahini-lemon dressing or a store-bought vegan Caesar.
  • This recipe is perfect for meal prep. Assemble the pasta and kale mixture and store it in an airtight container in the refrigerator for up to 4 days. Keep the roasted chickpeas in a separate container at room temperature (they stay crunchy for about 2 days) or re-crisp them in a 350°F oven for 5 minutes. When ready to serve, toss everything together. The flavors meld beautifully overnight, making it even tastier the next day.
  • Don’t skip the lemon juice! It brightens the entire dish and balances the richness of the Caesar dressing and Parmesan. A tablespoon of fresh lemon juice added at the end can transform the flavor profile. You can also add a pinch of red pepper flakes for a subtle kick, or some cracked black pepper for extra warmth.

Variations

  • Make it vegan: Replace the Caesar dressing with a vegan version (e.g., based on cashews, tahini, or silken tofu). Omit the Parmesan or use a vegan Parmesan alternative. The roasted chickpeas provide plenty of protein and crunch. For extra umami, add a tablespoon of nutritional yeast to the dressing.
  • Add protein: This dish is already high in protein from the chickpeas and Parmesan, but you can boost it further by adding grilled chicken, shrimp, or salmon. For a vegetarian option, add hard-boiled eggs or extra chickpeas. The Caesar dressing pairs wonderfully with any of these proteins.
  • Change the greens: While kale is hearty and holds up well, you can substitute with spinach, arugula, or a mix of baby greens. Note that more delicate greens will wilt faster, so add them just before serving if you’re meal prepping. Arugula adds a peppery kick that complements the Caesar dressing.
  • Gluten-free option: Use your favorite gluten-free pasta, such as chickpea, lentil, or brown rice pasta. Chickpea pasta will add even more protein and fiber. Cook according to package directions, as gluten-free pastas often require less time and careful monitoring to avoid mushiness.
  • Add crunch beyond chickpeas: For extra texture, toss in some toasted pine nuts, walnuts, or slivered almonds. You can also add croutons (store-bought or homemade from stale bread). If you want a lower-carb option, replace the pasta with roasted vegetables like broccoli or cauliflower florets.

Nutrition

  • Calories420 kcal
  • Total Fat18g
  • Saturated Fat4g
  • Cholesterol15mg
  • Sodium620mg
  • Total Carbohydrates52g
  • Dietary Fiber8g
  • Sugars5g
  • Protein16g

Common Questions

Can I make this Kale Caesar Pasta Bowl ahead of time?
Yes, this recipe is excellent for meal prep. Prepare the pasta and kale mixture and store it in an airtight container in the refrigerator for up to 4 days. Keep the roasted chickpeas separate at room temperature for up to 2 days, or re-crisp them in a 350°F oven for 5 minutes before serving. The flavors actually improve as they meld, making it a great make-ahead lunch or dinner.
How do I store leftovers?
Store any leftovers in an airtight container in the refrigerator for up to 4 days. If you’ve already mixed in the chickpeas, they will soften over time, but the dish will still be delicious. For best results, store components separately: pasta-kale mixture in the fridge, chickpeas at room temperature in a sealed container. Do not freeze this dish, as the creamy dressing may separate and the kale will become limp upon thawing.
Can I use a different type of pasta?
Absolutely. Short pasta shapes like fusilli, rotini, penne, or farfalle work best because they capture the dressing in their crevices. You can also use whole wheat, chickpea, or lentil pasta for added fiber and protein. If using gluten-free pasta, be careful not to overcook it—check for doneness a minute or two before the package suggests.
Is this recipe suitable for a low-carb diet?
This recipe is not low-carb due to the pasta. However, you can make a low-carb version by substituting the pasta with roasted cauliflower florets, zucchini noodles (zoodles), or steamed broccoli. The kale and chickpeas provide fiber and nutrients, and the Caesar dressing adds flavor. Keep in mind that chickpeas also contain carbs, so adjust portion sizes if needed.
Can I use homemade Caesar dressing?
Yes, homemade Caesar dressing elevates this dish. A classic recipe includes anchovy paste, garlic, Dijon mustard, lemon juice, Worcestershire sauce, egg yolk, olive oil, and Parmesan. If you’re concerned about raw eggs, use pasteurized eggs or a dressing without egg. For a quick version, whisk together 1/2 cup mayonnaise, 1 tablespoon lemon juice, 1 teaspoon Dijon mustard, 1 clove minced garlic, 1/4 cup grated Parmesan, and salt and pepper to taste.
How do I make the chickpeas extra crispy?
The key to crispy chickpeas is drying them thoroughly before roasting. After rinsing, spread them on a towel and pat dry, then let them air-dry for 10-15 minutes. Use a high oven temperature (400°F/200°C) and ensure they are in a single layer on the baking sheet. You can also toss them in a little cornstarch (about 1 teaspoon) before adding oil and spices—this creates an extra-crunchy coating. Roast for 20-25 minutes, shaking halfway, until deeply golden.
Can I add other vegetables?
Yes, this recipe is versatile. Add roasted cherry tomatoes, bell peppers, or broccoli for extra color and nutrients. You can also toss in some sliced radishes or cucumber for freshness. If adding raw vegetables, consider massaging them with a little salt to soften them slightly. The Caesar dressing pairs well with many vegetables, so feel free to experiment.

Notes

This Kale Caesar Pasta Bowl is one of those recipes that came together on a busy weeknight when I needed something quick, satisfying, and nutritious. I had a bunch of kale in the fridge that was about to wilt, a can of chickpeas in the pantry, and leftover pasta from the night before. The idea of combining a classic Caesar salad with pasta and crunchy roasted chickpeas felt like a natural fit—and it was an instant hit with my family. The creamy Caesar dressing coats every piece of pasta and kale, while the chickpeas add a protein punch and a satisfying crunch that mimics croutons. It’s a complete meal in one bowl, perfect for those evenings when you want something hearty but don’t have hours to spend in the kitchen. Over time, I’ve refined the technique: massaging the kale is essential to make it tender, and drying the chickpeas thoroughly ensures they get perfectly crispy. I love that this dish can be served warm, cold, or at room temperature, making it ideal for packed lunches or picnics. It’s also incredibly adaptable—you can swap in different greens, add grilled chicken, or use a vegan dressing to suit your dietary needs. The feedback from readers has been overwhelming; many have told me this has become their go-to meal prep recipe. I hope you enjoy it as much as we do! Serve it with a side of crusty bread or a simple green salad if you want extra greens. For a complete Italian-inspired dinner, pair it with a glass of crisp white wine like Pinot Grigio. And don’t forget to garnish with extra Parmesan and a crack of black pepper—it makes all the difference.

Roasted Chickpea Caesar Pasta

Roasted Chickpea Caesar Pasta
Easy Dinner Recipes • High-Protein Meals • Quick Pasta Recipes

⏱️ Prep: PT15M
🔥 Cook: PT20M
⏳ Total: PT35M
🍽️ Yield: 4 servings
⚡ Calories: 485 kcal
(284)
easy dinner recipesquick weeknight dinnershigh-protein pastakale caesar saladroasted chickpeasbudget meals30-minute mealsmeal prep pasta

This Roasted Chickpea Caesar Pasta is a quick and easy weeknight dinner featuring crispy roasted chickpeas, tender kale, and al dente pasta tossed in a creamy Caesar dressing. High-protein, budget-friendly,…

Ingredients

Toggle: Metric / US

Instructions

Step 1

Start by preheating your oven to 400°F (200°C). While the oven heats, bring a large pot of salted water to a rolling boil. The salt in the water is crucial—it seasons the pasta from the inside out, giving it flavor beyond just the sauce. Use about 1 tablespoon of salt per 4 quarts of water. Once boiling, add the pasta and cook according to package directions until al dente. Al dente means the pasta should still have a slight firmness when bitten; it will continue to cook slightly when tossed with the hot dressing later. Before draining, reserve about 1/2 cup of the starchy pasta water. This liquid gold helps emulsify the dressing and cling to the pasta. Drain the pasta and set aside. Do not rinse—the starch on the surface helps the sauce adhere.

Step 1 image
Step 2

While the pasta cooks, prepare the chickpeas. After draining and rinsing the chickpeas, pat them very dry with a clean kitchen towel or paper towels. Removing excess moisture is the secret to achieving crispy, crunchy chickpeas rather than soft, sad ones. In a small bowl, toss the chickpeas with 1 tablespoon of olive oil, smoked paprika, garlic powder, and a pinch of salt and pepper. Spread them in a single layer on a baking sheet lined with parchment paper. Roast for 15-20 minutes, shaking the pan halfway through, until golden brown and crispy. They will continue to crisp as they cool. The smoked paprika adds a subtle warmth that complements the Caesar dressing beautifully.

Step 2 image
Step 3

While the chickpeas roast, prepare the kale. Place the chopped kale in a large mixing bowl. Drizzle with the remaining 1 tablespoon of olive oil and a pinch of salt. Using your hands, massage the kale for 2-3 minutes. This step is non-negotiable: massaging breaks down the tough fibrous structure of kale, making it tender and more palatable. You’ll notice the leaves darken and shrink in volume. The kale will now feel silky and soft, perfect for eating raw in a salad. If you skip this, you’ll end up with chewy, bitter leaves.

Step 4

To the massaged kale, add the cooked pasta, grated Parmesan cheese, and creamy Caesar dressing. Toss everything together using tongs or two large spoons until the kale is evenly coated and the pasta is well dressed. If the mixture seems dry, add a splash of the reserved pasta water—start with 2 tablespoons and add more as needed. The starch in the water helps the dressing cling to the pasta and creates a luscious, silky texture. Taste and adjust seasoning with salt and pepper. Remember that Parmesan and Caesar dressing are salty, so go easy on additional salt.

Step 5

Divide the pasta salad among serving bowls. Top generously with the crispy roasted chickpeas and an extra sprinkle of Parmesan cheese. If using, scatter toasted pine nuts or slivered almonds over the top for added crunch. Serve immediately with lemon wedges on the side for a bright, acidic finish that cuts through the richness. For meal prep, store the components separately: keep the chickpeas in a separate container to maintain their crunch, and add them just before serving. The dressed pasta and kale will keep well in the fridge for up to 3 days.

For best results

  • For the crispiest roasted chickpeas, ensure they are thoroughly dried after rinsing. Pat them with a clean towel and even let them air-dry for 10 minutes. Tossing them with a little cornstarch (about 1 teaspoon) before roasting can also enhance crunchiness. Avoid overcrowding the baking sheet—if the chickpeas are too close together, they will steam instead of roast. Use two pans if needed.
  • Massaging kale is a game-changer. Don't be shy—really work the oil into the leaves for a full 2-3 minutes. You can also add a squeeze of lemon juice during massaging to help tenderize the leaves. The kale will reduce in volume significantly, so one bunch typically yields about 4 cups chopped.
  • To make this recipe even quicker, use store-bought Caesar dressing. Look for a high-quality brand with anchovies and Parmesan for authentic flavor. Alternatively, make your own by whisking together 1/2 cup mayonnaise, 2 tablespoons lemon juice, 1 teaspoon Dijon mustard, 1 minced garlic clove, 2 anchovy fillets (or 1 teaspoon anchovy paste), and 1/4 cup grated Parmesan. Thin with a little water if needed.
  • Reserve pasta water before draining—it's a secret weapon for creamy sauces. The starch helps emulsify the dressing and prevents a watery or clumpy texture. Start with 2 tablespoons and add more if the salad seems dry. Leftover pasta water can be stored in the fridge for a day or frozen for future use.
  • For meal prep, store the dressed pasta and kale in one container and the crispy chickpeas in a separate airtight container at room temperature. Assemble just before serving to maintain crunch. The salad itself tastes even better the next day as the flavors meld, but the chickpeas will soften if stored together.
  • If you prefer a warm pasta salad, you can toss the hot pasta directly with the kale and dressing. The heat will slightly wilt the kale, making it even more tender. In that case, add the chickpeas after the salad has cooled a bit to preserve their crunch.

Variations

  • Make it vegan: Use a plant-based Caesar dressing (many are available or make your own with cashews, lemon, capers, and nutritional yeast). Replace Parmesan with vegan Parmesan or a sprinkle of nutritional yeast for a cheesy flavor. The roasted chickpeas provide plenty of protein, making this a satisfying plant-based meal.
  • Add protein: For extra protein, add grilled chicken, shrimp, or tofu. Sliced grilled chicken breast pairs wonderfully with the Caesar flavors. For a vegetarian boost, toss in some hard-boiled eggs or white beans.
  • Gluten-free option: Use gluten-free pasta such as brown rice pasta, quinoa pasta, or chickpea pasta. Chickpea pasta adds even more protein and a slightly nutty flavor that complements the chickpeas. Adjust cooking time according to package directions as gluten-free pastas can vary.
  • Change up the greens: If you don't have kale, try this recipe with chopped romaine lettuce, spinach, or a mix of arugula and spinach. Note that spinach and arugula are more delicate and do not require massaging—just toss with the dressing gently to avoid wilting.
  • Add more veggies: Boost the nutritional content by adding halved cherry tomatoes, sliced cucumber, or roasted red peppers. For a heartier salad, toss in some cooked quinoa or farro along with the pasta.

Nutrition

  • Calories485 kcal
  • Total Fat22g
  • Saturated Fat5g
  • Cholesterol15mg
  • Sodium680mg
  • Total Carbohydrates56g
  • Dietary Fiber8g
  • Sugars6g
  • Protein18g

Common Questions

Can I make this salad ahead of time?
Yes, this recipe is excellent for meal prep. Prepare the pasta, massage the kale, and make the dressing up to 2 days in advance. Store the components separately in the fridge. Roast the chickpeas on the day you plan to serve for maximum crunch. When ready to eat, toss everything together and add the chickpeas on top. The dressed kale and pasta will keep for up to 3 days in an airtight container.
How do I store leftovers?
Store any leftovers in an airtight container in the refrigerator for up to 3 days. The kale will soften further but will still be delicious. The chickpeas will lose their crunch; to revive them, reheat in a 350°F oven for 5-7 minutes or in an air fryer at 350°F for 3-4 minutes. If the salad seems dry after storing, add a splash of Caesar dressing or a drizzle of olive oil before serving.
Can I use a different type of pasta?
Absolutely! Any short pasta shape works well—penne, rigatoni, farfalle, fusilli, or orecchiette. The nooks and crannies in shapes like rotini or cavatappi hold onto the dressing beautifully. For a gluten-free option, use your favorite gluten-free pasta. Just be sure to cook it al dente to avoid mushiness.
Is this recipe suitable for a low-carb diet?
This recipe is moderate in carbs due to the pasta and chickpeas. For a lower-carb version, replace the pasta with zucchini noodles (zoodles) or spaghetti squash. Roast the chickpeas as directed, but reduce the amount to 1/2 cup to lower carbs. The Caesar dressing and kale are naturally low-carb. You can also use a low-carb pasta alternative like edamame pasta.
Can I make this without chickpeas?
Yes, if you don’t have chickpeas or prefer a different crunch, substitute with roasted almonds, walnuts, or pumpkin seeds. For a non-vegetarian option, use crispy bacon bits or croutons. The roasted chickpeas add protein and fiber, but the salad is still delicious without them—just increase the Parmesan or add another protein source.
What if I don't have a Caesar dressing?
You can easily make a quick Caesar dressing at home with pantry staples. Whisk together 1/2 cup mayonnaise, 2 tablespoons lemon juice, 1 teaspoon Dijon mustard, 1 minced garlic clove, 2 anchovy fillets (or 1 teaspoon anchovy paste), and 1/4 cup grated Parmesan. If you don’t have anchovies, you can omit them, but the dressing will lack that classic umami depth. Alternatively, use a creamy ranch dressing for a different but tasty twist.

Notes

This Roasted Chickpea Caesar Pasta is a recipe close to my heart because it embodies everything I love about cooking: it’s affordable, nutritious, and incredibly satisfying. I developed this dish during a busy semester in college when I needed meals that were both budget-friendly and packed with protein to keep me energized. The combination of crispy roasted chickpeas and tender kale in a creamy Caesar dressing was an instant hit with my roommates, and it’s been a staple in my kitchen ever since.The inspiration comes from classic Caesar salad, but I wanted to transform it into a hearty main dish that could stand alone. By adding pasta and chickpeas, it becomes a complete meal with carbohydrates, protein, and healthy fats. The kale adds a robust texture that holds up well to the dressing, unlike delicate lettuce that wilts quickly. Plus, kale is a nutritional powerhouse rich in vitamins A, C, and K.One of my favorite things about this recipe is its versatility. You can serve it warm as a comforting dinner or chilled as a pasta salad for picnics and potlucks. It’s also a fantastic way to use up leftover kale or chickpeas from other meals. I often double the batch and enjoy it for lunches throughout the week—just remember to store the chickpeas separately to keep them crunchy.When it comes to serving, I love to garnish with extra Parmesan and a squeeze of fresh lemon. The acidity brightens the creamy dressing and balances the richness. For a special touch, I sometimes add a sprinkle of red pepper flakes for a hint of heat. This dish pairs beautifully with a crisp white wine like Sauvignon Blanc or a light beer.I hope this recipe becomes a favorite in your home as it has in mine. It’s proof that you don’t need expensive ingredients or hours in the kitchen to create a delicious, nourishing meal. Happy cooking!

Kale Caesar Pasta Salad

Kale Caesar Pasta Salad
Easy Dinner Recipes • Quick Dinner Ideas • 30-Minute Meals

⏱️ Prep: PT15M
🔥 Cook: PT15M
⏳ Total: PT30M
🍽️ Yield: 4 servings as a main dish
⚡ Calories: 420 kcal
(284)
kale caesar pasta saladeasy dinner recipesquick dinner ideas30-minute mealshigh-protein dinnermeal prephealthy pasta salad

This Kale Caesar Pasta Salad is a hearty 30-minute meal with pasta, kale, and crispy roasted chickpeas. Perfect for easy weeknight dinners or meal prep!

Ingredients

Toggle: Metric / US

Instructions

Step 1

Bring a large pot of generously salted water (about 1 tablespoon of salt per 4 quarts of water) to a rolling boil. Add the pasta and cook according to package directions until al dente, typically 8-10 minutes. Al dente pasta has a slight firmness when bitten, which is crucial because it will continue to absorb dressing later. While the pasta cooks, reserve about 1 cup of pasta water before draining. Drain the pasta in a colander and rinse briefly with cool water to stop the cooking process and remove excess starch. Set aside to cool slightly. Do not let the pasta sit dry for too long or it will stick together; toss with a drizzle of olive oil if needed.

Step 1 image
Step 2

While the pasta cooks, prepare the crispy roasted chickpeas. Preheat your oven to 400°F (200°C). After draining the chickpeas, spread them on a clean kitchen towel or paper towels and pat them very dry. Removing as much moisture as possible is the secret to achieving a crunchy exterior. In a medium bowl, toss the dried chickpeas with 1 tablespoon olive oil, smoked paprika, garlic powder, and a pinch of salt and pepper. Spread them in a single layer on a baking sheet lined with parchment paper. Roast for 20-25 minutes, shaking the pan halfway through, until golden brown and crispy. They will continue to crisp as they cool. Set aside to cool completely.

Step 2 image
Step 3

While the chickpeas roast, prepare the kale. Place the torn kale leaves in a large mixing bowl. Drizzle with about 1 tablespoon of olive oil and a pinch of salt. Using your clean hands, massage the kale for 2-3 minutes, squeezing and rubbing the leaves until they become darker, softer, and more tender. This step is essential because raw kale can be tough and bitter; massaging breaks down the fibrous cell walls and reduces bitterness, making the kale much more pleasant to eat raw. You should notice the volume of the kale reduce by about half and the leaves become silky.

Step 4

In a small bowl, whisk the Caesar dressing until smooth. If your dressing is thick, you can thin it with a tablespoon of the reserved pasta water to help it coat the ingredients evenly. The pasta water adds a touch of starch that helps the dressing cling to the pasta and kale. Now, assemble the salad: Add the cooled pasta to the bowl with the massaged kale. Pour the dressing over the top and toss well to combine, ensuring every piece of pasta and every leaf is coated. Add the grated Parmesan cheese and toss again. The cheese will add a salty, nutty depth and help bind the dressing.

Step 5

Finally, fold in the crispy roasted chickpeas (reserve a few for garnish if desired). Taste and adjust seasoning with additional salt, pepper, or a squeeze of lemon juice if you like more acidity. Transfer to a serving platter or individual bowls. Garnish with extra shaved Parmesan, the reserved chickpeas, and optional toasted nuts or fresh cracked black pepper. Serve immediately at room temperature or chilled. For meal prep, store in an airtight container in the refrigerator for up to 4 days. The kale holds up beautifully and the chickpeas stay crunchy if kept separate and added just before serving.

For best results

  • For the crispiest chickpeas, ensure they are thoroughly dried before roasting. After draining, spread them on a paper towel-lined plate and gently roll another towel on top to absorb excess moisture. Removing the skins is optional but yields an extra-crunchy texture; simply pinch each chickpea between your fingers to slip off the skin. Roast at a high temperature (400°F) and avoid overcrowding the pan—use two baking sheets if needed. Let them cool completely on the pan before adding to the salad, as they will continue to crisp.
  • Kale can be tough and bitter if not properly prepared. Always remove the tough central ribs by holding the stem and stripping the leaves away with your fingers. Massaging the leaves with oil and salt for 2-3 minutes is non-negotiable for a tender, enjoyable texture. You can also blanch the kale in boiling water for 30 seconds, then shock in ice water, but massaging is quicker and retains more nutrients. For a milder flavor, use baby kale, which requires less massaging.
  • The choice of pasta shape matters. Short, textured pastas like fusilli, rotini, or farfalle have nooks and crannies that trap the dressing and cheese, delivering flavor in every bite. Avoid long, thin pastas like spaghetti, which don't hold the dressing as well. Cook the pasta al dente—it will soften slightly as it sits with the dressing. Overcooked pasta becomes mushy and won't have a pleasant texture.
  • Homemade Caesar dressing is quick and elevates this salad. Whisk together 1/2 cup mayonnaise, 2 tablespoons lemon juice, 1 teaspoon Dijon mustard, 1 minced garlic clove, 1/2 teaspoon Worcestershire sauce, and 1/4 cup grated Parmesan. Season with salt and pepper. For a lighter option, use Greek yogurt in place of half the mayo. If using store-bought, look for a high-quality brand with real Parmesan and no artificial flavors.
  • This salad is perfect for meal prep, but to maintain crunch, store the roasted chickpeas separately in a paper bag or a container with the lid slightly ajar to allow moisture to escape. The dressed kale and pasta can be combined and stored in the fridge for up to 4 days. When ready to serve, let the salad sit at room temperature for 10 minutes, then add the chickpeas and a fresh sprinkle of Parmesan. The flavors meld beautifully overnight.
  • To make this a complete high-protein dinner, add grilled chicken, shrimp, or salmon. The chickpeas already provide plant-based protein (about 7g per serving), but adding 6 ounces of grilled chicken breast boosts the protein to over 35g per serving. You can also toss in some cooked bacon bits or hard-boiled eggs for extra richness.

Variations

  • Vegan Kale Caesar Pasta Salad: Replace the Parmesan cheese with 3 tablespoons of nutritional yeast for a cheesy, umami flavor. Use a vegan Caesar dressing made from cashews, lemon, garlic, and capers. The chickpeas already provide protein, making this a satisfying plant-based meal. Add some sun-dried tomatoes or artichoke hearts for extra texture.
  • Gluten-Free Option: Substitute the pasta with your favorite gluten-free pasta, such as brown rice pasta or chickpea pasta. Chickpea pasta boosts protein and fiber, complementing the chickpeas. Cook according to package directions, but be careful not to overcook as gluten-free pasta can become mushy. Rinse with cool water to stop cooking.
  • Southwest Twist: Replace the Caesar dressing with a creamy cilantro-lime dressing (blend avocado, lime juice, cilantro, Greek yogurt, and garlic). Swap the Parmesan for crumbled cotija cheese. Add black beans instead of chickpeas, and toss in some corn kernels and diced bell peppers. This variation is bright, zesty, and perfect for summer.
  • Mediterranean Version: Use a lemon-oregano vinaigrette instead of Caesar dressing. Replace Parmesan with crumbled feta cheese. Add chopped Kalamata olives, diced cucumber, cherry tomatoes, and red onion. The chickpeas remain, and you can add grilled chicken or lamb for extra protein. This version is fresh and tangy.
  • Low-Carb/Keto: Skip the pasta entirely and double the kale and chickpeas. Or replace pasta with roasted cauliflower florets or zucchini noodles. Use a high-fat Caesar dressing (homemade with extra olive oil and egg yolks). Add more Parmesan and top with bacon bits. This keeps the carbs low while maintaining the creamy, savory flavor.

Nutrition

  • Calories420 kcal
  • Total Fat22g
  • Saturated Fat5g
  • Cholesterol15mg
  • Sodium680mg
  • Total Carbohydrates45g
  • Dietary Fiber8g
  • Sugars6g
  • Protein15g

Common Questions

Can I make this salad ahead of time?
Yes, this salad is excellent for meal prep. Combine the massaged kale, cooked pasta, and dressing in an airtight container and refrigerate for up to 4 days. The kale holds up well and actually softens and becomes more flavorful as it marinates. However, keep the crispy roasted chickpeas separate and add them just before serving to maintain their crunch. If you’ve already added the chickpeas, the salad is still delicious, but the chickpeas will soften over time.
Can I use a different type of kale?
Absolutely. Curly kale is classic and provides a nice texture, but you can use lacinato (aka Tuscan or dinosaur) kale, which is more tender and has a slightly sweeter, nuttier flavor. Baby kale is the most tender and requires less massaging. If using regular kale, always remove the tough stems and massage the leaves with oil and salt for best results.
How do I store leftovers and how long do they last?
Store the assembled salad (without the crispy chickpeas) in an airtight container in the refrigerator for up to 4 days. The dressed kale and pasta will keep well; the flavors meld and improve over time. If the salad seems dry after refrigeration, add a splash of lemon juice or a drizzle of olive oil to refresh it. Keep the chickpeas in a separate container at room temperature for up to 3 days to maintain crispness. Do not freeze this salad, as the texture of the kale and dressing will suffer.
Can I use a different protein instead of chickpeas?
Definitely. For a non-vegetarian option, grilled chicken breast, shrimp, salmon, or even crispy bacon bits are fantastic. If you want to keep it vegetarian, try roasted tofu (pressed and cubed, then tossed in the same spices) or tempeh. For a vegan option, edamame or hearts of palm work well. Adjust cooking times accordingly.
What can I substitute for Caesar dressing?
If you don’t have Caesar dressing, you can make a quick substitute by whisking together 1/2 cup mayonnaise, 2 tablespoons lemon juice, 1 teaspoon Dijon mustard, 1 minced garlic clove, and 1/4 cup grated Parmesan. For a lighter version, use Greek yogurt in place of some or all of the mayo. You can also use a creamy ranch or a simple vinaigrette, though the flavor profile will change.
Is this salad suitable for a potluck or picnic?
Yes, it’s perfect for potlucks and picnics because it doesn’t wilt like traditional lettuce-based salads. The kale is sturdy and holds up well at room temperature for several hours. The chickpeas may lose some crunch if mixed in, so consider serving them on the side for people to add themselves. Transport the dressing separately and toss just before serving to keep everything fresh.
How can I make this salad more filling?
To turn this into a heartier main dish, add more protein such as grilled chicken, hard-boiled eggs, or extra chickpeas. You can also increase the amount of pasta or add cooked quinoa for extra fiber and protein. Avocado slices add healthy fats and creaminess. For a crunchier texture, toss in some toasted nuts or seeds like almonds, sunflower seeds, or pumpkin seeds.
Can I use frozen kale?
Frozen kale is not recommended for this raw salad because it becomes very watery and limp when thawed, lacking the crisp texture of fresh kale. If you only have frozen, thaw it completely, squeeze out as much moisture as possible, and use it in a cooked application like a sauté or soup. For this recipe, fresh kale is essential for the best texture and flavor.

Notes

This Kale Caesar Pasta Salad is one of my go-to weeknight dinners when I need something quick, nutritious, and satisfying. I first created it on a busy Tuesday evening when I had a bunch of kale that needed to be used up and a can of chickpeas staring at me from the pantry. The classic Caesar dressing—creamy, tangy, and loaded with umami from Parmesan—was the perfect bridge between the hearty greens and the al dente pasta. Roasting the chickpeas with smoked paprika added a smoky, crunchy element that completely transforms the dish. What I love most about this recipe is its versatility. It works as a main dish for four, a side for a crowd, or a meal prep staple that actually gets better after a day in the fridge. The kale doesn’t wilt like spinach or lettuce; instead, it softens just enough while retaining a pleasant chew. The dressing seeps into the pasta and coats every leaf, creating a cohesive, flavorful salad that never feels like an afterthought. I’ve served this at summer barbecues, holiday potlucks, and even as a quick lunch for my kids (who love the ‘crunchy bits’—the chickpeas). For an extra touch, I sometimes add a squeeze of fresh lemon juice and a few anchovies mashed into the dressing for authentic Caesar depth. If you’re new to massaging kale, don’t skip it—it’s the secret to making raw kale truly delicious. And if you’re short on time, you can use store-bought Caesar dressing, but homemade really elevates the dish. This recipe embodies the QuickPlateChef philosophy: fast, flavorful, and made with real ingredients. I hope it becomes a staple in your kitchen too!

Vegan Thai Noodle Salad

Vegan Thai Noodle Salad
Vegan Thai Noodle Salad • High-Protein Dinner • 30-Minute Meal

⏱️ Prep: PT15M
🔥 Cook: PT10M
⏳ Total: PT25M
🍽️ Yield: 4 servings
⚡ Calories: 385 kcal
(284)
vegan thai noodle saladhigh-protein dinner30-minute mealsgluten-freedairy-freepeanut saucerice noodles

This vegan Thai noodle salad is a healthy high-protein dinner made with rice noodles, fresh vegetables, and a rich peanut sauce. Perfect for easy weeknight dinners, this 30-minute meal is…

Ingredients

Toggle: Metric / US

Instructions

Step 1

Gather all your ingredients and prepare your vegetables. This step is crucial for a smooth cooking process, especially since this is a 30-minute meal. Start by bringing a large pot of water to a boil for the rice noodles. While the water heats, wash and peel the carrot, then julienne it into thin matchsticks using a mandoline or a sharp knife. Thinly slice the red bell pepper, shred the red cabbage (you can buy pre-shredded for convenience), and chop the cilantro. Slice the green onions and set everything aside. Having all your veggies prepped ensures you can assemble the salad quickly once the noodles are done.

Step 1 image
Step 2

Cook the brown rice noodles according to package instructions. Generally, you’ll boil them for 4-6 minutes until tender but still chewy (al dente). Stir occasionally to prevent sticking. Brown rice noodles are a great choice for this salad because they are gluten-free and have a nutty flavor that complements the peanut sauce. Once cooked, drain the noodles in a colander and rinse them under cold running water to stop the cooking process and remove excess starch. This also cools them down, making them ready for the salad. Let them drain thoroughly; excess water can dilute the dressing.

Step 2 image
Step 3

While the noodles cook, prepare the peanut dressing. In a small bowl, combine the creamy peanut butter, low-sodium soy sauce (or tamari), fresh lime juice, maple syrup, toasted sesame oil, sriracha, minced garlic, and grated ginger. Whisk vigorously until smooth. The mixture will be thick at first; if it’s too thick to drizzle, add warm water one tablespoon at a time, whisking after each addition, until you reach a pourable consistency. Aim for a consistency similar to heavy cream. Taste and adjust the seasoning: more lime for acidity, more maple for sweetness, or more sriracha for heat. The dressing should be balanced, with a savory, nutty, and slightly spicy profile.

Step 4

In a large mixing bowl, combine the cooled and drained noodles with the prepared vegetables: shredded carrot, sliced bell pepper, shredded red cabbage, bean sprouts, and chopped cilantro. Pour the peanut dressing over the top and toss everything together using tongs or two large spoons. Make sure every noodle and vegetable is evenly coated in the dressing. The salad should look vibrant and glossy. If it seems dry, add a splash more water or lime juice and toss again.

Step 5

Serve the salad immediately or refrigerate for later. To serve, divide the salad among four bowls. Garnish with chopped roasted peanuts for crunch and sliced green onions for freshness. You can also add extra cilantro or a sprinkle of sesame seeds. This salad is delicious at room temperature or cold, making it perfect for meal prep. If serving later, keep the dressing separate until ready to eat to prevent the noodles from absorbing too much liquid and becoming soggy.

For best results

  • For the best texture, cook the rice noodles just until al dente. Overcooking makes them mushy, and they will break apart when tossed with the dressing. Always rinse with cold water after draining to stop cooking and remove excess starch, which helps the noodles stay separate and not clump together.
  • Make the dressing ahead of time to save even more minutes. The dressing can be stored in an airtight container in the refrigerator for up to a week. Let it come to room temperature or microwave for 10 seconds before using, as the peanut butter will solidify when cold. Add a splash of warm water to thin it out if needed.
  • Customize the vegetables based on what you have on hand. This recipe is very forgiving: add shredded kale, thinly sliced cucumber, snow peas, or even edamame for extra protein. The key is to keep the vegetables crisp and fresh to contrast with the soft noodles.
  • For a nut-free version, substitute the peanut butter with sunflower seed butter or tahini. The flavor will change slightly, but it will still be delicious and creamy. Use sunflower seed butter for a similar consistency, or tahini for a more savory, earthy taste. Adjust the sweetener and lime accordingly.
  • To increase the protein content, add grilled tofu, tempeh, or edamame. For a non-vegan option, shredded cooked chicken or shrimp works beautifully. This salad is a complete meal on its own, but adding a protein source makes it even more satisfying for dinner.
  • If you prefer a spicy kick, add more sriracha or include a finely chopped Thai bird chili. For a milder version, reduce or omit the sriracha and add a pinch of red pepper flakes for subtle heat. Always taste the dressing before adding it to the salad to ensure it meets your heat preference.

Variations

  • Protein-Packed Version: Add 1 cup (150g) of baked tofu, tempeh, or edamame to the salad. For tofu, press and cube it, then toss with a little soy sauce and sesame oil, and bake at 400°F (200°C) for 20 minutes until golden. Alternatively, use pre-cooked edamame for a quick boost. This turns the salad into a high-protein dinner that will keep you full for hours.
  • Spicy Mango Twist: Replace the red bell pepper with 1 cup of diced ripe mango. The sweetness of mango pairs beautifully with the spicy peanut dressing. Add a handful of fresh mint leaves along with the cilantro for a refreshing, tropical flavor. This variation is perfect for summer picnics.
  • Crunchy Rainbow Salad: Add 1/2 cup of thinly sliced snow peas, 1/2 cup of grated beetroot, and 1/4 cup of toasted sesame seeds. The beetroot adds a vibrant color and earthy sweetness, while snow peas provide extra crunch. This version is packed with vitamins and antioxidants.
  • Low-Carb / Zoodle Version: Replace the rice noodles with spiralized zucchini or carrot noodles (zoodles). Lightly sauté the zoodles for 1-2 minutes to soften them, then toss with the dressing and vegetables. This reduces the carbohydrate content significantly while keeping the salad fresh and satisfying.
  • Thai Peanut Buddha Bowl: Serve the noodle salad over a bed of cooked quinoa or brown rice for a heartier meal. Add roasted sweet potato cubes, avocado slices, and a handful of microgreens. Drizzle extra peanut dressing on top and garnish with lime wedges. This is a complete, nutrient-dense bowl.

Nutrition

  • Calories385 kcal
  • Total Fat18g
  • Saturated Fat3g
  • Cholesterol0mg
  • Sodium620mg
  • Total Carbohydrates47g
  • Dietary Fiber6g
  • Sugars12g
  • Protein12g

Common Questions

Can I use regular wheat noodles instead of rice noodles?
Yes, you can substitute with soba noodles, udon, or even spaghetti. However, the recipe will no longer be gluten-free if using wheat-based noodles. For a similar texture, soba noodles (buckwheat) are a great choice. Cook them al dente and rinse under cold water as directed.
How long does this salad keep in the refrigerator?
If stored separately from the dressing, the salad will keep for up to 3 days in an airtight container. The noodles may absorb some moisture and become slightly softer, but still delicious. If already dressed, it’s best eaten within 24 hours for optimal texture.
Is this recipe nut-free?
No, it contains peanut butter. For a nut-free version, substitute with sunflower seed butter or tahini. Both provide a creamy texture and work well with the Asian flavors. Sunflower seed butter is closest in consistency, while tahini gives a more savory, earthy taste.
Can I make this salad ahead of time for meal prep?
Absolutely! Prepare the vegetables and dressing separately. Cook the noodles, rinse, and toss with a little sesame oil to prevent sticking. Store everything in separate containers. When ready to eat, combine and toss with the dressing. This keeps the salad fresh and crunchy for up to 3 days.
Is this recipe suitable for a low-FODMAP diet?
With modifications, yes. Use gluten-free tamari instead of soy sauce, omit garlic (use garlic-infused oil if tolerated), and replace the onion and cabbage with low-FODMAP vegetables like bok choy, carrot, and bell pepper. Check serving sizes for peanuts and bean sprouts.
How can I make the dressing thicker or thinner?
To thicken the dressing, add more peanut butter or reduce the water. To thin it, add warm water, lime juice, or extra soy sauce one tablespoon at a time. The dressing should be pourable but not watery. Adjust according to your preference.
What can I use instead of soy sauce?
Coconut aminos are a great soy-free alternative with a similar savory flavor. They are slightly sweeter, so you may want to reduce the maple syrup slightly. Tamari is another option for gluten-free. Both work well in this recipe.

Notes

This Vegan Thai Noodle Salad has quickly become a staple in my kitchen, and I’m thrilled to share it with you. I remember the first time I made it—I was craving something fresh, flavorful, and fast after a long day. The combination of silky rice noodles, crunchy vegetables, and that luscious peanut dressing hit every note: savory, sweet, tangy, and just a little spicy. It’s the kind of meal that feels indulgent but is actually packed with nutrients. The inspiration came from classic Thai street food salads, but I wanted to create a version that’s accessible, uses pantry staples, and comes together in under 30 minutes. Over the years, I’ve tweaked the dressing to achieve the perfect balance—enough peanut butter for richness, lime for brightness, and a touch of maple to round out the flavors. This salad is incredibly versatile: you can serve it as a main dish, a side, or even as a cold lunch the next day. It’s also a fantastic way to use up leftover vegetables. I love that it’s naturally gluten-free and dairy-free, making it suitable for so many dietary needs. When I serve this at gatherings, it always gets rave reviews. The vibrant colors and aromatic dressing draw people in, and the taste keeps them coming back for seconds. For best results, use high-quality peanut butter (just peanuts and salt) and fresh lime juice. Don’t skip the step of rinsing the noodles—it makes a world of difference in texture. I hope this recipe brings as much joy to your table as it has to mine. Happy cooking!