
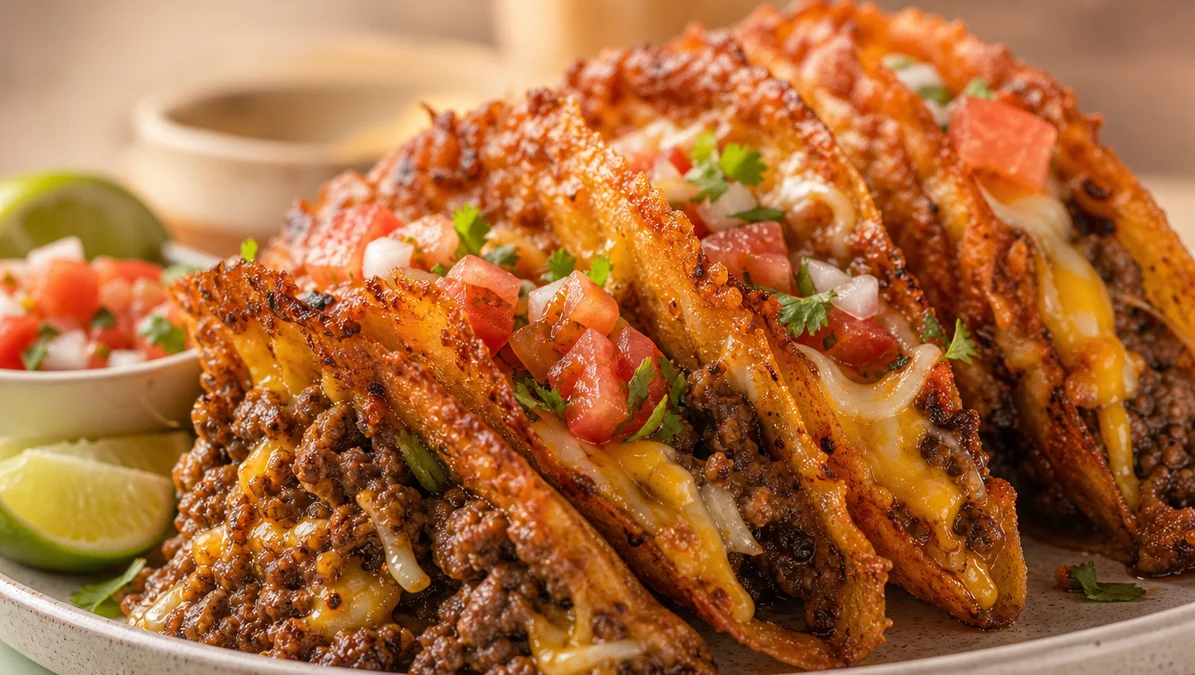
Crispy beef tacos loaded with seasoned ground beef and melty cheese. Ready in 30 minutes, perfect for busy weeknights or game day. Save this easy recipe!
Ingredients
Instructions
First, gather all your ingredients and set up your workstation. This mise en place approach ensures a smooth cooking process. For the ground beef, choose an 80/20 or 85/15 blend – the fat content is crucial because it provides moisture and flavor during browning. If you use leaner beef (like 93/7), the meat can become dry and crumbly. Place a large non-stick skillet or cast-iron pan over medium-high heat and let it get hot for about 2 minutes. You want the pan hot enough that a drop of water sizzles upon contact. Add the ground beef to the pan, breaking it apart with a wooden spoon or spatula. Spread it into an even layer and let it sear undisturbed for 3-4 minutes. This step develops a rich, savory crust (the Maillard reaction) that adds deep flavor. You’ll see the bottom turning brown while the top remains pink. After the sear, begin breaking the meat into smaller crumbles, stirring occasionally. Cook for another 4-5 minutes until the beef is fully browned and no pink remains. If there’s excess fat (more than 2 tablespoons), carefully drain it off, leaving about 1 tablespoon for flavor. The sound of sizzling will decrease as moisture evaporates, and the meat will start to crackle – that’s your cue that it’s ready for seasoning.

Reduce the heat to medium-low. Sprinkle the taco seasoning evenly over the cooked beef – if using a packet, use the entire contents. If you’re making your own seasoning, combine 1 tablespoon chili powder, 1 teaspoon each of cumin, paprika, garlic powder, onion powder, dried oregano, and salt, plus 1/4 teaspoon black pepper and a pinch of cayenne (optional for heat). Stir the seasoning into the meat until well coated. The spices will become fragrant within 30 seconds. Pour in 1/2 cup of water and stir to combine, scraping up any browned bits from the bottom of the pan. This deglazing step incorporates all that flavor into the sauce. Let the mixture simmer gently for 3-5 minutes, stirring occasionally, until most of the liquid has evaporated and the meat is moist but not soupy. You want a thick, saucy consistency that clings to the meat. The sauce will reduce and become glossy. Taste and adjust salt or spices if needed. Remove from heat and cover to keep warm.
While the beef simmers, prepare your taco shells and toppings. For hard taco shells, preheat your oven to 350°F (175°C) and place the shells upright on a baking sheet (you can use a taco shell holder or crumple foil to keep them stable). Bake for 5-7 minutes until warm and slightly crisper. Alternatively, you can crisp them in a dry skillet over medium heat for 1-2 minutes per side. If using soft corn tortillas, warm them directly over a gas flame (using tongs) for 30 seconds per side, or in a dry skillet until pliable and lightly charred. Meanwhile, shred the lettuce (iceberg gives the best crunch, but romaine works too), dice the tomato, and grate the cheese if not pre-shredded. Pre-shredded cheese often contains anti-caking agents that prevent smooth melting, so grating your own from a block yields a creamier melt. Set out any additional toppings like sour cream, salsa, sliced avocado, pickled jalapeños, or fresh cilantro.
Assemble the tacos just before serving to prevent sogginess. Place a generous spoonful (about 2-3 tablespoons) of the seasoned beef into each taco shell. Immediately top with a sprinkle of shredded cheese while the beef is still hot – this allows the cheese to melt slightly, creating that irresistible gooey layer. Add a handful of shredded lettuce and a spoonful of diced tomato. For extra creaminess, add a dollop of sour cream or a drizzle of crema. If you like heat, add sliced jalapeños or a dash of hot sauce. Serve immediately, as the shells can become soft if left too long. The contrast between the crunchy shell, warm savory beef, melted cheese, and cool crisp toppings is the hallmark of a perfect crispy beef taco. Enjoy with a wedge of lime to squeeze over each taco for a bright, citrusy finish.
For best results
- Choosing the Right Ground Beef: For the juiciest, most flavorful tacos, opt for ground beef with an 80/20 or 85/15 meat-to-fat ratio. The fat renders during cooking, basting the meat and keeping it moist. If you prefer leaner meat, add a tablespoon of olive oil or a splash of beef broth to compensate for the missing moisture. Avoid extra-lean (93/7) as it tends to dry out quickly and can result in crumbly, tough taco filling.
- Homemade Taco Seasoning: Making your own taco seasoning is not only cost-effective but also allows you to control the sodium and spice level. A basic blend includes chili powder, cumin, paprika, garlic powder, onion powder, oregano, salt, and pepper. Toast the spices in the pan for 30 seconds before adding water to deepen their flavor. You can also add a pinch of cinnamon or cocoa powder for a subtle, authentic Mexican touch.
- Preventing Soggy Shells: The enemy of a crispy taco is moisture. To keep shells crunchy, serve assembled tacos immediately. If you need to prep ahead, store the beef, cheese, and toppings separately and assemble just before eating. For hard shells, you can also line the inside with a thin layer of refried beans or sour cream before adding the beef – this creates a barrier that prevents the shell from absorbing liquid from the meat.
- Cheese Melting Magic: For the best melt, grate your cheese from a block rather than using pre-shredded bags. Pre-shredded cheese is coated with cellulose (an anti-caking agent) that inhibits smooth melting. A Mexican blend with cheddar, Monterey Jack, and asadero is ideal. Add the cheese immediately after spooning the hot beef onto the shell so the residual heat melts it into a luscious, stringy layer.
- Customizing Heat Level: Adjust the spiciness to your preference. For mild tacos, use a standard taco seasoning and omit cayenne. For medium heat, add 1/4 teaspoon cayenne or a chopped chipotle pepper in adobo sauce. For fiery tacos, include a minced habanero or a drizzle of hot sauce like Cholula or Tapatío. Remember that the heat will mellow slightly as the beef simmers.
- Batch Cooking and Storage: The seasoned beef freezes beautifully. Double the recipe and freeze half in an airtight container for up to 3 months. To reheat, thaw overnight in the fridge and warm in a skillet over medium heat with a splash of water to restore moisture. The beef can also be used in other dishes like taco salads, nachos, burritos, or stuffed peppers.
Variations
- Chicken Tacos: Substitute ground beef with ground chicken or turkey. Since poultry is leaner, add 1 tablespoon of olive oil to the pan before cooking. You may also want to increase the seasoning slightly (by 1/2 teaspoon each of cumin and chili powder) to compensate for the milder flavor. The cooking time remains the same.
- Vegetarian Black Bean Tacos: Replace the meat with two cans of black beans (rinsed and drained) or a 12-ounce package of plant-based crumbles. For beans, mash half of them with a fork before adding to the pan and simmer with the seasoning and water for 5-7 minutes. This creates a hearty, protein-packed filling. Top with crumbled queso fresco or a vegan cheese alternative.
- Fish Tacos: For a lighter twist, use flaky white fish like cod or tilapia. Cut into 1-inch pieces, season with chili powder, cumin, and lime juice, then pan-sear in a hot skillet with oil for 2-3 minutes per side. Break into chunks and serve in soft corn tortillas with cabbage slaw and a creamy chipotle sauce. Omit the cheese for a fresher flavor.
- Breakfast Tacos: Transform this recipe into a breakfast favorite by scrambling eggs with the seasoned beef. Cook the beef as directed, then push it to one side of the pan. Crack 4 eggs into the other side, scramble, and mix together. Serve in warm tortillas with cheese, salsa, and avocado. Perfect for a hearty morning meal.
- Low-Carb/Keto Tacos: For a low-carb version, skip the taco shells and serve the beef over lettuce wraps or in large romaine leaves. Use full-fat cheese and add extra toppings like sour cream, guacamole, and pickled jalapeños. You can also use cheese shells (baked cheese crisps) for a crunchy, keto-friendly alternative.
Nutrition
- Calories385 kcal
- Total Fat22g
- Saturated Fat10g
- Cholesterol85mg
- Sodium720mg
- Total Carbohydrates24g
- Dietary Fiber3g
- Sugars3g
- Protein25g