<

Easy Weeknight Casserole

Easy Weeknight Casserole
Casserole Recipes • Easy Dinner Ideas • Quick Family Meals

⏱️ Prep: PT15M
🔥 Cook: PT30M
🍞 Baking: PT20M
⏳ Total: PT45M
🍽️ Yield: 6 servings
⚡ Calories: 450 kcal
(284)
easy weeknight casseroleground beef casserolecheesy casserolefamily dinnerquick dinnerbroccoli casserolecomfort food

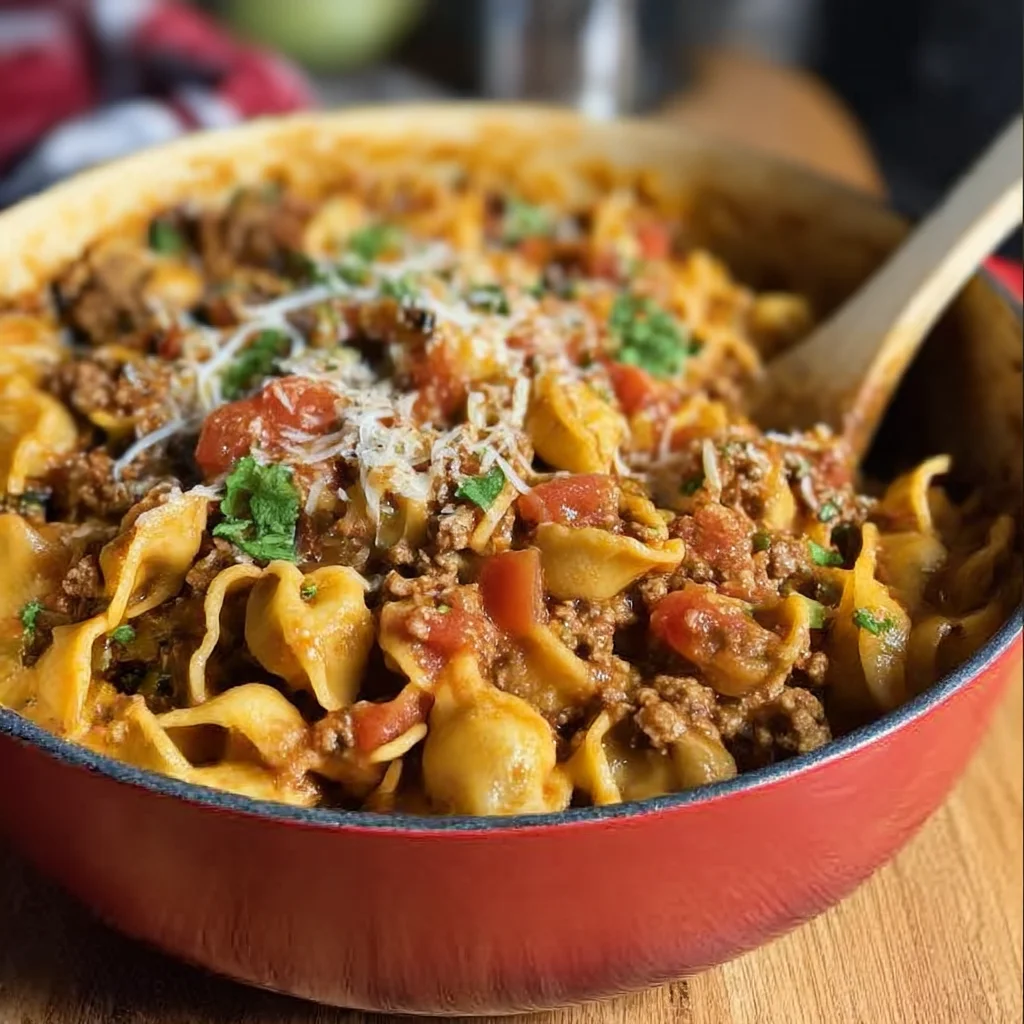
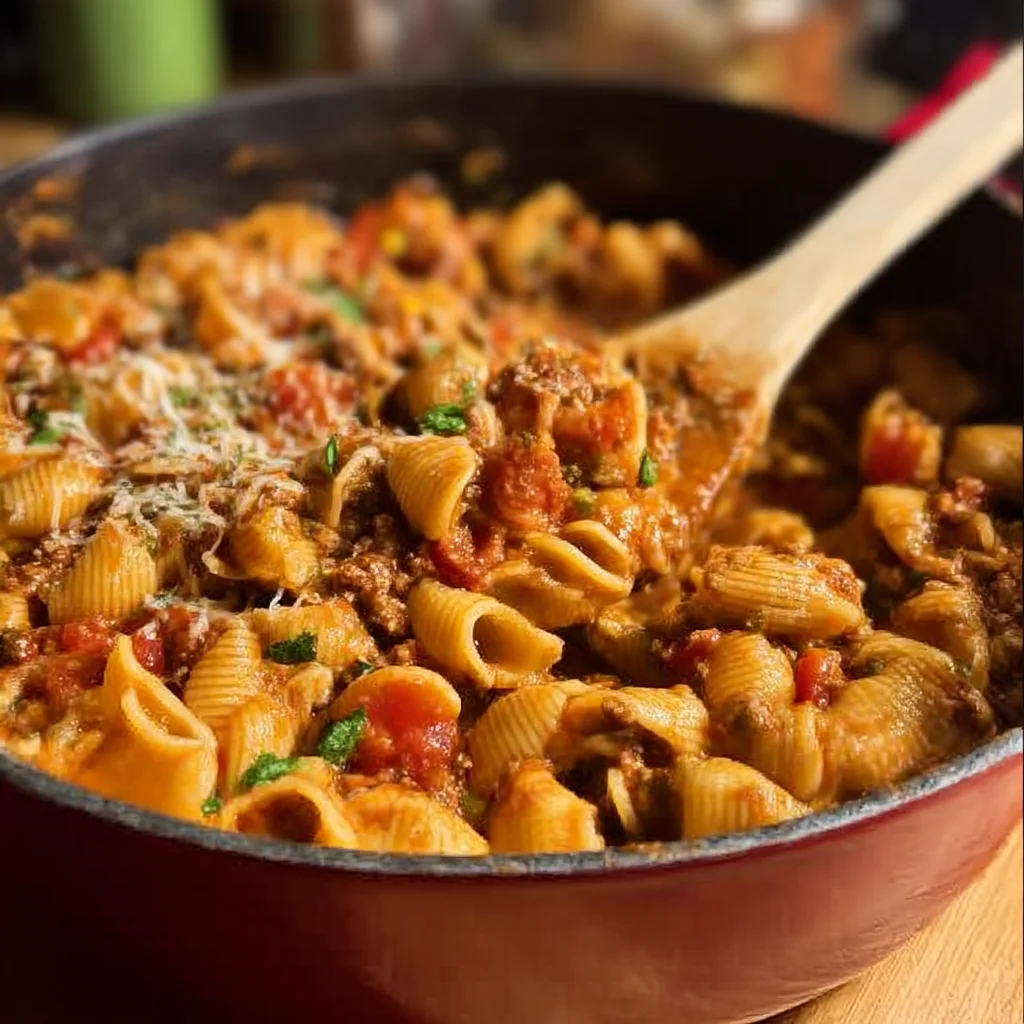
This easy weeknight casserole combines ground beef, cheese, and broccoli in a creamy sauce, all topped with a golden crust. Perfect for busy families, it's a quick dinner idea that…

Ingredients

Toggle: Metric / US

Instructions

Step 1

Preheat your oven to 375°F (190°C). While the oven is heating, bring a large pot of salted water to a boil. Cook the pasta according to package directions until al dente — this usually takes about 8-10 minutes. You want the pasta to be firm because it will continue cooking in the oven. Drain and set aside. If using fresh broccoli, blanch it in the boiling water for 2 minutes until bright green, then plunge into ice water to stop cooking. This preserves color and texture. For frozen broccoli, thaw and pat dry with paper towels to remove excess moisture, which can make the casserole watery.

Step 1 image
Step 2

In a large skillet over medium-high heat, cook the ground beef, breaking it up with a wooden spoon. Season with salt, pepper, and paprika. Cook until browned and no longer pink, about 6-8 minutes. The beef should be sizzling and release its fat — if there’s more than 2 tablespoons of grease, drain it off to avoid a greasy casserole. Add the diced onion and minced garlic to the skillet. Cook for 2-3 minutes until the onion is translucent and fragrant. The garlic should just begin to golden but not burn, as burnt garlic turns bitter. If using shredded chicken, add it now and stir to combine with the beef mixture.

Step 2 image
Step 3

In a large mixing bowl, whisk together the condensed cream of mushroom soup, whole milk, and sour cream until smooth. This creamy base is the heart of the casserole — the soup provides umami depth, while sour cream adds tanginess and richness. Stir in half of the shredded cheddar cheese (about 1 cup) and all of the Parmesan. The mixture should be thick but pourable. If it seems too thick, add a splash more milk. Fold in the cooked pasta, cooked rice, broccoli, and the meat mixture. Stir gently until everything is evenly coated. The pasta and rice should be well distributed so every bite has a balance of textures.

Step 3 image
Step 4

Transfer the mixture to a greased 9×13-inch baking dish. Spread it into an even layer using a spatula. Sprinkle the remaining cheddar cheese over the top. For a crunchy golden crust, combine breadcrumbs with melted butter and sprinkle over the cheese. The butter helps the breadcrumbs toast to a beautiful golden brown. Place the dish on the middle rack of the preheated oven. Bake for 20-25 minutes, until the casserole is bubbly around the edges and the top is golden. The internal temperature should reach 165°F (74°C) if using chicken. Let it rest for 5 minutes before serving — this allows the casserole to set so it doesn’t fall apart when you scoop it.

Step 4 image
Step 5

Serve the casserole hot, garnished with fresh parsley if desired. Use a large spoon to scoop out portions, making sure to get some of the crispy topping in each serving. The casserole is a complete meal on its own, but pairs beautifully with a simple green salad or steamed vegetables. Leftovers can be stored in an airtight container in the refrigerator for up to 4 days. To reheat, microwave individual portions or place the entire dish in a 350°F oven covered with foil for 15-20 minutes until warmed through. For best results, add a splash of milk before reheating to restore creaminess.

For best results

  • To prevent a watery casserole, make sure to drain any excess fat from the ground beef after browning. Also, if using frozen broccoli, thaw it completely and squeeze out as much moisture as possible with a clean kitchen towel. Water released during baking can dilute the creamy sauce and result in a soggy texture. Another trick is to slightly undercook the pasta and rice — they will absorb some liquid during baking and finish cooking perfectly. If you prefer a firmer casserole, reduce the milk by a couple of tablespoons.
  • For the best cheese pull, use freshly shredded cheddar instead of pre-shredded bagged cheese. Pre-shredded cheese is coated with anti-caking agents like cellulose or starch, which prevent it from melting smoothly. Grating your own cheese from a block ensures a silky, cohesive melt and superior flavor. Experiment with cheese blends: sharp cheddar for tang, Monterey Jack for creaminess, or Gruyère for nuttiness. A mix of cheeses adds complexity to the dish.
  • This casserole is incredibly versatile. You can swap the protein: use ground turkey or chicken for a lighter option, or Italian sausage for a spicier kick. For a vegetarian version, replace meat with a can of drained and rinsed black beans or lentils, and use vegetable broth in the sauce. The broccoli can be substituted with cauliflower, green beans, or peas. Even the starch can be changed: try quinoa, farro, or diced potatoes (parboil first). The key is to keep the total volume of solids roughly the same to maintain the sauce-to-filling ratio.
  • Make-ahead instructions: Assemble the casserole completely but do not bake. Cover tightly with plastic wrap and then foil, and refrigerate for up to 24 hours. When ready to bake, remove from the fridge while the oven preheats (about 20 minutes) to take the chill off, then bake as directed, adding 10-15 minutes to the baking time. You can also freeze the unbaked casserole for up to 3 months. Thaw overnight in the fridge before baking. If baking from frozen, add 30-40 minutes and cover with foil for the first half to prevent over-browning.
  • To achieve a perfectly golden and crispy topping, use panko breadcrumbs instead of regular breadcrumbs. Panko are larger and flakier, creating a lighter, crunchier crust. Mix them with melted butter and a pinch of salt and garlic powder. For an extra indulgent twist, add crushed potato chips or French fried onions on top during the last 5 minutes of baking. Watch carefully to avoid burning. If the topping is browning too quickly but the casserole isn't bubbly yet, tent loosely with foil and continue baking.
  • Serving suggestions: This casserole is hearty enough to stand alone, but for a balanced meal, serve with a crisp green salad dressed with a lemon vinaigrette to cut through the richness. Roasted asparagus or green beans also complement the creamy, cheesy casserole. For a low-carb option, skip the rice and pasta and double the broccoli and meat — the sauce will still bind everything together beautifully. You can also portion the casserole into individual ramekins for a fun presentation and quicker baking (reduce time to 15-18 minutes).
  • Storage and leftovers: Store leftovers in an airtight container in the refrigerator for up to 4 days. Reheat in the microwave in 30-second bursts, stirring halfway, or in a 350°F oven for 10-15 minutes. If the casserole seems dry after reheating, stir in a tablespoon of milk or cream per serving. To freeze, portion into freezer-safe containers and freeze for up to 3 months. Thaw overnight in the fridge. The texture may be slightly softer upon reheating due to the pasta and rice absorbing moisture, but the flavor remains delicious.

Variations

  • Low-Carb/Keto Variation: Replace the rice and pasta with riced cauliflower (fresh or frozen, thawed and squeezed dry). Use full-fat cream cheese instead of milk for a richer, low-carb sauce. Increase the meat and cheese to keep the casserole satisfying. You can also add sautéed mushrooms for extra umami. The macros shift dramatically: less than 10g net carbs per serving, making it perfect for keto dieters.
  • Spicy Southwestern Twist: Swap the cream of mushroom soup for a can of condensed cheddar cheese soup or use a homemade sauce with diced tomatoes and green chiles (Rotel). Add 1 teaspoon of cumin, 1 teaspoon of chili powder, and a pinch of cayenne. Use pepper Jack cheese instead of cheddar, and stir in a can of drained black beans and corn. Top with crushed tortilla chips and fresh cilantro before serving. This version is fiery, colorful, and packed with flavor.
  • Chicken Broccoli Alfredo Casserole: Replace the cream of mushroom soup with a homemade Alfredo sauce (butter, heavy cream, garlic, Parmesan). Use shredded rotisserie chicken and broccoli as the main fillers, and skip the ground beef. Cook pasta like fettuccine or penne and toss with the Alfredo sauce, chicken, and broccoli. Top with mozzarella and bake until bubbly. This variation is creamy, indulgent, and feels like a restaurant-quality dish.
  • Vegetarian Mediterranean Casserole: Omit the meat entirely. Use a mix of sautéed zucchini, bell peppers, onions, and spinach. Add a can of drained chickpeas for protein. Replace the cream of mushroom soup with a béchamel sauce (butter, flour, milk) seasoned with oregano and thyme. Use feta cheese and mozzarella on top. Serve with a side of tzatziki sauce. This version is fresh, herbaceous, and perfect for meatless Mondays.
  • Breakfast Casserole: Use the same base but swap the meat for cooked breakfast sausage or bacon. Replace broccoli with diced bell peppers and onions. Use hash browns (frozen, thawed) instead of rice and pasta. Pour a mixture of beaten eggs and milk over the layers instead of the cream soup mixture. Top with cheddar and bake until set. This makes a hearty brunch dish that can be prepared the night before.

Nutrition

  • Calories450 kcal
  • Total Fat24g
  • Saturated Fat12g
  • Cholesterol85mg
  • Sodium720mg
  • Total Carbohydrates35g
  • Dietary Fiber3g
  • Sugars6g
  • Protein28g

Common Questions

Can I use a different protein instead of ground beef?
Absolutely! Ground turkey, ground chicken, or Italian sausage work wonderfully. For a vegetarian option, use crumbled tofu, tempeh, or a can of lentils. If using sausage, be mindful of the fat content — drain excess grease. Shredded rotisserie chicken is a great time-saver and adds a different texture. You can even use leftover pot roast or pulled pork. Just make sure any protein is fully cooked before assembling the casserole.
How do I prevent the casserole from being too watery?
Watery casserole is usually caused by excess moisture from vegetables or undercooked pasta. Thaw frozen broccoli and pat it dry thoroughly. If using fresh broccoli, blanch and shock it, then drain well. Cook pasta al dente — it will absorb liquid during baking. Also, drain any fat from the meat. If you’re adding mushrooms, sauté them first to release their water. Finally, let the casserole rest for 5-10 minutes after baking; it will firm up as it cools.
Can I make this casserole ahead of time?
Yes! Assemble the casserole completely but do not bake. Cover tightly with plastic wrap and then foil, and refrigerate for up to 24 hours. When ready to bake, remove from the fridge while the oven preheats (about 20 minutes), then bake as directed, adding 10-15 minutes. You can also freeze the unbaked casserole for up to 3 months. Thaw overnight in the fridge before baking. If baking from frozen, add 30-40 minutes and cover with foil for the first half.
What can I use instead of cream of mushroom soup?
You can make a homemade cream sauce: melt 2 tablespoons butter, whisk in 2 tablespoons flour, cook for 1 minute, then slowly whisk in 1 cup milk and 1/2 cup chicken broth. Simmer until thickened, then season with salt, pepper, and garlic powder. Alternatively, use cream of chicken or cream of celery soup. For a dairy-free version, use a can of coconut milk and a slurry of cornstarch and water to thicken.
How long does this casserole last in the fridge?
Properly stored in an airtight container, the casserole will keep for 3-4 days in the refrigerator. Reheat in the microwave or oven. If reheating in the oven, cover with foil to prevent drying out. Add a splash of milk before reheating to restore creaminess. You can also freeze individual portions for up to 3 months. Thaw in the fridge overnight before reheating.
Can I add more vegetables?
Definitely! This casserole is a great way to use up leftover vegetables. Try adding sautéed mushrooms, bell peppers, zucchini, spinach, or kale. Just make sure to cook watery vegetables first to remove excess moisture. Frozen mixed vegetables (peas, carrots, corn) can be added directly without thawing. Keep the total volume of vegetables to about 2-3 cups to maintain the proper ratio of filling to sauce.
Is this casserole gluten-free?
To make it gluten-free, use gluten-free pasta and rice (ensure they are certified GF). Substitute the cream of mushroom soup with a gluten-free cream soup or make a gluten-free béchamel using a gluten-free flour blend (like rice flour or cornstarch). Use gluten-free breadcrumbs or crushed GF crackers for the topping. Check all labels for hidden gluten. The rest of the ingredients are naturally gluten-free.
Can I use leftover rice or pasta?
Yes, this is a perfect use for leftover rice or pasta. If using leftover rice, about 2 cups cooked is ideal. For pasta, use about 3 cups cooked. Leftover grains may be slightly drier, so you might want to add an extra splash of milk to the sauce. This is a great way to reduce food waste and save time. Just make sure the leftovers are no more than 3-4 days old.

Notes

This Easy Weeknight Casserole is a labor of love born from the chaos of busy weeknights when I needed something hearty, comforting, and simple to throw together. I remember those evenings when the kids were hungry, homework was piling up, and I had maybe 30 minutes to get dinner on the table. This casserole became my go-to solution. It uses pantry staples like pasta, rice, canned soup, and frozen broccoli, but it feels like a special meal. The combination of creamy sauce, tender meat, and gooey cheese is pure comfort.What I love most about this recipe is its adaptability. Over the years, I’ve made it with leftover rotisserie chicken, ground turkey, and even plant-based crumbles. I’ve swapped broccoli for cauliflower, added spinach, and used different cheese blends. Each variation is delicious in its own way. The recipe I’m sharing today is the classic version that always gets rave reviews from my family and friends. It’s the one they request for potlucks and family gatherings.One of my favorite memories is making this casserole for a neighborhood block party. I doubled the recipe and baked it in two large dishes. The aroma of melting cheese and savory beef drew people from all over. It was the first dish to be emptied, and I received countless requests for the recipe. That’s when I knew this casserole was something special. It’s not just food; it’s a connector. It brings people together around the table, sharing stories and laughter.When serving, I love to garnish with fresh parsley or chives for a pop of color. A side salad with a tangy vinaigrette balances the richness. For a complete meal, add roasted carrots or a simple green bean almondine. Leftovers are even better the next day, as the flavors meld together. I often make a double batch on Sunday and enjoy it for lunches throughout the week. It reheats beautifully.I hope this casserole becomes a staple in your home as it has in mine. Don’t be afraid to experiment with the variations and make it your own. Cooking is about intuition and love. Trust your taste buds, and remember that the best recipes are the ones shared with the people you care about. Happy cooking!

Quick Family Casserole

Quick Family Casserole
Easy Dinner Recipes • Quick Weeknight Meals • Casserole Recipes

⏱️ Prep: PT15M
🔥 Cook: PT30M
🍞 Baking: PT15M
⏳ Total: PT45M
🍽️ Yield: 6 servings
⚡ Calories: 485 kcal
(284)
casseroleground beefcheesebroccolieasy dinnerweeknight mealhigh proteinfamily friendly

This quick family casserole is the perfect easy dinner recipe for busy weeknights. Made with simple ingredients like ground beef and cheese, this hearty meal is a budget-friendly and high-protein…

Ingredients

Toggle: Metric / US

Instructions

Step 1

Preheat your oven to 375°F (190°C) and lightly grease a 9×13-inch (or similar 3-quart) baking dish with non-stick spray or a thin layer of butter. This ensures the casserole doesn’t stick and makes for easy cleanup. If you have time, you can also line the dish with parchment paper for extra insurance.

Step 1 image
Step 2

In a large skillet or Dutch oven, heat 1 tablespoon of olive oil over medium-high heat until it shimmers. Add the diced onion and cook for 3-4 minutes, stirring occasionally, until the onion becomes translucent and fragrant. The aroma of sautéing onion is the first sign that flavor is building. Add the minced garlic and cook for another 30 seconds until fragrant, being careful not to burn it.

Step 2 image
Step 3

Add the ground beef to the skillet, breaking it apart with a wooden spoon or spatula. Cook for 5-7 minutes, stirring occasionally, until the beef is browned and no longer pink. You’ll know it’s done when you see rich brown bits forming on the bottom of the pan — that’s fond, and it’s packed with flavor. If there’s excess fat (more than a tablespoon), drain it off to keep the casserole from becoming greasy. Season the beef with salt, pepper, paprika, and oregano, stirring to coat evenly. This step infuses the meat with a warm, savory spice blend that complements the creamy sauce.

Step 4

Reduce the heat to medium-low and stir in the condensed cream of mushroom soup, milk, and sour cream. Mix until the sauce is smooth and well combined, scraping up any browned bits from the bottom of the pan. The sauce will look slightly thick but should be pourable. Let it simmer gently for 2-3 minutes, allowing the flavors to meld. Taste and adjust seasoning if needed — you want a creamy, savory base that will coat every grain of rice and piece of broccoli.

Step 5

Add the broccoli florets and cooked rice to the skillet, stirring gently to incorporate everything evenly. The broccoli should be raw at this point — it will cook perfectly in the oven, retaining a slight crunch. If you prefer softer broccoli, you can blanch it for 2 minutes in boiling water beforehand. The mixture should look cohesive, with the sauce evenly distributed. Fold in 1 1/2 cups of the shredded cheddar cheese, reserving the remaining 1/2 cup for the top. The cheese will melt into the sauce, adding richness and a subtle tang.

Step 6

Transfer the entire mixture to the prepared baking dish, spreading it into an even layer. If using panko breadcrumbs, sprinkle them over the top along with the remaining 1/2 cup of cheddar cheese. The breadcrumbs add a delightful crunch that contrasts with the creamy interior. For an extra golden crust, you can dot the top with small pats of butter (about 1 tablespoon total).

Step 7

Place the dish in the preheated oven and bake for 20-25 minutes, or until the casserole is bubbly around the edges and the top is golden brown. Rotate the dish halfway through for even browning. You’ll know it’s ready when you see the cheese melted and slightly browned in spots, and the sauce is bubbling up through the topping. If the top is browning too quickly, tent loosely with foil for the last 10 minutes.

Step 8

Remove the casserole from the oven and let it rest for 5-10 minutes before serving. This resting period allows the sauce to set slightly, making it easier to scoop out clean portions. The casserole will be piping hot, so be careful. Serve with a side salad or steamed vegetables for a complete meal. Garnish with fresh parsley or chopped chives if desired. Leftovers can be stored in an airtight container in the refrigerator for up to 4 days.

For best results

  • For the best texture, use freshly shredded cheddar cheese from a block rather than pre-shredded cheese. Pre-shredded cheese often contains anti-caking agents like cellulose or potato starch, which can prevent the cheese from melting smoothly and may result in a grainy sauce. Grating your own cheese takes just a few minutes but makes a significant difference in creaminess and flavor.
  • If you want to boost the protein content even further, consider swapping half of the ground beef for ground turkey or chicken. You can also add a can of drained and rinsed black beans or chickpeas. The recipe is very forgiving, and these additions will not alter the overall flavor profile drastically while increasing the protein and fiber.
  • To make this casserole gluten-free, use a gluten-free condensed cream of mushroom soup (such as Pacific Foods or Progresso) and substitute the panko breadcrumbs with crushed pork rinds or a gluten-free breadcrumb blend. Also, ensure your sour cream and milk are gluten-free (most are, but always check labels). The rest of the ingredients are naturally gluten-free.
  • For a lighter version, use 93% lean ground beef, low-fat cream of mushroom soup (or make a homemade béchamel with skim milk), and reduced-fat cheddar cheese. You can also replace the sour cream with plain Greek yogurt for extra protein and tanginess. These swaps reduce the calorie and fat content without sacrificing much flavor.
  • Don't skip the step of sautéing the onion and garlic — it builds a flavor foundation that cannot be replicated by adding them raw. The Maillard reaction that occurs during browning creates complex savory notes that elevate the entire dish. If you're short on time, you can use frozen diced onion, but fresh is always better for texture and taste.
  • Broccoli can be swapped with cauliflower, green beans, or even frozen mixed vegetables. If using frozen vegetables, thaw them first and pat dry to remove excess moisture, which can make the casserole watery. Alternatively, you can roast the vegetables beforehand to concentrate their flavor and reduce liquid content.
  • For a crunchy, golden topping that rivals any restaurant casserole, mix the panko breadcrumbs with a tablespoon of melted butter and a pinch of garlic powder before sprinkling over the cheese. This ensures the crumbs toast evenly and become irresistibly crispy. Watch them closely during the last few minutes of baking to prevent burning.

Variations

  • Chicken & Broccoli Casserole: Replace ground beef with 2 cups of shredded or diced cooked chicken (rotisserie chicken works beautifully). The cooking time remains the same since the chicken is already cooked. You can also add a teaspoon of dried thyme or rosemary for an herbal note that pairs well with chicken.
  • Mexican-Style Casserole: Swap the cream of mushroom soup for a can of condensed cream of chicken soup, and add a can of drained diced tomatoes with green chilies (Rotel). Use pepper jack cheese instead of cheddar, and season the beef with cumin, chili powder, and smoked paprika. Top with crushed tortilla chips instead of panko for a crunchy Tex-Mex twist.
  • Vegetarian Option: Omit the meat entirely and double the broccoli (or add other vegetables like diced bell peppers, zucchini, or mushrooms). Use a can of cream of celery soup and add a can of drained and rinsed chickpeas or white beans for protein. The cooking time remains the same; just ensure the vegetables are cut into uniform pieces for even cooking.
  • Low-Carb/Keto Version: Replace the rice with cauliflower rice (about 4 cups). To avoid a watery casserole, sauté the cauliflower rice in a dry skillet over medium heat for 5-7 minutes to evaporate excess moisture before adding it to the mixture. Use full-fat cream cheese (4 oz) in place of the milk and sour cream for extra richness. The topping can be crushed pork rinds mixed with cheese for a crunchy, zero-carb crust.
  • Cheesy Broccoli & Rice Casserole: For a truly classic version, omit the meat entirely and use 3 cups of broccoli florets. Add an extra 1/2 cup of cheese to the sauce and a pinch of nutmeg, which complements the creamy cheese sauce beautifully. This version is a perfect side dish or a light vegetarian main.

Nutrition

  • Calories485 kcal
  • Total Fat28g
  • Saturated Fat14g
  • Cholesterol95mg
  • Sodium890mg
  • Total Carbohydrates32g
  • Dietary Fiber3g
  • Sugars5g
  • Protein28g

Common Questions

Can I make this casserole ahead of time?
Absolutely! This casserole is a great make-ahead meal. Assemble the casserole completely (without baking), cover tightly with foil or plastic wrap, and refrigerate for up to 24 hours. When ready to bake, remove from the refrigerator and let it sit at room temperature for about 20 minutes while the oven preheats. Then bake as directed, adding 5-10 minutes to the baking time since the dish starts cold. You can also freeze the unbaked casserole for up to 3 months; thaw overnight in the refrigerator before baking.
How do I store leftovers and reheat them?
Leftover casserole can be stored in an airtight container in the refrigerator for up to 4 days. To reheat, you can microwave individual portions for 1-2 minutes, stirring halfway through. For best results, reheat in a 350°F oven for 15-20 minutes, covered with foil to prevent drying out. If the casserole seems dry after reheating, add a splash of milk or broth before warming. The casserole also freezes well after baking; wrap tightly in foil and freeze for up to 3 months. Thaw in the refrigerator and reheat as above.
Can I use frozen broccoli instead of fresh?
Yes, frozen broccoli works fine, but you need to thaw it first and pat it very dry with paper towels to remove excess moisture. Frozen vegetables contain more water than fresh, and adding them directly to the casserole can make it watery. Alternatively, you can add the frozen broccoli directly without thawing, but increase the baking time by about 10 minutes and expect a slightly looser consistency. For the best texture, I recommend fresh broccoli when possible.
What can I substitute for cream of mushroom soup?
If you don’t have cream of mushroom soup, you can make a quick homemade substitute: In a small saucepan, melt 2 tablespoons of butter over medium heat. Whisk in 2 tablespoons of all-purpose flour and cook for 1 minute. Gradually whisk in 1 cup of milk or chicken broth, and cook until thickened, about 3-5 minutes. Season with salt, pepper, and a pinch of garlic powder. This makes about 1 cup of creamy sauce, equivalent to one can. You can also use cream of chicken or cream of celery soup for a different flavor profile.
Can I use a different type of cheese?
Absolutely! While sharp cheddar provides a classic flavor and great melt, you can use any good melting cheese. Colby Jack, Monterey Jack, Gouda, or a mix of mozzarella and Parmesan all work well. For a more intense flavor, try smoked gouda or Gruyère. Avoid using low-moisture cheeses like Parmesan alone (they don’t melt smoothly) or pre-shredded cheese blends that contain anti-caking agents. Grate your own cheese for the best results.
Is this casserole gluten-free?
The recipe as written is not gluten-free because it uses condensed cream of mushroom soup (which typically contains wheat flour) and panko breadcrumbs. However, you can easily make it gluten-free by using a gluten-free condensed soup or the homemade substitute mentioned above, and by using gluten-free breadcrumbs or crushed pork rinds for the topping. Also, ensure your sour cream and other ingredients are certified gluten-free if you have celiac disease or severe sensitivity.
Can I add other vegetables?
Definitely! This casserole is very versatile. You can add sliced mushrooms (sauté them with the onion), diced bell peppers, carrots, peas, corn, or chopped spinach. If adding spinach, stir it in at the end just until wilted to avoid overcooking. Keep the total vegetable volume around 2-3 cups so the casserole doesn’t become too watery. If using frozen vegetables, thaw and pat dry first.
What can I serve with this casserole?
This casserole is a complete one-dish meal, but it pairs wonderfully with a simple side salad dressed with vinaigrette to cut through the richness. You could also serve it with crusty bread or garlic bread to soak up any extra sauce. For a lighter meal, steamed green beans or roasted asparagus make excellent accompaniments. If you’re feeding a crowd, a fruit salad or coleslaw adds freshness.

Notes

This quick family casserole is a staple in my home, and I’m so excited to share it with you. I grew up on casseroles—my mom made them on busy weeknights when she needed something hearty and comforting that could feed five hungry kids without a lot of fuss. This particular recipe is my modern twist on that classic, with a few upgrades for flavor and nutrition. I’ve swapped out the canned vegetables for fresh broccoli, added a touch of paprika and oregano for depth, and used sharp cheddar for a bolder cheese presence. Yet, it still retains that nostalgic, creamy, comforting quality that makes casseroles so beloved.I remember the first time I made this for my own family; the kitchen filled with that familiar aroma of browning beef and melting cheese, and my kids came running in asking, “What’s for dinner?” That’s the magic of a good casserole—it brings people together. I love that this dish is so adaptable; you can clean out your fridge by adding leftover vegetables or swap the protein based on what you have. It’s the ultimate budget-friendly meal that never feels boring.One of my favorite things about this recipe is how forgiving it is. If you don’t have cream of mushroom soup, you can make a quick roux-based sauce. If you’re out of broccoli, use cauliflower or green beans. The rice can be swapped for quinoa, or even pasta if you’re in the mood for a different texture. The possibilities are endless, and that’s what makes this casserole a true workhorse in the kitchen.When serving, I like to garnish with a sprinkle of fresh parsley or chives for a pop of color and freshness. It also pairs beautifully with a simple green salad dressed with lemon vinaigrette—the acidity cuts through the richness of the cheese and cream. If you’re meal prepping, this casserole freezes wonderfully; just portion it into individual containers for quick lunches.I hope this recipe becomes a favorite in your home as it has in mine. Don’t be afraid to make it your own—cooking is all about experimenting and finding what makes you happy. Enjoy every cheesy, comforting bite!

Caramelized Onion Chicken Dinner

Caramelized Onion Chicken Dinner
Easy Dinner Recipes • Quick Weeknight Meals • French Onion Chicken

⏱️ Prep: PT15M
🔥 Cook: PT35M
⏳ Total: PT50M
🍽️ Yield: 4 servings
⚡ Calories: 485 kcal
(284)
French onion chickencaramelized onion chickeneasy chicken dinnerweeknight dinnercheesy chickenorzo casseroleone pan dinner

This Caramelized Onion Chicken Dinner delivers rich French onion flavor with juicy chicken, sweet caramelized onions, and melted cheese. An easy weeknight dinner ready in under an hour.

Ingredients

Toggle: Metric / US

Instructions

Step 1

Preheat your oven to 375°F (190°C). Season both sides of the chicken breasts with salt, pepper, and garlic powder. This simple seasoning enhances the natural flavor of the chicken and complements the sweet, savory onions. Let the chicken sit at room temperature for about 10 minutes while you prepare the onions—this helps the chicken cook more evenly. Meanwhile, in a large oven-safe skillet (preferably cast iron or stainless steel), heat 1 tablespoon of olive oil over medium-high heat until shimmering. Carefully place the chicken breasts in the skillet and sear for 4–5 minutes per side, until golden brown. The chicken doesn’t need to be cooked through at this point; we’re just building a flavorful crust. Transfer the seared chicken to a plate and set aside. The fond (brown bits) left in the skillet is pure flavor gold—do not discard it.

Step 1 image
Step 2

Reduce the heat to medium and add the remaining 1 tablespoon of olive oil and the butter to the skillet. Once the butter has melted, add the thinly sliced onions. Stir to coat the onions in the fat and scrape up any browned bits from the bottom of the pan—this deglazes the skillet and incorporates all that chicken flavor into the onions. Cook the onions, stirring occasionally, for about 15–20 minutes, until they are deeply caramelized and soft. Patience is key here: if the onions start to brown too quickly, reduce the heat to medium-low. You want them to turn a rich amber color, not burn. The natural sugars in the onions will caramelize, creating a sweet, savory base for the dish. If the skillet looks dry, add a splash of chicken broth or water to prevent sticking.

Step 2 image
Step 3

Once the onions are beautifully caramelized, sprinkle the dry onion soup mix over the onions and stir to combine. This concentrated seasoning amplifies the French onion flavor and adds depth. Add the orzo pasta and stir for about 1 minute, toasting the orzo slightly in the pan. Toasting the pasta brings out a nutty flavor that enhances the overall dish. Pour in the chicken broth and bring the mixture to a gentle simmer. Scrape up any remaining browned bits from the bottom. Let the orzo cook for about 5 minutes, stirring occasionally, until it has absorbed some liquid but is still al dente. The orzo will finish cooking in the oven.

Step 3 image
Step 4

Nestle the seared chicken breasts back into the skillet, placing them on top of the orzo mixture. Spoon some of the caramelized onions over each chicken breast. In a small bowl, combine the shredded Gruyère and mozzarella cheeses. Sprinkle the cheese mixture evenly over the chicken and onions. The cheese will melt into a golden, bubbly crust that mimics the classic French onion soup gratinée. Transfer the skillet to the preheated oven and bake for 20–25 minutes, until the chicken is cooked through (internal temperature reaches 165°F/74°C) and the cheese is melted and lightly browned. If you want extra browning, switch the oven to broil for the last 2–3 minutes, watching carefully to avoid burning.

Step 5

Remove the skillet from the oven and let it rest for 5 minutes. This resting period allows the juices to redistribute within the chicken, ensuring each bite is moist and tender. Garnish with fresh thyme leaves if desired. Serve the chicken and orzo hot, spooning any pan juices over the top. The orzo will have absorbed the savory broth and onion flavors, creating a risotto-like side dish. This meal is complete on its own, but you can also serve it with a simple green salad or steamed green beans for added freshness.

Step 5 image

For best results

  • For the deepest caramelized onion flavor, use yellow or sweet onions like Vidalia. They have a higher sugar content that breaks down into sweet, jammy strands. Slice the onions uniformly, about 1/4-inch thick, so they cook evenly. Don't rush the caramelization process—low and slow is the secret. If you're short on time, you can caramelize the onions in advance and refrigerate them for up to 3 days. This makes the recipe even faster on busy weeknights.
  • Choose chicken breasts that are similar in size and thickness to ensure even cooking. If some breasts are thicker, pound them to an even 1-inch thickness using a meat mallet or rolling pin. This not only promotes uniform cooking but also tenderizes the meat. Pat the chicken dry with paper towels before seasoning—dry surfaces sear better and develop a beautiful crust.
  • The onion soup mix is a shortcut that adds instant umami and French onion flavor. However, it can be high in sodium. To control salt, use low-sodium chicken broth and adjust seasoning at the end. If you prefer a homemade alternative, combine 1 tablespoon dried minced onion, 1 teaspoon onion powder, 1/2 teaspoon garlic powder, 1/2 teaspoon sugar, and 1/4 teaspoon black pepper.
  • Gruyère cheese is traditional for French onion dishes because of its nutty, creamy melting qualities. If Gruyère is unavailable or expensive, substitute with Swiss cheese, provolone, or even mozzarella mixed with a little Parmesan for a similar effect. For a sharper flavor, use aged cheddar or Gouda.
  • To make this dish gluten-free, substitute the orzo with gluten-free orzo or another small pasta shape, and ensure the onion soup mix is certified gluten-free (many brands are, but check labels). You can also use cooked rice or quinoa instead of orzo for a different texture.
  • Store leftovers in an airtight container in the refrigerator for up to 3 days. The orzo will continue to absorb liquid, so when reheating, add a splash of chicken broth or water to restore creaminess. Reheat in a covered skillet over medium-low heat or in the microwave at 50% power. This dish also freezes well for up to 2 months—thaw overnight in the fridge before reheating.

Variations

  • For a lower-carb version, omit the orzo and replace it with cauliflower rice or sautéed zucchini noodles. Increase the chicken broth to 1 cup and cook the cauliflower rice directly in the skillet for about 5 minutes before adding the chicken and cheese. This keeps the French onion flavors intact while reducing carbohydrates significantly.
  • Make it a creamy dish by stirring in 1/2 cup of heavy cream or crème fraîche into the orzo mixture just before adding the chicken. The cream adds richness and a velvety texture that pairs beautifully with the caramelized onions and cheese. For an even more decadent version, use half-and-half or whole milk.
  • Swap the chicken for boneless pork chops or turkey cutlets. Pork chops pair wonderfully with sweet caramelized onions and Gruyère. Adjust cooking time based on thickness: pork chops typically need 15–20 minutes in the oven. For a vegetarian version, use thick slices of portobello mushrooms or cauliflower steaks, and replace chicken broth with vegetable broth.
  • Add a splash of white wine or sherry when deglazing the pan after searing the chicken. About 1/4 cup of dry white wine (like Sauvignon Blanc) adds acidity that balances the sweetness of the onions. Let it reduce by half before adding the broth. This is a classic French technique that elevates the dish.
  • Incorporate fresh herbs like rosemary or sage along with the thyme. Add a sprig of rosemary to the skillet while baking for an aromatic infusion. Remove the sprig before serving. You can also sprinkle chopped fresh parsley over the finished dish for a pop of color and freshness.

Nutrition

  • Calories485 kcal
  • Total Fat24g
  • Saturated Fat11g
  • Cholesterol135mg
  • Sodium890mg
  • Total Carbohydrates32g
  • Dietary Fiber3g
  • Sugars8g
  • Protein38g

Common Questions

Can I use chicken thighs instead of breasts?
Absolutely! Chicken thighs are more forgiving and stay juicy even if cooked a bit longer. Use bone-in or boneless skinless thighs. If using bone-in, increase the baking time by 5–10 minutes. Skin-on thighs will add extra flavor and crispiness—just sear them skin-side down first until golden.
Can I prepare this dish ahead of time?
Yes, you can assemble the casserole up to the baking step and refrigerate it for up to 24 hours. When ready to bake, add an extra 10–15 minutes to the cooking time since the dish starts cold. You may also need to add a splash of broth if the orzo has absorbed too much liquid. For best results, bake just before serving to maintain the cheese’s gooey texture.
How do I prevent the orzo from becoming mushy?
Cook the orzo only until al dente before baking—about 5 minutes in the skillet. It will continue to cook in the oven and absorb more liquid. If you prefer firmer orzo, reduce the initial simmer time to 3 minutes. Also, use the correct amount of broth; too much liquid will make the orzo soggy. The orzo should be just covered by the broth before baking.
Can I freeze this casserole?
Yes, this dish freezes well. Assemble the casserole completely but do not bake. Cool it to room temperature, then cover tightly with foil and freeze for up to 2 months. To bake, thaw overnight in the refrigerator, then bake as directed, adding 10–15 minutes. Alternatively, bake from frozen at 350°F for about 45–50 minutes, until heated through.
What can I use instead of onion soup mix?
If you don’t have onion soup mix, you can make your own blend: mix 1 tablespoon dried minced onion, 1 teaspoon onion powder, 1/2 teaspoon garlic powder, 1/2 teaspoon sugar, 1/4 teaspoon black pepper, and 1/4 teaspoon dried parsley. This homemade version allows you to control the salt level. You can also skip the mix entirely and rely on the caramelized onions for flavor—just add extra salt and pepper to taste.
Is this recipe gluten-free?
As written, it contains gluten from the orzo and possibly the onion soup mix. To make it gluten-free, use gluten-free orzo or another small gluten-free pasta (like rice-based orzo), and ensure the onion soup mix is certified gluten-free. Many brands offer gluten-free versions. Check all labels carefully.
How do I get the cheese extra bubbly and browned?
For a perfectly browned cheese crust, switch the oven to broil during the last 2–3 minutes of baking. Keep a close eye on it to prevent burning. You can also use a kitchen torch to spot-brown the cheese if you prefer. Using a combination of Gruyère and mozzarella gives excellent melt and browning.

Notes

I first discovered the magic of French onion chicken on a chilly autumn evening when I was craving something warm, savory, and deeply comforting. The idea of combining the iconic flavors of French onion soup—caramelized onions, rich broth, and melted Gruyère—with tender chicken and orzo felt like a revelation. This Caramelized Onion Chicken Dinner quickly became a staple in my kitchen because it delivers that restaurant-quality taste with minimal effort. The best part? Everything comes together in one skillet, which means less cleanup and more time to enjoy your meal.What I love most about this recipe is its versatility. You can serve it as a complete one-pan dinner, or pair it with a simple side like roasted asparagus or a crisp green salad. The leftovers are just as delicious the next day—if there are any! The orzo soaks up all the savory juices, making each bite a little taste of heaven. I often double the recipe when hosting friends, and it never fails to impress.A little tip from my kitchen: don’t skip the step of toasting the orzo. It only takes a minute, but it adds a nutty depth that elevates the entire dish. And if you’re feeling indulgent, a sprinkle of fresh thyme or a drizzle of balsamic glaze right before serving adds a beautiful finishing touch. I hope this recipe brings as much joy to your table as it has to mine. Happy cooking!

Cheesy Orzo Chicken Casserole

Cheesy Orzo Chicken Casserole
Easy Dinner Recipes • Casserole Recipes • Quick Weeknight Meals

⏱️ Prep: PT20M
🔥 Cook: PT35M
🍞 Baking: PT15M
⏳ Total: PT55M
🍽️ Yield: 6 servings
⚡ Calories: 585 kcal
(284)
cheesy orzo chicken casseroleone pan chicken dinnerfrench onion chicken orzocreamy orzo casseroleeasy weeknight casserolecomfort food casserolegruyere chicken orzo

This Cheesy Orzo Chicken Casserole is a creamy, comforting one-pan meal with tender chicken, perfectly cooked orzo, and a golden melted cheese topping. Easy weeknight dinner ready in under an…

Ingredients

Toggle: Metric / US

Instructions

Step 1

Preheat your oven to 375°F (190°C) and position a rack in the center. While the oven heats, begin the caramelized onions: In a large, heavy-bottomed skillet or Dutch oven (at least 12 inches in diameter), heat 2 tablespoons of olive oil over medium heat. Add the thinly sliced onions and ½ teaspoon of salt. Cook, stirring occasionally, for 15–20 minutes until the onions are deeply golden and sweet. The key to perfect caramelization is patience—don’t rush the heat. If the onions start to stick, deglaze with a splash of water. Once done, transfer the onions to a bowl and set aside. The skillet will be used for the next steps.

Step 1 image
Step 2

Season the chicken pieces with the remaining ½ teaspoon salt and ¼ teaspoon black pepper. In the same skillet over medium-high heat, add the chicken in a single layer (work in batches if necessary to avoid overcrowding). Cook for 4-5 minutes per side until golden brown and cooked through. The internal temperature should reach 165°F (74°C). Use a meat thermometer to be precise. Overcooking can make the chicken dry, so remove it as soon as it’s done. Transfer the chicken to the bowl with the onions and set aside.

Step 2 image
Step 3

Reduce the heat to medium and add the butter to the skillet. Once melted, sprinkle the flour over the butter and whisk continuously for 1-2 minutes to cook the raw flour taste. This creates a roux that will thicken the sauce beautifully. Gradually pour in the chicken broth while whisking to prevent lumps. Then add the heavy cream and the condensed French onion soup (or the onion soup mix dissolved in 1 cup water). Whisk until smooth and bring to a gentle simmer. The sauce should thicken slightly, enough to coat the back of a spoon.

Step 4

Stir in the dried orzo pasta and the minced garlic. Return the chicken and caramelized onions to the skillet, along with any accumulated juices. Stir everything together to combine. The orzo will continue to cook in the oven, so it’s fine if it’s still firm at this stage. Taste the sauce and adjust seasoning with the remaining ¼ teaspoon black pepper or more salt if needed. Remember that the cheese will add saltiness, so go easy on the salt.

Step 5

Transfer the skillet to the preheated oven and bake uncovered for 15 minutes. The orzo will absorb the liquid and become tender, and the sauce will thicken to a creamy consistency. After 15 minutes, remove the skillet from the oven (careful, it’s hot!). Preheat the broiler to high.

Step 6

Sprinkle the shredded Gruyère cheese and grated Parmesan evenly over the top of the casserole. Place the skillet under the broiler for 2-4 minutes, watching closely, until the cheese is melted, bubbly, and golden brown in spots. The broiler works fast, so don’t walk away. Garnish with fresh thyme sprigs if desired. Let the casserole rest for 5 minutes before serving to allow the sauce to set slightly. Serve warm, scooping from the skillet right at the table for a rustic presentation.

For best results

  • Caramelizing the onions properly is the heart of this dish. Don't rush it! Low and slow is the key. If the onions start to brown too quickly or stick, add a splash of water or broth to deglaze the pan. This not only prevents burning but also incorporates those flavorful browned bits into the sauce. The onions should be soft, sweet, and deeply golden, almost jam-like. This process can take up to 25 minutes, but it's worth every second.
  • For the best texture, use boneless skinless chicken thighs rather than breasts. Thighs are more forgiving and stay juicy even after baking. If you prefer white meat, reduce the initial cooking time slightly and check for doneness early. Cutting the chicken into uniform bite-sized pieces ensures even cooking. Pat the chicken dry with paper towels before seasoning to get a better sear.
  • The roux step is crucial for a silky, thickened sauce without lumps. Whisk constantly while adding the broth. If you do get lumps, don't panic—just whisk vigorously or use an immersion blender to smooth it out. For a gluten-free version, substitute the all-purpose flour with an equal amount of cornstarch mixed with a little cold water to make a slurry, and add it at the end of simmering.
  • Feel free to customize the cheese blend. Gruyère is classic for French onion flavor, but Swiss, provolone, or even a sharp cheddar work beautifully. For a more affordable option, use a mix of mozzarella and Parmesan. The Parmesan adds a salty, nutty kick that complements the creamy sauce. Always shred your own cheese from a block—pre-shredded cheese contains anti-caking agents that prevent smooth melting.
  • This casserole is a complete meal in one pan, but you can round it out with a simple green salad or steamed vegetables. For extra veggies, stir in a cup of frozen peas or chopped spinach along with the orzo. The residual heat will warm them through perfectly. Leftovers keep well in the refrigerator for up to 4 days and can be reheated in the microwave or oven.

Variations

  • Vegetarian Version: Omit the chicken and use vegetable broth instead of chicken broth. Add 2 cups of sliced mushrooms (cremini or shiitake) along with the onions for an earthy umami boost. You can also toss in a can of drained chickpeas or white beans for protein. The cheese and creamy sauce make this hearty enough to satisfy even meat-lovers.
  • Lighter Option: Substitute the heavy cream with half-and-half or whole milk mixed with 1 tablespoon of cornstarch to thicken. Use low-fat cheese and reduce the amount by half. For the chicken, use boneless skinless chicken breasts and trim any visible fat. This cuts calories significantly while still delivering creamy comfort.
  • Spicy Twist: Add ½ teaspoon of red pepper flakes or a diced jalapeño when cooking the onions. Use pepper Jack cheese instead of Gruyère for a kick. You can also stir in 1 teaspoon of smoked paprika with the flour for a smoky depth. Serve with a dollop of sour cream to balance the heat.
  • Herb-Infused: Stir in 1 tablespoon of fresh chopped rosemary or 2 teaspoons of dried herbes de Provence along with the garlic. Top the casserole with a mixture of breadcrumbs and Parmesan before broiling for a crispy crust. Fresh thyme and parsley are excellent garnishes.

Nutrition

  • Calories585 kcal
  • Total Fat32g
  • Saturated Fat16g
  • Cholesterol145mg
  • Sodium890mg
  • Total Carbohydrates38g
  • Dietary Fiber2g
  • Sugars6g
  • Protein35g

Common Questions

Can I make this casserole ahead of time?
Yes! Assemble the casserole completely but stop before baking. Cover and refrigerate for up to 24 hours. When ready to bake, add about 10-15 minutes to the baking time since the dish will be cold. You may also need to add a splash of broth if the orzo has absorbed too much liquid. The broiling step should be done just before serving for the best cheese crust.
Can I freeze Cheesy Orzo Chicken Casserole?
Absolutely. Let the baked casserole cool completely, then transfer to an airtight container or wrap tightly with foil and plastic wrap. Freeze for up to 3 months. To reheat, thaw overnight in the refrigerator and bake at 350°F (175°C) until heated through, about 20-25 minutes. The texture of the orzo may soften slightly upon thawing, but the flavor remains delicious.
What can I use instead of orzo?
Orzo is a small rice-shaped pasta, but you can substitute with other small pasta shapes like ditalini, stelline, or even broken spaghetti. For a low-carb option, use cauliflower rice or zucchini noodles—but note that cooking times will change drastically. If using a different pasta, adjust the liquid ratio: for every 1 cup of pasta, you need about 1 cup of liquid. Since orzo absorbs a lot, you may need to add more broth if using a larger pasta shape.
Is there a substitute for French onion soup?
Yes! If you don’t have canned French onion soup, you can use 1 packet of onion soup mix dissolved in 1 cup of water. Alternatively, make your own by simmering 2 cups of beef broth with 1 large caramelized onion (extra from the recipe), 1 teaspoon of Worcestershire sauce, and a pinch of sugar. This homemade version gives you control over the sodium and flavor intensity.
How do I prevent the orzo from becoming mushy?
The key is not to overcook the orzo during the initial stovetop step. It should still be quite firm when you transfer the skillet to the oven. The orzo will continue to cook and absorb liquid as it bakes. Also, avoid stirring too vigorously after adding the orzo, as this can break the pasta and release excess starch, leading to a gummy texture.
Can I use pre-shredded cheese?
While you can, I strongly recommend shredding your own cheese from a block. Pre-shredded cheeses are coated with cellulose or starch to prevent clumping, which inhibits smooth melting and can make the sauce grainy. For the best creamy, stringy cheese pull, buy a block of Gruyère and shred it yourself using a box grater.

Notes

This Cheesy Orzo Chicken Casserole is a weeknight hero that came to life on a chilly autumn evening when I craved the deep, savory flavors of French onion soup but wanted something heartier. The idea of combining tender chicken, creamy orzo, and that iconic caramelized onion and Gruyère topping felt like a cozy hug in a dish. I remember testing it three times to get the liquid ratio just right—too much broth and the orzo becomes soupy, too little and it’s dry. The sweet spot is 1½ cups of broth plus the heavy cream and soup, which yields a luscious sauce that coats every grain of pasta. This recipe is perfect for busy families because it comes together in one skillet (less cleanup!) and uses pantry staples. I love serving it with a crisp green salad dressed with a simple vinaigrette to cut through the richness. For a truly memorable meal, pair it with a glass of dry white wine like Sauvignon Blanc or a light red like Pinot Noir. As a final thought, don’t skip the broiling step—that bubbly, golden cheese crust is what elevates this casserole from good to unforgettable. Enjoy every creamy, cheesy bite!

French Onion Chicken Bake

French Onion Chicken Bake
Chicken Casserole • French Onion • One-Pan Dinner

⏱️ Prep: PT20M
🔥 Cook: PT40M
🍞 Baking: PT15M
⏳ Total: PT75M
🍽️ Yield: 4 servings
⚡ Calories: 580 kcal
(284)
French Onion Chicken Bakechicken orzo casseroleone pan dinnercaramelized onion chickencheesy chicken bake

This French Onion Chicken Orzo Casserole combines caramelized onions, tender chicken, and orzo in a rich savory broth, topped with gooey melted cheese. An easy one-pan dinner bursting with flavor.

Ingredients

Toggle: Metric / US

Instructions

Step 1

**Caramelize the Onions:** Heat 2 tablespoons of olive oil in a large oven-safe skillet (preferably cast iron) over medium heat. Add the thinly sliced onions and 1/2 teaspoon of salt. Cook, stirring occasionally, for 20–25 minutes until the onions are deep golden brown and jammy. The key to perfect caramelization is patience: don’t rush the heat. If the onions start to stick, deglaze with a splash of water or broth. You’ll know they’re ready when they’ve reduced significantly in volume and smell intensely sweet and savory. Remove the onions to a plate and set aside. This step builds the foundational flavor for the entire dish.

Step 1 image
Step 2

**Sear the Chicken:** In the same skillet, melt 2 tablespoons of unsalted butter over medium-high heat. Season the chicken breasts with the remaining 1/2 teaspoon salt, 1/4 teaspoon black pepper, dried thyme, and garlic powder. Place the chicken in the skillet and cook for 4-5 minutes per side until golden brown and cooked through (internal temperature reaches 165°F/74°C). The Maillard reaction creates a deep savory crust that adds immense flavor. Remove the chicken to a plate and set aside. Don’t overcrowd the pan; if necessary, work in batches.

Step 2 image
Step 3

**Deglaze the Pan:** Reduce the heat to medium and pour in 1/4 cup of dry white wine (or chicken broth). Use a wooden spoon to scrape up all the browned bits from the bottom of the skillet—these are packed with flavor. Let the wine simmer for 1-2 minutes until slightly reduced. This deglazing step ensures you capture every bit of the caramelized onion and chicken essence.

Step 4

**Cook the Orzo:** Add 4 cups of low-sodium chicken broth, 1 1/2 cups of uncooked orzo, and the packet of dry onion soup mix to the skillet. Stir well to combine, ensuring the orzo is submerged. Bring to a boil, then reduce the heat to a simmer. Cook for 8-10 minutes, stirring occasionally, until the orzo is al dente and most of the liquid is absorbed. The orzo will continue to absorb liquid as it rests, so don’t overcook it. The mixture should be creamy and slightly saucy.

Step 5

**Assemble and Bake:** Preheat your oven to 375°F (190°C). Return the caramelized onions and chicken breasts to the skillet, nestling them into the orzo. Sprinkle the shredded Gruyère and mozzarella cheeses evenly over the top. Transfer the skillet to the oven and bake for 12-15 minutes, until the cheese is melted, bubbly, and golden brown. For extra browning, you can switch to broil for the last 1-2 minutes, watching carefully to prevent burning.

Step 6

**Garnish and Serve:** Remove the skillet from the oven and let it rest for 5 minutes. Garnish with fresh chopped parsley. Serve directly from the skillet for a rustic presentation. The cheese should be stretchy and the orzo creamy. Enjoy this comforting, one-pan meal with a side salad or crusty bread.

For best results

  • **Patience with Onions:** Caramelizing onions low and slow is the cornerstone of French onion flavor. Use a heavy-bottomed pan like cast iron for even heat. Stir every 5 minutes to prevent burning, and if they start to stick, add a splash of water or broth to deglaze naturally. The onions are ready when they are a deep mahogany color and have a sweet, jammy texture. This process can take up to 30 minutes but is well worth the effort.
  • **Pound Chicken Evenly:** For even cooking, place each chicken breast between two sheets of plastic wrap and pound to an even thickness of about 1/2 inch. This ensures the chicken cooks quickly and stays juicy. If you skip this step, thicker parts may be undercooked while thinner parts dry out.
  • **Use Low-Sodium Broth:** The dry onion soup mix adds significant salt, so using low-sodium chicken broth prevents the dish from becoming overly salty. You can always adjust seasoning at the end. If you only have regular broth, reduce the added salt in the recipe.
  • **Cheese Matters:** Gruyère is traditional for French onion soup and melts beautifully with a nutty flavor. If you can't find Gruyère, substitute with Swiss, Emmental, or a mix of provolone and mozzarella. Pre-shredded cheese often contains anti-caking agents that affect melting; shred your own for the best texture.
  • **Don't Overcook Orzo:** Orzo continues to absorb liquid even after you remove it from heat. Cook it to al dente (firm to the bite) so it retains a pleasant texture in the final bake. If the mixture looks too dry after baking, stir in a splash of warm broth before serving.
  • **Make Ahead:** You can caramelize the onions and sear the chicken up to 2 days in advance. Store them separately in the refrigerator. When ready to assemble, proceed with the recipe, adding a few extra minutes to the baking time to ensure everything is heated through.

Variations

  • **Vegetarian Version:** Omit the chicken and use vegetable broth instead of chicken broth. Add 1 can (15 oz) of drained chickpeas or white beans for protein. You can also add sautéed mushrooms along with the onions for an earthy, meaty flavor. The cheese topping remains the same for that classic French onion finish.
  • **Low-Carb / Keto Adaptation:** Replace the orzo with cauliflower rice or zucchini noodles. Cook the cauliflower rice separately and stir it in at the end to avoid mushiness. Use a low-carb thickener like xanthan gum if needed. Increase the cheese and add a splash of heavy cream to maintain richness.
  • **Spicy Twist:** Add 1/2 teaspoon of red pepper flakes or a diced jalapeño when cooking the onions. Use pepper jack cheese instead of mozzarella for a kick. This variation pairs well with a dollop of sour cream on top.
  • **Herb Infusion:** Stir in 1 tablespoon of fresh chopped rosemary or sage along with the thyme. Fresh herbs brighten the dish and add complexity. Garnish with additional fresh herbs just before serving.

Nutrition

  • Calories580 kcal
  • Total Fat22g
  • Saturated Fat10g
  • Cholesterol145mg
  • Sodium980mg
  • Total Carbohydrates48g
  • Dietary Fiber3g
  • Sugars8g
  • Protein45g

Common Questions

Can I use pre-cooked chicken?
Yes, you can use leftover rotisserie chicken or pre-cooked chicken breast. Add it when you return the caramelized onions to the skillet, just before baking. Reduce the baking time to 10 minutes, as the chicken only needs to be heated through.
Can I make this gluten-free?
Absolutely. Use gluten-free orzo (made from rice or corn) or substitute with gluten-free pasta like small shells. Ensure the dry onion soup mix is gluten-free, as some brands contain wheat flour. Alternatively, you can make a homemade onion seasoning blend.
How do I store leftovers?
Store leftovers in an airtight container in the refrigerator for up to 3 days. The orzo will absorb more liquid, so the dish may become thicker. Reheat in the microwave or on the stovetop with a splash of broth or water to loosen it. The cheese may not be as stretchy upon reheating, but the flavor remains delicious.
Can I freeze this casserole?
Yes, you can freeze the assembled but unbaked casserole. Prepare up to the point of adding cheese, then cover tightly with foil and freeze for up to 3 months. When ready to bake, thaw overnight in the refrigerator, then bake as directed, adding 10-15 minutes to the baking time. Alternatively, freeze baked leftovers in individual portions.
What can I use instead of white wine?
Substitute an equal amount of chicken broth or vegetable broth. For a splash of acidity, add 1 teaspoon of lemon juice or white wine vinegar. The wine adds depth, but the dish will still be flavorful without it.

Notes

This French Onion Chicken Bake is a true labor of love, inspired by the classic French onion soup that warms the soul on chilly evenings. I remember the first time I tasted a bowl of French onion soup in a bistro in Paris—the rich, caramelized onions swimming in a savory broth, topped with a blanket of melted Gruyère. I knew I had to capture that same comforting essence in a hearty, one-pan dinner. The addition of orzo, a rice-shaped pasta, makes it a complete meal that satisfies both the craving for soup and the need for something substantial. The chicken stays incredibly moist because it’s seared first and then finished in the oven, all while the orzo soaks up the flavorful broth. This dish is perfect for busy weeknights when you want something impressive without spending hours in the kitchen. I love serving it straight from the skillet, garnished with fresh parsley, alongside a simple green salad with a tangy vinaigrette to cut through the richness. A glass of the same white wine used in the recipe is a wonderful pairing. Over the years, I’ve made this for family gatherings and potlucks, and it always disappears quickly. The key is to take your time with the onions—that deep, sweet flavor is irreplaceable. I hope this recipe brings you the same warmth and joy it has brought to my kitchen. Happy cooking!

French Onion Chicken Orzo Casserole

French Onion Chicken Orzo Casserole
Easy Dinner Recipes • Casserole Recipes • Quick Weeknight Meals

⏱️ Prep: PT20M
🔥 Cook: PT35M
🍞 Baking: PT20M
⏳ Total: PT55M
🍽️ Yield: 6 servings
⚡ Calories: 485 kcal
(284)
French OnionChicken CasseroleOrzo PastaOne-Pan DinnerCheesy CasseroleCaramelized OnionsEasy Weeknight DinnerComfort Food

This French Onion Chicken Orzo Casserole combines tender chicken, caramelized onions, and creamy orzo pasta in a one-pan comfort meal. Topped with melty cheese and baked to bubbly perfection, it's…

Ingredients

Toggle: Metric / US

Instructions

Step 1

**Caramelize the onions:** In a large oven-safe skillet or Dutch oven (at least 12 inches in diameter), melt the butter with 1 tablespoon of olive oil over medium heat. Add the sliced onions and toss to coat. Cook, stirring occasionally, for about 20–25 minutes, until the onions are deeply golden brown and sweet. The key to perfect caramelization is patience: don’t rush the heat. If the onions start to stick, deglaze with a splash of water or wine. You’ll know they’re done when they have a rich mahogany color and have reduced significantly in volume. Season with salt, pepper, and dried thyme, then stir in the white wine, scraping up any browned bits from the bottom of the pan. Let the wine cook off for 1–2 minutes. Transfer the caramelized onions to a bowl and set aside. (This step can be done up to 3 days ahead and refrigerated.)

Step 1 image
Step 2

**Sear the chicken:** In the same skillet, add the remaining 1 tablespoon of olive oil over medium-high heat. Pat the chicken pieces dry with paper towels (this ensures a good sear). Season lightly with salt and pepper. Add the chicken in a single layer (work in batches if needed) and cook without moving for 4–5 minutes, until golden brown on one side. Flip and cook another 3–4 minutes. The chicken doesn’t need to be fully cooked through at this point—it will finish in the oven. Use a slotted spoon to transfer the chicken to the plate with the onions. If there are any burnt bits, wipe the skillet clean with a paper towel.

Step 2 image
Step 3

**Combine the casserole base:** Preheat your oven to 375°F (190°C). Return the skillet to medium heat. Add the chicken broth, onion soup mix, and heavy cream, whisking to combine. Bring to a gentle simmer, then stir in the dried orzo. Let the orzo cook for about 2 minutes, stirring occasionally, so it starts to absorb the liquid. The mixture will be quite liquidy at this stage—that’s perfect. Return the caramelized onions and chicken (along with any accumulated juices) to the skillet, stirring to distribute evenly. Taste the broth and adjust seasoning with additional salt and pepper if needed. Note that the onion soup mix adds salt, so go easy.

Step 3 image
Step 4

**Top with cheese and bake:** Sprinkle the shredded Gruyère and grated Parmesan evenly over the top of the casserole. For an extra golden crust, you can also add a handful of panko breadcrumbs tossed with melted butter (optional). Transfer the skillet to the preheated oven and bake for 20–25 minutes, until the cheese is bubbly and deeply golden, and the orzo is tender. The casserole should be bubbling at the edges. If the top isn’t brown enough, switch to broil for the last 1–2 minutes, watching closely to avoid burning. Let the casserole rest for 5 minutes before serving—this allows the sauce to thicken slightly.

Step 5

**Garnish and serve:** Sprinkle fresh chopped parsley over the top for a pop of color and freshness. Serve hot, straight from the skillet. This casserole pairs beautifully with a simple green salad dressed with a tangy vinaigrette to cut through the richness. Leftovers can be stored in an airtight container in the refrigerator for up to 4 days. Reheat gently in the microwave or oven, adding a splash of broth if needed to restore creaminess.

Step 5 image

For best results

  • **Mastering Caramelized Onions:** The secret to deeply flavorful onions is low and slow cooking. Use a heavy-bottomed pan to distribute heat evenly. Don't stir too often—let them develop color. A pinch of sugar can help kickstart browning, but it's not necessary if you're patient. If the onions start to burn, reduce the heat immediately. Deglazing with wine not only adds flavor but also lifts the fond (browned bits) that adds depth to the entire dish. You can caramelize onions in bulk and freeze them in ice cube trays for future use.
  • **Choosing the Right Chicken:** Boneless skinless thighs are more forgiving and stay juicier than breasts, but either works. If using breasts, be careful not to overcook them during the sear. Cutting the chicken into uniform 1-inch pieces ensures even cooking. For extra flavor, marinate the chicken in a tablespoon of Worcestershire sauce and a clove of minced garlic for 15 minutes before cooking.
  • **Orzo Cooking Tips:** Orzo is a small pasta that cooks quickly, but it can become mushy if overcooked. Since it will continue to cook in the oven, slightly undercook it during the stovetop step. The ideal texture is al dente—firm to the bite. If you prefer a thicker casserole, reduce the broth by 1/4 cup. For a gluten-free version, use gluten-free orzo or substitute with rice (adjust liquid accordingly).
  • **Cheese Selection and Melting:** Gruyère is traditional for French onion soup and melts beautifully with a nutty flavor. If Gruyère is hard to find or expensive, a blend of Swiss and mozzarella works well. For a sharper taste, add a bit of aged cheddar. Always shred your own cheese from a block—pre-shredded cheese contains anti-caking agents that can prevent smooth melting. Let the cheese come to room temperature before baking for even melting.
  • **Make-Ahead and Freezing:** This casserole is perfect for meal prep. Assemble the entire dish (without the cheese topping) up to 2 days in advance, cover, and refrigerate. When ready to bake, add the cheese and increase baking time by 10 minutes. To freeze, assemble in a freezer-safe dish, wrap tightly, and freeze for up to 3 months. Thaw overnight in the refrigerator before baking. The texture of the orzo may soften slightly upon reheating, but the flavor remains fantastic.
  • **Serving Suggestions:** While this casserole is a complete meal on its own, it pairs wonderfully with a crisp green salad dressed with lemon vinaigrette or steamed green beans. For a low-carb option, serve over cauliflower rice or alongside roasted vegetables. A glass of dry white wine like Sauvignon Blanc or unoaked Chardonnay complements the creamy, cheesy flavors.

Variations

  • **Low-Carb / Keto Version:** Replace the orzo with cauliflower rice or zucchini noodles. To keep the casserole from becoming watery, pre-cook the cauliflower rice by sautéing it in a dry pan until most moisture evaporates. Use full-fat cream and increase the cheese to 3 cups. Omit the onion soup mix (which contains sugar and starches) and instead use extra caramelized onions, onion powder, and garlic powder. This version is rich and satisfying with about 8g net carbs per serving.
  • **Vegetarian Adaptation:** Omit the chicken and double the mushrooms. Use a mix of cremini and shiitake for earthy flavor. Sauté the mushrooms along with the onions until deeply browned. Replace chicken broth with vegetable broth. For protein, add a can of drained chickpeas or white beans. The result is a hearty, umami-packed casserole that even meat-lovers will enjoy.
  • **Spicy Southwest Twist:** Add 1 teaspoon of smoked paprika, 1/2 teaspoon of cumin, and a pinch of cayenne to the onion mixture. Replace half the Gruyère with pepper jack cheese for a kick. Swap the parsley for fresh cilantro. Serve with a dollop of sour cream and sliced jalapeños. This variation brings a smoky heat that contrasts beautifully with the creamy orzo.
  • **Herb and Lemon Version:** Add 2 tablespoons of fresh lemon juice and 1 teaspoon of lemon zest to the broth. Stir in 1/4 cup of chopped fresh dill and 2 tablespoons of capers just before baking. Use a combination of Gruyère and feta cheese for a tangy finish. This bright, herby version is perfect for spring and pairs wonderfully with grilled chicken or fish.

Nutrition

  • Calories485 kcal
  • Total Fat28g
  • Saturated Fat15g
  • Cholesterol120mg
  • Sodium890mg
  • Total Carbohydrates34g
  • Dietary Fiber2g
  • Sugars6g
  • Protein32g

Common Questions

Can I use a different pasta shape instead of orzo?
Absolutely. Small pasta shapes like ditalini, stelline, or even broken spaghetti work well. Keep in mind that cooking times may vary. For larger shapes like penne, you may need to increase the broth by 1/2 cup and extend the baking time by 5–10 minutes. The key is to ensure the pasta is fully cooked and has absorbed enough liquid without becoming mushy.
How do I prevent the casserole from drying out?
The sauce should be quite liquidy before baking because the orzo will absorb a lot of liquid. If the casserole looks dry after baking, it may have been overbaked or the liquid ratio was off. Always use enough broth and cream, and cover the dish with foil for the first 15 minutes if your oven runs hot. Letting it rest for 5 minutes after baking allows the sauce to thicken naturally.
Can I make this casserole dairy-free?
Yes. Use a dairy-free butter substitute (like Miyoko’s), full-fat coconut cream or cashew cream instead of heavy cream, and dairy-free cheese shreds (such as Violife or Daiya). Note that coconut cream will add a subtle coconut flavor, which can work surprisingly well with the caramelized onions. Nutritional yeast can be added for a cheesy flavor boost.
Is it necessary to use wine? Can I substitute?
No, wine is not essential. You can substitute with an equal amount of chicken broth plus 1 tablespoon of balsamic vinegar or lemon juice to provide acidity that balances the richness. The alcohol cooks off during deglazing, but if you prefer to avoid it entirely, the vinegar substitution works beautifully.
How do I store and reheat leftovers?
Store leftovers in an airtight container in the refrigerator for up to 4 days. To reheat, add a splash of chicken broth or water to restore moisture and microwave in 30-second intervals, stirring between, or reheat in a 350°F oven for about 15 minutes covered with foil. The casserole can also be frozen for up to 3 months; thaw overnight in the fridge before reheating.
Can I add vegetables to this casserole?
Definitely. Sautéed mushrooms, wilted spinach, or roasted bell peppers are excellent additions. Add them when you return the onions and chicken to the skillet. If using frozen vegetables, thaw and drain them first to avoid excess water. For a nutritional boost, stir in a handful of baby kale or arugula just before baking.

Notes

This French Onion Chicken Orzo Casserole is a dish born from my love of classic French onion soup and the need for a hearty, one-pan dinner that satisfies the whole family. I first experimented with this combination during a cold winter evening when I wanted something warming, cheesy, and deeply savory. The caramelized onions are the soul of this dish—they require a bit of patience but reward you with incredible sweetness and depth. Over the years, I’ve refined the recipe to include a packet of onion soup mix for an extra layer of savory umami, though you can certainly omit it and rely solely on the caramelized onions.Serving this casserole straight from the skillet creates a rustic, inviting presentation. I like to place it on a trivet at the center of the table with a big green salad on the side. The leftovers are just as delicious, if not better, as the flavors meld overnight. For a special occasion, consider adding a splash of brandy or sherry when deglazing the onions for an even more complex flavor profile.This recipe is also incredibly adaptable. I’ve made it with turkey, mushrooms, and even leftover rotisserie chicken. The key is to keep the ratios of liquid to pasta consistent. I hope this dish becomes a staple in your home as it has in mine. Happy cooking!

Crispy Chicken & Caesar Wrap

Crispy Chicken & Caesar Wrap
Easy Dinner Recipes • Quick Weeknight Meals • 30-Minute High-Protein Dinners

⏱️ Prep: PT15M
🔥 Cook: PT15M
⏳ Total: PT30M
🍽️ Yield: 4 wraps
⚡ Calories: 585 kcal
(284)
crispy chicken wrapcaesar wrapeasy dinner30 minute mealhigh proteinweeknight dinnerchicken wrap recipecaesar salad wrap

This Crispy Chicken & Caesar Wrap delivers crunchy chicken, crisp romaine, and creamy Caesar dressing in a soft tortilla. An easy 30-minute dinner idea perfect for busy weeknights.

Ingredients

Toggle: Metric / US

Instructions

Step 1

Prepare the chicken: Place the chicken breasts on a cutting board and cover with plastic wrap. Use a meat mallet or rolling pin to gently pound them to an even thickness of about ½ inch (1.25 cm). This ensures uniform cooking and tender results. Season both sides generously with salt, pepper, garlic powder, onion powder, and smoked paprika. The paprika adds a subtle smoky depth that complements the Caesar dressing beautifully. Set aside while you set up the breading station.

Step 1 image
Step 2

Set up the breading station: In three shallow bowls, place the flour in the first, the beaten eggs in the second, and the panko breadcrumbs mixed with grated Parmesan cheese in the third. The Parmesan not only adds flavor but also helps the crust brown beautifully and become extra crispy. Working one piece at a time, dredge the chicken in flour, shaking off excess. Then dip into the egg, letting any excess drip off. Finally, coat thoroughly with the panko-Parmesan mixture, pressing gently to adhere. Place breaded chicken on a plate.

Step 2 image
Step 3

Cook the chicken: Heat about ½ inch of vegetable oil in a large skillet over medium-high heat until shimmering (about 350°F/175°C). Carefully place the breaded chicken in the hot oil, being careful not to overcrowd the pan. Cook for 4-5 minutes per side, until golden brown and crispy, and the internal temperature reaches 165°F (74°C). The crust should be deep golden and sound crunchy when tapped. Transfer to a wire rack set over a baking sheet to drain and stay crispy. Do not place on paper towels as they will make the crust soggy.

Step 4

Assemble the wraps: Warm the tortillas briefly in a dry skillet or microwave (about 20 seconds) to make them pliable. Lay a tortilla flat and spread about 2 tablespoons of Caesar dressing down the center. Top with a generous handful of chopped romaine lettuce, then place one cooked chicken breast (sliced if desired) on top. Sprinkle with shaved Parmesan cheese and a squeeze of lemon juice if using. Fold in the sides of the tortilla, then roll tightly from the bottom, tucking as you go to create a secure wrap. Repeat with remaining ingredients.

Step 5

Serve immediately: For the best texture, enjoy the wraps right away while the chicken is still crispy. You can also slice each wrap in half diagonally for a beautiful presentation. Serve with extra Caesar dressing for dipping and lemon wedges on the side. If meal prepping, store the components separately and assemble just before eating to maintain crunch.

For best results

  • Pounding the chicken to an even thickness is crucial for even cooking. If you don't have a meat mallet, use a rolling pin or even a heavy skillet. Aim for about ½ inch (1.25 cm) thickness. This not only ensures the chicken cooks through without drying out but also creates a larger surface area for the crispy coating, giving you more crunch in every bite.
  • For the crispiest crust, use panko breadcrumbs instead of regular breadcrumbs. Panko are larger and flakier, creating a light, airy texture that stays crunchy longer. Toasting the panko in a dry skillet for 2-3 minutes before breading can add even more crunch and a nutty flavor. Just watch carefully to avoid burning.
  • Let the breaded chicken rest for 10 minutes before frying. This allows the coating to adhere better and prevents it from falling off during cooking. Place the breaded chicken on a wire rack and refrigerate if time permits. The cold chicken hitting hot oil creates an even crispier crust.
  • Use a thermometer to check oil temperature. If the oil is too cool, the coating will absorb grease and become soggy. If too hot, the outside will burn before the inside cooks. Maintain a steady 350°F (175°C) and adjust the heat as needed between batches. A deep-fry thermometer is your best friend here.
  • To keep the wraps from getting soggy, assemble them just before serving. If you need to prep ahead, store the crispy chicken, washed and dried romaine, dressing, and tortillas separately. When ready to eat, quickly reheat the chicken in a 400°F (200°C) oven for 5 minutes to restore crispiness, then assemble.
  • For a lighter version, you can air fry the chicken instead of deep-frying. Preheat the air fryer to 400°F (200°C), spray the breaded chicken with cooking spray, and cook for 10-12 minutes, flipping halfway, until golden and cooked through. The result is still crispy but with significantly less oil.

Variations

  • Grilled Chicken Caesar Wrap: For a healthier twist, skip the breading and grill the seasoned chicken breasts over medium-high heat for 6-7 minutes per side until charred and cooked through. Slice thinly and assemble as directed. This variation reduces calories and fat while still delivering great flavor.
  • Spicy Buffalo Caesar Wrap: Add 2 tablespoons of hot sauce to the beaten eggs before breading, or toss the cooked crispy chicken in buffalo sauce. Replace the Caesar dressing with ranch or blue cheese dressing for a spicy kick. Top with crumbled blue cheese and extra celery slices for crunch.
  • Vegetarian Caesar Wrap: Substitute the chicken with crispy breaded tofu or tempeh. Press extra-firm tofu for 30 minutes to remove moisture, then slice into cutlets, season, and bread using the same method. Bake or fry until golden. Alternatively, use roasted chickpeas for a protein-packed, crunchy filling.
  • Low-Carb/Keto Wrap: Replace the flour tortilla with large lettuce leaves (like romaine or butter lettuce) or low-carb tortillas. Use almond flour or crushed pork rinds instead of panko for the breading. The filling remains the same, but the wrap becomes significantly lower in carbs while still satisfying.
  • Mediterranean Caesar Wrap: Add sun-dried tomatoes, kalamata olives, and crumbled feta cheese to the wrap. Swap the Caesar dressing for a lemon-herb vinaigrette or tzatziki sauce. The briny flavors complement the crispy chicken beautifully and offer a refreshing change.

Nutrition

  • Calories585 kcal
  • Total Fat28g
  • Saturated Fat8g
  • Cholesterol145mg
  • Sodium980mg
  • Total Carbohydrates48g
  • Dietary Fiber3g
  • Sugars4g
  • Protein38g

Common Questions

Can I use chicken thighs instead of breasts?
Absolutely! Boneless skinless chicken thighs work wonderfully in this recipe. They are more forgiving and stay juicy even if slightly overcooked. Pound them to the same ½-inch thickness and follow the same breading and cooking instructions. Cooking time may be similar, but always check for an internal temperature of 165°F (74°C).
How do I store leftovers and reheat them?
Store the components separately for best results. Keep the crispy chicken in an airtight container in the refrigerator for up to 3 days. To reheat, place the chicken on a wire rack over a baking sheet in a 375°F (190°C) oven for 8-10 minutes until hot and crispy. Avoid microwaving, as it will make the breading soggy. Assemble wraps fresh with the other ingredients.
Can I make this gluten-free?
Yes! Substitute the all-purpose flour with a gluten-free all-purpose blend (like one containing rice flour and xanthan gum). Use gluten-free panko breadcrumbs (available at most grocery stores) and ensure your Caesar dressing is gluten-free. The rest of the ingredients are naturally gluten-free. The texture will be slightly different but still delicious.
What is the best Caesar dressing to use?
You can use store-bought or homemade. For store-bought, look for a creamy, high-quality brand like Ken’s Steakhouse or Cardini’s. For homemade, whisk together ½ cup mayo, 2 tablespoons lemon juice, 1 teaspoon Dijon mustard, 1 minced garlic clove, 2 anchovy fillets (or 1 teaspoon anchovy paste), and ¼ cup grated Parmesan. Season with salt and pepper. It takes 5 minutes and tastes incredible.
Can I freeze the breaded chicken?
Yes, you can freeze the breaded chicken before cooking. Place the breaded chicken pieces on a baking sheet lined with parchment paper and freeze until solid (about 2 hours). Transfer to a freezer-safe bag or container for up to 3 months. Cook directly from frozen, adding a few extra minutes to the cooking time, until golden and cooked through.
Why did my breading fall off?
Breading can fall off for several reasons: the chicken was too wet when dredged, the oil wasn’t hot enough, or the coating wasn’t pressed on firmly. Make sure to pat the chicken dry before seasoning and breading. Press the panko mixture firmly onto the chicken. Also, let the breaded chicken rest for 10 minutes before frying to help the coating adhere.

Notes

This Crispy Chicken & Caesar Wrap is a weeknight hero that I’ve been making for years. It all started when I was craving a Caesar salad but wanted something more substantial and portable. The idea of wrapping all those classic flavors—crunchy romaine, tangy dressing, salty Parmesan—around a perfectly crispy chicken breast was a game-changer. The first time I made it, my family devoured it in minutes, and it’s been a staple ever since.The key to this recipe is the breading technique. I learned from working in restaurants that a three-step breading (flour, egg, panko) creates the crispiest crust, especially when you add Parmesan to the breadcrumbs. The cheese melts and browns, adding an umami punch that takes the wrap to the next level. I also love using smoked paprika in the seasoning—it’s a small detail that adds a subtle warmth you don’t get from regular paprika.Serving suggestions: These wraps are perfect for a quick dinner, but they also shine at picnics or game day gatherings. Slice them into pinwheels for appetizers, or pack them whole for lunch. Pair with a side of sweet potato fries or a simple fruit salad. For a complete meal, add a cup of tomato soup or a light pasta salad.One final thought: don’t skip the lemon wedges. A squeeze of fresh lemon juice right before eating brightens all the flavors and cuts through the richness of the dressing and fried chicken. It’s a small step that makes a big difference. I hope this wrap becomes a favorite in your home as it is in mine. Happy cooking!

Quick Chicken Caesar Sandwich

Quick Chicken Caesar Sandwich
Quick Dinner Ideas • 30-Minute Meals • Easy Chicken Recipes

⏱️ Prep: PT10M
🔥 Cook: PT15M
⏳ Total: PT30M
🍽️ Yield: 4 sandwiches
⚡ Calories: 485 kcal
(284)
chicken caesar sandwichquick dinner30 minute mealeasy chicken recipecrispy chickencaesar salad sandwichweeknight dinner

This Quick Chicken Caesar Sandwich combines crispy chicken, romaine lettuce, and creamy Caesar dressing on crusty bread. Ready in 30 minutes, it's the perfect easy weeknight dinner or quick lunch.

Ingredients

Toggle: Metric / US

Instructions

Step 1

Begin by preparing the chicken. Place one boneless, skinless chicken breast on a cutting board and cover it with a sheet of plastic wrap. Using a meat mallet or a rolling pin, gently pound the chicken to an even thickness of about 1/2 inch (1.25 cm). This ensures quick, even cooking and a tender texture. Repeat with the second breast. Season both sides lightly with salt and pepper. The even thickness prevents the edges from drying out while the center cooks through.

Step 1 image
Step 2

Set up a breading station with three shallow bowls. In the first bowl, place 1/2 cup all-purpose flour. In the second, beat 2 large eggs until smooth. In the third, combine 1 cup panko breadcrumbs, 1/2 cup grated Parmesan cheese, 1 teaspoon garlic powder, 1 teaspoon onion powder, 1/2 teaspoon salt, and 1/4 teaspoon black pepper. Mix the dry ingredients well so the seasonings are evenly distributed. The panko gives an extra-crispy crust, while Parmesan adds savory depth.

Step 2 image
Step 3

Dredge each chicken breast first in the flour, shaking off any excess. Then dip into the beaten eggs, allowing any excess to drip off. Finally, press firmly into the panko mixture, making sure both sides are fully coated. For an extra-thick crust, you can repeat the egg and breadcrumb step. Place the breaded chicken on a plate and let it rest for 5 minutes; this helps the coating adhere better during frying.

Step 4

While the chicken rests, heat 1/4 cup olive oil in a large skillet over medium-high heat. The oil should shimmer but not smoke. Carefully place the breaded chicken breasts into the hot oil. Cook for 4-5 minutes per side, until golden brown and the internal temperature reaches 165°F (74°C). Do not overcrowd the pan; cook in batches if necessary. The crust should be deep golden and crispy. Transfer to a wire rack to drain excess oil.

Step 5

While the chicken cooks, prepare the bread and lettuce. Split the crusty rolls or ciabatta buns in half and toast them lightly in a toaster or under the broiler until just golden. Chop the romaine lettuce into bite-sized pieces. The romaine provides a fresh, crunchy contrast to the rich chicken and dressing.

Step 6

Assemble the sandwiches. Spread a generous tablespoon of creamy Caesar dressing on the bottom half of each toasted bun. Top with a handful of chopped romaine lettuce. Place a crispy chicken breast on top of the lettuce. Drizzle with a little more dressing if desired. Add extra Parmesan shavings for a finishing touch. Close the sandwich with the top bun and press gently. Serve immediately while the chicken is still hot and crispy.

For best results

  • For the crispiest chicken, use panko breadcrumbs instead of regular breadcrumbs. Panko has a larger, flakier texture that creates a lighter, crunchier coating. Toasting the panko in a dry pan for a minute before breading can enhance the crunch even further.
  • If you prefer a lighter version, you can bake the chicken instead of frying. Place the breaded chicken on a wire rack set over a baking sheet, spray lightly with cooking spray, and bake at 400°F (200°C) for 18-20 minutes, flipping halfway through. The rack allows air to circulate, keeping the bottom crispy.
  • To save time, you can use pre-cooked crispy chicken strips from the freezer. Just bake or air fry according to package directions. This cuts prep time to about 10 minutes, making the sandwich even quicker for busy weeknights.
  • Homemade Caesar dressing is easy to make and elevates the sandwich. Whisk together 1/2 cup mayonnaise, 2 tablespoons lemon juice, 1 teaspoon Dijon mustard, 1 minced garlic clove, 1/4 cup grated Parmesan, and salt and pepper to taste. It takes only 5 minutes and tastes far better than store-bought.
  • For a gluten-free version, use gluten-free all-purpose flour and gluten-free panko breadcrumbs. The rest of the ingredients are naturally gluten-free. Be sure to check your Caesar dressing label, as some brands contain gluten.
  • Store leftover crispy chicken separately from the bread and lettuce to maintain crunch. Reheat the chicken in an air fryer or oven at 350°F (175°C) for 5-7 minutes. Assemble fresh when ready to eat. The sandwich does not keep well once assembled because the bread becomes soggy.

Variations

  • Make it spicy by adding 1/2 teaspoon cayenne pepper or red pepper flakes to the breadcrumb mixture. You can also drizzle sriracha or hot sauce over the chicken before closing the sandwich. The heat balances the creamy dressing beautifully.
  • For a healthier twist, swap the chicken for grilled chicken breast. Season the chicken with salt, pepper, and a little olive oil, then grill over medium-high heat for 6-7 minutes per side until cooked through. Slice and assemble as directed. This reduces the fat content while keeping the protein high.
  • Turn it into a wrap by using large flour tortillas instead of bread. Lay the tortilla flat, spread dressing, add lettuce and sliced chicken, then roll up tightly. Cut in half diagonally for a portable lunch. This variation is great for meal prep or picnics.
  • Swap the chicken for crispy tofu for a vegetarian version. Press and drain a block of extra-firm tofu, cut into 1/2-inch slices, then bread and fry exactly like the chicken. The tofu absorbs the flavors and becomes wonderfully crispy. Use vegan Caesar dressing to keep it plant-based.
  • Add extra toppings like crispy bacon, sliced avocado, or a fried egg for a more indulgent sandwich. Bacon adds smoky saltiness, avocado provides creaminess, and a runny egg yolk enriches every bite. These additions turn the sandwich into a hearty meal.

Nutrition

  • Calories485 kcal
  • Total Fat22g
  • Saturated Fat6g
  • Cholesterol145mg
  • Sodium980mg
  • Total Carbohydrates35g
  • Dietary Fiber2g
  • Sugars3g
  • Protein38g

Common Questions

Can I use chicken thighs instead of breasts?
Absolutely! Chicken thighs are juicier and more forgiving than breasts. They have a higher fat content, which keeps them moist even if overcooked slightly. Use boneless, skinless thighs and pound them to an even thickness for consistent cooking. Adjust cooking time as needed; thighs may take an extra minute per side.
How do I keep the chicken crispy after frying?
The key is to let the fried chicken rest on a wire rack rather than paper towels. Paper towels trap steam and soften the crust. A wire rack allows air to circulate, keeping the coating crisp. If you need to hold the chicken for more than 10 minutes, place the rack in a warm oven (200°F/95°C) to keep it hot and crunchy.
Can I make this sandwich ahead of time?
It’s best enjoyed immediately, but you can prep components in advance. Bread the chicken and refrigerate it (unfried) for up to 4 hours. Fry just before serving. You can also wash and chop the lettuce and make the dressing up to 2 days ahead. Assemble the sandwich only when ready to eat to avoid sogginess.
What type of bread works best?
Crusty rolls, ciabatta, or sourdough are ideal because they hold up to the juicy chicken and dressing without getting soggy. Avoid soft sandwich bread, which can become mushy. Toasting the bread adds a barrier that helps maintain texture. If using ciabatta, slice it horizontally and toast the cut sides.
Is this recipe kid-friendly?
Yes, most kids love crispy chicken and the familiar Caesar flavor. You can reduce or omit the black pepper and use a mild Caesar dressing. For picky eaters, serve the chicken strips on the side with dipping sauce instead of as a sandwich. The romaine can be swapped for iceberg lettuce for extra crunch.
How do I store leftovers?
Store the fried chicken, lettuce, dressing, and bread separately in airtight containers in the refrigerator. The chicken will keep for up to 3 days. To reheat, place the chicken in an air fryer at 375°F (190°C) for 4-5 minutes or in a 350°F (175°C) oven for 8-10 minutes. Assemble fresh when ready to eat.

Notes

This Quick Chicken Caesar Sandwich is one of those recipes that came together on a busy weeknight when I needed something fast, satisfying, and guaranteed to please everyone at the table. I love the classic Caesar salad, but I wanted to turn it into a handheld meal that’s more substantial and fun to eat. The combination of crispy, golden chicken with cool, crunchy romaine and tangy Caesar dressing is simply irresistible. The crusty bread ties it all together, offering a satisfying chew that contrasts with the crunchy coating. I’ve tested this recipe countless times to ensure the chicken stays juicy inside while achieving that perfect golden crust. One of my favorite tricks is using panko breadcrumbs mixed with Parmesan—the cheese adds a nutty, savory flavor and helps the crust brown beautifully. If you’re in a hurry, you can use store-bought crispy chicken strips, but trust me, making it from scratch is worth the extra few minutes. The aroma of chicken frying fills the kitchen and sets the stage for a comforting meal. I also love that this sandwich is incredibly versatile. You can customize it with your favorite toppings—bacon, avocado, or even a fried egg—to make it your own. For a lighter option, try grilling the chicken or using a whole-grain bun. And if you’re feeding a crowd, you can easily double or triple the recipe. Serve these sandwiches with a side of sweet potato fries or a simple green salad for a complete meal. I hope this recipe becomes a staple in your home as it has in mine. Enjoy every crunchy, creamy, savory bite!

Crunchy Caesar Chicken Sandwich

Crunchy Caesar Chicken Sandwich
Crispy Chicken Sandwich • Caesar Salad Sandwich • Quick Dinner Ideas

⏱️ Prep: PT10M
🔥 Cook: PT15M
⏳ Total: PT25M
🍽️ Yield: 4 sandwiches
⚡ Calories: 450 kcal
(284)
crispy chicken sandwichcaesar sandwichquick dinner30-minute mealeasy chicken recipeweeknight dinnersandwich recipecomfort food

This Crunchy Caesar Chicken Sandwich features crispy chicken, fresh romaine, and creamy Caesar dressing on toasted bread. A quick 30-minute meal perfect for busy weeknights or a simple family dinner.

Ingredients

Toggle: Metric / US

Instructions

Step 1

Prepare the chicken cutlets: Place each chicken breast half between two sheets of plastic wrap or parchment paper. Using a meat mallet or rolling pin, gently pound the chicken to an even thickness of about 1/2 inch (1.25 cm). This ensures uniform cooking and tender results. Season both sides of the cutlets with salt and pepper. Set up a breading station: In a shallow bowl, combine the flour, garlic powder, onion powder, and a pinch of salt. In a second bowl, beat the eggs until frothy. In a third bowl, mix the panko breadcrumbs with the grated Parmesan cheese. The Parmesan adds a savory, nutty crust that complements the Caesar flavors perfectly.

Step 1 image
Step 2

Bread the chicken: Dredge each cutlet first in the seasoned flour, shaking off any excess. Then dip into the beaten eggs, allowing any excess to drip off. Finally, press firmly into the panko-Parmesan mixture, ensuring an even coating on all sides. For an extra-crispy crust, let the breaded cutlets rest on a wire rack for 5 minutes before frying. This allows the coating to adhere better and prevents it from falling off during cooking.

Step 2 image
Step 3

Fry the chicken: In a large skillet, heat the vegetable oil over medium-high heat until shimmering (about 350°F / 175°C). Carefully place two cutlets into the hot oil, being careful not to overcrowd the pan. Fry for 3-4 minutes per side, until golden brown and cooked through (internal temperature reaches 165°F / 74°C). The chicken should feel firm to the touch and the crust should be deep golden and crunchy. Transfer to a paper towel-lined plate to drain excess oil. Repeat with the remaining cutlets.

Step 4

Toast the buns and prepare the lettuce: While the chicken rests, split the crusty rolls and place them cut-side down in a dry skillet or on a griddle over medium heat. Toast for 2-3 minutes until lightly golden and crisp. In a medium bowl, toss the chopped romaine lettuce with about 2 tablespoons of Caesar dressing until evenly coated. The dressing adds a creamy tang that balances the crispy chicken.

Step 5

Assemble the sandwiches: Spread a generous layer of Caesar dressing on the bottom half of each toasted bun. Place a fried chicken cutlet on top. Add a handful of dressed romaine lettuce. Sprinkle with shaved Parmesan cheese for an extra burst of flavor. Close the sandwich with the top bun and press gently. Serve immediately while the chicken is still hot and crispy. Enjoy the contrast of textures: crunchy coating, crisp lettuce, creamy dressing, and soft bread.

For best results

  • For the crispiest chicken, use panko breadcrumbs rather than regular breadcrumbs. Panko has a larger, flakier texture that fries up airy and crunchy. If you want an even lighter crust, try substituting half the panko with crushed cornflakes or potato chips for an extra-crunchy twist. Also, make sure your oil is hot enough (around 350°F) before adding the chicken. If the oil is too cool, the coating will absorb oil and become greasy; if too hot, the outside will burn before the inside is cooked. Use a thermometer for accuracy.
  • To save time on busy weeknights, you can prep the chicken cutlets and breading station in advance. Simply bread the chicken and refrigerate on a parchment-lined tray for up to 4 hours before frying. Alternatively, you can freeze the breaded cutlets on a baking sheet until solid, then transfer to a freezer bag. Fry from frozen, adding 2-3 minutes to the cooking time. This makes the recipe perfect for meal prep or last-minute dinners.
  • When selecting chicken breasts, look for ones that are uniform in size and thickness for even cooking. If your chicken breasts are very thick, slice them in half horizontally before pounding. This not only speeds up cooking but also creates more surface area for the crispy coating. For a juicier result, brine the chicken in a saltwater solution (1/4 cup salt to 4 cups water) for 15-30 minutes before breading. Rinse and pat dry thoroughly before proceeding.
  • The quality of Caesar dressing matters greatly in this sandwich. While store-bought works in a pinch, homemade dressing elevates the dish with fresh garlic, anchovy paste, and real Parmesan. For a quick homemade version, whisk together 1/2 cup mayonnaise, 2 tablespoons lemon juice, 1 teaspoon Dijon mustard, 1 minced garlic clove, 1 teaspoon anchovy paste (optional but recommended), and 1/4 cup grated Parmesan. Season with salt and pepper to taste. This takes just 5 minutes and tastes infinitely better.
  • To keep the lettuce crisp and prevent the sandwich from getting soggy, always dress the romaine just before assembling. If you dress it too early, the lettuce will wilt. Also, place a layer of undressed lettuce between the chicken and the top bun as a barrier if you're not serving immediately. For meal prep, store all components separately and assemble just before eating. The fried chicken can be reheated in an air fryer at 375°F for 3-4 minutes to restore its crunch.

Variations

  • For a lighter, healthier version, bake the chicken instead of frying. Preheat your oven to 425°F (220°C) and place the breaded cutlets on a wire rack set over a baking sheet. Spray generously with cooking spray. Bake for 12-15 minutes, flipping halfway, until golden and cooked through. The crust won't be as crunchy as fried, but it's still delicious and reduces the fat content significantly. You can also use an air fryer: cook at 400°F (200°C) for 10-12 minutes, shaking the basket halfway.
  • Make it gluten-free by substituting the all-purpose flour with a 1:1 gluten-free flour blend, and use gluten-free panko breadcrumbs (or crushed pork rinds for a keto-friendly version). Ensure your Caesar dressing is also gluten-free (many store-bought brands are, but check the label). The rest of the ingredients are naturally gluten-free, so this adaptation is straightforward and just as satisfying.
  • For a spicy kick, add 1/2 teaspoon cayenne pepper or smoked paprika to the flour mixture. You can also mix a tablespoon of hot sauce into the beaten eggs for a buffalo-style chicken sandwich. Drizzle the finished sandwich with extra hot sauce and serve with blue cheese dressing instead of Caesar for a totally different flavor profile. This variation is perfect for those who love heat.
  • Transform this into a wrap by using large flour tortillas instead of bread. Lay the tortilla flat, spread with Caesar dressing, add the chopped romaine, sliced crispy chicken, and shaved Parmesan. Roll up tightly, cut in half, and serve. This version is portable and great for picnics or lunchboxes. You can also use lettuce wraps for a low-carb option.
  • If you prefer a vegetarian version, replace the chicken with thick slices of halloumi cheese or tofu. Halloumi has a high melting point and becomes crispy when pan-fried, mimicking the texture of chicken. For tofu, press and drain extra-firm tofu, slice into cutlets, and marinate in a mixture of soy sauce, garlic, and lemon juice before breading and frying. Both options are delicious and pair beautifully with the Caesar flavors.

Nutrition

  • Calories450 kcal
  • Total Fat22g
  • Saturated Fat5g
  • Cholesterol120mg
  • Sodium680mg
  • Total Carbohydrates38g
  • Dietary Fiber2g
  • Sugars3g
  • Protein28g

Common Questions

Can I use chicken thighs instead of breasts?
Absolutely! Chicken thighs are more forgiving and stay juicy even if slightly overcooked. Boneless, skinless thighs work best. You can either pound them to an even thickness or leave them as is for a thicker, more substantial sandwich. Adjust cooking time: thighs may need an extra minute per side. The internal temperature should still reach 165°F (74°C).
How do I store leftover fried chicken?
Leftover fried chicken can be stored in an airtight container in the refrigerator for up to 3 days. However, the crust will lose its crunch over time. To reheat, place the chicken on a wire rack over a baking sheet and warm in a 375°F (190°C) oven for 5-7 minutes, or use an air fryer at 375°F for 3-4 minutes. Avoid microwaving, as it will make the coating soggy. For best results, only fry as much as you plan to eat immediately.
Can I make this sandwich ahead of time for a party?
This sandwich is best assembled fresh, but you can prep components in advance. Bread the chicken and refrigerate (or freeze) until ready to fry. Chop the romaine and store in a sealed bag with a paper towel to absorb moisture. Make the dressing up to a week ahead. Toast the buns just before serving. Fry the chicken right before assembling. This way, you can have everything ready and assemble quickly for guests.
What can I substitute for Caesar dressing?
If you don’t have Caesar dressing, you can use a creamy ranch or a Greek yogurt-based dressing for a healthier twist. For a tangy option, mix mayonnaise with lemon juice, garlic, and a splash of Worcestershire sauce. Alternatively, a simple vinaigrette (olive oil, lemon, Dijon) can work, though it will change the flavor profile significantly. The key is to have a creamy, flavorful sauce that complements the chicken and lettuce.
Is this recipe suitable for meal prep?
Yes, with some adjustments. Cook the chicken and store it separately from the bread and lettuce. Keep the dressing on the side. When ready to eat, reheat the chicken (see tip above), toast the bun, dress the lettuce, and assemble. The components will keep for 3-4 days in the fridge. For a grab-and-go option, pack the chicken and dressing separately and assemble at work or school.
Can I bake the chicken instead of frying?
Yes, baking is a great alternative to reduce oil. Preheat oven to 425°F (220°C). Place breaded cutlets on a wire rack over a baking sheet, spray with cooking spray, and bake for 12-15 minutes, flipping halfway, until golden and cooked through. The crust won’t be as crunchy as fried, but it’s still delicious and healthier. You can also use an air fryer for a similar result with less oil.
What type of bread works best?
A crusty roll or ciabatta bun is ideal because it holds up to the juicy chicken and dressing without getting soggy. Sourdough, French bread, or brioche buns also work well. Avoid soft sandwich bread, as it may tear or become mushy. Toasting the bread adds extra crunch and helps maintain structure.

Notes

This Crunchy Caesar Chicken Sandwich was born out of a love for classic Caesar salad and the universal craving for a satisfying, crispy chicken sandwich. I remember the first time I made it—I had leftover Caesar dressing and a couple of chicken breasts, and I thought, why not combine them? The result was so delicious that it quickly became a family favorite. The key is the contrast: the crunchy, golden panko-Parmesan crust against the cool, creamy dressing and crisp romaine. It’s a sandwich that feels indulgent but comes together in just 30 minutes, making it perfect for busy weeknights when you want something special without spending hours in the kitchen.I love serving this sandwich with a side of sweet potato fries or a simple arugula salad with lemon vinaigrette to balance the richness. For a complete meal, add a cup of tomato soup or a handful of crunchy pickles. The sandwich is also great for picnics or game day gatherings—just keep the components separate until serving to maintain crunch.One of my favorite things about this recipe is how adaptable it is. Whether you’re feeding a crowd or just yourself, you can scale it up or down easily. The leftovers (if there are any!) make an excellent chopped salad the next day: just chop the chicken and toss with extra romaine, croutons, and dressing. I hope this sandwich brings as much joy to your table as it has to mine. Happy cooking!

Crispy Chicken Caesar Sandwich – Chili to Choc

Crispy Chicken Caesar Sandwich - Chili to Choc
Easy Dinner Recipes • Quick Sandwich Ideas • 30-Minute Meals

⏱️ Prep: PT10M
🔥 Cook: PT20M
⏳ Total: PT30M
🍽️ Yield: 4 sandwiches
⚡ Calories: 485 kcal
(284)
crispy chicken sandwichcaesar sandwichquick dinner30 minute mealeasy weeknight dinnerchicken sandwich recipecaesar salad sandwich

This Crispy Chicken Caesar Sandwich combines crunchy chicken, crisp romaine, and creamy Caesar dressing on crusty bread. An easy weeknight dinner in 30 minutes!

Ingredients

Toggle: Metric / US

Instructions

Step 1

Prepare the chicken: Place the chicken breasts on a cutting board and cover with plastic wrap. Using a meat mallet or rolling pin, pound them to an even thickness of about ½ inch (1.25 cm). This ensures quick, even cooking and tender results. Season both sides with salt and pepper. If you have time, let the seasoned chicken rest for 5 minutes to allow the salt to penetrate.

Step 1 image
Step 2

Set up breading station: In three shallow bowls, place the flour in the first, beaten eggs in the second, and combine panko breadcrumbs, grated Parmesan, garlic powder, onion powder, and paprika in the third. Mix the dry ingredients well so the spices are evenly distributed. The Parmesan adds a savory umami boost and helps the crust brown beautifully.

Step 2 image
Step 3

Bread the chicken: Working with one cutlet at a time, dredge in flour, shaking off excess. Dip into egg, letting excess drip off. Then coat thoroughly with the panko mixture, pressing gently so the crumbs adhere. Place on a wire rack set over a baking sheet. This step is crucial for a crunchy crust that doesn’t fall off during frying. Repeat with all cutlets.

Step 4

Fry the chicken: In a large skillet, heat 2 tablespoons olive oil over medium-high heat until shimmering (about 350°F/175°C). Carefully place two breaded cutlets in the pan, being careful not to overcrowd. Fry for 3-4 minutes per side until golden brown and the internal temperature reaches 165°F (74°C). Transfer to a paper towel-lined plate to drain excess oil. Repeat with the remaining cutlets. The crust should be deep golden and shatteringly crisp.

Step 5

Toast the buns: While the chicken rests, split the sandwich rolls and toast them cut-side down in the same skillet over medium heat for about 1 minute, until lightly golden. This adds texture and prevents sogginess.

Step 6

Assemble the sandwiches: Spread a generous tablespoon of Caesar dressing on the bottom half of each bun. Top with a handful of chopped romaine lettuce, then place a crispy chicken cutlet on top. Drizzle a little more dressing over the chicken, sprinkle with shaved Parmesan, and close with the top bun. Serve immediately with lemon wedges if desired.

Step 6 image

For best results

  • For extra crispy chicken, use panko breadcrumbs instead of regular breadcrumbs. Panko has a larger, flakier texture that creates a lighter, crunchier crust. To take it a step further, toast the panko in a dry skillet for 2-3 minutes until lightly golden before breading – this adds depth of flavor and ensures maximum crunch even after the sandwich sits.
  • Pounding the chicken to even thickness is non-negotiable. It not only speeds up cooking but also prevents the thinner parts from drying out while the thicker parts cook through. Use a meat mallet or a heavy skillet; cover with plastic wrap to avoid splatters. Aim for about ½ inch thickness for the perfect bite.
  • Let the breaded chicken rest on a wire rack for 5-10 minutes before frying. This helps the coating adhere better and reduces the chance of the breading falling off in the pan. The wire rack allows air circulation so the coating doesn't become soggy.
  • Use a thermometer for the oil. Maintaining oil temperature around 350°F (175°C) is key. If the oil is too cool, the chicken will absorb excess oil and become greasy; if too hot, the outside will burn before the inside is cooked. A deep-fry thermometer or an instant-read thermometer works perfectly.
  • To make this recipe lighter, you can air-fry the chicken instead of pan-frying. Preheat the air fryer to 400°F (200°C), spray the breaded cutlets with cooking oil, and cook for 10-12 minutes, flipping halfway, until golden and cooked through. The result is just as crispy with less oil.
  • Homemade Caesar dressing takes this sandwich to another level. Whisk together ½ cup mayonnaise, 2 tablespoons lemon juice, 1 teaspoon Dijon mustard, 1 minced garlic clove, 2 anchovy fillets (mashed), and ¼ cup grated Parmesan. Season with salt and pepper. The anchovies add umami without a fishy taste.
  • For meal prep, bread the chicken ahead and refrigerate on a wire rack for up to 4 hours before frying. You can also fry the chicken and reheat in a 375°F (190°C) oven for 5-7 minutes to restore crispiness. Store components separately to avoid sogginess.

Variations

  • Grilled Chicken Caesar Sandwich: For a lighter version, skip the breading and grill the chicken breasts over medium-high heat for 5-6 minutes per side. Brush with olive oil and season with salt, pepper, and garlic powder. The char adds a smoky flavor that pairs beautifully with Caesar dressing.
  • Spicy Crispy Chicken Caesar Sandwich: Add 1 teaspoon cayenne pepper or chili powder to the breadcrumb mixture for a kick. You can also drizzle sriracha or hot honey over the assembled sandwich for extra heat and sweetness.
  • Vegetarian Caesar Sandwich: Replace chicken with thick slices of halloumi cheese or breaded and fried portobello mushrooms. Halloumi gets delightfully crispy when pan-fried and has a salty, savory profile that mimics chicken. For mushrooms, use the same breading process and fry until golden.
  • Gluten-Free Option: Substitute all-purpose flour with a gluten-free flour blend (like rice flour or a 1:1 baking mix) and use gluten-free panko breadcrumbs. The rest of the ingredients are naturally gluten-free. Check your Caesar dressing label as some brands contain gluten.
  • Caesar Wrap: Instead of bread, use large flour tortillas or lettuce wraps. Fill with the crispy chicken, romaine, dressing, and Parmesan, then roll tightly. This is a great low-carb option that's perfect for lunch on the go.
  • Add bacon: Cook 4 slices of bacon until crispy, then crumble or halve. Layer on the sandwich for a smoky, salty crunch. It turns this into a truly indulgent meal.

Nutrition

  • Calories485 kcal
  • Total Fat22g
  • Saturated Fat6g
  • Cholesterol110mg
  • Sodium820mg
  • Total Carbohydrates38g
  • Dietary Fiber2g
  • Sugars5g
  • Protein34g

Common Questions

Can I use chicken thighs instead of breasts?
Absolutely! Chicken thighs are more forgiving and stay juicy. Use boneless skinless thighs and pound them to even thickness. Cooking time may be slightly longer (about 4-5 minutes per side) due to higher fat content, but they will be incredibly tender and flavorful.
How do I store leftover crispy chicken?
Store leftover cooked chicken in an airtight container in the refrigerator for up to 3 days. To reheat and restore crispiness, place on a wire rack over a baking sheet and bake at 375°F (190°C) for 5-7 minutes. Avoid microwaving as it will make the coating soggy.
Can I make this sandwich ahead of time?
The components can be prepped ahead, but assemble just before serving to keep the bread and lettuce crisp. Bread the chicken and refrigerate (up to 4 hours), wash and chop lettuce, and make dressing. Fry the chicken right before serving, or reheat as above.
What can I use instead of Caesar dressing?
You can use ranch dressing, a garlic aioli, or a simple lemon vinaigrette. For a healthier option, try Greek yogurt mixed with lemon juice, garlic, and Parmesan. Each will give a different flavor profile but still delicious.
Is this recipe gluten-free?
As written, no, because of the flour and panko. However, you can easily make it gluten-free by using gluten-free flour and gluten-free panko (or crushed pork rinds for a keto option). Also ensure your Caesar dressing is gluten-free.
How do I keep the bread from getting soggy?
Toasting the buns is key – it creates a barrier that prevents the dressing and juices from soaking in. Also, let the fried chicken rest on a paper towel for a minute to drain excess oil. If packing for lunch, keep dressing separate and add just before eating.
Can I bake the chicken instead of frying?
Yes! Place breaded cutlets on a wire rack over a baking sheet, spray with cooking oil, and bake at 425°F (220°C) for 12-15 minutes, flipping halfway, until golden and cooked through. The crust will be less oily but still crispy.

Notes

This Crispy Chicken Caesar Sandwich is one of those recipes that feels like a splurge but comes together in just 30 minutes. I first made it on a busy weeknight when I was craving something crunchy and satisfying but didn’t want to spend hours in the kitchen. The combination of crispy, golden chicken with cool, crisp romaine and tangy Caesar dressing is pure comfort food magic.What I love most about this sandwich is its versatility. It’s perfect for a quick family dinner, but it’s also impressive enough for game day gatherings or casual get-togethers. The key is in the breading technique – using panko and Parmesan creates a crust that stays crunchy even after sitting in the dressing.If you’re new to making crispy chicken at home, don’t be intimidated. The process is straightforward, and the results are far superior to any fast-food version. I like to serve these sandwiches with a side of sweet potato fries or a simple green salad. For extra indulgence, add a slice of provolone or mozzarella on top of the chicken during the last minute of frying so it melts slightly.I hope this recipe becomes a staple in your kitchen as it has in mine. There’s something incredibly satisfying about biting into that first crunchy, creamy, savory mouthful. Enjoy!