<

Easy Greek Chicken Dinner

Easy Greek Chicken Dinner
Easy Dinner Recipes • 30-Minute Meals • Greek Casserole

⏱️ Prep: PT10M
🔥 Cook: PT20M
⏳ Total: PT30M
🍽️ Yield: 4 servings
⚡ Calories: 485 kcal
(284)
Greek chicken30-minute mealcasserolehigh-proteinMediterraneaneasy dinnerfeta cheeseKalamata olives

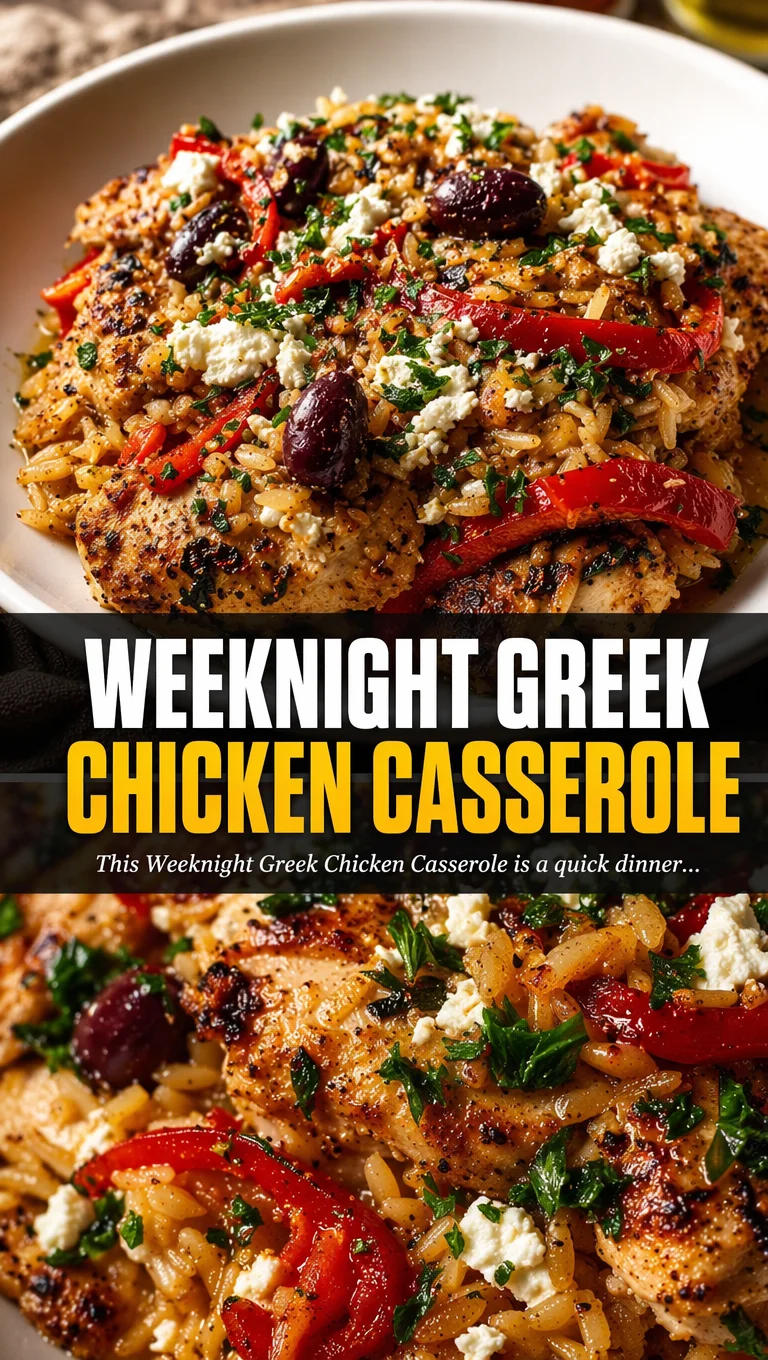
This Easy Greek Chicken Dinner brings together tender chicken, tangy feta cheese, and briny Kalamata olives in one comforting casserole. Ready in just 30 minutes, it's a quick and healthy…

Ingredients

Toggle: Metric / US

Instructions

Step 1

Preheat your oven to 400°F (200°C). While the oven heats, pat the chicken thighs dry with paper towels. This step is crucial for achieving a golden-brown sear later. Season both sides evenly with salt and pepper. Let the chicken sit at room temperature for about 10 minutes to take the chill off, ensuring more even cooking.

Step 1 image
Step 2

Heat 1 tablespoon of olive oil in a large oven-safe skillet (preferably cast iron or stainless steel) over medium-high heat until shimmering. Carefully place the chicken thighs in the skillet, skin-side down if using skin-on, or just one side down for boneless. Sear without moving for 4-5 minutes until a deep golden crust forms. Flip and sear the other side for 3 minutes. The crust locks in juices and adds incredible flavor. Transfer chicken to a plate; it will finish cooking in the oven.

Step 2 image
Step 3

Reduce heat to medium. Add the remaining 1 tablespoon olive oil to the skillet along with the minced garlic. Sauté for 30 seconds until fragrant, being careful not to burn the garlic. Add the halved cherry tomatoes and cook for 2 minutes, stirring occasionally, until they begin to soften and release their juices. If using white wine, pour it in now and let it simmer for 1 minute to deglaze the pan, scraping up any browned bits from the bottom.

Step 4

Stir in the chicken broth, dried oregano, and dried thyme. Bring the mixture to a gentle simmer. Nestle the seared chicken thighs back into the skillet, along with any accumulated juices. Sprinkle the halved Kalamata olives evenly around the chicken. The olives will infuse the sauce with their briny, rich flavor as they bake.

Step 5

Transfer the skillet to the preheated oven and bake for 15-20 minutes, or until the chicken reaches an internal temperature of 165°F (74°C) when checked with an instant-read thermometer. The tomatoes should be burst and the sauce slightly thickened. If you prefer a more caramelized top, switch the oven to broil for the last 2 minutes, watching closely to prevent burning.

Step 6

Remove the skillet from the oven and immediately sprinkle the crumbled feta cheese over the top. Let it rest for 5 minutes so the feta softens and melds with the warm sauce. Garnish with fresh parsley and serve directly from the skillet or transfer to a serving platter. This dish pairs beautifully with crusty bread, rice, orzo, or a simple Greek salad.

For best results

  • For the best flavor, use high-quality feta cheese that comes in a brine. Avoid pre-crumbled feta, which often contains anti-caking agents that prevent it from melting smoothly. Look for feta from Greece or Bulgaria for that authentic tangy, creamy texture. If you prefer a milder taste, opt for a cow's milk feta. To crumble, simply pat the block dry with a paper towel and use your fingers or a fork to break it into rustic pieces.
  • Searing the chicken is non-negotiable for maximum flavor. The browning, known as the Maillard reaction, creates hundreds of flavor compounds that deepen the overall taste of the dish. Don't overcrowd the pan; if your skillet is small, sear in batches. Use an instant-read thermometer to avoid overcooking—chicken thighs are forgiving but still benefit from precise doneness at 165°F.
  • To make this recipe even quicker, you can use pre-minced garlic from a jar, but fresh garlic provides a more pungent, aromatic kick. If you're short on time, swap fresh cherry tomatoes for a 14-ounce can of diced tomatoes, drained. The texture will be different but still delicious. For a low-carb version, serve over cauliflower rice or zucchini noodles.
  • Storage: Leftovers keep well in an airtight container in the refrigerator for up to 4 days. The flavors actually meld and improve overnight. Reheat gently in a 350°F oven or on the stovetop with a splash of broth to refresh the sauce. Freeze for up to 3 months in a freezer-safe container; thaw overnight in the fridge before reheating.
  • If you don't have an oven-safe skillet, transfer the tomato-olive mixture to a baking dish after deglazing, then arrange the seared chicken on top. Any 9×13-inch baking dish will work. To save on cleanup, line the dish with parchment paper or foil. For extra richness, stir in a tablespoon of butter or a splash of heavy cream to the sauce before baking.

Variations

  • Vegetarian Version: Replace chicken with 1.5 pounds of firm tofu, cubed and pan-seared until golden, or use 2 cans of chickpeas, drained and patted dry. Sauté the chickpeas with the garlic and tomatoes until slightly crispy. Proceed with the same sauce and baking time. The feta adds plenty of protein, making this a satisfying meatless meal.
  • Spicy Greek Chicken: Add 1/2 teaspoon of red pepper flakes or a chopped fresh chili (like serrano) along with the garlic. You can also stir in 1 tablespoon of harissa paste for a North African twist. The heat balances beautifully with the cool, creamy feta. Serve with a dollop of Greek yogurt to tame the spice.
  • Lemon-Herb Variation: Add the zest of one lemon and 2 tablespoons of fresh lemon juice to the broth mixture. Include 1 teaspoon of dried dill or 2 tablespoons of fresh dill along with the oregano. The bright citrus and dill elevate the dish to a lighter, brighter flavor profile perfect for spring and summer.
  • Protein Swap: Use boneless, skinless chicken breasts instead of thighs; reduce baking time to 12-15 minutes to avoid dryness. Alternatively, try bone-in, skin-on chicken thighs for extra juiciness—increase baking time to 25-30 minutes. For a seafood twist, use 1.5 pounds of large shrimp; sear for 2 minutes per side, then bake for only 5-7 minutes until pink and opaque.
  • Dairy-Free Adaptation: Omit the feta cheese or substitute with a dairy-free feta alternative made from almonds or tofu. You can also use a sprinkle of nutritional yeast for a cheesy flavor. The dish remains delicious without the cheese, relying on the olives and herbs for Mediterranean character.

Nutrition

  • Calories485 kcal
  • Total Fat28g
  • Saturated Fat9g
  • Cholesterol165mg
  • Sodium920mg
  • Total Carbohydrates8g
  • Dietary Fiber2g
  • Sugars4g
  • Protein45g

Common Questions

Can I use chicken breasts instead of thighs?
Absolutely! Boneless, skinless chicken breasts work well, but they cook faster and can dry out if overcooked. Reduce the baking time to 12-15 minutes and check internal temperature at 165°F. For best results, pound the breasts to an even thickness (about 1/2 inch) before searing to ensure uniform cooking. You may also want to add a splash of extra broth to keep the sauce moist.
Is this recipe gluten-free?
Yes, this recipe is naturally gluten-free as written. Ensure that your chicken broth is certified gluten-free (some brands may contain additives). Serve with rice, quinoa, or roasted potatoes to keep the meal entirely gluten-free. If you use white wine, confirm it’s gluten-free as well, though most wines are.
Can I make this ahead of time?
Certainly! You can prepare the entire dish up to the point of baking, then cover and refrigerate for up to 24 hours. When ready to bake, add 5-10 minutes to the cooking time since the dish will be cold. Alternatively, bake fully and reheat in a 350°F oven for 15 minutes. The flavors actually deepen overnight, making it a great meal prep option.
What can I serve with this Greek chicken bake?
This dish pairs wonderfully with a variety of sides. For a complete Mediterranean meal, serve with fluffy couscous, orzo pasta, or crusty bread to soak up the tomato-olive sauce. A simple Greek salad with cucumbers, tomatoes, red onion, and a lemon vinaigrette adds freshness. Roasted potatoes or lemon rice are also excellent choices.
How do I store and reheat leftovers?
Store leftovers in an airtight container in the refrigerator for up to 4 days. To reheat, place in a 350°F oven for 10-15 minutes or microwave in 30-second intervals until hot. If the sauce has thickened too much, stir in a tablespoon of chicken broth or water. For best texture, avoid reheating more than once. You can also freeze the dish for up to 3 months; thaw overnight in the fridge before reheating.
Can I use dried herbs instead of fresh?
Yes, this recipe already calls for dried oregano and thyme, which work perfectly. If you prefer fresh herbs, use 1 tablespoon of fresh oregano and 1 tablespoon of fresh thyme (or 2 tablespoons total of mixed herbs). Add them after sautéing the garlic for a more vibrant flavor. Fresh parsley is used as garnish; dried parsley won’t provide the same color or texture.
What if I don't have an oven-safe skillet?
No problem! After searing the chicken and cooking the tomatoes, transfer everything to a 9×13-inch baking dish or a similar oven-safe casserole dish. Arrange the chicken in the tomato mixture and bake as directed. You can also use a 10-inch cast iron skillet, which is ideal for this recipe. If using a glass dish, reduce the oven temperature by 25°F to avoid thermal shock.

Notes

I first discovered the magic of Greek flavors during a trip to the Peloponnese, where a local grandmother served a similar dish straight from her wood-fired oven. The simplicity of good olive oil, ripe tomatoes, briny olives, and creamy feta transformed humble chicken into something extraordinary. This Easy Greek Chicken Dinner is my weeknight homage to that meal—a 30-minute version that captures the essence of Mediterranean comfort without the need for hours of slow cooking. I love how the cherry tomatoes burst in the oven, creating a natural sauce that coats every piece of chicken. The feta softens but doesn’t fully melt, offering little pockets of tangy creaminess in every bite. This dish is incredibly forgiving; you can swap in whatever herbs you have on hand or add a handful of spinach in the last few minutes of baking. It’s the kind of recipe that makes you feel like a pro chef with minimal effort. Serve it with a glass of crisp Assyrtiko or a cold beer, and you’ll transport your dinner table straight to a sun-drenched Greek island. I hope this becomes a staple in your kitchen as it has in mine.

Easy Greek Chicken Casserole

Easy Greek Chicken Casserole
Casserole Recipes • Easy Dinner Recipes • Mediterranean

⏱️ Prep: PT15M
🔥 Cook: PT35M
⏳ Total: PT50M
🍽️ Yield: 6 servings
⚡ Calories: 385 kcal
(284)
Greek chicken casseroledump and bake casseroletzatziki casserolehigh protein dinnereasy weeknight dinnerMediterranean casserolechicken and yogurt bake

This easy Greek chicken casserole is a high-protein dinner that comes together with just a handful of ingredients like Greek yogurt, cucumber, and tender chicken. Perfect for busy nights, it's…

Ingredients

Toggle: Metric / US

Instructions

Step 1

Preheat your oven to 375°F (190°C). While the oven heats, prepare your baking dish — a 9×13-inch or similar 3-quart casserole dish works perfectly. Lightly grease it with a drizzle of olive oil or nonstick spray to prevent sticking and ensure easy cleanup. This initial step is crucial because it creates a non-stick surface and helps the casserole develop a beautiful golden crust on the bottom. The choice of dish matters: glass or ceramic dishes retain heat evenly, while metal pans may cook faster. Adjust your baking time slightly if using a metal pan.

Step 1 image
Step 2

In a large mixing bowl, combine the Greek yogurt, minced garlic, lemon juice, lemon zest, chopped dill, chopped mint, salt, pepper, and dried oregano. Whisk until smooth and well-blended. The yogurt mixture is the heart of this casserole — it mimics a thick tzatziki sauce that will coat every piece of chicken and infuse it with creamy, tangy, herbaceous flavor. Greek yogurt is key here because it has a much higher protein content and thicker consistency than regular yogurt, which means it won’t curdle or separate during baking. If you can, use full-fat Greek yogurt for the richest taste and creamiest texture, but 2% works well too. The lemon zest adds a bright, aromatic note that cuts through the richness, while the fresh herbs provide that unmistakable Mediterranean freshness. Dried herbs can be substituted in a pinch, but fresh truly elevates the dish.

Step 2 image
Step 3

Add the cubed chicken breasts to the bowl with the yogurt mixture. Using a spatula or your hands (with gloves), toss gently until every piece is evenly coated. This is a ‘dump and bake’ recipe, so you don’t need to marinate — just coat and go. However, if you have an extra 30 minutes, letting the chicken sit in the yogurt mixture at room temperature will allow the enzymes in the yogurt to tenderize the meat slightly, resulting in even juicier chicken. The yogurt acts as a natural tenderizer thanks to its lactic acid, which gently breaks down proteins without making the chicken mushy. Make sure each cube is well-covered; any exposed chicken will dry out during baking.

Step 4

Transfer the coated chicken and all the yogurt sauce into the prepared baking dish. Spread it into an even layer using the spatula. Sprinkle the diced cucumber evenly over the top. The cucumber adds a refreshing crunch and hydrating contrast to the rich yogurt sauce. English cucumbers are ideal because they have thin skins and fewer seeds, so you don’t need to peel them — just dice them into bite-sized pieces. If you use regular cucumbers, you may want to peel and seed them to avoid bitterness and excess moisture. The cucumber will release some water during baking, which helps create a light, saucy consistency, but too much water can make the casserole watery, so don’t skip seeding.

Step 5

Drizzle the olive oil over the casserole, then sprinkle the grated Parmesan cheese evenly across the top. Parmesan adds a salty, nutty, umami-rich crust that browns beautifully in the oven. Follow with the crumbled feta cheese, distributing it evenly. Feta provides tangy, salty bursts that complement the creamy yogurt and tender chicken. For the best texture, use a block of feta that you crumble yourself rather than pre-crumbled feta, which often contains anti-caking agents that prevent melting. If you prefer a milder flavor, you can reduce the feta or substitute with mozzarella.

Step 6

Bake the casserole uncovered for 30-35 minutes, until the chicken is cooked through (internal temperature of 165°F / 74°C) and the top is golden and bubbly. The cheese should be melted and lightly browned in spots, and the edges of the casserole will be bubbly and slightly caramelized. Do not overbake, as the yogurt sauce can separate if cooked too long. If you notice the top browning too quickly, you can tent the dish with foil for the last 10 minutes. Let the casserole rest for 5 minutes after removing it from the oven. This resting period allows the juices to redistribute and the sauce to thicken slightly, making it easier to serve.

Step 7

Serve the casserole warm, garnished with additional fresh dill or mint if desired. Scoop onto plates or into bowls, making sure to get some of the creamy sauce from the bottom. This dish pairs wonderfully with a side of warm pita bread, rice, or a simple Greek salad. For a low-carb option, serve over cauliflower rice or zucchini noodles. Store any leftovers in an airtight container in the refrigerator for up to 4 days. Reheat gently in the microwave or oven, adding a splash of water or lemon juice to revive the sauce.

For best results

  • For the juiciest chicken, avoid overbaking. Use an instant-read thermometer to check for doneness at 165°F (74°C). Chicken breasts can dry out quickly, so if you prefer extra insurance, you can use chicken thighs instead — they are more forgiving and stay moist even if baked a few minutes too long. Just increase the baking time by about 5-10 minutes since thighs are thicker.
  • English cucumbers are the best choice for this casserole because they have a thin, edible skin and minimal seeds. If you only have regular cucumbers, peel them, cut them in half lengthwise, and scoop out the seeds with a spoon before dicing. This prevents the casserole from becoming watery and ensures a pleasant texture. Also, salt the diced cucumber and let it sit for 10 minutes, then pat dry to remove excess moisture.
  • Greek yogurt is essential for the sauce — do not substitute with regular yogurt, sour cream, or mayonnaise, as they have different fat and water contents that will affect the texture and may curdle. For a dairy-free option, use a thick coconut yogurt (unsweetened) and omit the feta or use a vegan feta alternative. The sauce will be slightly less tangy but still delicious.
  • To make this casserole even more flavorful, consider marinating the chicken in the yogurt mixture for 2-4 hours in the refrigerator. The lactic acid in the yogurt tenderizes the meat and allows the herbs and garlic to penetrate deeper. If you're short on time, the dump-and-bake method works perfectly, but the extra marination takes it to the next level.
  • Leftovers can be repurposed in creative ways. Shred the leftover chicken and use it as a filling for Greek wraps or pitas, add it to a grain bowl with quinoa and roasted vegetables, or mix it into pasta for a creamy Mediterranean pasta bake. The flavors meld even more overnight, making leftovers a treat.

Variations

  • Make it vegetarian by substituting the chicken with 2 cans of drained chickpeas or 3 cups of cubed halloumi cheese. Chickpeas add a hearty texture and pair beautifully with the tzatziki sauce. Halloumi, a firm, salty cheese that doesn't melt, becomes golden and crispy on the edges while staying soft inside. If using halloumi, reduce the salt in the recipe since the cheese is already salty.
  • Add vegetables for extra nutrition and color. Stir in 2 cups of chopped spinach, 1 cup of halved cherry tomatoes, or 1 cup of sliced bell peppers along with the cucumber. Spinach will wilt into the sauce, tomatoes burst with sweetness, and peppers add crunch. You can also layer thinly sliced red onion or artichoke hearts for a more complex Mediterranean profile.
  • For a spicy twist, add 1/2 teaspoon of red pepper flakes or a diced jalapeño to the yogurt mixture. The heat contrasts nicely with the cool, creamy tzatziki. Alternatively, use a spicy cheese like pepper jack instead of Parmesan for a different kind of kick.
  • Swap the chicken for 1.5 lbs of boneless, skinless salmon fillets cut into chunks. Salmon pairs wonderfully with dill and lemon, and the yogurt sauce keeps it moist. Bake for 20-25 minutes, as salmon cooks faster than chicken. This variation is rich in omega-3 fatty acids and makes for an elegant dinner.
  • Turn this casserole into a one-dish meal by adding 2 cups of cooked orzo, rice, or quinoa to the baking dish before adding the chicken. Stir the grains into the yogurt mixture so they absorb the flavors as they bake. You may need to add an extra 1/2 cup of chicken broth to ensure the grains cook properly. This makes the casserole heartier and eliminates the need for a side dish.

Nutrition

  • Calories385 kcal
  • Total Fat18g
  • Saturated Fat8g
  • Cholesterol115mg
  • Sodium820mg
  • Total Carbohydrates8g
  • Dietary Fiber1g
  • Sugars5g
  • Protein48g

Common Questions

Can I use frozen chicken for this casserole?
Yes, you can use frozen chicken breasts, but you must thaw them completely first. Frozen chicken will release too much water during baking, making the casserole watery and potentially undercooked. Thaw overnight in the refrigerator or use the defrost setting on your microwave. Once thawed, pat the chicken dry with paper towels before cubing to remove excess moisture. If you’re in a hurry, you can use pre-cooked rotisserie chicken — just reduce the baking time to 15-20 minutes, until the casserole is heated through and the cheese is melted.
How do I store and reheat leftovers?
Store leftovers in an airtight container in the refrigerator for up to 4 days. The flavors actually improve after a day as the herbs meld. To reheat, place a portion in the microwave for 1-2 minutes, stirring halfway. For the oven, cover with foil and bake at 350°F (175°C) for 15-20 minutes. Add a splash of water or lemon juice to restore the sauce’s creaminess if it has thickened. Freezing is not recommended because the yogurt sauce can separate and become grainy upon thawing.
Can I make this casserole dairy-free?
Absolutely! Use a thick, unsweetened coconut or almond milk yogurt in place of Greek yogurt. For the cheeses, look for dairy-free Parmesan and feta alternatives made from nuts or soy. Note that dairy-free yogurts may be less tangy, so add an extra tablespoon of lemon juice to compensate. The texture may be slightly less thick, but the dish will still be delicious. Also, ensure your dairy-free cheese melts well — some brands are better than others for baking.
Why did my casserole turn out watery?
Watery casserole usually results from excess moisture in the cucumber or yogurt. To fix this, always seed and dice your cucumber, and consider salting it and letting it drain for 10 minutes before adding. Also, use Greek yogurt (not regular) as it has a thicker consistency. If you used frozen chicken or added too many vegetables, that can also contribute. To salvage a watery casserole, you can stir in 1-2 tablespoons of cornstarch mixed with an equal amount of cold water, then bake for an additional 5-10 minutes to thicken.
Can I prepare this casserole ahead of time?
Yes, you can assemble the casserole up to 24 hours in advance. Follow the recipe through step 4, but do not add the cheeses or olive oil until just before baking. Cover the dish tightly with plastic wrap or foil and refrigerate. When ready to bake, let it sit at room temperature for 20 minutes while the oven preheats, then top with cheeses and olive oil and bake as directed. You may need to add 5-10 minutes to the baking time since the dish starts cold.
Is this recipe gluten-free?
Yes, this recipe is naturally gluten-free as written. All ingredients — chicken, yogurt, vegetables, herbs, and cheeses — contain no gluten. However, always check labels on packaged items like feta or Parmesan to ensure no cross-contamination if you have celiac disease. Serve with gluten-free sides like rice, quinoa, or corn tortillas to keep the meal completely gluten-free.

Notes

This Easy Greek Chicken Casserole is one of those recipes that feels like a warm hug from the Mediterranean. I first created it on a hectic weeknight when I needed something nutritious, comforting, and fast — without a sink full of dishes. The ‘dump and bake’ method is a lifesaver for busy families: just mix, pour, and let the oven do the work. The inspiration came from classic Greek tzatziki sauce, which I love for its cooling, tangy flavor. I thought, why not turn that into a casserole? The result is a creamy, cheesy, protein-packed dish that tastes like you spent hours in the kitchen.One of the things I adore about this recipe is its versatility. You can serve it over rice, with crusty bread, or on its own for a low-carb meal. It’s also a fantastic way to use up leftover chicken or to meal prep for the week. The yogurt sauce keeps the chicken incredibly moist, and the cucumbers add a fresh crunch that contrasts beautifully with the melted cheese. I’ve made this for dinner parties and potlucks, and it always gets rave reviews.A few personal tips: I like to use a combination of fresh dill and mint, but if you only have one, double it. The lemon zest is non-negotiable — it brightens the entire dish. And don’t skip the resting time after baking; it allows the casserole to set and makes serving much cleaner. If you have leftovers, try them cold straight from the fridge — the flavors meld into something almost like a Greek chicken salad. I hope this casserole becomes a staple in your home as it has in mine. Enjoy!

Tzatziki Chicken Bake

Tzatziki Chicken Bake
Easy Dinner Recipes • Quick Casserole • Greek-Inspired Chicken Bake

⏱️ Prep: PT15M
🔥 Cook: PT35M
⏳ Total: PT50M
🍽️ Yield: 6 servings
⚡ Calories: 385 kcal
(284)
tzatziki chicken bakedump and bake casseroleeasy dinner recipesGreek chicken casserolehigh protein dinnerquick weeknight mealcreamy chicken bake

This tzatziki chicken bake is a quick dinner idea that transforms simple ingredients into a creamy, protein-packed meal. With Greek yogurt, cucumber, and tender chicken baked to perfection, it's one…

Ingredients

Toggle: Metric / US

Instructions

Step 1

Preheat your oven to 375°F (190°C). While the oven heats, prepare the cucumber: Grate the cucumber using the large holes of a box grater. Place the grated cucumber in a clean kitchen towel or cheesecloth and squeeze firmly over the sink to remove as much liquid as possible. This step is crucial because excess water will make the tzatziki sauce watery and prevent the casserole from achieving a creamy, thick consistency. You should end up with about 1/2 to 3/4 cup of squeezed, dry cucumber. Set aside.

Step 1 image
Step 2

In a large mixing bowl, combine the Greek yogurt, milk, minced garlic, fresh dill (or dried), lemon juice, olive oil, salt, pepper, onion powder, and dried oregano. Whisk until smooth and well incorporated. The mixture should be thick but pourable. Taste and adjust seasoning if needed—it should be tangy, herby, and well-seasoned. Fold in the squeezed cucumber and half of the crumbled feta cheese. This will become the creamy tzatziki sauce that coats the chicken.

Step 2 image
Step 3

Place the chicken thighs in a single layer in a 9×13-inch baking dish. If using chicken breasts, consider cutting them into uniform pieces to ensure even cooking. Pour the prepared tzatziki mixture evenly over the chicken, making sure each piece is fully coated. Use a spatula to spread the sauce if necessary. The chicken should be mostly submerged; if not, add a splash of milk or water to thin the sauce slightly.

Step 4

Cover the baking dish tightly with aluminum foil. Bake in the preheated oven for 25 minutes. The foil traps steam, which helps the chicken cook gently and stay moist. After 25 minutes, carefully remove the foil (watch out for hot steam). At this point, the chicken should be nearly cooked through and the sauce will have thickened slightly. If using mozzarella, sprinkle it over the top along with the remaining feta cheese. Return the dish to the oven, uncovered, and bake for an additional 10-15 minutes, or until the chicken reaches an internal temperature of 165°F (74°C) and the cheese is golden and bubbly. For a deeper golden crust, you can switch the oven to broil for the last 2-3 minutes, but watch closely to avoid burning.

Step 5

Remove the casserole from the oven and let it rest for 5 minutes. This resting period allows the sauce to thicken further and the flavors to meld. Garnish with additional fresh dill and a squeeze of lemon if desired. Serve warm over rice, quinoa, or with crusty bread to soak up the creamy sauce. Leftovers can be stored in an airtight container in the refrigerator for up to 4 days.

For best results

  • Squeezing the cucumber dry is non-negotiable. Cucumbers are over 95% water, and if you skip this step, your casserole will be watery and the sauce will separate. Use a nut milk bag or a clean kitchen towel to wring out every drop. For best results, salt the grated cucumber and let it sit for 10 minutes before squeezing—this draws out even more moisture.
  • For maximum flavor, use full-fat Greek yogurt. Low-fat or nonfat yogurt can work, but they may curdle slightly at high heat and produce a thinner sauce. Full-fat yogurt is more stable and yields a creamier, richer result. If you must use low-fat, add 1 tablespoon of cornstarch to the yogurt mixture to help stabilize it.
  • Chicken thighs are ideal because they stay juicy and tender even with longer baking. Chicken breasts are leaner and can dry out; if using breasts, reduce the covered baking time to 20 minutes and check temperature early. You can also pound breasts to even thickness for more reliable cooking.
  • This casserole is a fantastic meal prep option. Assemble the entire dish (without the final cheese topping) up to 24 hours in advance, cover, and refrigerate. When ready to bake, add the cheese and increase the uncovered baking time by 5-10 minutes since the dish starts cold. You can also freeze the unbaked casserole for up to 3 months; thaw overnight in the fridge before baking.
  • To add a crunchy element, top the casserole with toasted panko breadcrumbs mixed with a little olive oil and dried oregano before the final bake. This creates a golden, crispy crust that contrasts beautifully with the creamy sauce. Alternatively, sprinkle with pine nuts or slivered almonds for extra texture and healthy fats.

Variations

  • Make it vegetarian by substituting the chicken with 2 cans of drained chickpeas or 3 cups of cauliflower florets. For chickpeas, reduce the covered baking time to 15 minutes and skip the final broil. For cauliflower, roast the florets separately at 400°F for 20 minutes before adding to the sauce to prevent sogginess. Both options are protein-rich and satisfying.
  • Go low-carb by serving the casserole over zucchini noodles or cauliflower rice. The creamy tzatziki sauce pairs beautifully with these lighter bases. You can also add spinach or kale to the casserole during the last 10 minutes of baking for extra nutrients—simply stir in 3 cups of fresh spinach until wilted.
  • Turn up the heat with a spicy twist: add 1/2 teaspoon of red pepper flakes or a minced serrano pepper to the yogurt sauce. For a smoky flavor, use smoked paprika instead of oregano. You can also drizzle with harissa paste before serving for a North African-inspired kick.
  • Swap the protein: use boneless pork chops, turkey cutlets, or even firm tofu (pressed and cubed). Adjust cooking times accordingly—pork and turkey should reach 165°F, while tofu only needs 20 minutes total. The tzatziki sauce is versatile and complements many proteins.

Nutrition

  • Calories385 kcal
  • Total Fat22g
  • Saturated Fat9g
  • Cholesterol145mg
  • Sodium720mg
  • Total Carbohydrates8g
  • Dietary Fiber1g
  • Sugars5g
  • Protein38g

Common Questions

Can I use dried dill instead of fresh?
Absolutely. Use 2 teaspoons of dried dill in place of 2 tablespoons fresh. Dried herbs are more concentrated, so adjust to taste. However, fresh dill provides a brighter, more vibrant flavor that really shines in this dish. If using dried, add it to the yogurt mixture and let it sit for 5 minutes to rehydrate before pouring over the chicken.
How do I prevent the yogurt sauce from curdling?
Curdling can happen if the yogurt is exposed to high heat too quickly. To prevent this, use full-fat yogurt, avoid overmixing, and ensure the sauce is well-blended before baking. Also, covering the dish for the first part of baking creates a gentle steam environment. If you’re nervous, temper the yogurt by slowly whisking in a few tablespoons of warm milk before combining with the other ingredients.
Can I make this dairy-free?
Yes! Substitute the Greek yogurt with a thick dairy-free yogurt (coconut or soy-based work best) and use a plant-based milk like unsweetened almond or oat milk. Replace feta with a dairy-free feta or omit it, and use vegan mozzarella shreds. The texture may be slightly less creamy, but the flavor will still be delicious. Add 1 tablespoon of nutritional yeast for a cheesy note.
What can I serve with this casserole?
This dish is wonderful with a side of Greek lemon rice, roasted potatoes, or a simple green salad with lemon vinaigrette. For a low-carb option, serve with cauliflower rice or roasted vegetables like zucchini and bell peppers. Crusty bread is perfect for sopping up the extra sauce. You can also pair it with warm pita bread and a side of extra tzatziki for dipping.
How do I store and reheat leftovers?
Store leftovers in an airtight container in the refrigerator for up to 4 days. To reheat, place individual portions in a microwave-safe dish and heat in 30-second intervals, stirring gently, until warmed through. For best results, reheat in a 350°F oven covered with foil for 15 minutes. The sauce may thicken upon standing; add a splash of milk or water when reheating to restore creaminess.
Can I freeze this casserole?
Yes, you can freeze the unbaked casserole for up to 3 months. Assemble the dish in a freezer-safe baking dish, but do not add the final cheese topping. Cover tightly with plastic wrap and then foil. Thaw in the refrigerator overnight before baking. Add the cheese just before baking and increase the uncovered baking time by 10 minutes. The texture may be slightly less creamy after freezing, but the flavor remains excellent.

Notes

This Tzatziki Chicken Bake is a recipe born out of my love for Greek flavors and the need for a no-fuss dinner that doesn’t skimp on taste. I remember the first time I made this—it was a busy Tuesday, and I had a tub of Greek yogurt and some chicken thighs that needed using up. The result was so creamy, tangy, and satisfying that it instantly became a family favorite. The beauty of this dish lies in its simplicity: just dump, bake, and enjoy. It’s the kind of meal that makes you feel like you’ve spent hours in the kitchen when really, you’ve only done about 15 minutes of active work.I’ve tested this recipe with various tweaks over the years, and the version here is the most foolproof. The key is treating the cucumber right—squeezing out that excess water is what separates a perfect tzatziki from a watery mess. I also love that this casserole is incredibly forgiving. You can use chicken breasts if that’s what you have, though thighs are my go-to for their juiciness. And if you’re out of fresh dill, dried works in a pinch, but fresh really elevates the dish.Serving suggestions are endless. I often pair it with a simple lemon rice pilaf and a crisp Greek salad. But it’s also wonderful over orzo, quinoa, or even mashed potatoes. For a lighter meal, serve it with roasted vegetables or a big green salad. And don’t forget the extra tzatziki on the side—you can never have too much of that creamy goodness.I hope this recipe brings as much joy to your table as it has to mine. It’s a reminder that delicious, wholesome dinners don’t have to be complicated. Happy cooking!

DUMP AND BAKE CHICKEN TZATZIKI CASSEROLE

DUMP AND BAKE CHICKEN TZATZIKI CASSEROLE
Easy Dinner Recipes • Casserole Recipes • High Protein

⏱️ Prep: PT15M
🔥 Cook: PT40M
⏳ Total: PT55M
🍽️ Yield: 6 servings
⚡ Calories: 385 kcal
(284)
dump and bakechicken tzatzikicasseroleeasy dinnerhigh proteinMediterraneanGreek yogurt

This dump and bake chicken tzatziki casserole is the ultimate easy weeknight dinner, combining tender chicken with creamy Greek yogurt and fresh cucumbers. Ready in under an hour with minimal…

Ingredients

Toggle: Metric / US

Instructions

Step 1

Preheat your oven to 375°F (190°C). While the oven heats, prepare your ingredients. This casserole uses a ‘dump and bake’ method, meaning you’ll combine everything in the baking dish with minimal fuss. Start by dicing the cucumber: cut it in half lengthwise, use a spoon to scrape out the seeds (this prevents the casserole from becoming watery), then chop into 1/2-inch pieces. Mince the garlic and chop the fresh dill. Set these aside. The chicken breasts can be used whole or cut into large chunks for faster cooking and easier shredding later. If you prefer chunks, cut each breast into 4-5 pieces. The key to this recipe is not overcomplicating—just get everything ready.

Step 1 image
Step 2

In a 9×13-inch baking dish (or similar 3-quart casserole dish), combine the Greek yogurt, olive oil, lemon juice, minced garlic, chopped dill, salt, and pepper. Whisk these together until you have a smooth, creamy sauce. The yogurt is the star here—it provides tanginess and richness while keeping the chicken incredibly moist. Greek yogurt is thicker than regular yogurt, so it clings well to the chicken and doesn’t separate during baking. If you’re using dried dill instead of fresh, add it now; dried herbs need heat to release their flavor. Taste the sauce and adjust salt or lemon if desired—it should be bright and herby.

Step 2 image
Step 3

Add the chicken pieces (or whole breasts) to the dish and toss them in the yogurt sauce, making sure each piece is well coated. Then sprinkle the diced cucumber over the top and gently stir it in. Don’t worry if the cucumber isn’t perfectly mixed; it will soften as it bakes and release some moisture, which helps create a luscious sauce. Spread everything into an even layer. The chicken should be mostly submerged in the sauce. If using whole breasts, arrange them in a single layer for even cooking. At this point, the dish looks plain, but the magic happens in the oven.

Step 4

Cover the baking dish tightly with aluminum foil. This traps steam and ensures the chicken cooks through gently without drying out. Place the dish in the preheated oven and bake for 30 minutes. After 30 minutes, carefully remove the foil (watch out for hot steam). The chicken should be cooked through—use an instant-read thermometer to check; it should read 165°F (74°C) at the thickest part. If not quite done, re-cover and bake in 5-minute increments. Once the chicken is done, remove the foil entirely.

Step 5

Sprinkle the shredded mozzarella cheese evenly over the top of the casserole. Return the dish to the oven, uncovered, and bake for another 10 minutes, or until the cheese is melted and bubbly with golden brown spots. If you want a deeper golden crust, switch the oven to broil for the last 2-3 minutes, watching closely to prevent burning. The cheese adds a wonderful savory note and a slight stretchiness that contrasts with the creamy yogurt base.

Step 6

Remove the casserole from the oven and let it rest for 5 minutes. This allows the sauce to thicken slightly and makes serving easier. If you used whole chicken breasts, transfer them to a cutting board and shred or slice them, then return the chicken to the dish and stir everything together. Alternatively, you can break up the chicken directly in the dish with two forks. Garnish with additional fresh dill and cucumber slices for a pop of color and freshness. Serve warm over rice, quinoa, or with crusty bread to soak up the delicious sauce.

For best results

  • For the best texture, use full-fat Greek yogurt. Nonfat yogurt can work, but it may curdle slightly or become watery because it has less stabilizing fat. If you're watching calories, 2% Greek yogurt is a good compromise. Also, avoid using regular plain yogurt (not Greek), as it is too thin and will result in a runny casserole. Always drain any excess liquid from the yogurt container before measuring.
  • To prevent a watery casserole, seed the cucumber thoroughly. The seeds contain most of the moisture. After seeding, you can also salt the diced cucumber and let it sit for 10 minutes, then pat dry with paper towels. This extra step removes even more water, ensuring your sauce stays thick and creamy. If you're short on time, just seeding is usually sufficient.
  • For maximum flavor, let the assembled casserole sit in the refrigerator for 30 minutes before baking. This allows the chicken to marinate in the yogurt sauce, which tenderizes the meat and infuses it with garlic and dill. You can even prep the dish the night before and bake it the next day—just add 5-10 minutes to the baking time since it starts cold.
  • If you prefer a more pronounced tzatziki flavor, add 1 tablespoon of chopped fresh mint along with the dill. Mint is a classic tzatziki ingredient and pairs beautifully with the cucumber and yogurt. Alternatively, you can stir in 1 teaspoon of dried oregano for an extra Mediterranean touch. Feel free to experiment with herbs like parsley or chives.
  • Leftovers can be stored in an airtight container in the refrigerator for up to 4 days. The flavors actually meld and improve overnight. To reheat, place in a covered baking dish at 350°F (175°C) for 15-20 minutes, or microwave individual portions in 30-second bursts. The sauce may thicken upon standing; stir in a splash of milk or water to restore creaminess.
  • For a low-carb version, serve the casserole over cauliflower rice or zucchini noodles. You can also add spinach or kale to the dish during the last 10 minutes of baking for extra nutrients. Simply stir in a couple of handfuls of fresh greens after removing the foil and before adding the cheese.

Variations

  • Make it a vegetarian meal by replacing the chicken with 1.5 pounds of firm tofu (pressed and cubed) or 2 cups of cooked chickpeas. For tofu, toss it in the yogurt sauce and bake as directed, but reduce the covered baking time to 20 minutes since tofu cooks faster. For chickpeas, use canned (drained and rinsed) and bake covered for only 15 minutes, then add cheese and bake until melted. Both options are high in plant-based protein and equally delicious.
  • Try a Mediterranean twist by adding 1/2 cup of chopped sun-dried tomatoes (rehydrated if not oil-packed) and 1/4 cup of sliced kalamata olives along with the cucumber. These briny, tangy ingredients complement the creamy yogurt and make the dish even more flavorful. You can also swap the mozzarella for crumbled feta cheese—add it after baking to preserve its texture, or mix it in before baking for a creamier result.
  • For a spicier version, add 1/2 teaspoon of red pepper flakes or a finely chopped jalapeño (seeds removed) to the yogurt sauce. You can also use pepper jack cheese instead of mozzarella for an extra kick. The heat balances beautifully with the cool cucumber and fresh dill. Serve with a side of tzatziki sauce for dipping if you like it extra cool.
  • Protein swap: Use boneless skinless chicken thighs instead of breasts for a juicier, more flavorful casserole. Thighs have a higher fat content, so they stay tender even if baked a few minutes longer. Adjust cooking time as needed—thighs may take an additional 5-10 minutes. You can also use leftover rotisserie chicken: shred 3 cups of cooked chicken and reduce the covered baking time to 15 minutes (just enough to heat through and meld flavors).

Nutrition

  • Calories385 kcal
  • Total Fat18g
  • Saturated Fat7g
  • Cholesterol115mg
  • Sodium720mg
  • Total Carbohydrates8g
  • Dietary Fiber1g
  • Sugars4g
  • Protein46g

Common Questions

Can I use frozen chicken breasts?
Yes, you can use frozen chicken breasts, but you’ll need to adjust the cooking time. Thawing first is recommended for even cooking. If using frozen, add 15-20 minutes to the covered baking time and check that the internal temperature reaches 165°F (74°C). Also, frozen chicken releases more water, so you may want to add 1 tablespoon of cornstarch to the yogurt sauce to help thicken it.
How do I store leftovers and how long do they last?
Store leftovers in an airtight container in the refrigerator for up to 4 days. The casserole can also be frozen for up to 3 months. To freeze, let it cool completely, then transfer to a freezer-safe container. Thaw overnight in the fridge before reheating. Reheat in a 350°F oven covered with foil until warmed through, or microwave in 30-second bursts. The texture may be slightly softer after freezing, but the flavor remains excellent.
Can I make this casserole dairy-free?
Yes, you can substitute the Greek yogurt with a thick dairy-free yogurt such as coconut or almond-based yogurt (look for plain, unsweetened varieties). For the cheese, use a dairy-free shredded mozzarella alternative. Note that dairy-free yogurts are often thinner, so you may need to add 1 tablespoon of cornstarch or arrowroot powder to help thicken the sauce. Also, coconut yogurt adds a slight coconut flavor, which can be pleasant with the dill and cucumber.
Why did my casserole turn out watery?
A watery casserole is usually caused by excess moisture from the cucumber or yogurt. Make sure to seed the cucumber thoroughly and pat it dry. Also, avoid using nonfat Greek yogurt, as it has more whey and can separate. If you still end up with extra liquid, you can simmer the casserole on the stovetop after baking to reduce the sauce, or add a slurry of 1 tablespoon cornstarch mixed with 2 tablespoons cold water and stir it in.
Can I add rice or pasta to the casserole?
Yes, you can turn this into a one-dish meal by adding 1 cup of uncooked long-grain rice or 2 cups of cooked pasta. For rice, stir it into the yogurt sauce before baking and increase the liquid by adding 1 cup of chicken broth. Bake covered for 45-50 minutes (rice may need a bit longer). For pasta, use cooked pasta and stir it in after baking, then top with cheese and bake just until melted. Be aware that adding grains will increase the carb content and may require additional liquid.
Is this recipe gluten-free?
Yes, this dump and bake chicken tzatziki casserole is naturally gluten-free as written. All ingredients—chicken, yogurt, cucumber, garlic, dill, olive oil, lemon juice, and cheese—are gluten-free. Just be sure to check labels if using any pre-shredded cheese, as some brands add anti-caking agents that may contain gluten. Serve with gluten-free sides like rice, quinoa, or gluten-free bread.

Notes

This Dump and Bake Chicken Tzatziki Casserole is one of those recipes that feels like a cheat code for busy home cooks. I first discovered the magic of tzatziki as a sauce for grilled meats during a trip to Greece, and I knew I had to bring that creamy, herby flavor into an easy weeknight dinner. The ‘dump and bake’ method is perfect for evenings when you want something homemade but don’t have the energy for multiple steps. Just combine everything in one dish, pop it in the oven, and let the heat do the work. The result is tender, juicy chicken swimming in a luscious yogurt sauce with pops of fresh cucumber and a golden cheese crust.This casserole is incredibly versatile. I love serving it over fluffy rice or with warm pita bread to soak up every bit of sauce. For a lighter meal, try it with a Greek salad on the side. The leftovers are even better the next day, making it ideal for meal prep. I hope this recipe becomes a staple in your kitchen as it has in mine. Don’t be afraid to make it your own—add extra herbs, swap the cheese, or throw in some spinach. The beauty of a dump and bake is that it’s forgiving and adaptable. Enjoy!

High Protein Cheeseburger Bake

High Protein Cheeseburger Bake
Low Carb • High Protein • Casserole Recipes

⏱️ Prep: PT10M
🔥 Cook: PT20M
⏳ Total: PT30M
🍽️ Yield: 6 servings
⚡ Calories: 385 kcal
(284)
low carbhigh proteinturkey casserolecheeseburger casserole30 minute mealketo dinnereasy weeknight dinner

This high protein cheeseburger bake features lean ground turkey, melted cheddar cheese, and savory spices for a satisfying low-carb dinner. It's an easy, 30-minute meal perfect for busy weeknights and…

Ingredients

Toggle: Metric / US

Instructions

Step 1

Preheat your oven to 375°F (190°C). While the oven heats, gather all ingredients. This casserole comes together quickly, so having everything prepped and measured is essential. You’ll need a 9×9-inch baking dish or a similar 2-quart casserole dish. Lightly grease it with non-stick spray or a thin layer of olive oil to ensure easy cleanup. The cream cheese should be at room temperature so it blends smoothly into the egg mixture without lumps.

Step 1 image
Step 2

In a large skillet over medium-high heat, add the olive oil. Once shimmering, add the diced onion and cook for 2-3 minutes until translucent. Add the minced garlic and cook for 30 seconds until fragrant. Then add the ground turkey. Break it apart with a wooden spoon and cook for 5-7 minutes, stirring occasionally, until the turkey is no longer pink. The meat should be browned and crumbly. Drain any excess fat if needed, though lean turkey should have minimal fat. The Maillard reaction on the meat adds deep savory flavor, so don’t rush this step.

Step 2 image
Step 3

Reduce heat to low. Stir in the tomato paste, yellow mustard, Worcestershire sauce, smoked paprika, salt, and black pepper. Cook for 1 minute, stirring constantly, until the spices are fragrant and the tomato paste darkens slightly. This blooming step intensifies the flavors and mimics the classic cheeseburger taste. Then add the chopped dill pickles and stir to combine. Remove the skillet from heat and let it cool slightly while you prepare the custard base.

Step 4

In a medium bowl, whisk together the softened cream cheese, eggs, and heavy cream until smooth and fully combined. Make sure there are no lumps of cream cheese. The mixture should be thick but pourable. This egg-cream mixture acts as a binder and adds richness, replacing the need for a traditional pasta or rice base. It also creates a custard-like texture that holds the casserole together.

Step 5

Spread the cooked turkey mixture evenly in the prepared baking dish. Pour the cream cheese-egg mixture over the top, making sure it covers the meat evenly. Gently shake the dish to distribute the liquid. Sprinkle the shredded cheddar cheese evenly over the top. The cheese will melt into a golden, bubbly crust that is irresistible. For extra browning, you can add a pinch of paprika on top.

Step 6

Bake in the preheated oven for 18-20 minutes, or until the edges are bubbly and the center is set. The casserole should jiggle slightly in the middle when shaken, but not be liquid. If you insert a knife near the center, it should come out clean. For a deeper golden crust, switch to broil for the last 1-2 minutes, watching carefully to avoid burning. Let the casserole rest for 5 minutes before slicing. This allows the custard to set completely and makes serving easier. Garnish with sesame seeds if desired, and serve warm.

For best results

  • For the best texture, use lean ground turkey with a 93/7 lean-to-fat ratio. Higher fat content can make the casserole greasy, while extra lean (99/1) may result in a drier dish. If you prefer a juicier casserole, you can substitute ground chicken or a mix of turkey and lean ground beef. The key is to brown the meat well to develop flavor without overcooking.
  • To achieve a silky, lump-free custard, ensure your cream cheese is fully softened to room temperature. If you're short on time, cut the cream cheese into small cubes and microwave on low power in 10-second intervals until soft but not melted. Whisk vigorously with the eggs and cream until the mixture is completely smooth. Any lumps will remain in the final dish.
  • Pickles are essential for that classic cheeseburger tang. Use dill pickle chips, not sweet pickles, to keep the flavor profile savory. Chop them finely so they distribute evenly throughout the casserole. For extra crunch, you can add a few pickle slices on top before baking, but they may soften. Alternatively, serve fresh pickle slices on the side.
  • This casserole is naturally low-carb and keto-friendly, with only about 5g net carbs per serving. If you want to add more vegetables, consider stirring in 1/2 cup of finely chopped bell peppers or mushrooms along with the onion. Just sauté them first to remove excess moisture, otherwise the casserole can become watery.
  • Storage: Leftovers can be refrigerated in an airtight container for up to 4 days. To reheat, microwave individual portions for 1-2 minutes, or reheat in a 350°F oven for 10 minutes. The casserole also freezes well for up to 3 months. Wrap tightly in plastic wrap and foil before freezing. Thaw overnight in the refrigerator before reheating.

Variations

  • Cheeseburger Casserole with Beef: Swap the ground turkey for lean ground beef (90/10) for a more traditional cheeseburger flavor. The beef adds a richer, beefier taste that pairs perfectly with the cheddar and pickles. Follow the same instructions; no other adjustments needed.
  • Spicy Jalapeño Popper Version: Add 1-2 finely diced jalapeños (seeds removed for less heat) along with the onion. Stir in 2 oz of cream cheese and top with pepper jack cheese instead of cheddar. For extra kick, drizzle with hot sauce before serving. This variation adds a smoky, spicy twist.
  • BBQ Bacon Cheeseburger Casserole: Cook 4 strips of bacon until crispy, then crumble. Replace the tomato paste with 2 tbsp of sugar-free BBQ sauce. Stir in the bacon bits and top with extra cheddar. The smoky bacon and tangy BBQ sauce elevate the casserole to new heights.
  • Vegetarian Option: Omit the turkey and use 1 lb of crumbled firm tofu or a plant-based ground meat substitute. Sauté the tofu with the same spices and proceed with the recipe. The custard and cheese provide enough protein and fat to keep the dish satisfying. Add 1/2 cup of chopped mushrooms for extra umami.
  • Dairy-Free Adaptation: Use dairy-free cream cheese and shredded vegan cheddar. Replace heavy cream with full-fat coconut cream (the thick part from a can of coconut milk). The texture will be slightly different but still delicious. Ensure all other ingredients are dairy-free.

Nutrition

  • Calories385 kcal
  • Total Fat28g
  • Saturated Fat12g
  • Cholesterol215mg
  • Sodium680mg
  • Total Carbohydrates6g
  • Dietary Fiber1g
  • Sugars3g
  • Protein30g

Common Questions

Can I make this casserole ahead of time?
Yes! You can assemble the casserole completely (without baking) up to 24 hours in advance. Cover tightly with plastic wrap or foil and refrigerate. When ready to bake, remove from the fridge while the oven preheats, then bake as directed, adding 5-10 minutes to the baking time since the dish starts cold. Alternatively, bake it fully, cool, and refrigerate; reheat in the oven at 350°F for about 15 minutes.
Is this recipe keto-friendly?
Absolutely! Each serving contains approximately 5g net carbs (total carbs minus fiber). The use of cream cheese, eggs, and heavy cream keeps the carbohydrate count low while providing plenty of fat and protein. Be sure to use sugar-free ketchup or tomato paste without added sugars to keep it keto. Always check labels on condiments.
Can I use ground beef instead of turkey?
Definitely. Substitute an equal amount of lean ground beef (90/10 or 85/15). Ground beef will add more flavor and juiciness. You may need to drain a bit more fat after browning. The cooking time remains the same. For a lower fat option, you can also use ground chicken.
What can I serve with this casserole?
Since this casserole is a complete meal with protein and fat, serve it with a side of steamed green vegetables like broccoli, green beans, or a crisp salad with a vinaigrette. For a heartier meal, add cauliflower rice or roasted zucchini. It also pairs well with a side of sugar-free coleslaw.
How do I store leftovers and reheat?
Store leftovers in an airtight container in the refrigerator for up to 4 days. To reheat, microwave on high for 1-2 minutes or until hot throughout. For a crispier top, reheat in a toaster oven or regular oven at 350°F for 10 minutes. You can also freeze the baked casserole for up to 3 months; thaw overnight in the fridge before reheating.
Can I add vegetables to this casserole?
Yes, but choose low-carb vegetables to keep the carb count down. Sautéed mushrooms, bell peppers, spinach, or zucchini work well. Be sure to cook them first to release excess moisture, otherwise the casserole may become watery. Add them after sautéing the onion and garlic.
Why is my casserole watery?
A watery casserole can result from not draining the cooked turkey properly, using high-moisture vegetables without pre-cooking, or not letting the casserole rest after baking. Make sure to cook the turkey until most liquid evaporates, and if adding veggies, sauté them first. Also, let the casserole sit for 5-10 minutes after baking to allow the custard to set.
Can I omit the eggs?
Eggs are crucial for the custard-like texture that binds the casserole. Without them, the dish will be more like a loose meat mixture. If you need an egg-free version, you can try using a combination of additional cream cheese and a flax egg (1 tbsp ground flaxseed + 3 tbsp water per egg), but the texture will be denser.

Notes

I first created this High Protein Cheeseburger Bake on a hectic weeknight when I was craving the flavors of a classic cheeseburger but wanted something quick, low-carb, and satisfying without the bun. The inspiration came from my love for casseroles—they’re the ultimate one-dish meal that feeds a crowd and tastes even better the next day. I wanted to capture the essence of a cheeseburger: savory seasoned meat, melted cheddar, tangy pickles, and that hint of mustard and ketchup. But instead of a bun, I used a rich egg and cream cheese custard to create a cohesive, sliceable casserole that feels indulgent but is actually packed with protein and low in carbs. This dish has become a staple in my home, especially on meal prep Sundays. It’s versatile enough to please both keto dieters and picky eaters. I love serving it with a side of crispy roasted broccoli or a simple garden salad drizzled with ranch dressing. For a fun twist, you can even spoon the casserole into lettuce wraps for a handheld ‘burger’ experience. The leftovers are fantastic—cold, it almost tastes like a cheeseburger dip with a fork. I hope this recipe brings you the same comfort and convenience it has brought my family. Happy cooking!

Turkey Cheeseburger Casserole

Turkey Cheeseburger Casserole
Casserole Recipes • High Protein Dinner • Low Carb Meals

⏱️ Prep: PT15M
🔥 Cook: PT25M
⏳ Total: PT40M
🍽️ Yield: 6 servings
⚡ Calories: 385 kcal
(284)
turkey cheeseburger casserolelow carb casserolehigh protein dinnerketo casseroleeasy weeknight dinnerground turkey recipecheeseburger casserole

This turkey cheeseburger casserole combines lean ground turkey, cheddar cheese, and tangy pickles for a comforting, high-protein dinner. Quick and easy weeknight meal.

Ingredients

Toggle: Metric / US

Instructions

Step 1

Preheat your oven to 375°F (190°C). Grease a 9×13-inch baking dish with a little olive oil or nonstick spray. This ensures the casserole doesn’t stick and makes cleanup a breeze. While the oven heats, gather all your ingredients and dice the onion and mince the garlic. Using fresh garlic rather than pre-minced gives a more pungent, aromatic flavor that stands up to the turkey and cheese.

Step 1 image
Step 2

Heat 1 tablespoon of olive oil in a large skillet over medium-high heat. Once the oil shimmers, add the diced onion and cook for 4-5 minutes, stirring occasionally, until it becomes translucent and fragrant. The onion should soften but not brown too much—this builds the savory base. Add the minced garlic and cook for another 30 seconds until you can smell it, being careful not to burn the garlic.

Step 2 image
Step 3

Add the ground turkey to the skillet. Break it apart with a wooden spoon or spatula. Cook for 6-8 minutes, stirring frequently, until the turkey is no longer pink and has a nice golden brown color. You want some browning for flavor—that’s the Maillard reaction at work. Drain any excess fat if necessary (lean turkey shouldn’t produce much). Season with salt, black pepper, smoked paprika, and garlic powder. Stir well to coat the meat evenly.

Step 4

Reduce the heat to low. Stir in the sugar-free ketchup, yellow mustard, Worcestershire sauce, and dill pickle juice. These ingredients mimic the classic cheeseburger condiments—tangy, sweet, and savory. Let the mixture simmer for 2-3 minutes, allowing the flavors to meld. Taste and adjust seasoning if needed. Then fold in the diced dill pickles for that essential crunch and briny pop.

Step 5

In a separate small bowl, whisk together the heavy cream and eggs until smooth. This creates a custard-like binder that will make the casserole creamy and set beautifully. Pour the cream-egg mixture over the turkey mixture in the skillet and stir to combine. The eggs will help the casserole hold together when baked.

Step 6

Transfer the entire mixture into the prepared baking dish. Spread it into an even layer. Top with the shredded sharp cheddar cheese, distributing it evenly. For an extra golden crust, you can sprinkle a pinch of smoked paprika on top. Bake in the preheated oven for 20-25 minutes, or until the cheese is melted and bubbly and the edges are lightly browned. The casserole should be set in the center—a slight jiggle is okay, but it shouldn’t be liquidy.

Step 7

Remove from the oven and let it rest for 5 minutes before serving. This resting period allows the casserole to firm up slightly, making it easier to slice and serve. Garnish with sesame seeds if desired (to mimic a bun top). Serve warm, perhaps with a side salad or roasted vegetables to keep it low carb. Enjoy the comforting, cheeseburger-like flavors in every bite!

For best results

  • For the best texture and flavor, use freshly shredded sharp cheddar cheese rather than pre-shredded bags. Pre-shredded cheese contains anti-caking agents (like cellulose) that can prevent it from melting smoothly, leading to a grainy texture. Shredding your own from a block gives a creamy, gooey melt that's irresistible. Plus, sharp cheddar has a more pronounced tang, which stands up well to the turkey and pickles.
  • If you prefer a spicier kick, add 1/4 teaspoon of cayenne pepper or a few dashes of hot sauce to the turkey mixture. You can also use pepper jack cheese instead of cheddar for a Southwest twist. For those who love extra pickles, increase the diced pickles to 1 1/2 cups and even lay a few pickle slices on top before baking for a pretty presentation.
  • To make this casserole even lower in carbs, replace the sugar-free ketchup with tomato paste thinned with a little water and seasoned with a pinch of sweetener (like stevia or erythritol). Many store-bought sugar-free ketchups still have a few carbs from tomato concentrate, but making your own gives you full control. Also, ensure your Worcestershire sauce is gluten-free if needed—some brands contain malt vinegar derived from barley.
  • Leftovers can be stored in an airtight container in the refrigerator for up to 4 days. To reheat, place individual portions in the microwave for 1-2 minutes or in a 350°F oven for 10 minutes until warmed through. The casserole also freezes well: wrap the entire dish (or individual portions) tightly in plastic wrap and foil, then freeze for up to 3 months. Thaw overnight in the fridge before reheating.
  • If you don't have dill pickle juice, you can substitute with a splash of apple cider vinegar mixed with a pinch of sugar (or sweetener) and a little water. The acidity is crucial to cut through the richness of the cheese and turkey. Alternatively, use a tablespoon of red wine vinegar. The pickle juice adds a unique brininess, but the vinegar will still provide the necessary tang.
  • For a dairy-free version, use a dairy-free shredded cheese alternative (look for one that melts well, like Violife or Daiya) and replace the heavy cream with full-fat coconut cream or unsweetened almond milk mixed with a tablespoon of nutritional yeast for cheesiness. The eggs still help bind, but the texture may be slightly less creamy. You can also omit the eggs and add a bit more cream for a looser casserole.

Variations

  • Make it a bacon cheeseburger casserole by cooking 6 slices of bacon until crispy, then crumbling them over the top before baking. The smoky, salty bacon adds incredible depth and crunch. You can also mix some bacon bits into the turkey mixture for even distribution. For a double-protein punch, use half ground turkey and half ground beef (or all beef) for a more traditional burger flavor.
  • Transform this into a Mexican-inspired casserole by swapping the pickles for diced jalapeños and using pepper jack cheese. Add a can of drained and rinsed black beans (if not strictly low carb) and a teaspoon of cumin to the turkey mixture. Top with fresh cilantro and a dollop of sour cream after baking. This variation is perfect for those who love Tex-Mex flavors.
  • For a low-carb/keto-friendly version, ensure all condiments are sugar-free and use full-fat cheese and cream. You can also add a layer of cauliflower rice or zucchini noodles at the bottom of the baking dish before adding the turkey mixture for extra vegetables. This bulks up the casserole without adding many carbs. Just be sure to squeeze out excess moisture from the zucchini to avoid a watery casserole.
  • If you're not concerned about carbs, you can add a layer of frozen tater tots or diced potatoes on top of the turkey mixture before baking. This creates a 'tater tot casserole' twist that's incredibly satisfying. Bake until the tots are golden and crispy. You can also stir in a cup of cooked elbow macaroni or shells for a cheeseburger mac casserole—a family favorite.

Nutrition

  • Calories385 kcal
  • Total Fat24g
  • Saturated Fat12g
  • Cholesterol165mg
  • Sodium720mg
  • Total Carbohydrates8g
  • Dietary Fiber1g
  • Sugars4g
  • Protein35g

Common Questions

Can I use ground beef instead of turkey?
Absolutely! Ground beef (80/20 or 85/15) will yield a richer, more traditional cheeseburger flavor. Just be sure to drain excess fat after browning to keep the casserole from becoming greasy. You may need to adjust seasoning slightly, as beef has a stronger taste. The cooking time remains the same.
How do I store leftovers and how long do they last?
Store leftover casserole in an airtight container in the refrigerator for up to 4 days. To reheat, microwave individual portions for 1-2 minutes or reheat in a 350°F oven for about 10 minutes until hot. You can also freeze the casserole for up to 3 months. Wrap it tightly in plastic wrap and then aluminum foil to prevent freezer burn. Thaw overnight in the fridge before reheating.
Can I make this casserole ahead of time?
Yes, this is a great make-ahead meal. Assemble the casserole completely (but do not bake), cover with foil, and refrigerate for up to 24 hours. When ready to bake, remove from the fridge while the oven preheats, then bake as directed, adding 5-10 minutes to the cooking time since it starts cold. You can also freeze the unbaked casserole; thaw overnight before baking.
Is this casserole gluten-free?
Yes, this recipe is naturally gluten-free as written. However, always check labels on Worcestershire sauce (some contain gluten from malt vinegar) and ensure your mustard and ketchup are certified gluten-free. Most yellow mustards are safe, but double-check. Serve with gluten-free sides like a salad or roasted vegetables.
Can I omit the eggs?
The eggs help bind the casserole and give it a custard-like texture. If you omit them, the casserole may be more crumbly and less cohesive. You can try replacing each egg with 1/4 cup of unsweetened applesauce or a flax egg (1 tablespoon ground flaxseed mixed with 3 tablespoons water, let sit for 5 minutes). However, the texture will be slightly different. For a keto version, you can add an extra 1/4 cup of heavy cream to add moisture.
What can I serve with this casserole to keep it low carb?
This casserole is quite filling on its own, but if you want a side, consider a crisp green salad with a vinaigrette dressing, steamed broccoli or cauliflower, roasted asparagus, or zucchini noodles. For a heartier option, serve with cauliflower rice or a side of sautéed spinach. These sides keep the meal low carb and add fiber and nutrients.
Can I use a different type of cheese?
Definitely! While sharp cheddar is classic, you can use Monterey Jack, Colby, Gouda, or a Mexican blend for different flavors. For a smokier taste, try smoked cheddar or provolone. Avoid using only mozzarella as it’s mild and may not provide enough flavor. A mix of cheeses (like cheddar and Monterey Jack) works wonderfully.

Notes

This recipe came to me on a busy weeknight when I was craving a cheeseburger but didn’t want the carbs from a bun or the hassle of grilling. I had a pound of ground turkey in the fridge and a block of cheddar cheese, and the idea for a casserole just clicked. The first time I made it, I was blown away by how much it tasted like a real cheeseburger—the pickles, the mustard, the melty cheese all came together perfectly. Over the years, I’ve tweaked it to make it even more macro-friendly by using lean turkey and sugar-free ketchup, and now it’s a staple in my meal prep rotation.One of the things I love most about this casserole is its versatility. You can easily swap ingredients based on what you have on hand. Don’t have dill pickles? Use relish or even chopped olives for a different briny kick. Want more veggies? Stir in some sautéed bell peppers or mushrooms. The base of seasoned turkey and cheese is so forgiving that you can customize it endlessly.Serving suggestions: I like to serve this casserole with a simple side salad dressed with a tangy vinaigrette to cut through the richness. Sometimes I’ll add a dollop of sour cream or a few slices of avocado for healthy fats. If you’re not strictly low carb, a side of roasted sweet potatoes or a crusty roll makes a great accompaniment. For a fun presentation, you can even shape the casserole into patties and serve on lettuce wraps with all your favorite burger toppings.I hope this recipe becomes a favorite in your home as it has in mine. It’s proof that you don’t need a bun or a grill to enjoy the comforting flavors of a cheeseburger. Happy cooking!

Low Carb High Protein Turkey Cheeseburger Casserole

Low Carb High Protein Turkey Cheeseburger Casserole
Low Carb Casserole • High Protein Dinner • 30-Minute Meal

⏱️ Prep: PT10M
🔥 Cook: PT20M
⏳ Total: PT30M
🍽️ Yield: 6 servings
⚡ Calories: 320 kcal
(284)
low carbhigh proteinturkey casserolecheeseburger casserole30-minute mealeasy dinnerketo friendlygluten free

This low carb turkey cheeseburger casserole is packed with lean ground turkey, cheddar cheese, and savory seasonings for a high-protein dinner. Ready in 30 minutes, it's a quick and easy…

Ingredients

Toggle: Metric / US

Instructions

Step 1

Preheat your oven to 375°F (190°C). While the oven is heating, gather all your ingredients and equipment: a large oven-safe skillet (preferably 12-inch cast iron or stainless steel) or a separate baking dish (9×13-inch). If using a baking dish, you’ll need a large skillet for stovetop cooking. Having everything prepped and measured (mise en place) ensures a smooth cooking process and prevents burning or overcooking. Dice the onion and mince the garlic; set aside. Shred the cheeses if not pre-shredded—pre-shredded cheese often contains anti-caking agents that can affect meltability, so for the best gooey texture, shred from a block.

Step 1 image
Step 2

Heat 1 tablespoon of olive oil in the large oven-safe skillet (or a regular skillet if transferring) over medium-high heat. Once the oil shimmers (about 30 seconds), add the diced onion. Sauté for 3-4 minutes, stirring occasionally, until the onion becomes translucent and starts to brown slightly at the edges. The browning, known as caramelization, develops natural sugars and adds depth of flavor. Add the minced garlic and cook for another 30 seconds until fragrant—be careful not to burn the garlic, as it turns bitter. This aromatic base is the foundation of the casserole’s savory profile.

Step 2 image
Step 3

Add the ground turkey to the skillet. Break it apart with a wooden spoon or spatula into small crumbles. Cook for 5-7 minutes, stirring occasionally, until the turkey is no longer pink and has reached an internal temperature of 165°F (74°C). As the turkey cooks, you’ll notice it releases moisture; continue cooking until most of the liquid evaporates and the meat begins to brown. This browning (Maillard reaction) is crucial for a rich, meaty flavor. Do not rush this step—proper browning can take up to 10 minutes. If the pan seems dry, you can add a splash of water or broth to deglaze any browned bits from the bottom, which are packed with flavor.

Step 4

Reduce the heat to medium-low. Add the salt, black pepper, paprika, garlic powder, onion powder, and mustard powder to the turkey mixture. Stir well to evenly coat the meat with the spices. Cook for 1 minute, allowing the spices to toast and bloom, which intensifies their aroma and flavor. Then, add the sugar-free ketchup, yellow mustard, Worcestershire sauce, and dill pickle relish. Stir until everything is thoroughly combined and the sauce coats the meat. The mixture should look glossy and smell like a classic cheeseburger. Taste and adjust seasoning if needed—you can add more salt, pepper, or a dash of hot sauce for heat.

Step 5

If using an oven-safe skillet, smooth the turkey mixture into an even layer. If using a separate baking dish, transfer the mixture to a lightly greased 9×13-inch baking dish and spread evenly. Sprinkle the shredded cheddar and mozzarella cheeses evenly over the top. For a more indulgent texture, you can also mix some cheese into the meat mixture before topping. The cheese will melt and form a golden, bubbly crust. Place the skillet or dish in the preheated oven and bake for 10-12 minutes, until the cheese is fully melted and lightly browned on the edges. If you prefer a deeper golden crust, you can switch to broil for the last 1-2 minutes, but watch closely to prevent burning.

Step 6

Remove from the oven and let the casserole rest for 2-3 minutes. This resting time allows the casserole to set slightly for cleaner slices. Garnish with chopped fresh parsley and optional chopped dill pickles for a fresh, tangy contrast. Serve hot, directly from the skillet or dish. This casserole pairs wonderfully with a side salad, steamed green beans, or cauliflower rice to keep the meal low carb. Leftovers can be stored in an airtight container in the refrigerator for up to 4 days. Reheat individual portions in the microwave or oven until warmed through.

For best results

  • For the best texture and flavor, use lean ground turkey with a fat content of 93/7 or 85/15. Higher fat content (like 80/20) can make the casserole greasy, while extra lean (99/1) may result in a dry, crumbly texture. If you only have extra lean turkey, consider adding a tablespoon of olive oil or a splash of chicken broth during cooking to maintain moisture. The Maillard browning is essential for depth, so don't skip the step of cooking until the meat is well-browned; this develops savory notes that mimic a classic burger patty.
  • Shred your own cheese from a block for superior melting. Pre-shredded cheeses are coated with cellulose or starch to prevent clumping, which can inhibit melting and create a grainy texture. A block of sharp cheddar and low-moisture mozzarella will melt into a smooth, creamy layer. For a stronger cheese flavor, try using extra-sharp cheddar or adding a sprinkle of smoked gouda. If you're dairy-sensitive, you can use dairy-free shredded cheese alternatives, but note that melting properties may vary—look for brands that specifically state they melt well.
  • Sugar-free ketchup is key to keeping this dish low carb. Many store-bought ketchups contain high-fructose corn syrup or added sugars, which can add up to 5-10 grams of carbs per tablespoon. Look for brands sweetened with stevia, erythritol, or monk fruit. If you don't have sugar-free ketchup, you can make your own by mixing tomato paste with a little water, vinegar, and a zero-calorie sweetener to taste. Alternatively, you can substitute with no-sugar-added tomato sauce or even salsa for a different flavor profile.
  • To make this casserole even quicker, you can cook the turkey and onion mixture ahead of time. Simply cook and season the meat, let it cool, and store it in the refrigerator for up to 3 days. When ready to bake, just transfer to a baking dish, top with cheese, and bake. This is a great meal prep strategy for busy weeknights. You can also freeze the unbaked casserole (without cheese) for up to 3 months. Thaw overnight in the fridge, then add cheese and bake as directed, adding 5-10 minutes to the baking time since it starts cold.
  • If you prefer a crispy top, after baking, switch the oven to broil for 1-2 minutes. Watch closely as broiling can quickly burn the cheese. For an extra crunch, you can also sprinkle crushed pork rinds or a low-carb breadcrumb alternative (like crushed almonds mixed with parmesan) over the cheese before baking. This adds a texture reminiscent of a breaded casserole without the carbs.
  • The dill pickle relish is a secret ingredient that adds tanginess and moisture, mimicking the pickle on a cheeseburger. If you don't have relish, you can finely chop dill pickles and add a teaspoon of pickle juice. The acidity cuts through the richness of the cheese and meat, balancing the flavors. For a sweeter note, you could use bread and butter pickle relish, but that will add a few carbs, so adjust your macros accordingly.

Variations

  • For a beef version, substitute ground turkey with lean ground beef (90/10). The beef will have a richer, more traditional cheeseburger flavor. You may want to reduce the salt slightly as beef can be saltier. Alternatively, use ground chicken or pork for different flavor profiles. Ground chicken is milder and pairs well with white cheddar, while ground pork adds a hint of sweetness that complements the mustard and pickles.
  • To make this dairy-free, use dairy-free shredded cheese alternatives (such as those made from coconut oil or cashews) and ensure your Worcestershire sauce is vegan (some contain anchovies). The texture may be slightly less gooey, but the flavor will still be delicious. You can also add a tablespoon of nutritional yeast to the meat mixture for a cheesy flavor without dairy.
  • For a spicy kick, add 1-2 teaspoons of hot sauce (like sriracha or Frank's RedHot) to the meat mixture along with the ketchup and mustard. You can also mix in diced jalapeños or a pinch of cayenne pepper. Top the casserole with sliced pickled jalapeños before baking for a Tex-Mex twist. Serve with a side of sour cream or Greek yogurt to cool the heat.
  • Turn this into a stuffed pepper casserole by adding 1-2 cups of diced bell peppers (any color) along with the onion. Sauté the peppers until slightly softened before adding the turkey. The peppers add sweetness, color, and extra nutrients. You can also mix in 1 cup of cauliflower rice (raw or pre-cooked) to bulk up the casserole with more vegetables and fiber while keeping it low carb.
  • For a Mexican-inspired version, replace the ketchup and mustard with 1/2 cup of salsa and 1 teaspoon of cumin. Use a Mexican cheese blend (cheddar, Monterey Jack, and queso quesadilla) and top with fresh cilantro and avocado slices. Serve with a side of low-carb tortilla chips or lettuce wraps for a taco bowl experience.

Nutrition

  • Calories320 kcal
  • Total Fat18g
  • Saturated Fat8g
  • Cholesterol95mg
  • Sodium780mg
  • Total Carbohydrates9g
  • Dietary Fiber1g
  • Sugars4g
  • Protein32g

Common Questions

Can I make this casserole ahead of time?
Yes, absolutely. You can prepare the entire casserole (without baking) up to 2 days in advance. Assemble the meat mixture in the baking dish, top with cheese, cover tightly with foil or plastic wrap, and refrigerate. When ready to bake, remove from the fridge 20 minutes before baking to take the chill off, then bake as directed, adding 5-10 minutes to the baking time since it starts cold. You can also freeze the unbaked casserole (without cheese) for up to 3 months; thaw overnight in the fridge, add cheese, and bake.
Is this casserole keto-friendly?
Yes, this turkey cheeseburger casserole is keto-friendly as long as you use sugar-free ketchup and watch your portion sizes. Each serving contains approximately 6-8 grams of net carbs (total carbs minus fiber), depending on the specific brands used. The main carb sources come from the onion, ketchup, and pickle relish, but these are minimal. For a stricter keto version, you can reduce the onion to half and use a relish with no added sugar. This casserole is also gluten-free, making it suitable for those with celiac disease or gluten sensitivity.
Can I use ground beef instead of turkey?
Absolutely. Substitute an equal amount of lean ground beef (90/10 or 85/15) for the turkey. The cooking time and instructions remain the same. Beef will have a richer flavor and slightly higher fat content, which can make the casserole more moist. If using higher fat beef (like 80/20), you may want to drain off excess fat after browning to prevent the casserole from being greasy. Ground chicken or pork also work well as substitutes.
How should I store leftovers and how long do they last?
Store leftovers in an airtight container in the refrigerator for up to 4 days. The casserole can also be frozen for up to 3 months. To reheat, microwave individual portions for 1-2 minutes or reheat in a 350°F oven for 10-15 minutes until warmed through. If frozen, thaw overnight in the fridge before reheating. The texture may be slightly softer upon reheating, but the flavor will remain delicious.
Can I add vegetables to this casserole?
Yes, this casserole is very versatile. You can add diced bell peppers, mushrooms, zucchini, or spinach. For bell peppers and mushrooms, sauté them with the onion until softened. For spinach, stir in a few handfuls of fresh spinach after cooking the turkey and let it wilt before adding the sauce. Adding vegetables will increase the volume and nutrient density, but may slightly increase the carb count. Keep the total vegetable additions to about 1-2 cups to maintain the casserole’s structure.
What can I use instead of Worcestershire sauce?
Worcestershire sauce adds a savory umami depth. If you don’t have it, you can substitute with 1 tablespoon of soy sauce (or tamari for gluten-free) plus a dash of vinegar (apple cider or red wine). Alternatively, use 1 tablespoon of fish sauce for a more intense flavor, or simply omit it and add a little extra salt and a pinch of sugar substitute. The casserole will still taste great, though slightly less complex.
Is this recipe suitable for meal prep?
Yes, this casserole is excellent for meal prep. Cook the entire casserole, let it cool, then portion it into individual containers. Store in the fridge for up to 4 days. You can reheat portions for quick lunches or dinners throughout the week. The flavors often meld and improve after a day in the fridge. To reheat, microwave for 1-2 minutes or reheat in a toaster oven at 350°F for 10 minutes. For best texture, avoid overcooking when reheating.
Can I make this casserole without an oven?
Yes, you can make a stovetop version. After cooking the turkey mixture and stirring in the cheese, cover the skillet and cook on low heat for 5-7 minutes until the cheese is melted. Alternatively, you can transfer the mixture to a microwave-safe dish, top with cheese, and microwave on high for 2-3 minutes until the cheese is bubbly. The stovetop or microwave method won’t produce the same browned top, but it’s still delicious and quick.

Notes

This Low Carb High Protein Turkey Cheeseburger Casserole was born out of my desire to enjoy the nostalgic flavors of a classic cheeseburger without the bun and the carbs. As someone who follows a high-protein, low-carb lifestyle, I often crave comfort food that fits my macros. One evening, after a long day, I was making my usual turkey burger patties and thought, ‘Why not turn this into a casserole?’ The idea of layering seasoned ground turkey with melted cheese and tangy pickles in a single dish felt like the ultimate weeknight hack. The first time I made it, the aroma of sizzling turkey and melting cheddar filled my kitchen, and when I pulled it out of the oven, the golden, bubbly cheese was irresistible. My family devoured it, and my kids even asked for seconds—a huge win for a low-carb meal.This casserole is more than just a recipe; it’s a testament to the fact that eating healthy doesn’t mean sacrificing flavor or satisfaction. The combination of savory turkey, sharp cheddar, and the classic cheeseburger condiments (ketchup, mustard, pickles) creates a dish that hits all the right notes: savory, tangy, rich, and comforting. I love serving it with a simple side salad dressed with a light vinaigrette to add freshness and crunch. For a heartier meal, pair it with roasted broccoli or cauliflower rice. It’s also a fantastic dish for gatherings—everyone loves a good casserole, and this one is sure to please even the pickiest eaters.One of my favorite things about this recipe is its adaptability. Over the months, I’ve experimented with different cheeses (smoked gouda, pepper jack), added vegetables like bell peppers and mushrooms, and even swapped the turkey for ground beef or chicken. Each variation brings a new twist. I’ve also found that making a double batch and freezing half is a lifesaver on busy nights. Just thaw, bake, and dinner is ready.As a chef, I believe that cooking should be approachable and fun. This casserole requires minimal fuss and uses ingredients you likely have on hand. It’s a perfect example of how a few simple components can come together to create something truly special. I hope this recipe becomes a staple in your kitchen as it has in mine. Happy cooking, and remember: you don’t need a bun to enjoy a cheeseburger!

Easy Pot Pie Bake

Easy Pot Pie Bake
Casserole Recipes • Easy Dinner Ideas • 30-Minute Meals

⏱️ Prep: PT10M
🔥 Cook: PT15M
🍞 Baking: PT12M
⏳ Total: PT37M
🍽️ Yield: 6 servings
⚡ Calories: 385 kcal
(284)
chicken pot pie casseroleeasy casserolequick dinner30 minute mealcomfort foodbiscuit casserole

This easy pot pie bake transforms simple ingredients into a hearty, creamy casserole. Perfect for busy weeknights, ready in under 30 minutes!

Ingredients

Toggle: Metric / US

Instructions

Step 1

Preheat your oven to 375°F (190°C). While the oven heats, lightly grease a 9×13-inch baking dish or a 10-inch cast iron skillet with nonstick spray or a thin layer of butter. Greasing ensures the creamy filling doesn’t stick and makes cleanup a breeze. If using a glass dish, place it on a baking sheet to catch any potential overflow.

Step 1 image
Step 2

In a large mixing bowl, combine the 2 cups of cooked shredded chicken, the entire can of cream of celery soup, 1 cup of frozen peas, 1/2 cup of whole milk, and 1/4 teaspoon of black pepper. Stir until everything is well incorporated. The mixture will be thick and creamy; the frozen peas will help cool the mixture slightly. If you like extra flavor, add 1/4 teaspoon garlic powder or a pinch of dried thyme. This filling is the heart of the casserole, so taste and adjust seasoning if needed.

Step 2 image
Step 3

Pour the chicken mixture into the prepared baking dish and spread it evenly. The layer should be about 1 inch thick. If you’re adding shredded cheddar cheese, sprinkle it over the filling now for an extra layer of richness. The cheese will melt into the sauce, creating a luscious, golden top.

Step 4

Open the can of refrigerated buttermilk biscuits. Separate the 8 biscuits and cut each one into quarters (or halves for larger pieces). Arrange the biscuit pieces evenly over the chicken mixture, placing them cut-side down for maximum surface area to brown. The biscuits will puff up and turn golden as they bake, creating a beautiful crust. Leave a little space between pieces so steam can escape and the biscuits cook through.

Step 5

Bake the casserole in the preheated oven for 12-15 minutes, or until the biscuits are golden brown and the filling is bubbly around the edges. The internal temperature of the filling should reach 165°F (74°C) to ensure it’s hot all the way through. If the biscuits brown too quickly, tent the dish loosely with aluminum foil for the last 5 minutes. The aroma of buttery biscuits and creamy chicken will fill your kitchen.

Step 6

Remove the casserole from the oven and let it rest for 5 minutes before serving. This resting time allows the filling to thicken slightly and the biscuits to set, making it easier to scoop out portions. Serve warm, garnished with fresh parsley or a sprinkle of black pepper. Enjoy the creamy, savory filling with the tender, flaky biscuit topping – pure comfort in every bite!

For best results

  • For the best texture, use leftover rotisserie chicken or poached chicken breasts. Poaching is simple: place boneless skinless chicken breasts in a pot, cover with water or broth, bring to a boil, then reduce to a simmer and cook for 12-15 minutes until internal temperature reaches 165°F. Shred with two forks. This method keeps the chicken moist and flavorful without extra fat. If using canned chicken, drain well and pat dry to avoid a watery filling.
  • Cream of celery soup is the secret to a rich, savory base without making a roux from scratch. It adds a subtle celery flavor that complements the peas and chicken. If you prefer a lighter option, use cream of chicken or mushroom soup, or make a quick homemade white sauce: melt 2 tablespoons butter, whisk in 2 tablespoons flour, cook 1 minute, then slowly whisk in 1 cup milk and 1/2 cup chicken broth until thickened. Season with salt, pepper, and celery seed.
  • Don't skip the milk! It thins the soup just enough to create a creamy sauce that coats the chicken and peas. Whole milk gives the richest consistency, but 2% or unsweetened almond milk work too. If the mixture seems too thick after stirring, add an extra splash of milk. The frozen peas will release some liquid as they cook, helping to thin the sauce naturally.
  • For extra crispy biscuits, brush the tops with a little melted butter or an egg wash (1 egg beaten with 1 tablespoon water) before baking. This creates a golden, shiny crust that looks bakery-worthy. You can also sprinkle flaky sea salt or everything bagel seasoning on top for a savory twist.
  • To make this casserole ahead of time, assemble the dish completely but do not bake. Cover tightly with plastic wrap or foil and refrigerate for up to 24 hours. When ready to bake, remove from the fridge while the oven preheats (about 15 minutes) to take the chill off the dish. Bake as directed, adding 5-10 minutes to the cooking time since the filling starts cold. Check that the center is hot and bubbly before serving.
  • Leftovers can be stored in an airtight container in the refrigerator for up to 3 days. To reheat, place a portion in the microwave for 1-2 minutes or in a 350°F oven for 10 minutes. The biscuits will soften slightly but remain delicious. For a crispy top, reheat in an air fryer at 350°F for 3-4 minutes. This casserole also freezes well: assemble, cover tightly, and freeze for up to 3 months. Thaw overnight in the fridge before baking.

Variations

  • Vegetarian Pot Pie Casserole: Omit the chicken and replace with 2 cups of diced mixed vegetables such as carrots, potatoes, corn, and green beans. Use cream of mushroom soup and add 1 cup of vegetable broth for extra flavor. You can also add 1 can of drained chickpeas for protein. The biscuits provide plenty of carbs, so this version is satisfying and hearty.
  • Gluten-Free Adaptation: Use gluten-free cream of celery soup (or make a gluten-free roux with rice flour) and gluten-free refrigerated biscuits. Many brands now offer gluten-free biscuit dough that bakes up flaky and tender. Check labels to ensure all ingredients are gluten-free. The rest of the recipe remains the same, making it easy for those with dietary restrictions to enjoy.
  • Cheesy Chicken Pot Pie Casserole: Stir 1 cup of shredded cheddar cheese into the chicken mixture before pouring into the dish. You can also sprinkle an additional 1/2 cup on top of the biscuits during the last 5 minutes of baking. The cheese adds a gooey, savory layer that elevates the dish to ultimate comfort food. Try using smoked gouda or pepper jack for a flavor twist.
  • Herb and Garlic Twist: Add 1 teaspoon of dried thyme, 1/2 teaspoon of dried rosemary, and 2 minced garlic cloves to the chicken mixture. The herbs infuse the sauce with aromatic depth that pairs beautifully with the buttermilk biscuits. Fresh herbs can be used – double the amount if using fresh. This variation gives the casserole a more sophisticated, rustic flavor profile.
  • Spicy Southwest Version: Replace the cream of celery soup with cream of chicken soup, add 1/2 cup of salsa verde, 1/2 teaspoon of cumin, and 1/4 teaspoon of chili powder. Use frozen corn instead of peas, and top with chopped cilantro before serving. The biscuits soak up the tangy, spicy sauce for a fun fusion twist. Serve with a dollop of sour cream or avocado slices.

Nutrition

  • Calories385 kcal
  • Total Fat18g
  • Saturated Fat6g
  • Cholesterol55mg
  • Sodium890mg
  • Total Carbohydrates34g
  • Dietary Fiber2g
  • Sugars6g
  • Protein22g

Common Questions

Can I use fresh peas instead of frozen?
Yes, you can substitute fresh peas. Blanch them in boiling water for 2 minutes, then drain and add to the mixture. Fresh peas will cook slightly faster, so keep an eye on the casserole. Frozen peas are convenient and hold up well in baking, but fresh peas add a bright, sweet flavor if in season.
How do I prevent the biscuits from becoming soggy?
To keep biscuits crisp, ensure they are placed on top of the filling, not mixed in. The cut sides should face down to maximize browning. Also, avoid overloading the filling with liquid – stick to the measurements. If your filling seems too thin, add 1 tablespoon of cornstarch mixed with 2 tablespoons of cold water before baking. Finally, don’t cover the casserole while baking; steam needs to escape.
Can I make this casserole dairy-free?
Absolutely! Use a dairy-free cream soup (such as Pacific Foods brand) and replace the milk with unsweetened almond milk, oat milk, or coconut milk (full-fat for richness). Use dairy-free biscuits – many brands like Pillsbury offer a dairy-free version. Check labels to confirm. The texture will be slightly different but still delicious.
What can I use instead of cream of celery soup?
You can use cream of chicken, cream of mushroom, or cream of broccoli soup. Each will change the flavor profile slightly. For a from-scratch option, make a quick béchamel: melt 2 tablespoons butter, whisk in 2 tablespoons flour, cook 1 minute, then gradually whisk in 1 cup milk and 1/2 cup chicken broth. Cook until thickened, then season with salt, pepper, and a pinch of celery seed.
How many calories per serving?
Each serving (1/6 of the recipe) contains approximately 385 calories. This includes the biscuits, chicken, soup, and milk. The nutrition is provided as an estimate and will vary based on specific brands and any additions like cheese. For a lighter version, use low-fat soup and skim milk, or reduce biscuit pieces to 6 instead of 8.
Can I use homemade biscuit dough instead of canned?
Yes! Use your favorite drop biscuit recipe or a simple 2-ingredient dough (1 cup self-rising flour + 1/2 cup plain yogurt or buttermilk). Drop spoonfuls over the filling instead of cutting canned biscuits. Bake as directed; homemade biscuits may need 2-3 extra minutes. They will be less uniform but equally delicious.
Is it necessary to pre-cook the chicken?
Yes, because the baking time is only 12-15 minutes – not enough to cook raw chicken safely. Use fully cooked chicken: leftover rotisserie, poached, grilled, or canned. For food safety, the filling must reach 165°F. If you want to use raw chicken, cook it first in a skillet until no longer pink, then shred or dice.
Can I double this recipe?
Certainly! Double all ingredients and use a 9×13-inch dish plus an 8×8-inch dish, or a large roasting pan. Increase baking time by 5-10 minutes since the dish will be deeper. Check that the center is hot and bubbly. Leftovers freeze well, so doubling is great for meal prep.

Notes

This Easy Homemade Chicken Pot Pie Casserole is a recipe born from the need for comfort without complexity. I remember making a traditional pot pie from scratch once – the roux, the pastry, the rolling – and while it was delicious, it took nearly two hours. I thought, ‘There has to be a faster way to get that same soul-warming feeling.’ And that’s how this casserole came to be. By using cream of celery soup and refrigerated biscuits, we cut the time in half without sacrificing flavor. The first time I made it, my family devoured it in minutes, and I knew I had a winner.The beauty of this dish lies in its adaptability. It’s a canvas for whatever you have on hand: leftover turkey after Thanksgiving, rotisserie chicken from the store, or even canned chicken in a pinch. The peas add a pop of color and sweetness, but you can swap them for mixed vegetables, corn, or chopped green beans. The biscuits become golden and flaky on top while staying tender underneath, soaking up the creamy sauce. It’s the kind of meal that makes a Tuesday night feel special.I love serving this casserole with a simple side salad dressed in lemon vinaigrette to cut through the richness. A crisp green salad with a tangy dressing balances the creamy, buttery casserole perfectly. For a heartier meal, pair it with roasted vegetables or mashed potatoes – yes, carbs on carbs! But honestly, this dish is substantial enough to stand alone as a one-dish wonder.One of my favorite memories is making this casserole with my niece. She helped cut the biscuits into quarters (with a plastic knife, of course) and arranged them like little puzzle pieces on top. She was so proud when it came out of the oven, and we ate it together with big smiles. That’s what this recipe is about: bringing people together around a warm, delicious meal without stress. I hope it becomes a staple in your home too. Enjoy every creamy, flaky bite!

Chicken Pot Pie Casserole

Chicken Pot Pie Casserole
Chicken Pot Pie Casserole • Easy Dinner Recipes • Comfort Food Casseroles

⏱️ Prep: PT20M
🔥 Cook: PT25M
🍞 Baking: PT25M
⏳ Total: PT70M
🍽️ Yield: 8 servings
⚡ Calories: 385 kcal
(284)
chicken pot pie casseroleeasy dinner recipescomfort food casserolequick weeknight dinnercreamy chicken casserolepuff pastry casserolerotisserie chicken recipe

This chicken pot pie casserole delivers all the classic comfort food flavors with a creamy chicken and vegetable filling topped with a buttery, flaky crust. Quick and easy dinner idea…

Ingredients

Toggle: Metric / US

Instructions

Step 1

Preheat your oven to 400°F (200°C). While the oven is heating, remove the puff pastry sheets from the refrigerator and let them sit at room temperature for about 10 minutes – this makes them pliable without being too soft. On a lightly floured surface, gently unfold each sheet. Using a sharp knife or pizza cutter, cut each sheet into 4 equal rectangles (or use a round cutter for a more rustic look). Place the pastry pieces on a parchment-lined baking sheet, spacing them about 1 inch apart. Brush the tops generously with the beaten egg wash – this will give the crust that gorgeous golden-brown sheen. Using a fork, poke a few holes in each piece to allow steam to escape, preventing a soggy bottom. Bake for 12-15 minutes, or until the pastry is puffed and deeply golden. Watch closely in the last few minutes to avoid burning. Set aside on a wire rack; the pastry will continue to crisp as it cools.

Step 1 image
Step 2

While the pastry bakes, prepare the creamy filling. In a large bowl, combine the shredded rotisserie chicken and frozen mixed vegetables. Using rotisserie chicken is a huge time-saver – it’s already cooked and seasoned, adding depth of flavor. The frozen vegetables do not need to be thawed; they will cook perfectly in the oven. In a separate medium bowl, whisk together the condensed cream of mushroom soup, chicken broth, milk, garlic powder, onion powder, dried thyme, dried rosemary, salt, and pepper. Whisk until the mixture is smooth and creamy. The soup acts as a thickener and flavor base, while the broth and milk create a luscious sauce. Taste the mixture and adjust seasoning – remember, the rotisserie chicken adds saltiness, so go easy on the salt initially.

Step 2 image
Step 3

Pour the creamy soup mixture over the chicken and vegetables. Stir gently with a rubber spatula until everything is evenly coated. The mixture will look quite saucy – that’s perfect because the puff pastry will soak up some moisture during baking, and you want a moist, not dry, casserole. Transfer the filling into a greased 9×13-inch baking dish (or a similar 3-quart casserole dish). Spread it into an even layer. The filling should fill the dish about halfway; if it seems too shallow, you can add more vegetables or a second can of soup if desired.

Step 4

Once the puff pastry pieces are baked and golden, arrange them on top of the chicken and vegetable filling. You can overlap them slightly for a more rustic look, or place them in a neat grid pattern. Don’t press them down – just lay them gently on the surface. The pastry will absorb some of the sauce and become slightly tender on the bottom while staying crispy on top. If you have any leftover pastry scraps, you can tuck them in for extra crunch.

Step 5

Return the assembled casserole to the oven (still at 400°F) and bake for 20-25 minutes, or until the filling is bubbly around the edges and the pastry is deep golden brown. The internal temperature of the filling should reach at least 165°F (74°C) for food safety. Let the casserole rest for 5-10 minutes before serving – this allows the filling to set slightly, making it easier to scoop. Garnish with fresh thyme sprigs if desired. Serve warm, spooning the creamy filling and a piece of crispy pastry onto each plate.

For best results

  • For the flakiest puff pastry, always keep it cold until just before baking. If the dough becomes too warm, it will stick and the butter layers may melt prematurely, resulting in a dense, oily crust. Work quickly and return any unused pastry to the refrigerator. You can also freeze the unbaked pastry pieces on a baking sheet, then transfer to a freezer bag for up to 3 months – bake directly from frozen, adding 2-3 minutes to the baking time.
  • Rotisserie chicken is the ultimate shortcut, but you can also use leftover roasted chicken or even quickly poached chicken breasts. To poach: place boneless, skinless chicken breasts in a pot, cover with water, add a bay leaf and a teaspoon of salt, bring to a gentle simmer, then cook for 15-18 minutes until internal temperature reaches 165°F. Let cool, then shred. This method yields moist, tender chicken without extra fat.
  • The cream of mushroom soup can be substituted with cream of chicken or cream of celery soup for a different flavor profile. For a from-scratch alternative, make a quick béchamel: melt 4 tablespoons butter, whisk in 4 tablespoons flour, cook for 1 minute, then gradually whisk in 2 cups whole milk and 1 cup chicken broth. Simmer until thickened (about 5 minutes), then season with salt, pepper, and herbs. This from-scratch version reduces sodium and allows you to control the creaminess.
  • Don't skip the egg wash! It's the secret to that beautiful golden, glossy crust. For an extra-sleek finish, you can also sprinkle a pinch of flaky sea salt (like Maldon) on the pastry right after brushing with egg wash – the salt crystals add a delightful crunch and a pop of flavor. If you prefer a lighter crust, you can use milk or cream instead of egg, but the color won't be as deep.
  • To prevent a soggy bottom, partially baking the puff pastry before assembling (as we do) is key. You can also place the casserole dish on a preheated baking sheet in the oven – the direct heat helps crisp the bottom of the pastry. Additionally, ensure the filling is not too watery; if using fresh vegetables, sauté them first to release excess moisture. Frozen vegetables are ideal because they are flash-frozen at peak freshness and have a consistent moisture content.
  • This casserole is incredibly forgiving – feel free to add other vegetables like diced potatoes (parboiled for 5 minutes), chopped mushrooms, or even spinach (stir in fresh spinach at the end of baking). For a heartier meal, stir in 1 cup of cooked rice or quinoa to the filling. The recipe can easily be doubled for a crowd; use a larger dish (like a 10×15-inch pan) and increase baking time by 5-10 minutes.

Variations

  • Gluten-Free Adaptation: Substitute the puff pastry with a gluten-free puff pastry (many brands are available, such as Schär or homemade using gluten-free flour blends). For the filling, use a gluten-free condensed cream of mushroom soup or make a gluten-free béchamel with a 1:1 gluten-free flour blend. Ensure all other ingredients (chicken broth, seasonings) are certified gluten-free. The baking times remain the same; just check the pastry for doneness as gluten-free versions may brown faster.
  • Dairy-Free & Vegan Version: Replace the condensed cream of mushroom soup with a can of coconut cream (full-fat) blended with 1 tablespoon cornstarch and 1 teaspoon mushroom bouillon. Use unsweetened oat milk or almond milk instead of whole milk. For the puff pastry, choose a vegan brand (most commercial puff pastries are vegan, but check labels – some contain butter). Use a vegan egg wash (mix 1 tablespoon maple syrup with 1 tablespoon plant milk). The filling will have a subtle coconut flavor, which pairs surprisingly well with the herbs and chicken (or use chickpeas for a vegan protein swap).
  • Cheesy Chicken Pot Pie Casserole: For extra indulgence, stir 1 cup of shredded sharp cheddar cheese or Gruyère into the filling before baking. The cheese will melt into the sauce, creating a rich, savory casserole. You can also sprinkle an additional 1/2 cup of cheese on top of the pastry during the last 5 minutes of baking for a bubbly, golden crust. This variation is especially popular with kids and adds a nice tangy contrast.
  • Herb & Lemon Twist: Brighten the flavor by adding the zest of one lemon and 2 tablespoons of fresh lemon juice to the filling, along with 1/4 cup of chopped fresh parsley and 2 tablespoons of fresh dill. This variation is perfect for spring and summer, cutting through the richness of the cream sauce. You can also swap the dried thyme and rosemary for 1 tablespoon of fresh tarragon – tarragon has a delicate anise-like flavor that complements chicken beautifully.

Nutrition

  • Calories385 kcal
  • Total Fat22g
  • Saturated Fat8g
  • Cholesterol75mg
  • Sodium620mg
  • Total Carbohydrates28g
  • Dietary Fiber3g
  • Sugars4g
  • Protein18g

Common Questions

Can I make this chicken pot pie casserole ahead of time?
Absolutely! You can assemble the entire casserole (without the baked puff pastry) up to 24 hours in advance. Prepare the filling, pour it into the baking dish, cover tightly with plastic wrap or foil, and refrigerate. When ready to bake, remove from the fridge, let sit at room temperature for 20 minutes, then top with the pre-baked puff pastry pieces and bake as directed. You may need to add 5-10 minutes to the baking time since the filling starts cold. Alternatively, you can bake the pastry separately and store it in an airtight container at room temperature for up to 2 days, then assemble and bake.
How do I store leftovers and reheat them?
Store any leftover casserole in an airtight container in the refrigerator for up to 4 days. To reheat, place individual portions on a microwave-safe plate and microwave in 30-second intervals until heated through (the pastry will soften, but still taste great). For a crispier reheated crust, place leftovers on a baking sheet in a 350°F oven for 10-15 minutes, or until the filling is bubbly and the pastry re-crisps. You can also reheat in an air fryer at 350°F for 5-7 minutes. Freezing is not recommended for the fully assembled casserole because the puff pastry becomes soggy upon thawing, but you can freeze the filling alone for up to 3 months and bake fresh pastry when ready.
Can I use homemade pie crust instead of puff pastry?
Yes, you can substitute a traditional double pie crust (top and bottom) for the puff pastry. If using a bottom crust, blind bake it for 10 minutes at 400°F before adding the filling to prevent sogginess. Then add the filling, top with the second crust, cut vents, and bake for 30-35 minutes until golden. Puff pastry gives a lighter, flakier texture, while pie crust offers a sturdier, more classic pot pie experience. Both are delicious!
What can I use instead of cream of mushroom soup?
You can use an equal amount of cream of chicken or cream of celery soup for a different flavor. For a homemade version, melt 4 tablespoons of butter, whisk in 4 tablespoons of all-purpose flour, and cook for 1 minute. Gradually whisk in 2 cups of whole milk and 1 cup of chicken broth. Cook until thickened, about 5 minutes, then season with salt, pepper, and herbs. This homemade sauce is lower in sodium and allows you to control the ingredients. You can also stir in 1/2 cup of sour cream or cream cheese for extra richness.
Can I add more vegetables or swap the protein?
Certainly! This recipe is very versatile. You can add diced potatoes (parboil for 5 minutes first), chopped mushrooms, bell peppers, or even broccoli florets. For a different protein, try shredded turkey (great for Thanksgiving leftovers), cooked diced ham, or even canned tuna (drained) for a tuna pot pie twist. For a vegetarian version, replace the chicken with 2 cans of drained chickpeas or 2 cups of cooked lentils, and use vegetable broth instead of chicken broth. The herbs and creamy sauce pair well with many ingredients.
Why is my puff pastry not puffing up?
Puff pastry relies on cold butter layers that create steam when baked, causing it to rise. Common reasons for poor puffing include: the pastry was too warm before baking (butter melted prematurely), the oven wasn’t hot enough (always preheat fully), or the pastry was pressed down too firmly. Make sure your puff pastry is thoroughly chilled (but not frozen) before baking, and handle it as little as possible. Also, do not skip the egg wash – it helps seal the edges and promotes even browning. If using a convection oven, reduce the temperature by 25°F to prevent over-browning.

Notes

This Chicken Pot Pie Casserole holds a special place in my heart because it’s the dish I turn to on busy weeknights when I need a comforting, no-fuss meal that feels like a hug in a bowl. Growing up, my grandmother made a traditional chicken pot pie from scratch, with a flaky double crust and a filling that simmered for hours. While I cherish those memories, I also understand that modern life demands efficiency. That’s why I developed this version – it captures all the creamy, savory goodness of the classic but uses clever shortcuts like rotisserie chicken and frozen vegetables to cut prep time dramatically. The real star here is the puff pastry topping: it bakes up into golden, buttery shards that contrast beautifully with the velvety filling. I love how the pastry absorbs just a bit of the sauce on the bottom while staying crisp on top, creating a textural symphony in every bite. This casserole is also a fantastic way to clean out the fridge – toss in leftover roasted vegetables, swap the chicken for turkey, or add a handful of spinach. It’s forgiving and adaptable, which is exactly what weeknight cooking should be. Serve it with a simple green salad dressed with lemon vinaigrette to cut the richness, or with crusty bread to soak up every last drop of sauce. I hope this recipe becomes a staple in your home, just as it has in mine. Happy cooking!

Easy Homemade Chicken Pot Pie Casserole Recipe

Easy Homemade Chicken Pot Pie Casserole Recipe
Chicken Pot Pie Casserole • Easy Dinner Recipes • 30-Minute Meals

⏱️ Prep: PT10M
🔥 Cook: PT20M
⏳ Total: PT30M
🍽️ Yield: 6 servings
⚡ Calories: 450 kcal
(284)
chicken pot pie casseroleeasy dinner recipes30-minute mealscasserole recipescomfort foodfamily dinnerbiscuit topping

This easy homemade chicken pot pie casserole combines tender chicken, mixed vegetables, and a creamy sauce all baked under a golden, flaky biscuit topping. It's a comforting 30-minute meal perfect…

Ingredients

Toggle: Metric / US

Instructions

Step 1

Preheat your oven to 375°F (190°C). While the oven is heating, lightly grease a 9×13-inch baking dish with nonstick cooking spray or a thin layer of butter. This step ensures that the creamy filling doesn’t stick to the dish, making serving easier and cleanup a breeze. If you want extra browning on the bottom, you can use a metal or ceramic dish; glass works too but may require an extra minute or two of baking. Set the prepared dish aside on a baking sheet (to catch any potential overflow from the bubbling filling).

Step 1 image
Step 2

In a large mixing bowl, combine the shredded cooked chicken, frozen mixed vegetables (no need to thaw them first—they will cook perfectly in the oven), condensed cream of chicken soup, whole milk, shredded cheddar cheese, garlic powder, onion powder, and black pepper. Stir everything together with a rubber spatula or wooden spoon until the mixture is uniformly combined. The soup acts as the base of the creamy sauce, while the milk thins it to the perfect consistency—not too thick, not too runny. The cheese adds richness and a savory depth that complements the chicken and vegetables. If you prefer a lower-sodium dish, you can omit the extra salt since the soup already contains a fair amount. Taste the filling at this point if you like (it’s safe to eat since the chicken is already cooked), and adjust seasonings accordingly. The mixture should be thick but spoonable; if it seems too stiff, add an extra tablespoon of milk.

Step 2 image
Step 3

Pour the chicken and vegetable mixture into the prepared baking dish, spreading it evenly with the spatula. Make sure the filling reaches all corners and is level, so that the biscuits bake uniformly on top. The filling should fill about 2/3 of the dish, leaving enough room for the biscuits to rise without overflowing. If you have extra filling, you can mound it slightly in the center—it will settle during baking.

Step 4

Open the can of refrigerated biscuit dough and separate the 8 biscuits. Arrange them evenly on top of the filling in a single layer. You can place them in a 2×4 grid pattern or scatter them randomly—just make sure they are not overlapping, as they need space to puff up and become golden. For a more rustic look, you can cut each biscuit in half and scatter the pieces, but whole biscuits give a more classic pot pie appearance. Press the biscuits down gently into the filling so they are about halfway submerged; this helps them absorb some of the creamy sauce and become extra tender on the bottom while staying flaky on top.

Step 5

Brush the tops of the biscuits with the melted butter using a pastry brush. This step is crucial for achieving that beautiful golden-brown, flaky crust. The butter also adds a subtle richness and helps the biscuits crisp up without burning. If you want extra flavor, you can mix a pinch of garlic powder or dried parsley into the melted butter before brushing.

Step 6

Place the baking dish in the preheated oven and bake for 20-25 minutes, or until the biscuits are golden brown and the filling is hot and bubbly around the edges. To check doneness, insert a knife into the center of the filling—it should come out hot to the touch. The internal temperature of the casserole should reach at least 165°F (74°C) for food safety. If the biscuits are browning too quickly but the filling isn’t bubbling yet, tent the dish loosely with aluminum foil for the last 5 minutes of baking. Every oven is different, so start checking at 18 minutes. The biscuits should be puffed and deep golden, and you may see a few spots of cheese peeking through. Let the casserole rest on a wire rack for 5-10 minutes before serving. This resting period allows the filling to set slightly, making it easier to scoop without turning into a soupy mess. The biscuits will also firm up a bit, giving you that perfect flaky texture.

Step 7

Scoop generous portions onto plates or into bowls, making sure each serving gets some biscuit and creamy filling. Garnish with fresh chopped parsley or thyme if desired for a pop of color and freshness. This casserole pairs beautifully with a simple green salad or steamed green beans. Leftovers can be stored in an airtight container in the refrigerator for up to 4 days. To reheat, microwave individual portions for 1-2 minutes or reheat in a 350°F oven for 10-15 minutes until warmed through. The biscuits may lose some crispness upon reheating, so for best results, reheat in the oven or an air fryer.

For best results

  • For the most flavorful filling, use a rotisserie chicken from the grocery store. The dark meat adds moisture and richness, and the skin can be removed and discarded or chopped and added for extra flavor. Alternatively, you can poach chicken breasts in seasoned broth: simply place boneless, skinless breasts in a pot, cover with chicken broth, add a bay leaf and peppercorns, bring to a boil, then simmer for 12-15 minutes until cooked through. Shred with two forks. This method infuses the chicken with savory flavor that elevates the entire dish.
  • Don’t skip the step of brushing the biscuits with melted butter. This not only promotes even browning but also creates a crispy, flaky top that contrasts beautifully with the creamy filling. For an extra golden sheen, you can brush the biscuits halfway through baking as well. If you’re dairy-free, use a plant-based butter or brush with olive oil mixed with a pinch of salt.
  • Frozen mixed vegetables are a convenient and cost-effective choice, but you can customize them based on what you have on hand. Try adding diced potatoes (parboiled first), chopped green beans, or even leftover roasted vegetables. If using fresh vegetables, blanch them briefly in boiling water for 2-3 minutes before adding to the filling to ensure they cook through in the 20-minute bake time.
  • To make this casserole even more budget-friendly, use homemade cream of chicken soup substitute: melt 2 tablespoons butter in a saucepan, whisk in 2 tablespoons all-purpose flour, cook for 1 minute, then gradually whisk in 1 cup chicken broth and 1/2 cup milk. Simmer until thickened, season with salt, pepper, and poultry seasoning. This yields about 1.5 cups, which is equivalent to one can. Not only does it taste fresher, but it also allows you to control the sodium content.
  • If you prefer a from-scratch biscuit topping, you can substitute the refrigerated dough with homemade drop biscuits. Combine 2 cups all-purpose flour, 1 tablespoon baking powder, 1/2 teaspoon salt, 1/4 cup cold butter (cut into small pieces), and 3/4 cup milk. Mix until just combined, then drop spoonfuls over the filling. Bake as directed; the biscuits may need an extra 2-3 minutes. This variation takes the casserole to the next level of homemade goodness.
  • Storage tip: This casserole freezes beautifully. Assemble the casserole in a freezer-safe dish (skip the biscuit topping), cover tightly with foil and plastic wrap, and freeze for up to 3 months. When ready to bake, thaw overnight in the refrigerator, then top with biscuits and bake as directed, adding 5-10 minutes to the baking time since the filling will be cold. Alternatively, you can bake the fully assembled casserole, let it cool completely, then freeze individual portions for quick lunches.

Variations

  • Vegetarian Version: Omit the chicken and replace it with 2 cups of cooked chickpeas or white beans (rinsed and drained) and 1 cup of sautéed mushrooms. The mushrooms add an umami depth that mimics the savory notes of chicken. Use cream of mushroom soup instead of chicken soup, or make a homemade béchamel with vegetable broth. The result is a hearty, satisfying meatless meal that even carnivores will enjoy.
  • Gluten-Free Adaptation: Use gluten-free condensed cream of chicken soup (or make your own using gluten-free flour blend) and gluten-free biscuit dough. Many brands offer gluten-free refrigerated biscuits, or you can make a simple gluten-free drop biscuit using a 1:1 gluten-free flour blend. Ensure all other ingredients (like shredded cheese) are certified gluten-free if needed. The texture will be slightly different but still delicious.
  • Spicy Southwest Twist: Add 1 teaspoon chili powder, 1/2 teaspoon cumin, and a 4-ounce can of diced green chiles to the filling. Swap the cheddar cheese for pepper jack, and top with sliced jalapeños before baking. Serve with a dollop of sour cream and fresh cilantro. This variation adds a kick that wakes up the classic comfort dish.
  • Crustless Pot Pie (Low-Carb/Keto): Skip the biscuit topping entirely and instead top the filling with a layer of shredded mozzarella or cheddar mixed with crushed pork rinds for a crunchy, low-carb crust. Alternatively, use a cauliflower mash topping: steam and mash 1 head of cauliflower with cream cheese and butter, spread over the filling, and broil until golden. This keeps the carb count low while maintaining the creamy, comforting essence.
  • Herb and Lemon Chicken Version: Add 1 tablespoon fresh lemon juice, 1 teaspoon lemon zest, and 1 tablespoon fresh chopped thyme or rosemary to the filling. Replace the cheddar with a milder cheese like mozzarella or provolone. The bright citrus and herbs cut through the richness and make the dish feel lighter, perfect for spring or summer dinners.
  • Casserole for a Crowd: Double all ingredients and bake in a 9×13-inch dish plus an 8×8-inch dish, or use a large roasting pan. You may need to increase the baking time by 5-10 minutes. For the biscuit topping, use two cans of biscuit dough and arrange them in overlapping rows. This is perfect for potlucks, holiday gatherings, or large family meals.

Nutrition

  • Calories450 kcal
  • Total Fat22g
  • Saturated Fat9g
  • Cholesterol75mg
  • Sodium980mg
  • Total Carbohydrates38g
  • Dietary Fiber3g
  • Sugars8g
  • Protein28g

Common Questions

Can I use chicken thighs instead of breasts?
Absolutely! Chicken thighs are even more flavorful and moist due to their higher fat content. Simply cook them until tender (about 20 minutes for boneless, skinless thighs) and shred or chop. Using thighs will make the filling richer and more succulent. You can also use a mix of white and dark meat for the best of both worlds.
How do I prevent the biscuits from getting soggy?
To avoid soggy biscuits, make sure your filling is thick enough before adding the biscuits. If the filling seems watery, you can stir in an additional tablespoon of flour or cook it on the stovetop for a few minutes to reduce. Also, pressing the biscuits lightly into the filling helps them absorb just enough moisture to become tender without turning mushy. Baking on a lower oven rack can also help the bottoms crisp up. If you’re reheating leftovers, use an oven or air fryer to restore crispness.
Can I make this casserole ahead of time?
Yes, you can assemble the casserole (without the biscuit topping) up to 24 hours in advance. Cover and refrigerate. When ready to bake, let it sit at room temperature for 20 minutes while the oven preheats, then add the biscuit topping and bake as directed, adding 5-10 minutes to the baking time since the filling will be cold. You can also freeze the fully baked casserole for up to 3 months; thaw overnight in the fridge and reheat in a 350°F oven until hot.
What can I use instead of cream of chicken soup?
You can substitute with an equal amount of cream of mushroom soup, cream of celery soup, or a homemade béchamel sauce. For a homemade version, melt 2 tablespoons butter, whisk in 2 tablespoons all-purpose flour, cook for 1 minute, then gradually add 1 cup chicken broth and 1/2 cup milk. Simmer until thickened, then season with salt, pepper, and a pinch of poultry seasoning. This yields a creamy, flavorful base without any canned soup.
Is this recipe freezer-friendly?
Yes, it freezes wonderfully. For best results, assemble the casserole without the biscuit topping, cover tightly with foil and plastic wrap, and freeze for up to 3 months. When ready to bake, thaw overnight in the refrigerator, then add the biscuit topping and bake as directed, adding 5-10 minutes. You can also freeze individual portions of the fully baked casserole in airtight containers for quick lunches. Reheat in the microwave or oven.
How can I make this recipe dairy-free?
To make it dairy-free, use a dairy-free condensed cream of chicken soup (or make a roux with dairy-free butter and unsweetened almond milk), dairy-free shredded cheese (such as vegan cheddar), and dairy-free biscuit dough (many brands are naturally dairy-free, or use a recipe with coconut oil). For brushing, use olive oil or melted dairy-free butter. The flavor will still be creamy and delicious.
Can I add extra vegetables?
Certainly! This recipe is very versatile. You can add diced celery, chopped broccoli florets (blanched first), sliced mushrooms, or even leftover roasted root vegetables. If adding extra vegetables, keep the total volume of filling similar to avoid overflowing the dish. You may need to adjust the seasoning slightly. For a heartier version, add 1 cup of cooked diced potatoes.
Why is my filling too runny after baking?
A runny filling usually results from too much liquid or not enough thickener. Make sure you are using condensed soup (not diluted) and measure the milk accurately. If the vegetables release a lot of water (especially if using fresh vegetables), you can cook them briefly to remove excess moisture before adding. To fix a runny casserole after baking, you can let it rest for 10-15 minutes—the filling will thicken as it cools slightly. Next time, add an extra tablespoon of flour or use a bit less milk.

Notes

This Easy Homemade Chicken Pot Pie Casserole has quickly become one of my most requested recipes, and for good reason. It’s the ultimate weeknight comfort food: creamy, savory, and topped with golden, flaky biscuits that soak up all that delicious sauce. I first developed this recipe on a chilly autumn evening when I craved the warmth of a traditional chicken pot pie but didn’t have the time (or patience) to make a from-scratch pie crust. The solution was simple: use refrigerated biscuit dough as a shortcut topping. To my delight, the biscuits turned out even better than a traditional crust—they’re tender on the inside, crispy on the edges, and they catch every bit of the luscious filling.This dish is a perfect example of how a few pantry staples can come together to create something truly special. The cream of chicken soup provides a velvety base, while the shredded cheddar adds a subtle tang and beautiful golden color. Frozen mixed vegetables are a lifesaver for busy cooks—they’re already chopped and blanched, so they cook perfectly in the oven without any extra prep. And the rotisserie chicken? It’s my secret weapon for adding deep, roasted flavor without any effort. I love that this casserole is forgiving enough to accommodate whatever ingredients you have on hand. Swap the chicken for turkey, use a different cheese, or add a handful of fresh herbs—it always turns out delicious.Serving suggestions: I like to serve this casserole with a simple side salad dressed with lemon vinaigrette to cut through the richness. Steamed green beans or roasted broccoli also make excellent accompaniments. For a truly comforting meal, pair it with a warm dinner roll and a glass of crisp white wine like Sauvignon Blanc. Leftovers are just as good the next day—I often pack them for lunch, and my coworkers always ask what I’m eating. The casserole also reheats beautifully in the oven or air fryer, restoring the biscuit’s flakiness.I hope this recipe brings as much joy to your table as it does to mine. Whether you’re cooking for a busy family, meal-prepping for the week, or simply craving a hug in a bowl, this chicken pot pie casserole delivers. Don’t forget to leave a comment and rating if you try it—I love hearing your variations and tips! Happy cooking!