
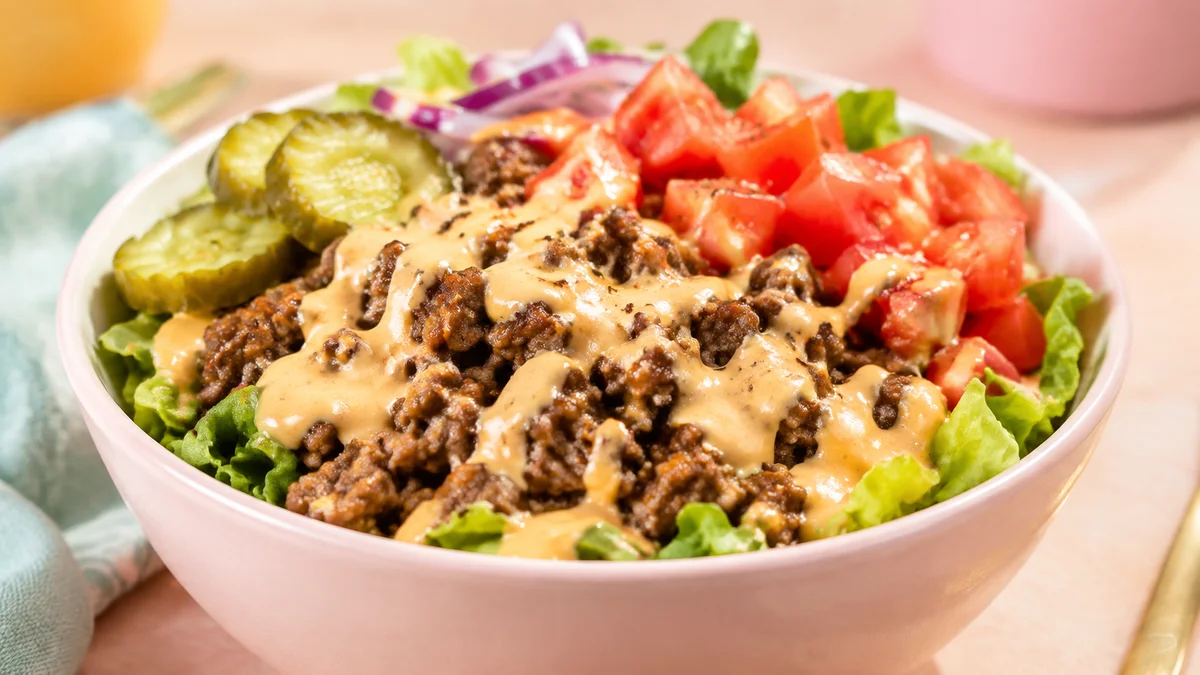
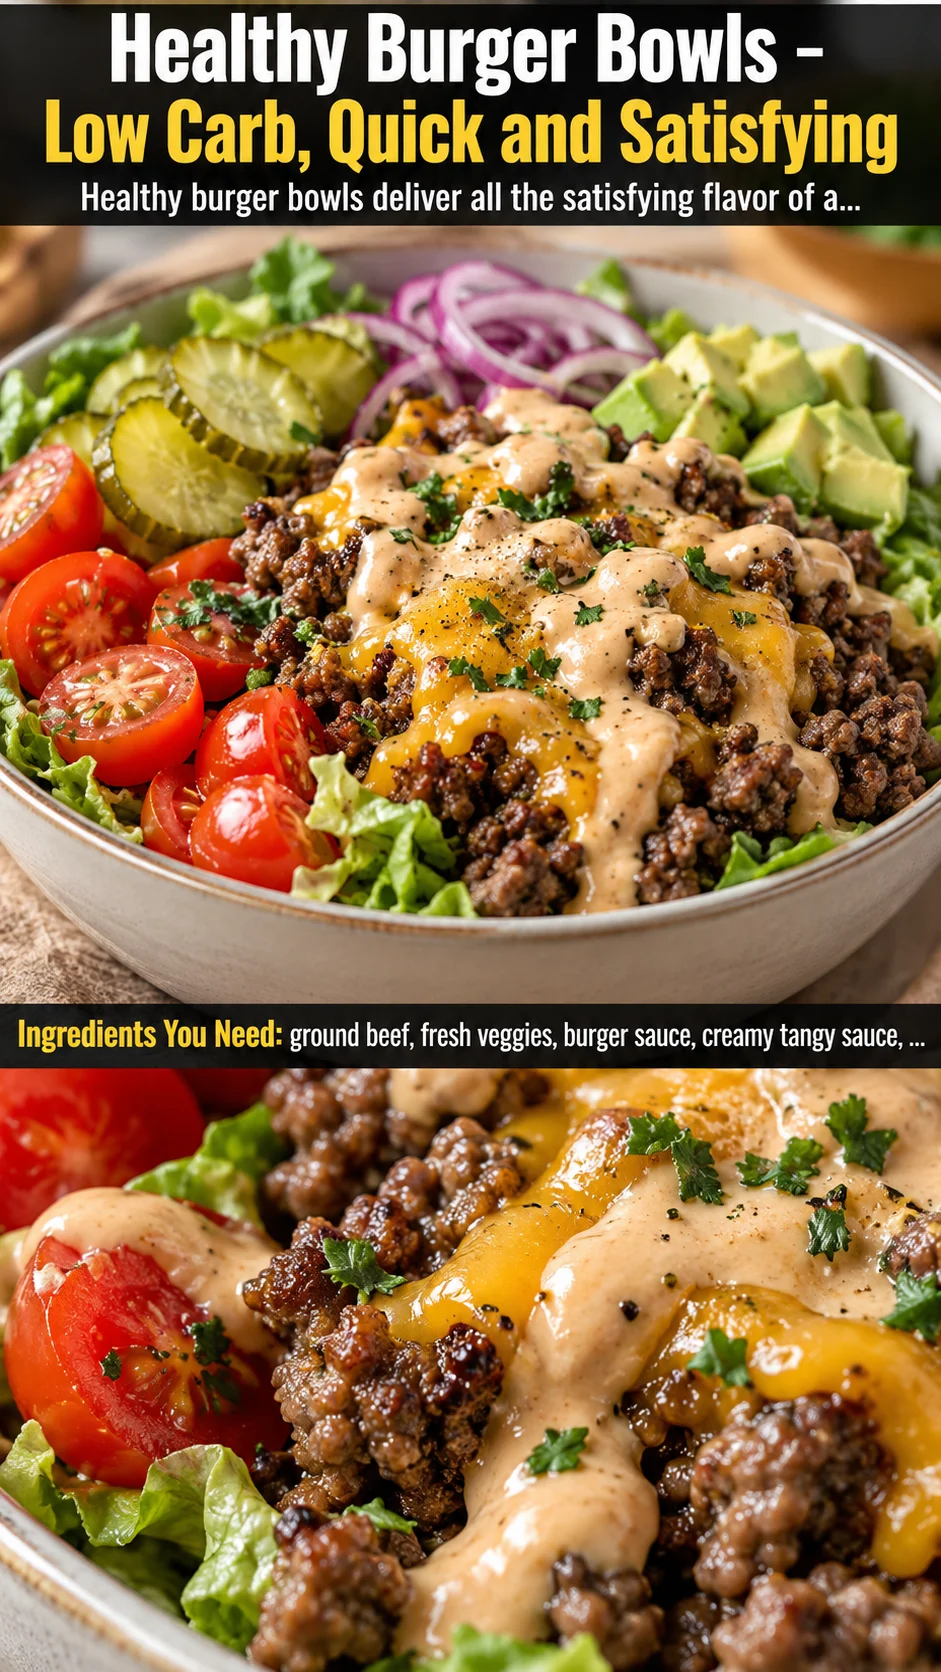
Healthy burger bowls ready in under 30 minutes! Juicy ground beef, crisp veggies, and creamy tangy burger sauce make a low-carb, high-protein dinner.
Ingredients
Instructions
Before you turn on a single burner, take five minutes to set up your station like a professional line cook. This ‘mise en place’ approach is the single biggest time-saver in any 30-minute recipe — it prevents the frantic mid-cook scrambling that leads to scorched beef and wilted lettuce. Pull out your largest skillet (a cast iron pan or a heavy stainless-steel skillet is ideal because it retains heat and delivers that gorgeous browned crust), a sharp chef’s knife, a large cutting board, a big mixing bowl for the lettuce, and a small bowl for the sauce. Bring your ground beef out of the fridge so it loses its icy chill, and measure your garlic powder, onion powder, smoked paprika, salt, and pepper into a tiny pinch bowl so you can season in one confident sweep. Wash and dry your romaine thoroughly — a salad spinner or clean kitchen towel works perfectly, because any lingering water will dilute your dressing and make the bowls soggy. If you’re short on time, you can absolutely pre-chop the lettuce, halve the tomatoes, and slice the onion up to 24 hours ahead and store them in airtight containers in the fridge. Good prep is quiet, calm, and organized — and it’s the difference between a stressful cook and a joyful one.
Whisk together the burger sauce first, because it needs a few minutes for the flavors to meld and it will hold beautifully in the fridge while you cook the beef. In a small bowl, combine 1/2 cup mayonnaise, 2 tablespoons ketchup, 2 tablespoons dill pickle relish, 1 tablespoon yellow mustard, 1 teaspoon apple cider vinegar, 1/4 teaspoon garlic powder, and a pinch each of kosher salt and freshly cracked black pepper. Whisk vigorously for about 30 seconds until the mixture turns a uniform, glossy pale pink-orange and ribbons off the whisk rather than plopping. Taste it right away — this is your chance to calibrate. If it tastes flat, add a few more drops of vinegar for brightness; if it’s too sharp, a touch more mayo; if it needs that signature burger-joint punch, a pinch more pickle relish. The apple cider vinegar is doing quiet but important work here: its acidity cuts through the richness of the beef and keeps the whole bowl feeling fresh instead of heavy. Set the sauce aside at room temperature (or in the fridge if your kitchen runs warm) and give it a stir right before serving. This sauce is the soul of the recipe — it’s essentially a deconstructed Big Mac sauce, and it transforms humble ground beef and lettuce into something you’ll genuinely crave.
Place your largest skillet over medium-high heat and let it get properly hot for a full 2 to 3 minutes before anything touches the pan. This preheat is non-negotiable: a cold pan steams ground beef into gray, rubbery crumbles, while a screaming-hot pan sears it into deeply browned, flavor-packed morsels through the Maillard reaction. Add 1 tablespoon of oil and swirl it to coat, then add the ground beef in an even layer. Resist the urge to stir immediately — let it sit undisturbed for 90 seconds so a brown crust can form on the underside. Then break it into bite-sized crumbles with a wooden spoon or spatula, continuing to cook and stir for 5 to 7 minutes until no pink remains and the meat is flecked with golden-brown bits. Now add the garlic powder, onion powder, smoked paprika, salt, and pepper directly over the beef and stir to coat every crumble evenly, cooking for another 30 to 60 seconds until the spices bloom and smell warm and toasty. Smoked paprika is the secret weapon here — it mimics that char-grilled, backyard-burger flavor without a grill. If a lot of fat has pooled, tilt the pan slightly and spoon off the excess, leaving just enough to keep everything juicy. The beef should look glossy, deeply seasoned, and smell irresistible.
While the beef browns, tackle your vegetables in parallel — this simultaneous tasking is the true secret to finishing in 30 minutes flat. Chop your romaine into ribbons about 1 inch wide and pile them into your large bowl. Halve the cherry tomatoes, thinly slice the red onion (a mandoline makes quick, uniform work if you have one), roughly chop the pickles, and slice the avocado last so it doesn’t brown before serving. As you work, keep an eye on the pan and give the beef an occasional stir. A few sensory cues will tell you the veggies are right: the lettuce should be crisp, cool, and completely dry to the touch, the tomatoes should be firm and glossy, and the onion should be thin enough to be slightly translucent at the edges. If you’re adding bacon, this is the moment to crisp it in a separate skillet or microwave between paper towels until it shatters when snapped, then crumble it and set it aside. Arrange your chopped produce in small separate piles or bowls so that when you build the bowls, everyone can customize their own — this is a huge win with picky eaters and helps the lettuce stay crisp instead of getting tossed and bruised with wet ingredients.
Now build the bowls, starting with a generous bed of crisp romaine — about 2 packed cups per serving. The lettuce acts as your bun replacement, so it needs to be plentiful enough to support everything piled on top without collapsing. Spoon a quarter of the warm seasoned ground beef over the greens. There’s something magical about the contrast of hot, savory beef against cool, crunchy lettuce; it wakes up all your senses and makes the bowl feel far more satisfying than a plain salad. Next, arrange the toppings in neat little sections around the perimeter of the bowl: halved cherry tomatoes for juicy sweetness, slivered red onion for a sharp bite, and chopped pickles for that essential briny tang. If you’re using cheese, scatter the shredded cheddar over the hot beef so it melts slightly into the crumbles — that gooey, savory moment is pure comfort. Add the sliced avocado and, if you like, a scattering of crumbled bacon and toasted sesame seeds. Don’t overthink the arrangement; rustic and colorful is the goal, and the varying shades of green, red, and gold make these bowls as beautiful as they are delicious.
Drizzle the creamy tangy burger sauce generously over each bowl — about 2 tablespoons per serving, or more if you’re a sauce devotee. For the most Instagram-worthy result, spoon the sauce into a small zip-top bag, snip the corner, and pipe it in a decorative zigzag across the top. This isn’t just for looks: distributing the sauce in thin ribbons ensures every single bite gets a hit of that creamy, tangy, slightly sweet flavor, rather than one lucky forkful getting all the sauce and the rest tasting dry. Finish with a final crack of black pepper and a light pinch of flaky sea salt over the avocado. Give the whole bowl a gentle toss just before eating, folding from the bottom up so the sauce coats everything without crushing the lettuce. The first bite should deliver a symphony of contrasts — juicy beef, creamy sauce, crisp greens, sharp onion, bright tomato, and briny pickle all in happy harmony. If you’ve made the bowls for meal prep, keep the sauce separate and add it right before serving so everything stays fresh.
Serve these burger bowls immediately while the beef is still warm and the lettuce is at peak crunch. If you’re feeding a family, set out all the toppings buffet-style and let everyone build their own — it turns dinner into a fun, interactive experience that even kids love. For meal prep, portion the lettuce, veggies, and beef into separate airtight containers and store the sauce in a small jar; this way the components stay at their best for up to 4 days in the refrigerator. When you’re ready to eat, simply reheat the beef for about 60 seconds in the microwave, then pile it over the cold, crisp veggies and drizzle on the sauce. Leftovers are best enjoyed within 3 days for optimal texture and food safety, and the beef should be reheated to steaming hot (165°F / 74°C). These bowls pair beautifully with sparkling water with lime, a light iced tea, or a crisp dry white wine, and they make a fantastic packed lunch that holds up better than you’d expect. Enjoy every last satisfying, guilt-free bite.
For best results
- Choose the right ground beef for your goals. An 80/20 blend (80% lean, 20% fat) gives you the juiciest, most flavorful crumbles because fat carries flavor and keeps the meat from drying out as it sears. If you're tracking macros tightly, an 85/15 or even 90/10 blend works beautifully — just add an extra drizzle of olive oil to the pan and don't overcook it. Grass-fed beef tends to be leaner and cook faster, so pull it off the heat about a minute earlier than you would conventional beef. Whatever you choose, buy it fresh from a busy butcher counter or grocery store where turnover is high, and use it within one to two days of purchase or freeze it right away for later.
- Dry your lettuce like it's your job. The number one reason homemade burger bowls turn out soggy and sad is residual water clinging to the greens. After washing, spin the romaine in a salad spinner, then lay it out on a clean kitchen towel and pat it completely dry. You can even roll it up in the towel and store it in the fridge for an hour before serving. Dry lettuce means the sauce clings to every leaf instead of sliding to the bottom of the bowl, and it keeps the whole dish crisp from the first bite to the last.
- Let the beef rest before you break it apart. When ground beef hits a hot pan, it needs contact time to develop that deep brown crust that gives it real burger flavor. If you stir it constantly from the moment it lands, you'll get pale, steamed, gray crumbles with none of that caramelized richness. Give it 90 seconds of undisturbed contact, then break it up. Also, season the meat after it's browned rather than before — salting raw ground beef too early can draw out moisture and prevent browning, so bloom your spices in the hot fat once the meat is cooked through.
- Balance your sauce like a chef. Great burger sauce is all about the push-and-pull of fat, acid, sweet, and savory. Start with the base recipe, then taste and adjust: more vinegar or pickle juice for tang, more ketchup for sweetness, more mustard for a savory kick, or a dash of hot sauce for heat. A tiny pinch of sugar can round out overly acidic flavors, while a squeeze of fresh lemon brightens the whole thing. Make a double batch and keep it in a jar in the fridge for up to two weeks — it's fantastic on grilled chicken, fries, roasted potatoes, and even as a dip for fresh veggies.
- Meal prep these bowls like a pro. The key to meal-prep burger bowls that actually taste good on day three is keeping wet and dry components separate. Store the cooked beef, chopped veggies, and sauce in individual containers, then assemble fresh each day. Sliced avocado will brown, so either leave it out of the prep and add it fresh, or coat the slices in a little lime juice and press plastic wrap directly onto their surface. This layered approach keeps the lettuce crisp, the beef juicy, and the sauce creamy, so lunch never feels like a sad afterthought.
- Don't skip the acid and the crunch. A burger without pickles and onion is missing its soul. The briny tang of dill pickles and the sharp bite of raw red onion are what make this bowl taste like an actual burger rather than a plain taco salad. If raw onion is too aggressive for you, soak the slices in ice water for 10 minutes to mellow their bite. And for crunch, consider adding a handful of crushed pork rinds, toasted almonds, or even a few baked cheese crisps — they mimic the toasty snap of a bun in the most low-carb-friendly way.
- Temperature contrast matters more than you think. The reason these bowls feel so satisfying is the interplay of hot and cold: warm, juicy beef against cool, crisp lettuce and chilled sauce. To maximize that effect, serve the beef straight from the pan and keep the veggies and sauce cold right up until assembly. If you're meal prepping, reheat only the beef and leave everything else refrigerated. This simple detail makes a huge difference in how crave-worthy the final bowl tastes.
- Watch your sodium and cheese if you're tracking nutrition. Ground beef, pickles, and cheese are all naturally salty, so taste before you add extra salt. If you're watching sodium, use a lower-sodium cheese, rinse your pickles, and season the beef with just the spices and a light pinch of salt. For a dairy-free version, swap the cheddar for a dairy-free shred or simply omit it — the creamy sauce already provides plenty of richness. Small swaps like these let you tailor the bowl to any dietary plan without sacrificing flavor.
Variations
- Classic Cheeseburger Bowl (the original comfort version): Keep everything as written but add a slice of melted American or sharp cheddar over the hot beef, and don't hold back on the pickles and onion. For an even more authentic diner feel, toast a few sesame seeds in a dry pan for 30 seconds and sprinkle them over the top — that nutty aroma instantly evokes a sesame-seed bun. Some cooks like to add a spoonful of caramelized onions for sweetness and depth; cook sliced onions low and slow in butter for 20 minutes until jammy, then pile them over the beef. This version is the closest thing to a drive-thru burger you can eat with a fork while still keeping it low-carb.
- Southwest Taco Burger Bowl: Swap the smoked paprika-heavy seasoning for a taco blend — cumin, chili powder, garlic powder, and a pinch of oregano — and use pepper jack cheese instead of cheddar. Replace the dill pickles with pickled jalapeños and add a scoop of pico de gallo, black beans, and a squeeze of fresh lime. Swap the burger sauce for a chipotle-lime crema made with mayo, sour cream, lime juice, and minced chipotle in adobo for a smoky, spicy finish. Top with crushed tortilla chips or toasted pepitas for crunch. This Tex-Mex twist is a fantastic way to use up leftover taco toppings and never fails to please a crowd.
- Mediterranean Burger Bowl: Season the beef with oregano, garlic, and a little lemon zest, then build the bowl over chopped romaine and cucumber with cherry tomatoes, sliced red onion, kalamata olives, and crumbled feta. Skip the cheddar and instead drizzle a lemony tahini-yogurt sauce (Greek yogurt, tahini, lemon juice, garlic, and a pinch of salt) or a simple tzatziki over the top. Add a handful of chickpeas for extra protein and fiber, and finish with fresh parsley and a squeeze of lemon. The briny, herby, bright flavors make this feel like a totally different meal while still using the same ground-beef foundation.
- Turkey or Chicken Burger Bowl: Swap the ground beef for ground turkey (93/7) or ground chicken for a leaner, lighter bowl. Because these meats are leaner and can dry out, add a tablespoon of olive oil to the pan and cook over medium-high heat just until no pink remains, being careful not to overcook. Season a touch more aggressively since poultry is milder, and consider adding a splash of Worcestershire sauce or a teaspoon of Dijon to the pan for depth. The result is a slightly lighter bowl that still delivers that burger satisfaction, perfect for anyone watching saturated fat or looking for a lower-calorie high-protein option.
- Keto and Whole30 Adaptations: For a strict keto version, use full-fat mayo and sugar-free ketchup in the sauce, skip any added sugar, and be generous with avocado and cheese for healthy fats. For Whole30, make your own mayo or use a compliant brand, replace the ketchup with a compliant tomato paste-based sauce, and omit the cheese entirely — add extra avocado and a sprinkle of nutritional yeast for a cheesy umami note. Both versions are naturally low-carb and packed with protein, so they fit beautifully into these popular eating plans without any sense of deprivation.
- Vegetarian Mushroom-Walnut Burger Bowl: For a meatless version that still satisfies, sauté cremini mushrooms and finely chopped walnuts with the same seasonings until deeply browned and savory, then use that mixture in place of the beef. A crumbled veggie burger or cooked lentils seasoned with smoked paprika and garlic also work wonderfully. Keep all the same fresh toppings and the creamy burger sauce — the contrast of earthy, savory crumbles with crisp veggies and tangy sauce is every bit as delicious, and no one will miss the meat.
- Bacon Ranch Burger Bowl: Crumble crisp bacon over each bowl and drizzle the beef with a creamy ranch dressing instead of (or in addition to) the burger sauce. Add halved cherry tomatoes, shredded cheddar, and a sprinkle of fresh chives. The smoky bacon and herby ranch turn this into a loaded, indulgent-feeling bowl while keeping the carb count impressively low. It's a brilliant way to use up leftover bacon from breakfast and adds just enough decadence to feel like a weekend treat.
Nutrition
- Calories430 kcal
- Total Fat32g
- Saturated Fat10g
- Cholesterol95mg
- Sodium620mg
- Total Carbohydrates12g
- Dietary Fiber4g
- Sugars6g
- Protein27g