
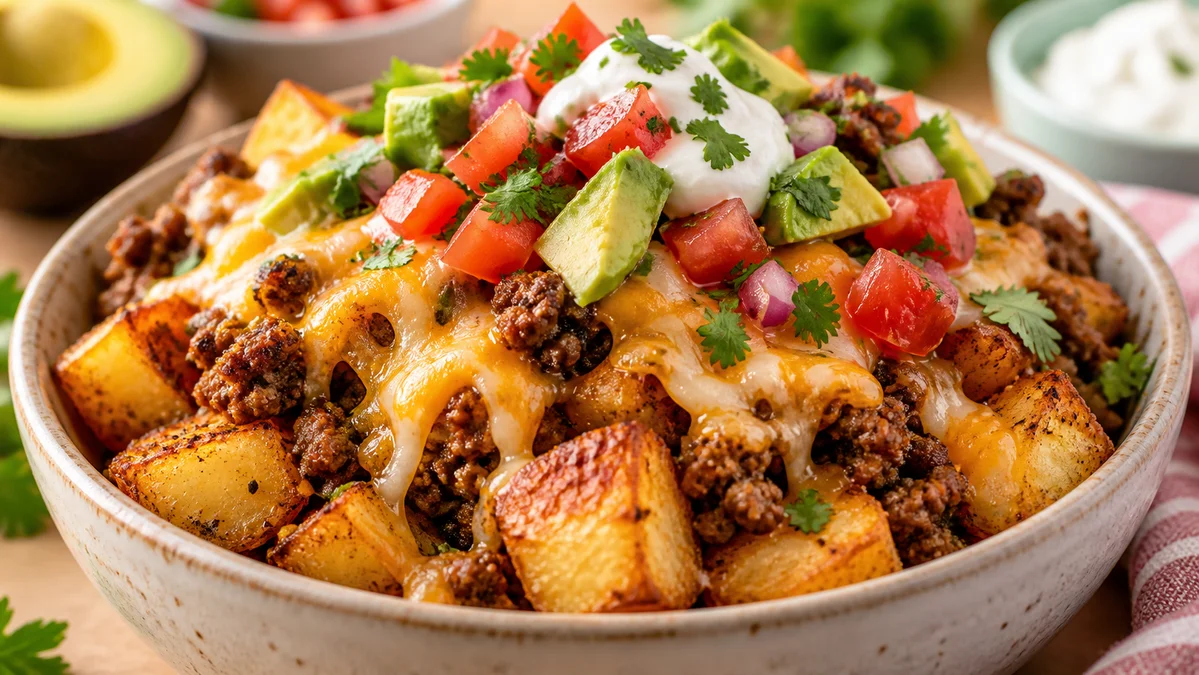
This loaded potato taco bowl is a cheesy, 30-minute weeknight dinner with crispy roasted potatoes, seasoned ground beef, and fresh toppings. Easy family meal!
Ingredients
Instructions
Start by preheating your oven to 425°F (220°C) and setting a rack in the upper-middle position. While it heats, gather every ingredient on the counter so nothing gets forgotten mid-cook — this is the single biggest reason weeknight dinners go sideways. Scrub your russet potatoes under cool running water (no need to peel; the skin is where a lot of the fiber and all of that rustic crispiness lives), then pat them bone-dry with a clean kitchen towel. Water is the enemy of browning, so dryness here directly translates to crunch later. Cut the potatoes into uniform 3/4-inch cubes — roughly the size of a dice — so they roast at the same rate. Any piece that is noticeably smaller will burn before its neighbors are tender, so take the extra two minutes to even them out. Place the cubes in a large bowl and drizzle with 2 tablespoons of the olive oil. Add the smoked paprika, garlic powder, onion powder, cumin, 3/4 teaspoon of the kosher salt, and the black pepper. Toss with your hands or a spatula until every cube wears an even, rusty-red coat. If you have a moment, let them sit for five minutes so the spices bloom into the oil — you will smell the difference immediately, a warm, smoky, almost sweet aroma that signals the seasoning has woken up.
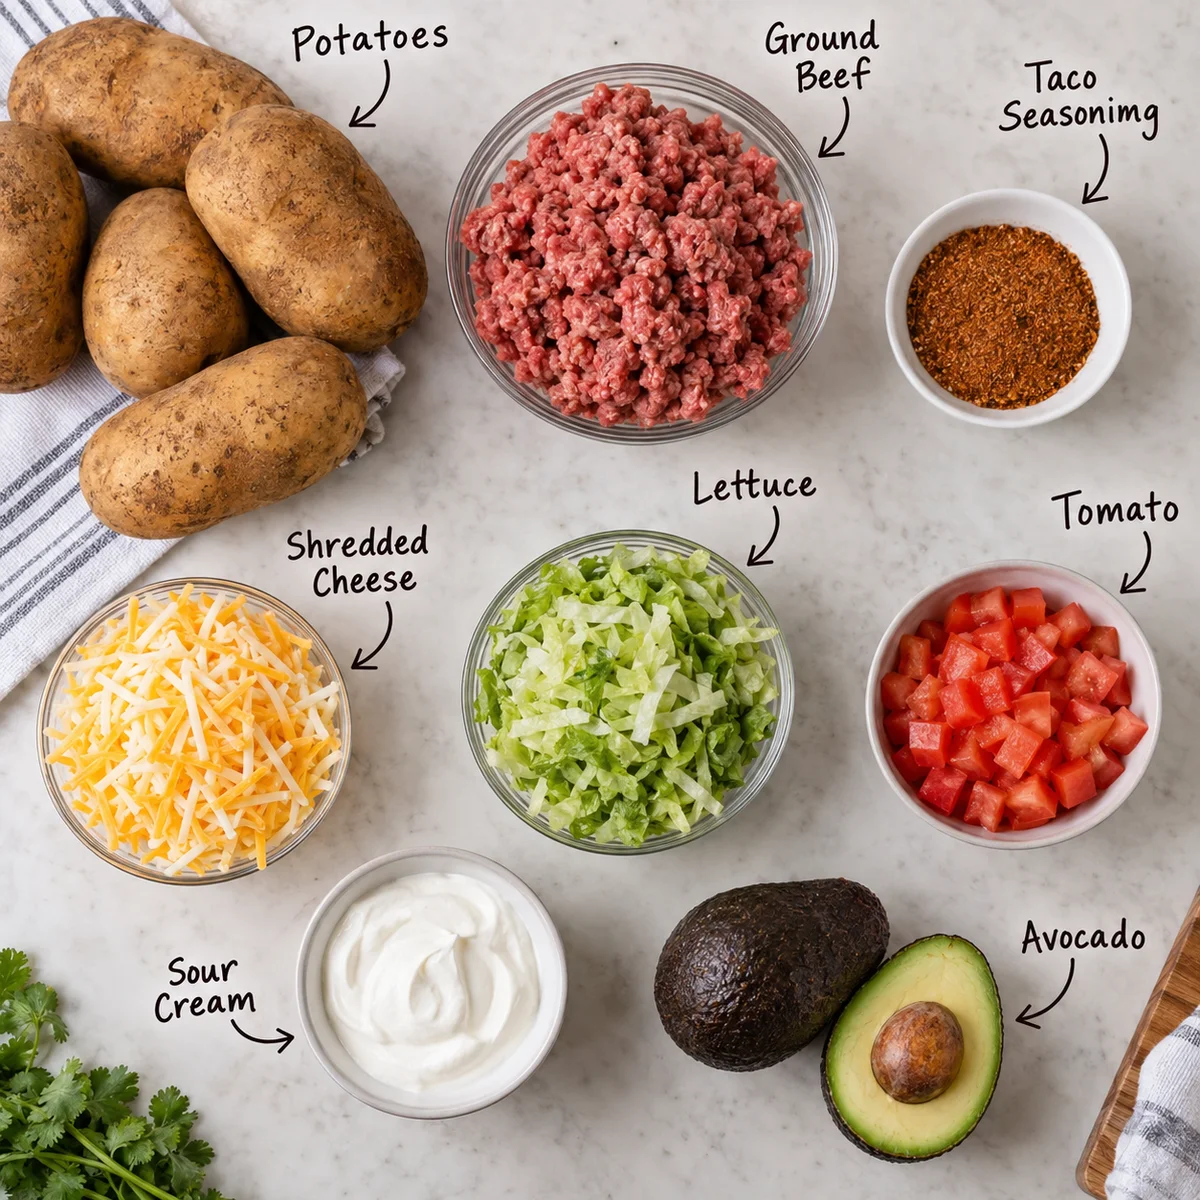
Spread the seasoned potatoes onto a large rimmed sheet pan in a single, uncrowded layer, flat-side down where possible. Crowding is the classic mistake: when potatoes touch, they steam instead of roast, and you end up with pale, soft cubes rather than golden shards with crackly edges. If your pan is looking full, use two pans — the extra pan in the oven costs you nothing and saves the entire dish. Slide the pan into the hot oven and set a timer for 15 minutes. At the 15-minute mark, pull the pan out, close the oven door to keep the heat in, and use a thin metal spatula to flip and shuffle the cubes. You are looking for the undersides to be deeply golden with a few dark, caramelized freckles. Rotate the pan 180 degrees, return it to the oven, and roast another 12 to 15 minutes, until the cubes are crisp-edged and a knife slides through the center with zero resistance. Total roast time lands around 27 to 30 minutes, but trust your eyes and your fork over the clock — every oven runs a little hot or cold.

While the potatoes roast, heat the remaining 1 tablespoon of olive oil in a large skillet over medium-high heat. Add the diced onion and cook for 3 to 4 minutes, stirring occasionally, until the pieces turn translucent and just begin to pick up color at the edges. Push the onion to one side and add the ground beef, breaking it into chunks with a wooden spoon. Let it sit undisturbed for a full 60 to 90 seconds before you stir — that untouched contact with the hot pan is what creates the browned, savory crust that gives the whole bowl its backbone of flavor. Then break the meat apart and cook for another 4 to 5 minutes, until no pink remains and the crumbles are nicely seared. Carefully tip the pan and spoon off any excess rendered fat, leaving about a tablespoon behind to carry the spices.
Sprinkle the taco seasoning over the beef and onion, stirring constantly for about 30 seconds so the spices toast against the hot pan. Toasting is the small step that separates flat, dusty-tasting taco meat from the deeply seasoned kind you get at a good taqueria. Pour in the beef broth or water and scrape the bottom of the pan with your spoon to lift up every browned bit — those stuck-on fragments are pure concentrated flavor. Simmer for 3 to 4 minutes, until the liquid has mostly cooked off and the meat looks glossy and juicy rather than wet or soupy. Taste a spoonful and adjust with a pinch of salt or a splash more broth. Turn the heat to low, cover, and keep warm until the potatoes are done. Meanwhile, warm the drained black beans in a small saucepan over low heat with a pinch of salt and a splash of water, or simply microwave them for 90 seconds, covered.
Now comes the assembly, and this is where a taco bowl becomes a loaded taco bowl. Divide the hot, crispy roasted potatoes among four wide, shallow bowls — a broad bowl beats a deep one because it lets you spread the toppings into layers instead of burying them. Add a scoop of the seasoned beef, then a spoonful of warm black beans alongside it. Scatter the shredded cheese over the hot beef and beans and give it 30 to 60 seconds before adding anything cold; the residual heat will melt it into a gooey, stretchy blanket. If your cheese needs a nudge, zap the bowl in the microwave for 20 seconds, or run the whole line of bowls under a broiler for 45 seconds — just watch them, because the broiler moves from perfect to burnt in a blink. Only once the cheese is glossy and melted should you move on to the fresh toppings.
Finish each bowl with the cool, crunchy elements that balance all that richness: a tumble of shredded romaine, a handful of halved cherry tomatoes, a fan of sliced avocado, and a generous dollop of sour cream. Add pickled jalapenos for heat, chopped cilantro for brightness, and a scatter of crushed tortilla chips if you want an extra layer of crunch. Squeeze a lime wedge over the top of each bowl right before serving — that hit of acid is not optional in my kitchen, because it lifts the smoky, heavy flavors and makes the whole bowl taste fresher and lighter. Serve immediately, while the potatoes are still crisp at the edges and the cheese is at maximum pull. Leftovers keep in an airtight container in the refrigerator for up to 3 days; store the potatoes separately from the fresh toppings and reheat them in a hot skillet or air fryer rather than the microwave so they stay crisp.
For best results
- Choose the right potato and treat it right. Russets (also sold as Idaho or baking potatoes) are the gold standard here because their high starch content turns fluffy and mealy inside while the exterior crisps into a shattering shell. Waxy potatoes like red or Yukon Gold will work in a pinch, but they hold more moisture and tend to come out denser and less crunchy. Whatever you buy, scrub rather than peel — the skin crisps beautifully and adds fiber — and dry the cubes thoroughly. If you have 10 spare minutes, soak the cubes in cold water for 8 minutes, drain, and dry; this rinses away surface starch, which keeps the potatoes from sticking together and gives you an even crispier finish. This is the one trick that consistently upgrades roasted potatoes from good to restaurant-level.
- Season in layers, not in one dump. The potatoes get their own spice blend before roasting, the beef gets taco seasoning toasted in the pan, and the beans get a pinch of salt and a splash of water. That layering means every bite tastes seasoned instead of relying on a single sauce to carry the whole bowl. If you only have a packet of taco seasoning, use half of it on the potatoes mixed with a teaspoon of oil, and the rest on the beef. Your spice cabinet does the work of three separate recipes for pennies per serving, which is exactly why this bowl slips so comfortably under a $10 family-dinner budget.
- The cheese-melting window matters more than you think. Shred your own block cheese if you can — pre-shredded bags are dusted with potato starch and cellulose to stop clumping, and those additives make it melt into a grainy, oily puddle instead of a smooth, gooey blanket. Sharp cheddar, Monterey Jack, Oaxaca, or a Mexican blend all work. Add the cheese only to the hot meat-and-bean layer, never on top of cold lettuce or tomatoes, and give it a moment to slump and shine. A quick 20-second microwave blast or 45 seconds under a broiler turns a good bowl into a great one, but stay close — broilers do not forgive distraction.
- Build a toppings bar for picky eaters. One of the quiet superpowers of this recipe is that it is endlessly customizable at the table. Set out the lettuce, tomatoes, avocado, sour cream, cilantro, jalapenos, and hot sauce in small bowls and let everyone assemble their own. Kids can skip the jalapenos and go heavy on cheese; heat-lovers can pile on the pickled chilies; someone watching their intake can double the lettuce and avocado and skip the sour cream. This format also means you can stretch the recipe to feed five or six people without adding much cost, because the toppings do a lot of the filling work.
- Make the components ahead for true 15-minute weeknights. The roasted potatoes, cooked taco beef, and warmed beans all hold beautifully in the refrigerator for up to 3 days. On a frantic Tuesday, reheat the potatoes in a 400°F air fryer for 5 to 7 minutes (they come back surprisingly crisp), warm the beef and beans in a skillet, and you have dinner on the table in the time it takes to chop a tomato. This is meal-prep that does not feel like sad, soggy containers of the same thing five days running — it feels like a fresh, made-to-order bowl because you assemble it hot and cold at the very end.
- Do not fear the fat, but do control it. Ground beef at 85% lean gives you enough fat to brown properly and stay juicy without leaving a pool of grease in the bowl. If you use 90% or 93% lean, add an extra drizzle of olive oil to the pan or the meat will steam rather than sear, and the seasoning will taste thin. Conversely, if you are draining a lot of fat from 80% lean beef, leave a tablespoon behind — fat carries flavor, and a completely dry pan means a dusty, bland taco meat. Balance is the whole game here.
- Save your scraps and stretch your dollar. Potato peels, onion skins, and the woody stems of cilantro can all go into a freezer bag for a future batch of vegetable stock. Leftover taco beef is stellar folded into quesadillas, spooned over nachos, or scrambled into eggs the next morning. Overripe avocado can be mashed with lime and salt into a quick guacamole for tomorrow's lunch. This kind of zero-waste thinking is how a single pot of groceries quietly turns into three or four meals, which is the entire philosophy behind feeding a family well on a small budget.
- Balance heat, acid, and fat deliberately. A great taco bowl is not just a pile of delicious things — it is a composition. The potatoes bring crunch and starch, the beef brings savory depth, the cheese and sour cream bring richness, and the lime, cilantro, and pickled jalapenos bring acid and brightness to cut through all of it. If your bowl tastes heavy or flat, it is almost always missing acid. A squeeze of lime, a spoonful of salsa verde, or a splash of vinegar-based hot sauce will snap everything back into focus. Taste as you build, and adjust before you serve.
Variations
- High-protein ground beef taco bowl: This is the version my fitness-minded readers ask for most. Swap the 85% lean beef for 93% lean ground beef or ground turkey breast and add a half-cup of extra black beans or a scoop of Greek yogurt in place of sour cream to push the protein past 40 grams per bowl. Use a light hand with the cheese (or choose a reduced-fat blend) and lean harder on the avocado for satiating healthy fat. If you are tracking macros, weigh your potatoes and cheese — those are the two ingredients that swing the calorie count most. The finished bowl stays deeply satisfying because the potatoes are so filling, and it proves that high-protein eating does not require giving up comfort food.
- Vegetarian and vegan loaded potato bowl: Skip the beef entirely and build the bowl around seasoned black beans, pinto beans, or a crumble of cooked lentils mixed with taco seasoning and a splash of broth. Saute the lentils or beans with onion and a teaspoon of smoked paprika so they get that same savory, toasted depth. For the dairy-free version, use a dairy-free shredded cheese or a dollop of cashew crema, and swap the sour cream for a thinned, lime-spiked plant-based yogurt. Double the avocado for richness, and finish with plenty of salsa and pickled jalapenos. The potatoes do not care what is sitting next to them — they will still be golden, crisp, and completely crave-worthy.
- Sweet potato and black bean variation: Roast cubed sweet potatoes instead of russets using the same spice blend, though you may want to add an extra pinch of chili powder and a little cinnamon for warmth. Sweet potatoes roast a bit faster and caramelize more aggressively, so start checking at 20 minutes. Pair them with black beans, crumbled feta or cotija, red onion, and a bright chipotle-lime crema. This version leans a touch sweeter and more autumnal, and it is fantastic with roasted corn folded in. It is also a beautiful bowl — the orange, black, and white against green cilantro makes a striking photo that performs well on Pinterest.
- Chipotle and smoky adobo twist: For a deeper, smokier bowl, add one minced chipotle pepper in adobo plus a teaspoon of the sauce to the beef while it simmers. The adobo brings heat, a subtle sweetness, and that unmistakable smoky depth that resonates with everything from the cumin in the potatoes to the lime at the finish. Balance it with an extra squeeze of lime and a little more sour cream, because chipotle is potent. You can also stir a spoonful of adobo into the sour cream to make a quick smoky crema that drizzles beautifully over the top. Start with half a pepper if you are heat-shy — you can always add more, but you cannot take it back out.
- Air fryer and sheet-pan-dinner adaptations: If you have an air fryer, roast the potatoes at 400°F for 18 to 22 minutes, shaking the basket halfway, and you will get an even crispier exterior with a fraction of the oil and heat in your kitchen. You can also go full sheet-pan-dinner and roast the potatoes on one side of a large pan while the seasoned beef-and-bean mixture bakes on the other, cutting your active cooking time to about 10 minutes. Either route keeps the spirit of the recipe intact: crispy potatoes, savory taco-spiced protein, and a pile of fresh, cool toppings added at the very end so nothing turns soggy.
- Beef swap options for every budget and pantry: Ground pork, ground chicken, or ground bison all substitute one-for-one for the beef, as does a 50/50 blend of beef and cooked lentils to stretch the meat and lower the cost per serving. Shredded leftover chicken or pulled pork from a weekend cook works beautifully — just warm it with a splash of broth and the taco seasoning. Canned or frozen corn, diced zucchini roasted alongside the potatoes, or a handful of crushed tortilla chips can all fill out the bowl if you are running low on meat. This is one of those forgiving recipes that rewards improvisation rather than punishing it.
Nutrition
- Calories638 kcal
- Total Fat34g
- Saturated Fat13g
- Cholesterol86mg
- Sodium790mg
- Total Carbohydrates49g
- Dietary Fiber9g
- Sugars6g
- Protein33g