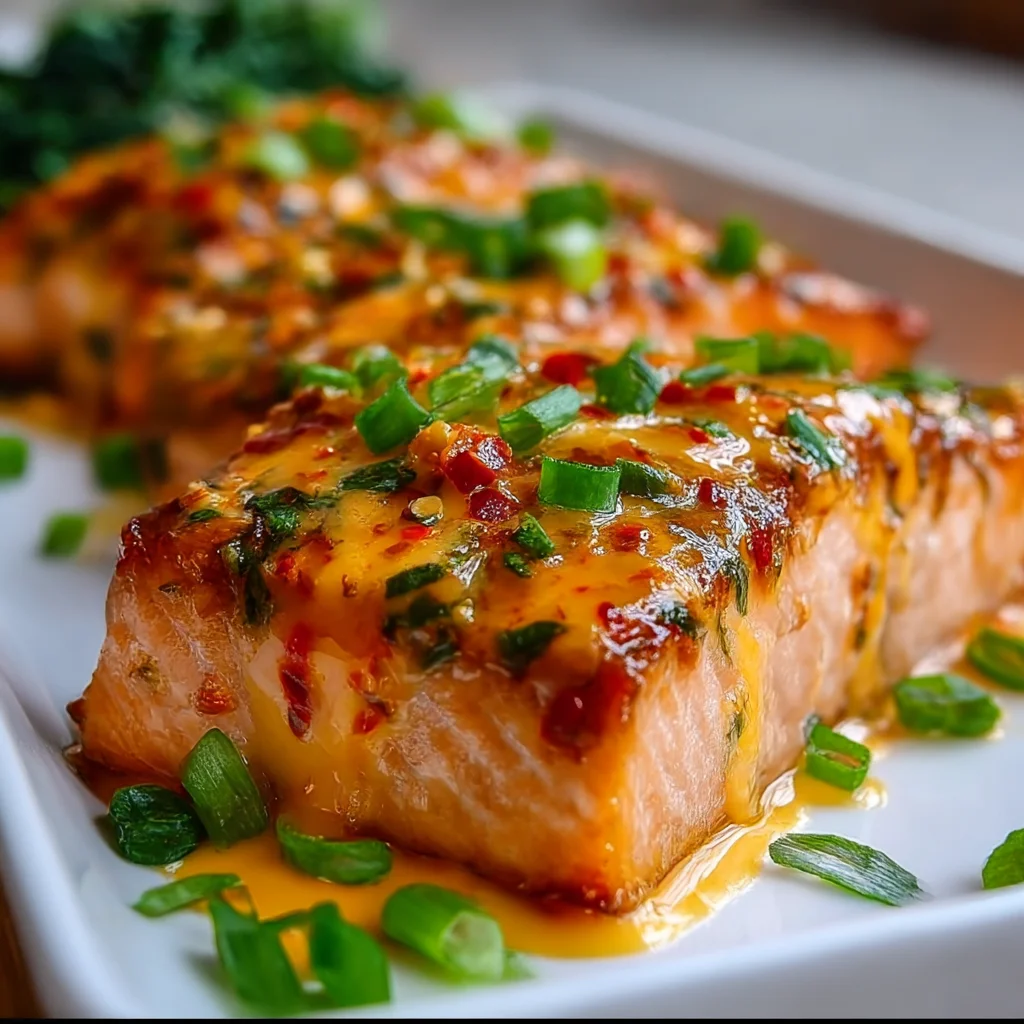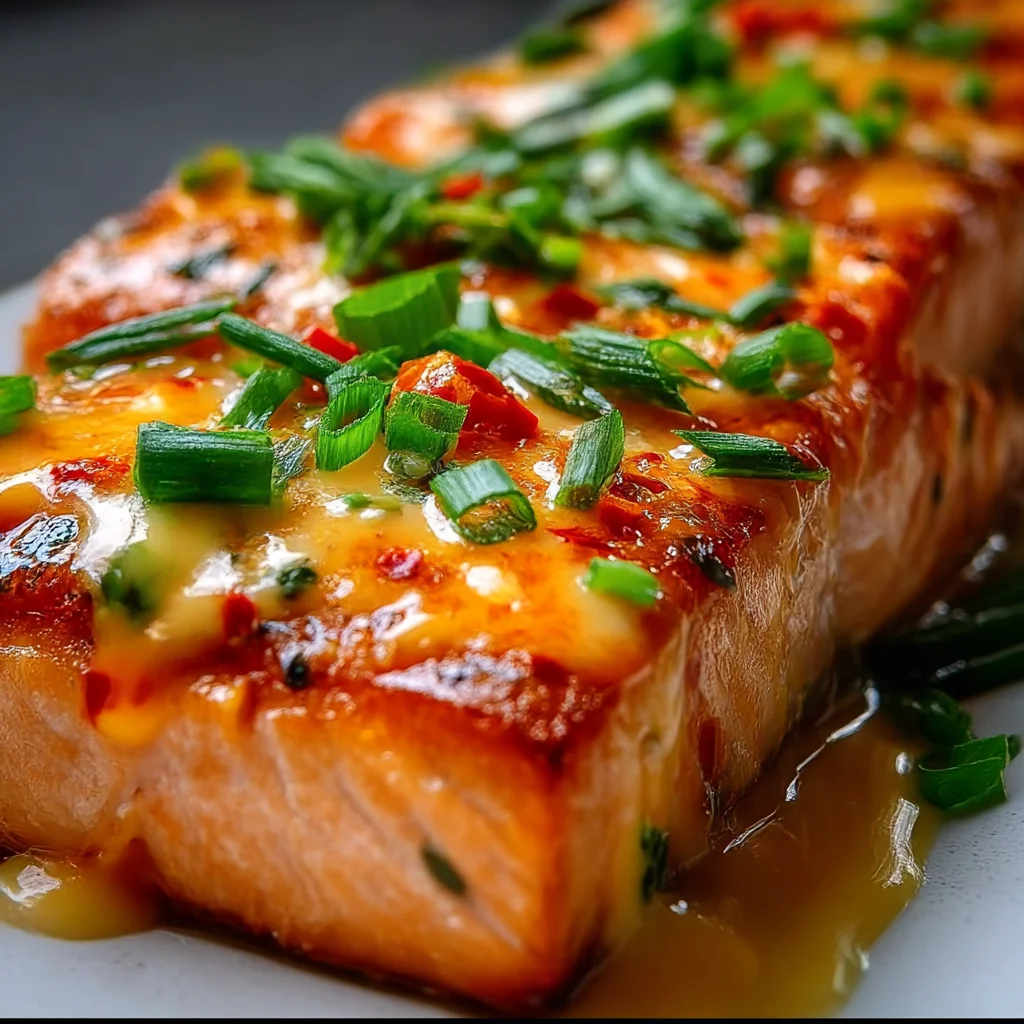
This baked Bang Bang Salmon is a quick high-protein dinner with a spicy sriracha honey glaze. Ready in 25 minutes, it's perfect for busy weeknights!
Ingredients
Instructions
Preheat your oven to 400°F (200°C). Line a baking sheet with parchment paper or aluminum foil for easy cleanup. Pat the salmon fillets dry with paper towels—this removes excess moisture and helps the glaze adhere better. Place the fillets skin-side down (if using skin-on) on the prepared baking sheet, spacing them evenly to allow hot air to circulate, which ensures even cooking. Season lightly with salt and pepper; remember that the glaze will add saltiness from the soy sauce, so go easy.
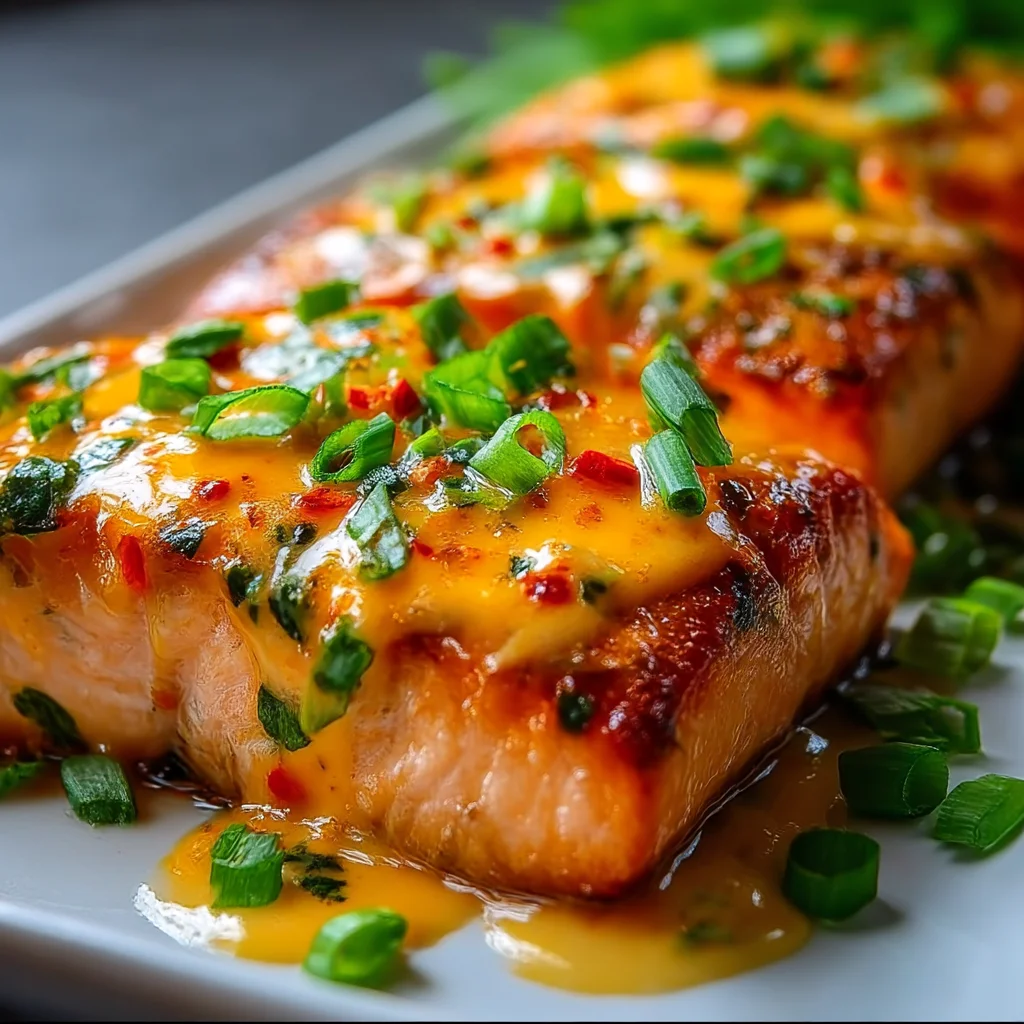
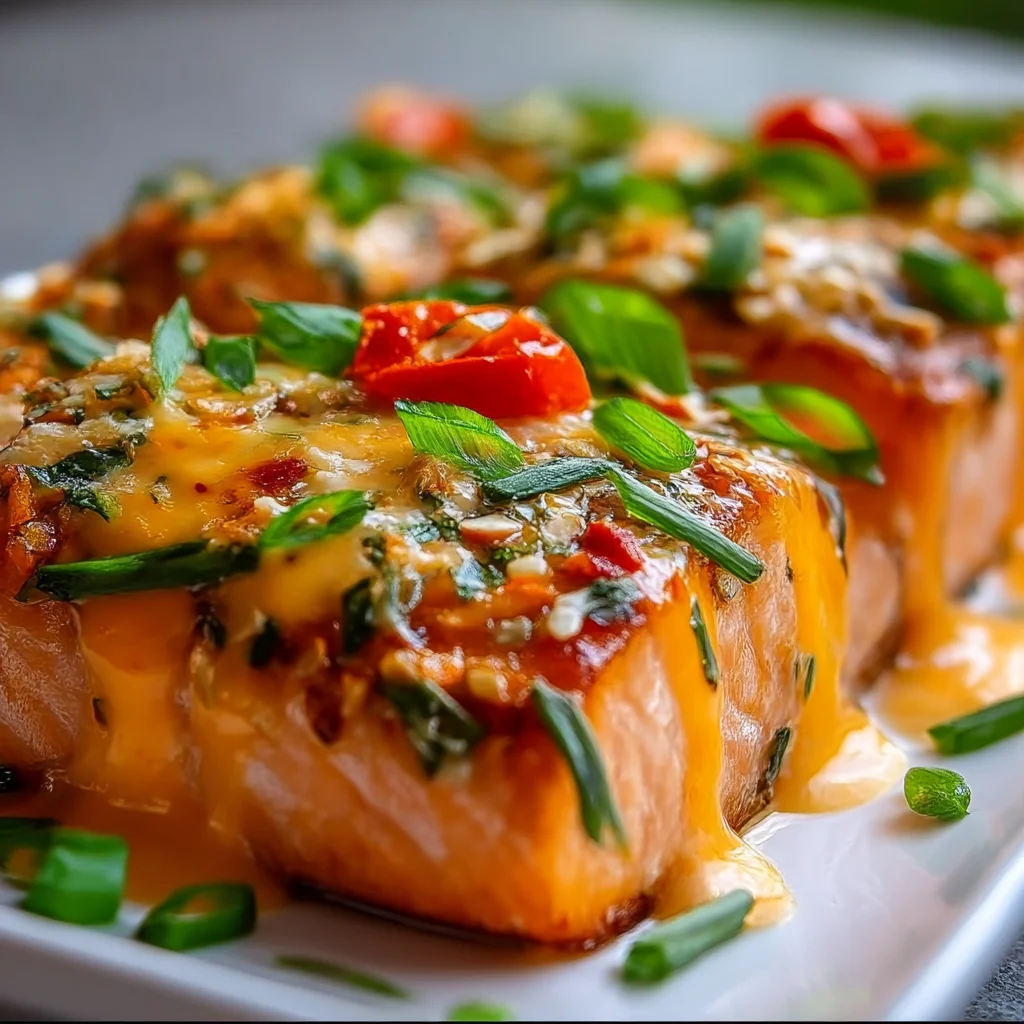
In a small bowl, whisk together the mayonnaise, sriracha, honey, minced garlic, soy sauce, sesame oil, and rice vinegar until smooth. The mixture should be a vibrant orange-red with a creamy consistency. Taste and adjust: if you prefer more heat, add extra sriracha; if you like it sweeter, add a bit more honey. This bang bang sauce is the star of the dish—it’s creamy, spicy, sweet, and tangy all at once.

Spoon the sauce generously over each salmon fillet, using a brush or the back of a spoon to spread it evenly over the top and sides. Don’t worry if some sauce pools around the fillets; it will caramelize beautifully in the oven. Reserve a little sauce for drizzling after baking if desired.
Bake the salmon for 12–15 minutes, depending on the thickness of your fillets. The salmon is done when it flakes easily with a fork and the internal temperature reaches 145°F (63°C) at the thickest part. For a slightly caramelized top, you can switch the oven to broil for the last 1–2 minutes, watching carefully to prevent burning. The sauce will bubble and darken, creating sticky, golden edges.
Remove from the oven and let the salmon rest for 2–3 minutes. This allows the juices to redistribute. Garnish with sliced green onions and sesame seeds if using. Serve immediately with steamed rice, quinoa, or a crisp green salad. Drizzle any remaining sauce over the top for extra flavor. Enjoy the perfect balance of spicy, sweet, and savory in every bite!
For best results
- For the best texture, choose salmon fillets that are about 1-inch thick. Thinner fillets will cook faster, so adjust the baking time accordingly. If using frozen salmon, thaw it completely in the refrigerator overnight and pat dry very well before seasoning. Excess moisture can prevent the sauce from sticking and lead to steaming instead of roasting, which affects the caramelization.
- Make the bang bang sauce ahead of time! You can prepare it up to 3 days in advance and store it in an airtight container in the fridge. This makes weeknight dinner assembly even faster. Just give it a good stir before using, as the ingredients may separate slightly.
- If you prefer a lighter version, substitute the mayonnaise with Greek yogurt. The sauce will be tangier and slightly less creamy, but still delicious. For a dairy-free option, use vegan mayonnaise or a blend of olive oil and Dijon mustard. Note that the texture and browning may vary slightly.
- To get perfectly flaky salmon every time, avoid overbaking. Start checking for doneness at the 10-minute mark. The fish should be opaque and just beginning to flake when pressed gently with a fork. Remember that carryover cooking will continue after removal from the oven, so it's better to undercook slightly than overcook.
- Line your baking sheet with parchment paper or foil for the easiest cleanup. The sauce can caramelize and stick to the pan, making scrubbing a chore. If using foil, lightly spray it with cooking spray to prevent sticking. You can also use a silicone baking mat, which is reusable and non-stick.
- Double the sauce recipe if you love extra for drizzling over rice or vegetables. The sauce is also fantastic as a dip for spring rolls, chicken tenders, or roasted veggies. Store leftover sauce in the fridge for up to a week and use it as a quick dressing or marinade.
Variations
- For a low-carb or keto-friendly meal, serve the salmon over cauliflower rice or a bed of sautéed spinach. The bang bang sauce is naturally low in carbs (honey adds a small amount), making this a great option for those watching their carbohydrate intake. You can also reduce the honey to 1 tablespoon and add a pinch of stevia if desired.
- Make it a sheet pan dinner by adding vegetables like broccoli florets, asparagus spears, or bell pepper strips to the baking sheet. Toss the veggies with a little olive oil, salt, and pepper, and arrange them around the salmon. Roast everything together—the vegetables will soak up some of the spicy sauce as it cooks. Add the veggies halfway through if they need less time.
- Swap the salmon for other proteins: chicken thighs or breasts work beautifully (adjust cooking time to 20–25 minutes at 400°F), or use firm tofu for a vegetarian version. For tofu, press it dry, cut into slabs, and bake for 20 minutes after coating with sauce. Shrimp is another quick option—bake for 8–10 minutes until pink.
- Turn up the heat by adding 1 teaspoon of chili flakes or a dash of cayenne pepper to the sauce. Alternatively, use gochujang (Korean chili paste) in place of sriracha for a deeper, fermented spice. For a milder version, reduce sriracha to 1 tablespoon and add 1 tablespoon of ketchup for sweetness and color.
- Add a tropical twist by mixing 1 tablespoon of coconut cream into the sauce and topping the finished salmon with fresh mango salsa (diced mango, red onion, cilantro, lime juice). The sweetness of the mango complements the spicy sauce perfectly. Serve with coconut rice for an island-inspired meal.
Nutrition
- Calories420 kcal
- Total Fat24g
- Saturated Fat4g
- Cholesterol95mg
- Sodium680mg
- Total Carbohydrates12g
- Dietary Fiber0g
- Sugars10g
- Protein38g