
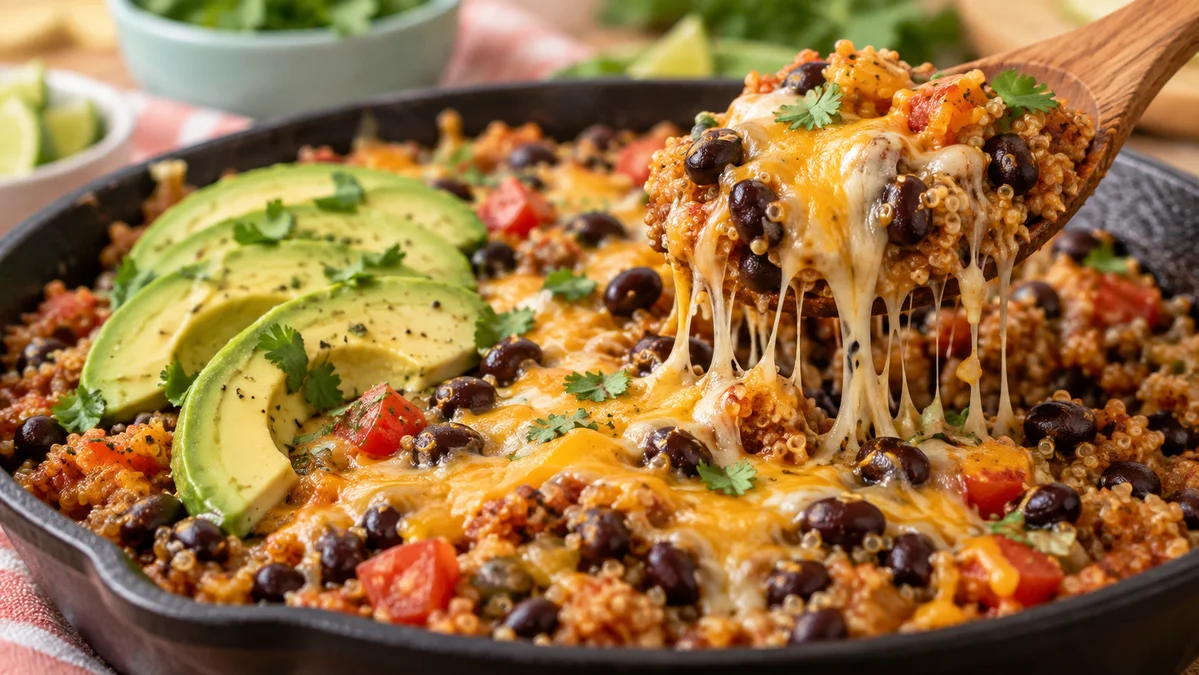
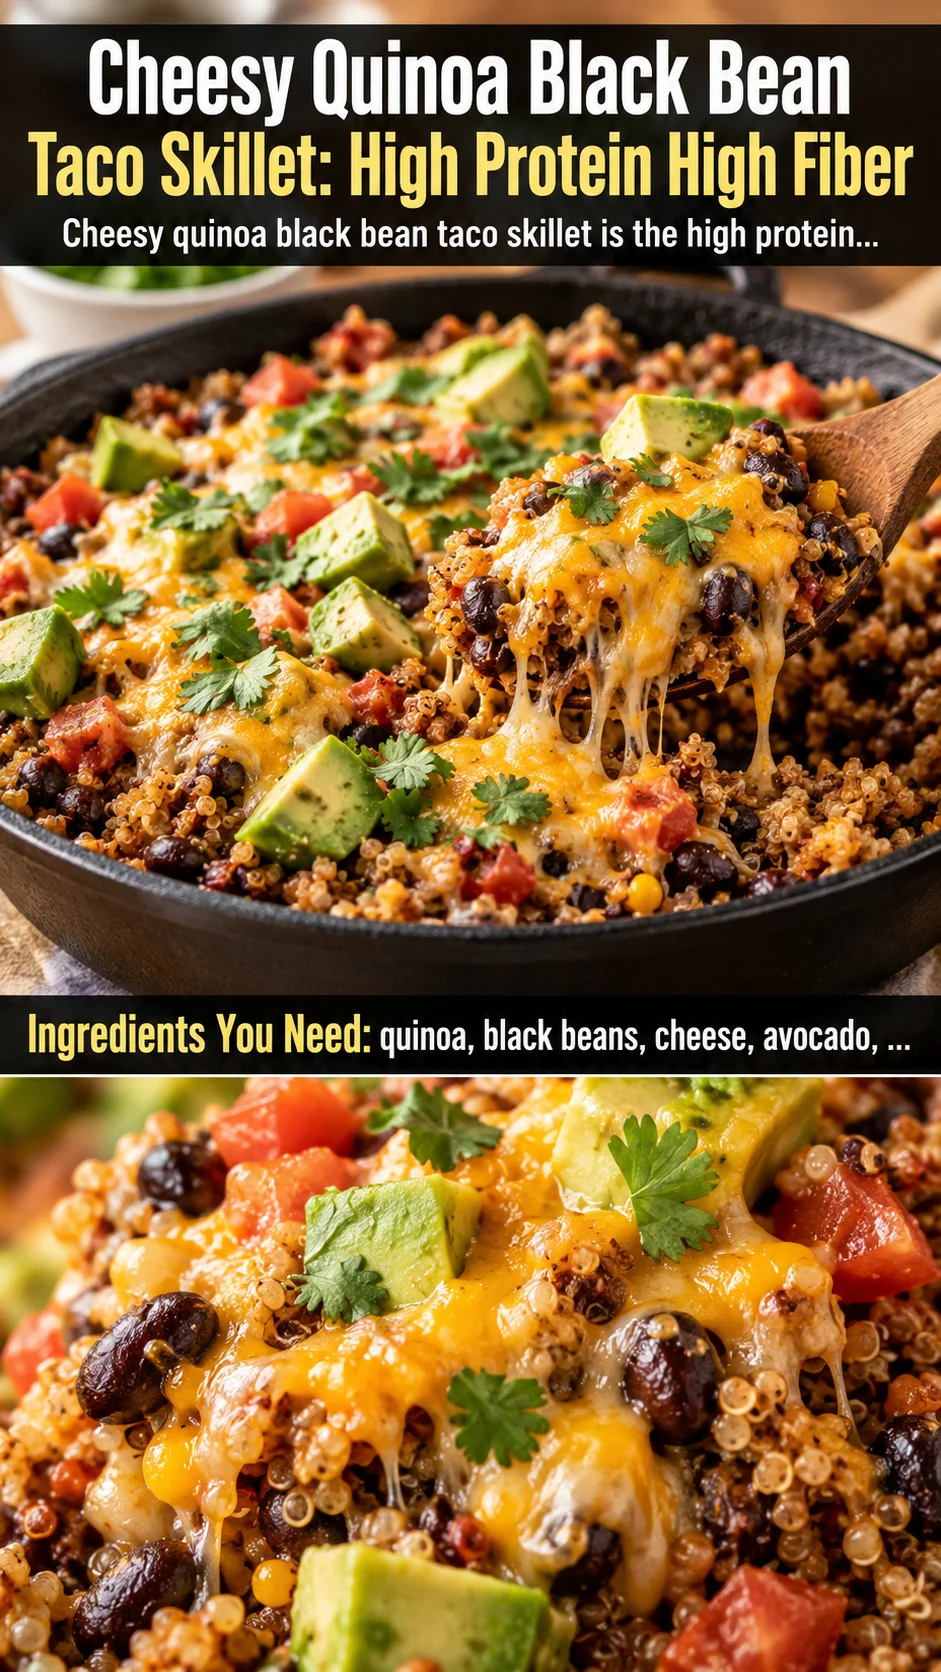
This cheesy quinoa black bean taco skillet is a high protein, high fiber 30-minute one pan dinner loaded with veggies, black beans, and gooey melted cheese.
Ingredients
Instructions
Start by prepping every single ingredient before you touch the stove — this is the real secret to a genuine 30-minute dinner, and it is non-negotiable in a recipe this fast. Dice the onion, bell pepper, and jalapeño, mince the garlic, drain and rinse the black beans until the foam disappears (that foam is excess starch that would otherwise turn your skillet gluey), and shred the cheese if you bought a block. Then rinse 1 cup of quinoa under cold running water in a fine-mesh strainer for a full 30 seconds, rubbing the grains between your fingers until the water runs clear rather than cloudy. Quinoa is naturally coated in saponins, a bitter, soapy-tasting compound, and rinsing is the literal difference between a nutty, crave-worthy skillet and one that tastes like dish soap. Shake the strainer hard and let the quinoa drain while you heat the pan — wet quinoa steams instead of toasting, and that first dry-toast is where the flavor lives.
Set a large 12-inch skillet or braiser over medium-high heat and add 1 tablespoon of olive oil. Once the oil shimmers and slides easily across the surface — a good visual cue is that it looks thinner and ripples slightly — add the diced onion and bell pepper. Sauté for 4 to 5 minutes, stirring only every 30 seconds or so, until the onion turns translucent and the edges of the pepper begin to soften and pick up golden-brown blistered spots. Resist the urge to stir constantly: leaving the vegetables untouched for those short stretches is what develops browning, and browning equals flavor. Add the jalapeño and garlic and cook for just 45 to 60 seconds more, until the garlic smells sweet and fragrant but has not darkened. Burnt garlic turns acrid and bitter in seconds, so the moment you can smell it, you move on to the next step.
Push the vegetables to the edges of the pan to create a hot, bare spot in the center, add the remaining 1 tablespoon of olive oil, and tip in 2 tablespoons of taco seasoning. Let the spices sit directly on that hot metal for 30 to 45 seconds — this is called blooming, and it is the difference between a skillet that tastes flat and one that tastes like a proper taco. The heat activates the fat-soluble flavor compounds in the chili powder, cumin, and paprika, and you will know it is ready when the spices darken by a shade and smell deeply toasted and almost smoky. Do not walk away: bloomed spices go from perfect to burnt in under a minute. Stir the toasted spices into the vegetables, then add the drained quinoa and stir for another minute so every grain gets coated in that seasoned oil — this toasting step gives the quinoa a nutty, popcorn-like backbone that plain boiled quinoa simply cannot match.
Pour in the entire can of fire-roasted diced tomatoes with green chiles (juice and all), the drained black beans, and 1 1/2 cups of low-sodium vegetable broth. Stir everything together, scraping the bottom of the pan to lift up any browned bits, then bring the mixture to a full, rolling simmer — you want to see real bubbles breaking the surface, not a lazy quiver. Once it simmers, immediately drop the heat to low, cover the skillet tightly with a lid, and set a timer for 15 minutes. The quinoa needs that steady, gentle steam to hydrate and the starch needs time to gelatinize; boiling it hard will make the grains blow out and turn mushy. Peek only once at the halfway mark — every time you lift the lid, you lose precious steam and add cooking time.
At the 15-minute mark, uncover and check the quinoa. It is done when the grains look plump and translucent around the outside with a tiny opaque white curl — the germ — visible on each one, and when a spoon dragged through the pan leaves a brief trail that slowly fills in. Bite a spoonful: it should be tender with the faintest pleasant pop, never crunchy in the middle and never slippery-soft. If it still has a chalky bite, add 2 to 3 tablespoons more broth or water, re-cover, and cook for 3 to 4 more minutes. If it is done but looks soupy, leave the lid off and let it cook uncovered for 2 minutes, stirring, so the excess liquid evaporates and the mixture tightens into a rich, spoonable, chili-like texture.
Now for the cheese — and this is where patience pays off. Turn the heat off completely, then stir in about 1 cup of the shredded cheese in three additions, folding gently rather than stirring aggressively, and letting each handful melt into the hot quinoa before adding the next. Adding cheese to a boiling pan causes the proteins to seize and the fat to split, which is why you always kill the heat first; folding rather than whipping keeps the mixture creamy instead of stringy. Taste it now and adjust: a pinch of kosher salt, a squeeze of fresh lime juice, or a little extra cumin if you want more warmth. That acid hit from the lime is the single most underrated finishing move in the whole recipe — it brightens the heavy beans and cheese and makes the whole skillet taste seasoned rather than just spicy.
Scatter the remaining 1/2 cup of cheese in an even layer across the top of the skillet and cover it again for 3 to 4 minutes, or slide the whole pan under a preheated broiler for 2 to 3 minutes if your skillet is oven-safe. For the covered method, the trapped steam melts the cheese into a glossy, gooey blanket; for the broiler method, you get those gorgeous blistered, bronzed, slightly crispy cheese edges that make people reach for a fork before you have even set the table. Watch it constantly if you broil — cheese goes from perfectly golden to blackened in about 30 seconds. You are looking for a surface that is fully liquid with a few deep-golden spots and a smell that is nutty, toasty, and unmistakably cheesy.
Take the skillet off the heat and let it rest for 2 to 3 minutes so the cheese sets just slightly and the filling firms up enough to scoop cleanly. Serve it straight from the pan family-style, or spoon it into warm tortillas, over tortilla chips, or into bowls. Top each portion with a generous dollop of Greek yogurt or sour cream, slices of creamy avocado, a shower of fresh cilantro, sliced green onion, and a lime wedge on the side. The cool, tangy yogurt against the hot, spiced quinoa is the contrast that makes this dish feel complete, and the avocado adds richness plus healthy fat that helps you absorb the fat-soluble vitamins from the peppers and tomatoes. Store leftovers in an airtight container in the fridge for up to 4 days, and reheat gently with a splash of broth so the cheese melts back into a sauce rather than turning rubbery.
For best results
- Toast the quinoa before it ever sees liquid. The single biggest upgrade you can make to this skillet is to let the dry, rinsed quinoa hit the seasoned oil for a full minute before you add the broth. You will hear a faint crackle and smell something between toasted nuts and popcorn, and that aroma is the Maillard reaction building flavor on the surface of the grain. Toasted quinoa holds its shape better, tastes deeper, and gives the finished skillet a texture that feels intentional rather than porridge-like. If you skip this step, the dish still works, but it will taste flatter and the grains will be softer and less distinct.
- Respect your liquid ratio and your altitude. The classic quinoa ratio is 1 part grain to 2 parts liquid, but in this recipe the tomatoes and their juice contribute meaningful moisture, so 1 cup of quinoa to 1 1/2 cups of broth plus a 14.5-ounce can of tomatoes is the sweet spot. If you live above 3,000 feet, quinoa needs more water and more time — add an extra 1/4 cup of broth and plan on 3 to 5 extra minutes covered. The texture test at the end matters far more than the clock: tender with a slight pop, never chalky in the center, is your target every single time.
- Treat cheese like a finishing ingredient, not a filler. The best cheesy skillets use a cheese that melts smoothly and has real flavor: a Mexican blend, sharp cheddar, Monterey Jack, or a little Oaxaca cheese if you can find it. Pre-shredded bags are convenient but are coated in potato starch or cellulose to prevent clumping, which means they melt less smoothly and can turn grainy — shredding a block yourself takes 90 seconds and gives you a dramatically silkier, stretchier result. Always add cheese off the heat, in stages, and fold gently. If your cheese ever looks greasy or split, a splash of warm broth and a few vigorous stirs will usually pull it back together.
- Make it a meal-prep superstar. This skillet is one of those rare dishes that is arguably better on day two, because the spices have time to marry and the quinoa absorbs the tomato and bean juices overnight. Portion it into four airtight glass containers while it is still slightly warm, let them cool uncovered for 20 minutes so condensation does not form, then lid and refrigerate for up to 4 days. To reheat, add a tablespoon of broth or water, cover loosely, and microwave in 60-second bursts, stirring between each, until steaming. Pack the yogurt, avocado, and cilantro separately so they stay fresh and cold, and add them only after reheating.
- Boost the protein without changing the vibe. As written, this skillet lands around 20 grams of protein per serving thanks to the quinoa, black beans, and cheese, which is already respectable for a meatless meal. If you want to push it toward 30 to 35 grams, brown 1 pound of lean ground turkey or beef in the skillet first, drain the fat, and proceed with the recipe using the rendered fat in place of some of the olive oil. You can also stir in a cup of cottage cheese at the end for a creamy, high-protein twist, or top each bowl with a fried or poached egg. Just remember that adding meat will require a splash more broth, since the grains will soak up more liquid.
- Do not fear the broiler — but never leave it. The broiler is the fastest route to that magazine-cover cheese pull, and it takes only 2 to 3 minutes under high heat. Use an oven-safe skillet such as cast iron or a stainless steel braiser, and make sure the handle does not have a plastic or silicone sleeve that is not oven-rated. Position the rack about 6 inches from the element so the top browns without the bottom scorching. Stay at the oven door the entire time, because the line between beautifully blistered and burnt is roughly half a minute. If you are nervous, use the covered-lid method instead — it will not brown, but it melts perfectly every time.
- Lean on your pantry when fresh produce is scarce. Frozen bell pepper strips and frozen diced onion work beautifully here with no thawing required — just add a minute or two to the sauté. Canned diced tomatoes can stand in for fire-roasted, though you will lose a little smokiness; a quarter teaspoon of smoked paprika restores it instantly. No fresh jalapeño? A tablespoon of pickled jalapeños or a quarter teaspoon of crushed red pepper flakes does the job. And if you are out of taco seasoning, whisk together 1 tablespoon chili powder, 2 teaspoons cumin, 1 teaspoon smoked paprika, 1 teaspoon garlic powder, 1 teaspoon onion powder, and 1 teaspoon kosher salt — that is a batch big enough to season this skillet twice.
Variations
- Ground beef or turkey taco skillet: Brown 1 pound of lean ground beef or 93 percent lean ground turkey in the skillet over medium-high heat, breaking it into small crumbles, until no pink remains — about 6 to 8 minutes. Drain off the excess fat, leaving about a tablespoon in the pan, then proceed exactly as written, adding the onion and pepper and continuing through the recipe. The result is a heartier, more classic taco-night skillet that clocks in around 35 grams of protein per serving. Because the meat adds moisture and the quinoa still needs its full hydration time, bump the broth up by a quarter cup and taste for salt at the end, since the meat will have absorbed some of the seasoning.
- Vegan and dairy-free version: Swap the cheese for 1 cup of a good melting vegan shred such as a cashew-based mozzarella, or stir in 3 tablespoons of nutritional yeast plus 2 tablespoons of tahini at the end for a cheesy, savory, umami-rich finish. Replace the Greek yogurt and sour cream with a thick coconut or oat-based yogurt, and finish with extra lime and a pinch of flaky salt to compensate for the missing dairy richness. Everything else in the recipe is naturally plant-based, which makes this one of the easiest dinners to convert. The vegan version will be a bit less stretchy but every bit as flavorful, and it actually keeps a touch better in the fridge.
- Baked enchilada casserole version: Instead of finishing on the stovetop, transfer the cooked quinoa and bean mixture to a 9×13-inch baking dish, stir in 1 cup of the cheese and a half cup of red or green enchilada sauce, top with the remaining cheese, and bake at 400 degrees Fahrenheit for 12 to 15 minutes until bubbling at the edges and golden on top. This is the move when you are feeding a crowd, bringing a dish to a potluck, or simply want to make it ahead and slide it into the oven on a busy night. Add 10 minutes to the total time, and let it rest for 5 minutes before serving so the layers hold together when you scoop.
- Low-carb cauliflower rice version: Replace the quinoa with 4 cups of riced cauliflower and reduce the broth to three quarters of a cup, since cauliflower releases its own moisture and needs far less liquid. Simmer covered for only 6 to 8 minutes, then proceed with the cheese steps. The finished dish is lighter and lower in carbohydrates, though it also drops about 6 grams of protein and 4 grams of fiber per serving, so add an extra half cup of beans or a scoop of cottage cheese if you want to keep the macros high. Cauliflower rice skillets can get watery, so leaving the lid off for the final two minutes is essential to drive off the excess.
- Chipotle and chorizo spicy twist: Add 2 minced chipotle peppers in adobo plus a teaspoon of the adobo sauce along with the taco seasoning for a smoky, deep, back-of-the-throat heat that transforms the whole dish. For an even bolder version, brown 4 ounces of diced Mexican chorizo with the onion — the paprika-heavy fat it renders will dye the entire skillet a gorgeous rust-red and season everything it touches. Balance the added heat with an extra squeeze of lime and an extra dollop of cool yogurt at the table. This variation is the one to make for anyone who says taco skillets are boring.
- Breakfast or brunch version: Skip the taco seasoning and instead use a teaspoon each of cumin and smoked paprika plus a pinch of chipotle powder, then after the quinoa is cooked, make four small wells in the mixture, crack an egg into each, cover, and cook for 5 to 7 minutes until the whites are just set and the yolks are still runny. Scatter the cheese over the top during the last two minutes so it melts around the eggs. Serve with warm tortillas, hot sauce, and avocado for a savory, protein-packed brunch that comes together in one pan and feeds four without any last-minute scrambling.
Nutrition
- Calories428 kcal
- Total Fat19g
- Saturated Fat8g
- Cholesterol38mg
- Sodium690mg
- Total Carbohydrates47g
- Dietary Fiber12g
- Sugars7g
- Protein20g