
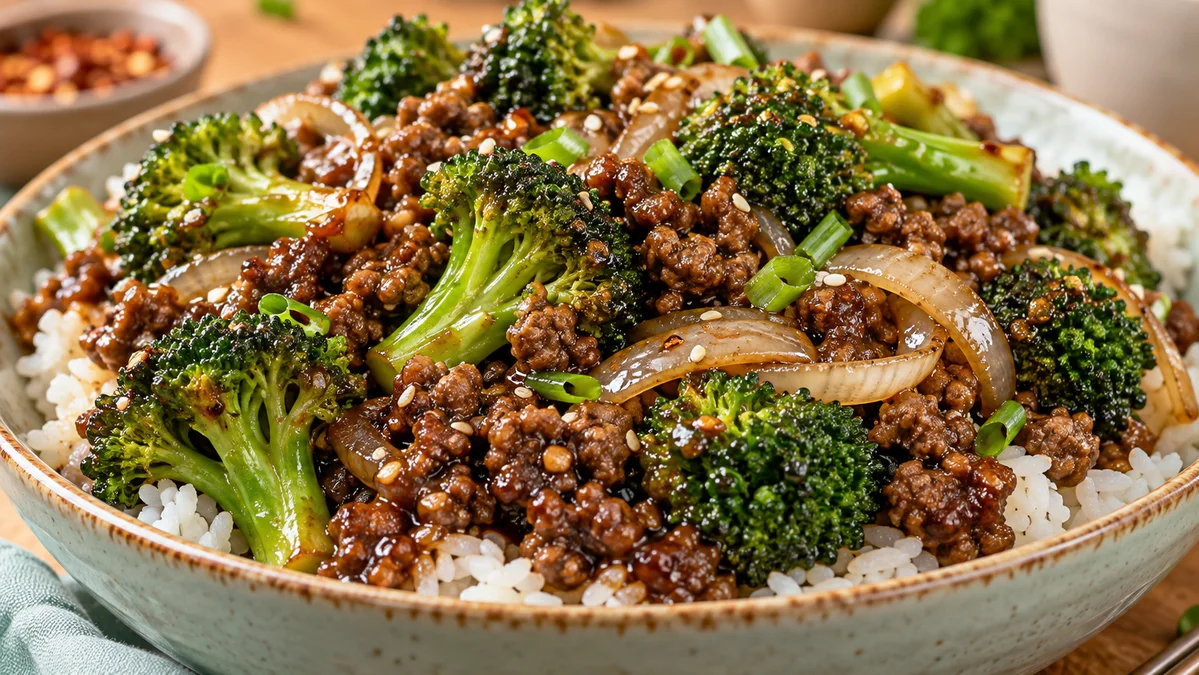
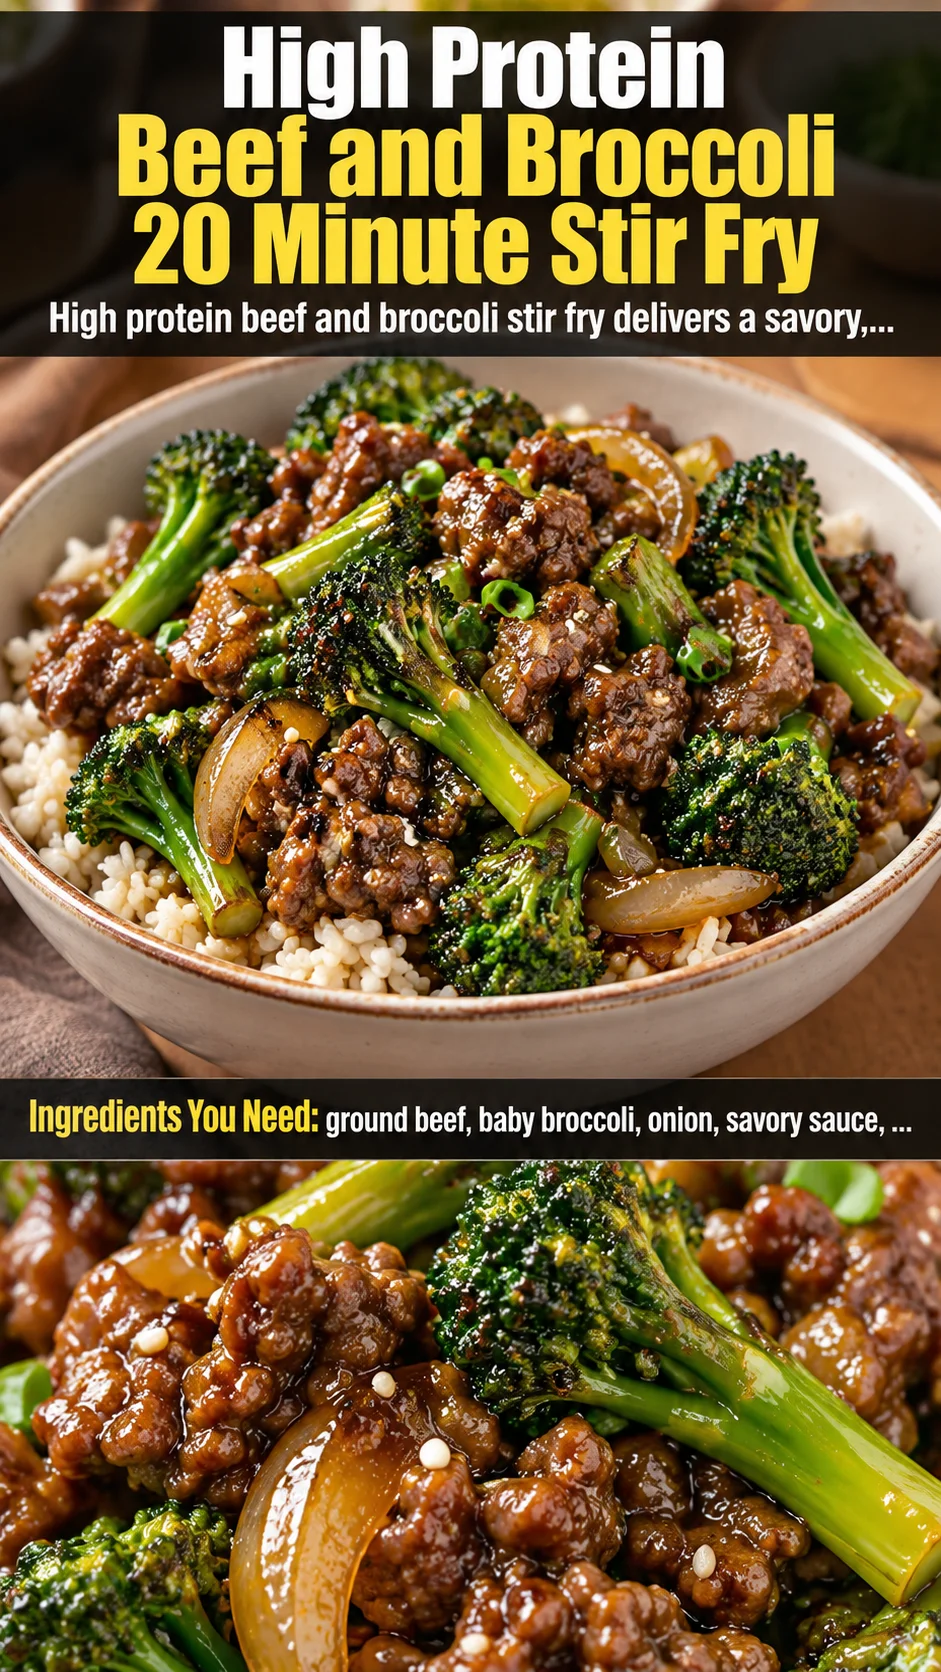
This high protein beef and broccoli stir fry is a 20 minute dinner idea with caramelized ground beef, baby broccoli, onion, and a savory sauce over rice.
Ingredients
Instructions
Start by getting every single component measured, chopped, and lined up on the counter before you ever turn on the heat. This is the non-negotiable backbone of a true 20 minute stir fry, and it is exactly what the Chinese call ‘mise en place’ — literally ‘everything in its place.’ A stir fry moves at the speed of a sprint, not a jog, so once the beef hits the pan you will have roughly 60 to 90 seconds between each step with zero time to dig through the fridge for the soy sauce or hunt for a garlic clove. Trim the woody ends from the baby broccoli, cutting away only the bottom quarter-inch or so where it turns dry and fibrous, then cut any thick stems in half lengthwise so every piece cooks at the same rate. Slice the onion thinly from pole to pole, not crosswise, because cutting along the grain of the onion keeps the crescent shapes intact and helps them hold a bit of bite instead of dissolving into mush. Mince the garlic, grate the ginger, and whisk together the soy sauce, oyster sauce, sesame oil, honey, and rice vinegar in a small bowl so the sauce is ready to pour in one fluid motion. Finally, whisk the cornstarch with cold water in a separate cup — cold water is critical here, because warm water will give you lumps that you can never fully whisk out. Line everything up, take a breath, and you are now officially 20 minutes from dinner.
Preheat a wide, heavy-bottomed 12-inch skillet or wok over medium-high heat for a full two minutes before adding anything. If your rice is not already cooked, start it now — jasmine rice typically needs about 12 to 15 minutes of simmering with a 1:1.25 rice-to-water ratio, which dovetails perfectly with the cook time of this stir fry, so both land on the table at the same moment. Pour in 1 tablespoon of the avocado or canola oil and swirl it around the pan. When you flick a single drop of water into the oil and it sizzles aggressively and beads across the surface, the pan is fully rippened and ready. Then add the ground beef in one even layer, pressing it gently with the back of a wooden spoon so you create maximum surface contact with the hot metal. Do not stir it for a full two minutes — this is the secret to actual caramelization rather than gray, steamed ground beef. You want to hear a consistent, assertive sizzle, not a passive hiss. After two minutes, break the beef into roughly one-inch crumbles with a wooden spoon or spatula and continue cooking for three to four minutes, stirring occasionally, until the meat is mostly cooked through but still glossy with fat. Season with a pinch of kosher salt and cracked black pepper, then use a slotted spoon to transfer the beef to a plate, leaving behind about 1 to 2 tablespoons of rendered fat in the pan. That rendered fat is liquid gold — it is the base of flavor for everything that follows.
With the skillet still over medium-high heat, add the remaining 2 tablespoons of oil along with the sliced onion. Cook the onion for three to four minutes, stirring frequently, until the edges turn translucent and just barely golden. You are looking for soften and sweeten, not fully brown. Next, add the baby broccoli in a single layer and let it sit undisturbed for a full 90 seconds before stirring. This is what gives you those beautiful blistered, charred spots on the florets that taste intensely sweet and nutty — the Maillard reaction working its magic. After the first undisturbed sear, stir and continue cooking for another three to four minutes. The stems should be crisp-tender, meaning a knife should slide through with a slight resistance, and the florets should be vivid emerald green, never olive drab. If your pan seems dry or the broccoli is catching, add a splash of water (about 2 tablespoons) and cover with a lid for a single minute to steam the stems through; this little steam-then-sear trick keeps the broccoli bright while still getting real char on the florets.
Push the vegetables to the outer edges of the skillet to create a small open well in the center, then add the garlic, ginger, and optional red pepper flakes directly into that hot spot. Stir them constantly for 30 to 45 seconds — no longer — until they become intensely fragrant and smell nutty and warm, but do not let them brown, because burnt garlic turns acrid and bitter in seconds and there is no way to rescue a pan once that happens. Pour the pre-whisked sauce mixture over the aromatics and let it bubble up for about 30 seconds, then return the cooked ground beef to the pan and toss everything together so the caramelized crumbles absorb all that savory glaze. Give the cornstarch slurry one more stir — it settles fast — then drizzle it into the bubbling sauce in a thin stream while stirring constantly. Within 20 to 30 seconds you will watch the sauce transform from thin and watery to a glossy, lacquered glaze that coats every piece of beef and hugs each broccoli floret. This is the moment the dish goes from ‘ingredients in a pan’ to an actual stir fry. Taste it and adjust: a splash more soy sauce for saltiness, a drizzle of honey if you want it sweeter, or a few drops of rice vinegar to sharpen the edges.
To serve, fluff the steamed rice with a fork to release the steam and keep it light, then divide it evenly among four deep bowls or wide-rimmed plates. Spoon the beef and broccoli mixture generously over the rice, making sure every bowl gets an equal share of the glossy sauce — tilt the pan and use a spoon to scrape up every last bit, because that sauce is the heart of the dish. Garnish with thinly sliced scallions and a sprinkle of toasted sesame seeds for a pop of freshness and a little crunch. Serve immediately while everything is steaming hot, ideally with chopsticks or a spoon and an extra drizzle of chili crisp on the side for heat lovers. If you are meal prepping, let the dish cool completely at room temperature for no more than 30 minutes, then portion into airtight glass containers with the rice on the bottom and the stir fry on top so the grains do not get soggy. It keeps beautifully in the refrigerator for up to four days and reheats in 90 seconds in the microwave with a splash of water or a teaspoon of soy sauce to rehydrate the sauce.
For best results
- Choose your ground beef wisely and you will change the entire texture of this dish. For the best marriage of juiciness and leanness, reach for 90/10 (90% lean, 10% fat) or, if you are tracking macros aggressively, 93/7. Anything leaner than 93/7 tends to turn dry and pebbly in a hot skillet because there simply is not enough fat to conduct heat and keep the crumbles tender, and anything fattier than 85/15 will leave you with a greasy, soupy pan that steams the broccoli instead of searing it. If you only have very lean beef on hand, add an extra half-tablespoon of oil and pull the beef out of the pan about 30 seconds earlier than you think you should, letting the residual heat finish the job. You can also swap in ground turkey or chicken for a lighter bowl, but be aware that poultry needs slightly more seasoning because it lacks the natural savoriness of beef.
- Baby broccoli, also sold as broccolini, is a genuinely different vegetable from standard broccoli and it is worth seeking out. It is a natural hybrid of broccoli and gai lan (Chinese broccoli), which gives it long, slender, tender stems and small, loose florets that cook in a fraction of the time. Unlike regular broccoli crowns, you do not need to peel the stems and you can eat nearly the whole stalk from floret to base. If you can only find standard broccoli, cut the crowns into small, even florets and slice the peeled stems into thin coins so they cook in the same time window. Frozen broccoli florets will work in a pinch for a weeknight emergency, but do not thaw them first, and expect a softer texture and far less char because the ice crystals will cool your pan down the moment they hit the oil.
- Heat management is the single most important skill in stir frying, and it is the reason restaurant woks produce that unmistakable 'wok hei' — the smoky, almost charred breath of the wok. Home burners cannot match commercial BTU output, so the workaround is a heavy-bottomed skillet or cast-iron pan that holds and distributes heat evenly, plus patience. Let the pan preheat for a full two minutes before adding oil, add ingredients in batches so you never crowd the pan, and resist the urge to stir constantly. Every time you add a cold ingredient, the pan temperature drops, so give it 30 to 60 seconds to recover before the next addition. If you see steam pouring off the food instead of hearing a sizzle, your pan is too cold and your food is steaming, not frying.
- The sauce is a simple balance of five flavor pillars: salty (soy sauce), sweet (honey or brown sugar), tangy (rice vinegar), savory-umami (oyster sauce and toasted sesame oil), and aromatic (garlic and ginger). Once you understand that architecture, you can tune the dish to your family's taste with confidence. Love it sweet like takeout? Bump the honey to two tablespoons. Watching sodium? Use a low-sodium soy sauce and skip the extra pinch of salt. Want a gluten-free version? Swap the soy sauce for tamari and double-check that your oyster sauce is certified gluten-free, or use a mushroom-based vegetarian stir-fry sauce in its place. The cornstarch slurry is what gives you that glossy restaurant-style sheen, so do not skip it — just always add it to a bubbling liquid and stir, or it will seize into clumps.
- If you want to make this dish faster than 20 minutes, cook your rice in advance and refrigerate it. Day-old cold rice actually works better for bowls because the grains stay separate and firm, and they soak up the sauce without turning mushy. You can also prep the entire stir fry base up to the point of cooking and store the raw components in separate containers in the refrigerator for up to 24 hours — just wait to add the sauce and slurry until the moment of cooking. This is the classic 'prep once, cook twice' approach that turns one weeknight of effort into two dinners. For anyone feeding a crowd, this recipe doubles cleanly, but cook it in two separate batches so each one gets proper searing heat rather than being crowded.
- Do not neglect the resting moment before you eat. That is not just a nicety — it is chemistry. When you pull the pan off the heat and let the stir fry sit for 60 to 90 seconds, the cornstarch continues to thicken the sauce as it cools slightly, and the beef reabsorbs a bit of the glaze, becoming juicier. Meanwhile, the rice finishes steaming in its own residual heat and firms up just enough to hold a fork. Taste one last time and adjust with a squeeze of lime or a dash of sesame oil just before serving. Restaurants plate this way because the two-minute pause produces a noticeably better bowl, and it costs you nothing but patience.
- For meal prep, layer your containers intelligently: rice on the bottom, stir fry on top, and garnishes like scallions and sesame seeds stored separately in a tiny silicone cup or a folded piece of parchment so they stay crisp. Reheat covered with a damp paper towel to create steam that revives the sauce, and add a teaspoon of water if the beef looks dry. This dish keeps for four days in the refrigerator and up to three months in the freezer if you freeze it in flat, airtight portions. Thaw overnight in the fridge, never on the counter, and reheat until steaming hot all the way through.
- Finally, consider your rice. Jasmine rice is fragrant and slightly sticky, which makes it perfect for soaking up sauce, while basmati is longer, fluffier, and a bit more elegant. Brown rice adds fiber and a chewier bite but needs about 40 minutes to cook, so if you are racing the clock, make extra white rice on Sunday and stash it in the fridge all week. You can also swap the rice entirely for cauliflower rice to drop the carbs dramatically, or serve the stir fry over rice noodles, quinoa, or even a bed of crisp shredded lettuce for a lighter, almost salad-like bowl. The beauty of a power bowl is that the stir fry stays the same while the base flexes to your goals.
Variations
- For a lighter, lower-carb version, replace the rice entirely with cauliflower rice or a mix of cauliflower rice and shredded cabbage. Pulse fresh cauliflower in a food processor until it resembles rice, then saute it in a dry nonstick skillet for three to four minutes to drive off moisture and give it a slightly toasted, nutty flavor before spooning the beef and broccoli on top. The savory sauce will soak into the cauliflower beautifully, and each bowl slashes roughly 200 calories and 40 grams of carbohydrates while still delivering more than 40 grams of protein. If cauliflower is not your thing, try zucchini noodles, which add a fresh, grassy crunch, or serve the stir fry over a big bed of baby spinach — the heat from the beef will gently wilt the greens right in the bowl.
- Turn this into a spicy Korean-inspired bowl by swapping the oyster sauce for gochujang and adding a tablespoon of gochugaru (Korean chili flakes) along with the garlic and ginger. Finish with a drizzle of toasted sesame oil, a shower of scallions, and a fried egg on top for an extra six grams of protein and a runny yolk that becomes a second sauce when you break it. For a Thai-inspired twist, use fish sauce instead of oyster sauce, add a tablespoon of brown sugar, and finish with a squeeze of fresh lime and a handful of Thai basil torn over the top. The basil's anise-like notes transform the whole dish into something distinctly Southeast Asian.
- If you prefer sliced steak to ground beef, freeze a flank steak or sirloin for 20 minutes to firm it up, then slice it paper-thin against the grain. Cook the vegetables first and set them aside, then sear the beef in a single layer for about 90 seconds per side in two batches, return everything to the pan, and add the sauce. The result is a classic restaurant-style beef and broccoli with that satisfying chew and beefy depth. Thinly sliced chicken breast or thighs, pork tenderloin, or even crumbled tofu all work here too. For tofu, press a block of extra-firm tofu for 20 minutes, cube it, toss it in a tablespoon of cornstarch, and pan-fry it until golden and crisp before adding it back at the end so it stays crunchy.
- Make it a vegetarian or vegan bowl by using plant-based ground meat or crumbled tempeh in place of the beef and a mushroom-based stir-fry sauce or vegan oyster sauce in place of the traditional version. Tempeh has a nutty, earthy flavor that stands up beautifully to the savory glaze and brings about 18 grams of protein per serving. Saute the tempeh with a splash of soy sauce to season it before folding it into the sauce. You can also bulk the dish up with extra vegetables — sliced red bell peppers, snap peas, water chestnuts, or shiitake mushrooms all add texture and nutrition. If you add more vegetables, increase the sauce by half so everything stays glossy and well coated.
- For a gluten-free adaptation, swap the soy sauce for tamari, which is brewed with little to no wheat, and verify that your oyster sauce and any added sauces carry a certified gluten-free label, since many brands sneak in wheat as a thickener. Cornstarch is naturally gluten-free, so your slurry needs no adjustment. If you are avoiding shellfish, use hoisin sauce, a mushroom stir-fry sauce, or a simple blend of soy sauce, molasses, and a splash of rice vinegar to mimic that deep, caramel-like oyster sauce flavor. Always read labels, and when in doubt, build your own sauce from single-ingredient components so you control every bite.
- Finally, think beyond the bowl and use this stir fry as a filling for lettuce wraps, a topping for baked sweet potatoes, or a stuffing for cheater's egg rolls made with flour tortillas and air-fried until crisp. Tuck it into a toasted hoagie roll with melted provolone for a beef and broccoli cheesesteak, or pile it over crispy wonton chips for an appetizer-style nacho platter. Leftovers shine in fried rice — simply chop everything small, heat a wok, scramble an egg, add cold rice and the stir fry, and hit it with a splash of soy sauce and sesame oil. One recipe, endless second lives, and zero waste in the process.
Nutrition
- Calories512 kcal
- Total Fat22g
- Saturated Fat7g
- Cholesterol92mg
- Sodium880mg
- Total Carbohydrates48g
- Dietary Fiber4g
- Sugars9g
- Protein42g